Cognex MX-1000 User Manual
Hide thumbs
Also See for MX-1000:
- Reference manual (30 pages) ,
- Quick reference manual (29 pages) ,
- User manual (26 pages)
Table of Contents
Advertisement
Quick Links
Download this manual
See also:
Quick Reference Manual
Advertisement
Table of Contents

Subscribe to Our Youtube Channel
Related Manuals for Cognex MX-1000


Summary of Contents for Cognex MX-1000
- Page 1 MX-1000 User Guide Version 5.5.3 3/24/2016...
-
Page 2: Legal Notices
Copyright © 2016. Cognex Corporation. All Rights Reserved. Portions of the hardware and software provided by Cognex may be covered by one or more U.S. and foreign patents, as well as pending U.S. and foreign patents listed on the Cognex web site at: http://www.cognex.com/patents. -
Page 3: Table Of Contents
The DataMan Quick Setup System Setup Installing the DataMan Setup Tool Proxy Mode Keyboard Mode Data Buffering Power Off Mode MX-1000 Battery Management Charging and Discharging Batteries Troubleshooting Compliance Information Agency Compliance Statements Agency Compliance Statements: MX-1000 Charging Station Precautions... -
Page 4: Symbols
Symbols Symbols The following symbols indicate safety precautions and supplemental information. WARNING: This symbol indicates the presence of a hazard that could result in death, serious personal injury or electrical shock. CAUTION: This symbol indicates the presence of a hazard that could result in property damage. Note: Notes provide supplemental information about a subject. -
Page 5: About Mx-1000
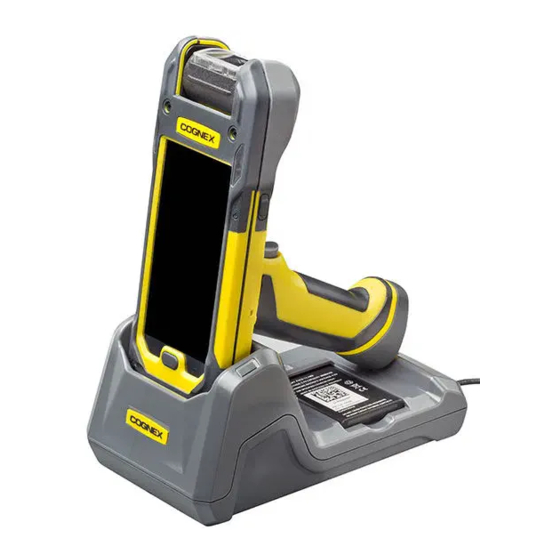
It features high-speed bar code reading performance in a modular, rugged design that supports a variety of 3rd party mobile devices. The MX-1000 reader provides the industry’s most advanced technology for reading 1-D and 2-D codes. The MX-1000X also reads challenging 2-D DPM codes. It is designed to withstand heavy use in industrial settings and the unique modular design allows you to stay current with mobile communications technology and easily replace or upgrade components without the need for a service plan. -
Page 6: Initial Testing
Make sure that there is a battery in the MX-1000 device. ii. Make sure that the mobile device is powered on. iii. Ensure that the MX-1000 engine is turned on by pressing either of the trigger buttons (left or right side). 2. Scan the following Reader Programming (RP) codes:... -
Page 7: Tricks And Tips
Tricks and Tips 1. A battery must be inserted in the back of the MX-1000 device for the scan engine to boot up. The scan engine does not run off the phone’s battery. Rather, the Cognex battery powers the Cognex scan engine and provides auxiliary power to the phone. -
Page 8: The Dataman Quick Setup
The first step in the MX-1000 setup process is to download and start the DataMan Quick Setup on your mobile phone. Note: For information on how to install the DataMan Quick Setup, see the section on Initial Testing. - Page 9 The DataMan Quick Setup Step 4: Configure exposure and gain on the second Step 5: Configure illumination fields on the third screen screen of the Camera page. of the Camera page. 6. The functions can be reached from the main menu. On the Result History page, you find details about your past activities with the DataMan Quick Setup.
- Page 10 The DataMan Quick Setup 8. The Statistics page provides data on the triggers and reads. You can perform the steps above not only by using the MX-1000 reader but also by using readers connected to your device on a network.
-
Page 11: System Setup
4. Start the DataMan Quick Setup on your reader because the DataMan Quick Setup must be running while using the DataMan Setup Tool. 5. Start the DataMan Setup Tool on your PC or laptop. Select one or more MX-1000 readers you want to work with and click Connect. -
Page 12: Proxy Mode
System Setup 6. Set up and configure the reader. Tip: For more information on how to use the DataMan Setup Tool, consult the DataMan Setup Tool Quick Reference Guide. Proxy Mode The DataMan Quick Setup provides the most important configuration features of readers. If you need more functions to get the appropriate reading result, use your reader in proxy mode via a WiFi network. -
Page 13: Keyboard Mode
System Setup Keyboard Mode In order to get the MX-1000 reader into keyboard mode, scan the standard USB Keyboard scan code: USB Keyboard Note: In keyboard mode, the DataMan Quick Setup will not connect. To get the DataMan Quick Setup connecting again, scan the USB-COM/RS-232 code:... -
Page 14: Data Buffering
Data Buffering The MX-1000 reader can be used in offline mode as well. In offline mode, the DataMan Quick Setup is not running on your mobile phone. If you use the trigger button(s) of your reader in offline mode, the result of successful first triggering, indicated by two short beeps, will be stored in the device buffer. -
Page 15: Mx-1000 Battery Management
MX-1000 Battery Management MX-1000 Battery Management The battery management of MX-1000 reader supports two types of optimization: charging time optimization and runtime optimization. Charging time optimization distributes available wireless charging power among the different batteries in the system to achieve the shortest charge time under the given conditions. - Page 16 (Battery Threshold MX-1000 Low): 16% (Battery Threshold MX-1000 High): 50% The MX-1000 battery values are half of the above values if the pistol grip battery is used in addition to the battery of the MX-1000 reader. The mobile device will be charged unconditionally if the MX-1000 battery charge is above the BT threshold.
- Page 17 When the phone's own battery drops below 20%, it will be charged to (hystheresis) 30%. Blinking Behavior The red led on the MX-1000 starts to blink at different intervals when the battery charge is low. Consult the table below to see what a certain blinking behavior indicates.
- Page 18 MX-1000 Battery Management Blinking Intensity Battery Capacity / Effect per 4 seconds 9-5% per 2 seconds 4-3% per second 2-0% per 500 ms Conservation charging You can also check the battery status via the Quick Setup Application (see on image below).
-
Page 19: Troubleshooting
Troubleshooting Troubleshooting Symptom: You have MX-1000s or DataMan reader(s) present on your wireless network and you are unable to connect to them from the DataMan Setup Tool or from the DataMan Quick Setup despite being on the same wireless network. Explanation: If you are using a wireless access point that is not supporting physical broadcast, then you are not able to connect to your DataMan readers. -
Page 20: Compliance Information
This section provides compliance statements about the MX-1000 reader and the Charging Station. Agency Compliance Statements The MX-1000 (Regulatory Model Number: 1AA7) device meets or exceeds the requirements of all applicable standards organizations for safe operation. However, as with any electrical equipment, the best way to ensure safe operation is to operate them according to the agency guidelines that follow. - Page 21 Compliance Information Където е приложимо, оборудването е съобразено с основните изисквания наЕвропейските директиви 2004/108/ЕС и 2006/95/ЕС. Декларации са налични от местния представител. Toto zařízení splňuje základní požadavky směrnic EU 2004/108/ES a 2006/95/ES, vždy dle konkrétního způsobu použití. Příslušná prohlášení jsou k dispozici u vašeho lokálního distributora. Dette udstyr overholder de væsentlige krav i EU-direktiv 2004/108/EF og 2006/95/EF, som er relevant Erklæringerne kan fås hos din lokale repræsentant.
-
Page 22: Agency Compliance Statements: Mx-1000 Charging Station
(1) this device may not cause harmful interference, and (2) this device must accept any interference received, including interference that may cause undesired operation. Changes or modifications made to this equipment not expressly approved by Cognex may void the FCC authorization to operate this equipment. - Page 23 Compliance Information Canadian Compliance This Class A digital apparatus complies with Canadian ICES-003. Cet appareil numérique de la classe A est conforme à la norme NMB-003 du Canada. European Compliance This equipment complies with the essential requirements of EU Directives 2004/108/EC and 2006/95/EC, as applicable. Declarations are available from your local representative.
- Page 24 2006/95/EC, mida kohaldatakse. Deklarat-sioonid on saadaval Teie kohaliku esindaja. For European Union Users Cognex complies with Directive 2002/96/EC OF THE EUROPEAN PARLIAMENT AND OF THE COUNCIL of 27 January 2003 on waste electrical and electronic equipment (WEEE). This product has required the extraction and use of natural resources for its production. It may contain hazardous substances that could impact health and the environment, if not properly disposed.
-
Page 25: Precautions
Precautions Precautions Observe these precautions when installing the Cognex product, to reduce the risk of injury or equipment damage: To reduce the risk of damage or malfunction due to over-voltage, line noise, electrostatic discharge (ESD), power surges, or other irregularities in the power supply, route all cables and wires away from high-voltage power sources.
Need help?
Do you have a question about the MX-1000 and is the answer not in the manual?
Questions and answers