Cognex DataMan 280 Series Reference Manual
Fixed-mount barcode reader
Hide thumbs
Also See for DataMan 280 Series:
- Reference manual (60 pages) ,
- Quick reference manual (49 pages) ,
- Quick reference manual (43 pages)
Table of Contents
Advertisement
Quick Links
Advertisement
Table of Contents

Related Manuals for Cognex DataMan 280 Series


Summary of Contents for Cognex DataMan 280 Series
- Page 1 ® DataMan 280 Series Reference Manual 2024 December 20 Revision: 25.1.0.4...
-
Page 2: Legal Notices
Copyright © 2025. Cognex Corporation. All Rights Reserved. Portions of the hardware and software provided by Cognex may be covered by one or more U.S. and foreign patents, as well as pending U.S. and foreign patents listed on the Cognex web site at: cognex.com/patents. -
Page 3: Precautions
Precautions Precautions To reduce the risk of injury or equipment damage, observe the following precautions when you install the Cognex product: Connectivity is possible through the following options: 24 VDC (+/- 10%) output connection using a UL or NTRL listed power supply Power over Ethernet (PoE) 13 W power supply Any other voltage creates a risk of fire or shock and can damage the components. -
Page 4: Symbols
Symbols Symbols The following symbols indicate safety precautions and supplemental information: WARNING: This symbol indicates a hazard that could cause death, serious personal injury or electrical shock. CAUTION: This symbol indicates a hazard that could result in property damage. Note: This symbol indicates additional information about a subject. Tip: This symbol indicates suggestions and shortcuts that might not otherwise be apparent. -
Page 5: Table Of Contents
Table of Contents Table of Contents Legal Notices Precautions Symbols Table of Contents Getting Started About the DataMan 280 Series Supporting Documentation DataMan 280 Series Accessories Lenses Illumination Lens Covers Mounting Brackets Cables DataMan 280 Series Systems DataMan 280 Systems... - Page 6 Manual Focus Lens Focus Feedback Best Practices Connection Options Connecting the Ethernet Cable to DataMan 280 Series Readers DataMan 282 Readers LED Behavior with PoE Connecting the EtherCAT Cable to the DataMan 280 EtherCAT Reader Star EtherCAT Topology Line EtherCAT Topology Ring EtherCAT Topology Connecting the Power and I/O Breakout Cable...
- Page 7 Table of Contents High Speed Output Wiring Ethernet Cable EtherCAT Adapter Cable CCB-M12x12Fy-xx CCBL-05-01 CCB-PWRIO-05 Cleaning and Maintenance Clean the Housing Clean the Reader Image Sensor Window Clean the Reader Lens Cover Regulations and Conformity 中 国 大陆 RoHS (Information for China RoHS Compliance) For European Community Users...
-
Page 8: Getting Started
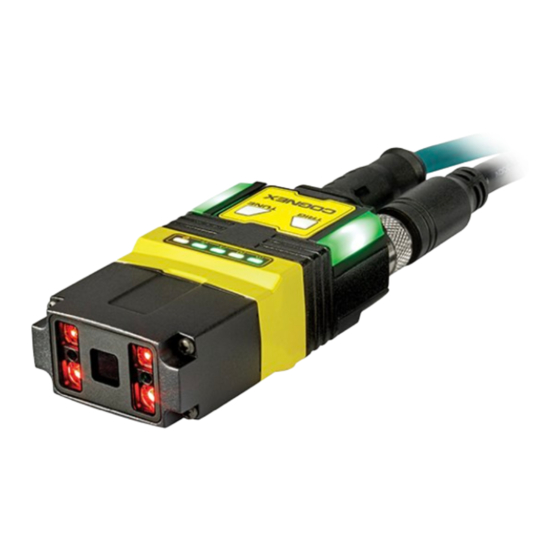
Getting Started Getting Started This section provides general information about the DataMan 280 series reader and the accessories and systems. About the DataMan 280 Series The DataMan 280 series readers are high-performance readers that offer: Premium class performance in a compact package Flexible Industry 4.0 connectivity options... -
Page 9: Supporting Documentation
Getting Started Supporting Documentation This document provides basic information about the DataMan 280 series readers. Additional information is available through the Windows Start menu or the DataMan Setup Tool Help menu after you install the DataMan software on your PC. -
Page 10: Dataman 280 Series Accessories
Getting Started DataMan 280 Series Accessories You can purchase the following components separately. For a list of options and accessories, contact your local Cognex sales representative. Lenses Accessory Product Number Illustration DM280 DM280 DM282 6.2 mm lens kit that includes: DM280-LENS-62 ✓... - Page 11 Getting Started Accessory Product Number Illustration DM280 DM280 DM282 IR 16 mm lens kit that includes: DMA-KIT-IR-16 ✓ ✓ 16 mm optics mount 16 mm lens (IR) Standard Infrared Light for 16mm (Risk Group Exempt acc. IEC62471) Manual lens cap (assembled) Screws High Speed Liquid Lens Module (HSLL) to be used DMA-HSLL-280...
-
Page 12: Illumination
Getting Started Illumination Accessory Product Illustration DM280 DM280 DM282 Number Red LED Light for 6.2 mm Lens (Risk Group Exempt acc. IEC DM150- ✓ ✓ 62471) LED-RED White LED Light for 6.2 mm Lens (Risk Group Exempt acc. IEC DM150- ✓... -
Page 13: Lens Covers
Getting Started Lens Covers Accessory Product Number Illustration DM280 DM280 DM282 Standard front cover. Use with a 6.2 DM280-CVR-62 ✓ ✓ mm lens only. Standard front cover, half-polarized. DM280-LENS- ✓ ✓ Use with a 6.2 mm lens only. 62CVR-P Standard front cover, fully-polarized. DM280-LENS- ✓... -
Page 14: Mounting Brackets
Getting Started Mounting Brackets Accessory Product Number Illustration DM280 DM280 EC DM282 Universal mounting bracket DM100-UBRK-000 ✓ ✓ ✓ Pivot mounting bracket DM100-PIVOTM-01 ✓ ✓ ✓ Tilted angle pivot bracket DMBK-DMPIVOT-00 ✓ ✓ ✓ Logistics mounting bracket and plate kit DMA-BKT-LGS ✓... -
Page 15: Cables
Sealed USB Type C Cable to DMA-RTCBLE-IP65-25 ✓ ✓ ✓ USB Type A, Angled, 2.5 m Sealed USB Type C Cable to DMA-RTCBLE-IP65-36 ✓ ✓ ✓ USB Type A, Angled, 3.6 m EtherCAT Adapter Cable CCB-ECAT-30 ✓ DataMan 280 Series Systems... -
Page 16: Dataman 280 Systems
Getting Started DataMan 280 Systems Omnidirectional 1D 1D Max High Speed 2DMax - Hard PowerGrid - Multi- Resolution Codes with Decoding to Read 2D Damaged 2D Reader Hotbars Codes Codes Sync 280L Codes 280QL Codes 280S 1440 x 1080 1D/2D Codes 280Q 1D/2D Codes 280X... -
Page 17: Dataman 282 Systems
Getting Started DataMan 282 Systems Omnidirectional 1D Max High Speed 2DMax - Hard to PowerGrid - Multi- Resolution 1D Codes with Decoding Read 2D Codes Damaged 2D Reader Hotbars Codes Sync 282L Codes 282QL Codes 282S 1920 x 1080 1D/2D Codes 282Q 1D/2D... -
Page 18: Dataman 280 Ethercat Systems
Getting Started DataMan 280 EtherCAT Systems Omnidirectional 1D 1D Max High Speed 2DMax - Hard PowerGrid - Multi- Resolution Codes with Decoding to Read 2D Damaged 2D Reader Hotbars Codes Codes Sync 280L Codes 280QL Codes 280S 1440 x 1080 1D/2D Codes 280Q 1D/2D Codes... - Page 19 Getting Started Illumination Board PoE Powered 24 V Externally Powered Max. exposure time Max. duty cycle Max. exposure time Max. duty cycle High Power White 1 ms 10 ms Standard Blue 1 ms 1 ms 1 ms 1 ms High Power IR 1 ms 10 ms High-Power Integrated...
-
Page 20: Setting Up Your Dataman Reader
Read this section to learn how the reader connects to its standard components and accessories. Note: Cables are sold separately. If a standard component is missing or damaged, immediately contact your Cognex Authorized Service Provider (ASP) or Cognex Technical Support. CAUTION: All cable connectors are keyed to fit the connectors on the reader. - Page 21 Setting Up Your DataMan Reader Number Description Trigger button Tune button Indicator LEDs Power LED indicator Train/Trigger status LED indicator Good/Bad read LED indicator Communication LED indicator Error LED indicator...
-
Page 22: Dm282 Layout
Setting Up Your DataMan Reader DM282 Layout The image and table below shows the elements of the reader. Number Description Power I/O Breakout cable connector USB-C slot (with plastic cover) Ethernet connector Illumination LEDs LED aimer Distance Sensor Trigger button Tune button Indicator LEDs Power LED indicator... -
Page 23: Dm280 Ethercat Layout
Setting Up Your DataMan Reader DM280 EtherCAT Layout The image and table below shows the elements of the reader. Number Description Power I/O Breakout cable connector USB-C slot (with plastic cover) Network connector (EtherCAT) Ethernet connector Illumination LEDs LED aimers EtherCAT Link Activity Out LED Trigger button EtherCAT Status LED... -
Page 24: Indicator Leds
Setting Up Your DataMan Reader For more information on the EtherCAT LEDs, see EtherCAT Indicators on page 24. Indicator LEDs The table summarizes the functions of the indicator LEDs on DataMan 280 series readers. Indicator Color/Status Meaning User LED indicator GREEN, Light edges blink in GREEN when the device performs a good read. - Page 25 Setting Up Your DataMan Reader GREEN The Status LED is steady GREEN when the EtherCAT connection is running. blinking The Status LED blinks GREEN when the EtherCAT connection is in PRE- OPERATIONAL state. single The Status LED flashes once GREEN when the EtherCAT connection is in SAFE- flash OPERATIONALstate.
-
Page 26: Dimensions
Setting Up Your DataMan Reader Dimensions The following sections list dimensions of the reader. Note: Dimensions are in millimeters and are for reference purposes only. All specifications are for reference purposes only and can change without notice. DataMan 280 with 6.2 mm lens The following image shows the dimensions of DataMan 280, equipped with 6.2 mm lens. -
Page 27: Dataman 280 With 16 Mm Lens
Setting Up Your DataMan Reader DataMan 280 with 16 mm Lens The following image shows the dimensions of DataMan 280 equipped with 16 mm lens. -
Page 28: Dataman 280 With L-Shaped Extension, Equipped With 6.2 Mm Lens
Setting Up Your DataMan Reader DataMan 280 with L-shaped extension, equipped with 6.2 mm Lens The following image shows the dimensions of DataMan 280 equipped with L-shaped extension and 6.2 mm lens. -
Page 29: Dataman 280 With L-Shaped Extension, Equipped With 16 Mm Lens
Setting Up Your DataMan Reader DataMan 280 with L-shaped extension, equipped with 16 mm Lens The following image shows the dimensions of DataMan 280 equipped with L-shaped extension and 16 mm lens. -
Page 30: Dataman 280 Ethercat With 6.2 Mm Lens
Setting Up Your DataMan Reader DataMan 280 EtherCAT with 6.2 mm lens The following image shows the dimensions of DataMan 280 EtherCat, equipped with 6.2 mm lens. DataMan 280 EtherCAT with 16 mm Lens The following image shows the dimensions of DataMan 280 EtherCAT equipped with 16 mm lens. -
Page 31: Dataman 280 Ethercat With L-Shaped Extension, Equipped With 6.2 Mm Lens
Setting Up Your DataMan Reader DataMan 280 EtherCAT with L-shaped extension, equipped with 6.2 mm Lens The following image shows the dimensions of DataMan 280 EtherCAT equipped with L-shaped extension and 6.2 mm lens. DataMan 280 EtherCAT with L-shaped extension, equipped with 16 mm Lens The following image shows the dimensions of DataMan 280 EtherCAT equipped with L-shaped extension and 16 mm lens. -
Page 32: Dataman280 Ethercat With Side Mirror Accessory
Setting Up Your DataMan Reader DataMan280 EtherCAT with Side Mirror Accessory The following image shows the dimensions of DataMan280 EtherCAT equipped with the side mirror accessory... -
Page 33: Dataman 282 With High-Power Integrated Torch
Setting Up Your DataMan Reader DataMan 282 with High-Power Integrated Torch The following image shows the dimensions of DataMan 282 equipped with High-Power Integrated Torch. -
Page 34: Dataman 282 With High-Power Integrated Torch - L-Shaped Extension
Setting Up Your DataMan Reader DataMan 282 with High-Power Integrated Torch - L-Shaped Extension The following image shows the dimensions of DataMan 282 equipped with a High-Power Integrated Torch and L-shaped extension. -
Page 35: Dataman 282 With Dome Front Cover
Setting Up Your DataMan Reader DataMan 282 with Dome Front Cover The following image shows the dimensions of DataMan 282 equipped with a dome front cover. -
Page 36: Dataman 282 With Dome Front Cover - Right Angle Configuration
Setting Up Your DataMan Reader DataMan 282 with Dome Front Cover - Right Angle Configuration The following image shows the dimensions of DataMan 282 equipped with L-shaped extension and dome front cover. -
Page 37: Field Of View And Reading Distance
Setting Up Your DataMan Reader Field of View and Reading Distance This section provides the Field of View (FoV) values for 6.2 mm and 16 mm lenses. DataMan 280 EC and Standard Model Readers with 6.2 mm Lens 6.2 mm lenses can be focused to 105 mm (short range) and to 190 mm (long range). Short Range (Focused to 105 mm) The following tables show the Field of View (FoV) widths of the 6.2 mm lens focused to 105 mm at various distances. -
Page 38: Dataman 280 Ec And Standard Model Readers With 16 Mm Lens
Setting Up Your DataMan Reader Working distance in mm Horizontal values in mm Vertical values in mm = 190 = 159 = 119 = 225 = 187 = 140 = 307 = 230 = 375 = 1000 = 808 = 606 Distances in mm 2D min. - Page 39 Setting Up Your DataMan Reader Working distance in mm Horizontal values in mm Vertical values in mm = 375 = 116 = 87 = 1000 = 310 = 232 Distances in mm 2D min. code in mil 1D min. code in mil 1000...
-
Page 40: Dataman 282 Readers With 8 Mm Lens
Setting Up Your DataMan Reader DataMan 282 Readers with 8 mm Lens Working distance in mm Horizontal values in mm Vertical values in mm = 300 = 223 = 125 = 750 = 526 = 295 = 1200 = 828 = 466 Working Distance in mm 2D min. -
Page 41: Dataman 282 Readers With 12 Mm Lens
Setting Up Your DataMan Reader DataMan 282 Readers with 12 mm Lens Working distance in mm Horizontal values in mm Vertical values in mm = 300 = 141 = 79 = 750 = 343 = 193 = 1200 = 545 = 306 Working Distance in mm 2D min. -
Page 42: Dataman 282 Readers With 16 Mm Lens
Setting Up Your DataMan Reader DataMan 282 Readers with 16 mm Lens Working distance in mm Horizontal values in mm Vertical values in mm = 300 = 105 = 59 = 750 = 256 = 144 = 1200 = 407 = 229 Working Distance in mm 2D min. -
Page 43: Connecting The Reader
Setting Up Your DataMan Reader Connecting the Reader Installing a C-Mount Lens on page 44 Mounting the Reader on page 56 Connecting the Ethernet Cable to DataMan 280 Series Readers on page 61 Connecting the Power and I/O Breakout Cable on page 63... -
Page 44: Installing And Changing Lenses
Installing and Changing Lenses This section provides an overview about installing and changing different kinds of lenses. Note: Use a Phillips screwdriver with drive size #1 for all Phillips screws that are reachable from the front side. Note: Disconnect the reader from power before changing lenses or mounts. CAUTION: Perform all lens modification procedures in a dust-free and ESD safe area. - Page 45 2. Remove the illumination module. 3. Unscrew the two M2x5mm Phillips head screws, remove the 6.2 mm lens mount and the 6.2 mm lens.
- Page 46 4. Place the C-Mount cover on the front of the device, and tighten the screws. Note: Observing the tightening sequence below, tighten all six M2 x 12 mm Phillips Pan screws to 12 Ncm using a torque wrench. 5. Place the lens cover adapter plate on the C-Mount cover, and tighten the screws.
- Page 47 6. Thread the lens into the reader. 7. Screw the lens cover onto the lens cover adapter.
-
Page 48: Changing A 6.2 Mm Lens To A 16 Mm Lens
Changing a 6.2 mm Lens to a 16 mm Lens This section provides a step-by-step process for changing the 6.2 mm lens to a 16 mm lens on the reader. 1. Unscrew the four M2x12mm Phillips Pan head screws, then take off the metal cover from the reader. 2. - Page 49 3. Unscrew the two M2x5mm Phillips head screws, remove the 6.2 mm lens mount and the 6.2 mm lens. 4. Attach the 16 mm lens mount and lens, and screw in the two M2x5mm Phillips head screws. Focus, if necessary. For more information, see Setting Focus on page 57.
- Page 50 5. Attach the 16 mm lens illumination module.
- Page 51 6. Attach the 16 mm lens front cover. Note: The rib in the front cover must be oriented to the top side. Note: Observing the tightening sequence below, tighten all four M2 x 12 mm Phillips Pan screws to 16 Ncm using a torque wrench.
-
Page 52: Installing A High Speed Liquid Lens
Installing a High Speed Liquid Lens This section shows the process of installing a liquid lens onto the DataMan 280 with a 6.2 mm lens. 1. Unscrew the four M2 x 12 mm Phillips Pan head screws, then take off the metal cover from the reader. 2. - Page 53 3. Turn the lens cap to the 105 mm position. 4. Carefully remove the lens cap from the imager lens. Note: In order not to lose focus calibration, do not rotate the imager lens while the lens cap is removed. 5.
- Page 54 6. Press the liquid lens onto the imager lens until you reach the stop. 7. Re-attach the illumination module.
- Page 55 8. Re-attach the front cover. Note: The rib in the front cover must be oriented to the top side. Note: Observing the tightening sequence below, tighten all four M2 x 12 mm Phillips Pan screws to 16 Ncm using a torque wrench.
-
Page 56: Installing Front Cover On High-Power Integrated Torch
Installing Front Cover on High-Power Integrated Torch 1. Screw in the four screws from the light module housing into the front cover. The following image depicts the dome front cover. The same instructions apply to polarized and diffuse front covers. Note: Observing the tightening sequence below, tighten all four M2.5 x 34 mm Phillips Pan screws to 0.25 Ncm using a torque wrench. -
Page 57: Mounting The Reader In Straight Configuration
Mounting the Reader in Straight Configuration Align the holes on the mounting surface with the mounting holes on the reader. Insert the M3X5 screws into the mounting holes. Mounting the Reader in Right-Angle Configuration Align the holes on the mounting surface with the mounting holes on the reader. With the reader in right-angle position, only the back mounting holes can be used. -
Page 58: Manual Focus Lens
To set the focus on your reader, use the following options depending on whether you use a liquid lens or a manual focus lens. Note: The DataMan Setup Tool has focus sheets that can help you manually adjust lenses or swapping between them. Manual Focus Lens Click the Focus Feedback button in the image panel in SetupTool to enable focus feedback. -
Page 59: Focus Feedback
Focus Feedback Focus is indicated by colors ranging from red (bad focus) to green (sharp focus). When focusing the reader, you need to adjust its position until the focus column becomes green. Best Practices Both Optimize Focus and the Focus Feedback use the same procedure for testing the current focus. They consider various sub-regions of the image. - Page 60 Note: If you use the focus feedback indicator to adjust a manual focus lens, you must apply power to the reader before you remove the cover. If you remove the cover before applying power, the internal illumination will not function. If you use a Liquid Lens, make sure that the cover is mounted and connected before you apply power.
-
Page 61: Connection Options
For more information on how to connect your DataMan reader to your network, see the DataMan Communications and Programming Guide. Connecting the Ethernet Cable to DataMan 280 Series Readers CAUTION: The Ethernet cable shield has to be grounded at the far end. If the far end device is not grounded, add a ground wire in compliance with local electrical codes. -
Page 62: Star Ethercat Topology
The DataMan 280 EtherCAT supports the following physical topologies: Star Line Ring Note: For detailed information on the supported EtherCAT configurations, see the DataMan Industrial Protocols Manual. Star EtherCAT Topology The star topology connects each reader to the PLC individually. This topology offers increased availability, as each reader can be reached individually. -
Page 63: Line Ethercat Topology
Line EtherCAT Topology The line topology connects the readers in daisy chain. The output of one adapter cable is plugged into the input of the next one. The line starts at the output from the PLC, and ends at the input connector of the last reader. This topology reduces the cabling needed to connect all readers. -
Page 64: Using Your Device Through Usb
Note: Perform wiring or adjustments to I/O devices when the reader is not receiving power. You can clip unused wires short or use a tie made of non-conductive material to tie them back. Keep bare wires separated from the +24 V DC wire. 1. - Page 65 4. Identify the virtual adapter. On the example image below, it is Ethernet 5. 5. Right-click on the virtual adapter and select Properties. Assign a fixed IP to the network adapter starting with 192.168.111. Use Case Examples To connect to the DataMan Setup Tool: 1.
- Page 66 To connect through Telnet: 1. Connect the PC to the DataMan 280 with an USB-C cable. 2. Set up the Ethernet emulation as described in Configure the PC-emulated Ethernet driver to be in the same LAN on page 64. 3. Open a Telnet connection with the 192.168.111.2/23 IP address. To connect to the WebHMI: 1.
-
Page 67: Usb-Keyboard (Hid) Functionality
4. Open a browser and enter 192.168.111.2 into the address bar to connect to the WebHMI through the virtual IP address. WebHMI is a use case example. You can also use Telnet or DataMan Setup Tool for emulating Ethernet functionality. Telnet Open Telnet connection with 192.168.111.2/23 IP address. -
Page 68: Using Your Dataman Reader
Follow the steps below to install and connect your reader to the DataMan Setup Tool. 1. Check the DataMan Release Notes for a full list of system requirements. 2. Download the latest version of the DataMan Setup Tool from support.cognex.com/downloads/dataman/software- firmware and follow the on-screen steps. -
Page 69: External Triggers
Using Your DataMan Reader External Triggers If you are using external triggering, you can use any of the following methods to trigger your reader. Press the trigger button on the reader. Send a pulse on the I/O cable. Trigger + Trigger - Send a trigger command over any serial connection . -
Page 70: Manual Training
Using Your DataMan Reader Press and hold the trigger button for a minimum of three seconds. Click Train Code under Actions on the ribbon bar. You can use training in Single, Burst, Continuous or Self trigger modes. Note: Only a single symbol of each symbology kind can be trained. Manual Training You can manually train your reader which is helpful if you do not have a barcode nearby or you need to train during a running production. -
Page 71: Training Feedback
Using Your DataMan Reader Training Feedback The second LED from left on the reader glows green to indicate that it is currently trained. If the reader has no trained code, the LED is off. Connect the reader to the DataMan Setup Tool to untrain it and allow it to recognize other enabled symbologies. Incremental Training for Multiple Symbologies If you want to train the reader to recognize multiple symbologies, you can present a single image showing all the desired symbologies and perform the training procedure previously described. -
Page 72: Dm282 Led Configurations
Using Your DataMan Reader With incremental training enabled, you can train the reader using multiple images showing the symbologies you expect to decode. The reader will train each new symbology while retaining the existing trained symbologies. DM282 LED Configurations In the DataMan Setup Tool, you can control the primary illumination color of the LED lights of the reader in the Optimize Image tab. - Page 73 Using Your DataMan Reader In the Inputs / Outputs pane, you can assign a LED color for the input/output events. For example, you can set a color for a successful read and set a different color for an unsuccessful read. 1.
- Page 74 Using Your DataMan Reader 2. Pick a custom LED color in the Custom LED Color Selector column. Note: If you choose the same color for the primary illumination and for the custom inputs/outputs LED, a warning appears next to the custom color. In this case, you either have to choose a different primary illumination color, or choose a different custom LED color for the inputs/outputs events.
-
Page 75: Industrial Protocols
Scan the appropriate Reader Configuration codes. For more information, see Reader Configuration Codes available through the Windows Start menu, the DataMan Setup Tool Help menu, or DataMan documentation available on the Cognex support site. Send the appropriate DMCC command. For more information, see Command Reference available through the Windows Start menu or the DataMan Setup Tool Help menu. -
Page 76: Specifications
Specifications Specifications The following sections list general specifications for the reader. DataMan 280 Series Reader Specification DataMan 280 DataMan 282 DataMan 280 EC Weight 6.2 mm: 141 g HPIT: 290 g 16 mm: 169 g Right angle configuration adds 50 g... -
Page 77: Dataman 280 Series Reader Image Sensor
N/A for DataMan 280 and 282 For details on the EtherCAT interface, see Connecting the EtherCAT Cable to the DataMan 280 EtherCAT Reader on page 61. DataMan 280 Series Reader Image Sensor Specification DataMan 280 DataMan 282 DataMan 280 EC Image Sensor... - Page 78 Specifications RED HPIL BLUE WHITE 6500K (Color temperature) IR HPIL...
-
Page 79: Acquisition Trigger Input
Specifications Acquisition Trigger Input The reader features one acquisition trigger input, which is optically isolated. You can configure the acquisition trigger input to trigger from an NPN (current sinking) or PNP (current sourcing) device. To trigger from an NPN type photoelectric sensor or PLC output, connect COMMON IN to +24 VDC and connect IN 0 to the output of the photoelectric sensor. -
Page 80: High-Speed Outputs
Specifications High-Speed Outputs Specification Description Voltages : 26 VDC through external load : ≤ ± 3 V @ 50 mA Current : 50 mA maximum sink or source current Each line is protected against over-current, short circuits and transients from switching inductive loads. High current inductive loads require an external protection diode. -
Page 81: High Speed Output Wiring
Specifications High Speed Output Wiring To connect to an NPN-compatible PLC input, connect one of the reader's high-speed outputs directly to the PLC input. When enabled, the output pulls the PLC input down to less than 3 VDC. To connect to a PNP-compatible PLC input, connect one of the reader's high-speed outputs directly to the PLC input. When enabled, the output pulls the PLC input up to greater than 21 VDC. -
Page 82: Ethernet Cable
Specifications Ethernet Cable The Ethernet cable provides Ethernet connectivity to the reader. The Ethernet cable is used to connect the reader to other network devices. P1 Pin Number Wire Color Signal Name P2 Pin Number White/Orange TxRx A + Orange TxRx A - White/Green TxRx B +... -
Page 83: Ethercat Adapter Cable
Specifications EtherCAT Adapter Cable The EtherCAT adapter cable breaks out the EtherCAT input and output ports of the DataMan 280 EtherCAT reader to individual connectors: The P1 EtherCAT output is an M12 D-coded female connector that provides access to the EtherCAT output port of the reader. -
Page 84: Ccb-M12X12Fy-Xx
Specifications CCB-M12x12Fy-xx The Power and I/O Breakout cable provides access to trigger and high-speed outputs. For RS-232, use the Power Supply return path for ground. The figure on the left shows the plug on the device. Pin# Signal Names Wire Color Out 2/In 2 White Green... -
Page 85: Ccbl-05-01
Specifications CCBL-05-01 The Power and I/O Breakout cable provides access to trigger and high-speed outputs. For RS-232, use the Power Supply return path for ground. The figure on the left shows the plug on the device. Pin# Signal Names Wire Color Out 2/In 2 Yellow White/Yellow... -
Page 86: Ccb-Pwrio-05
Specifications CCB-PWRIO-05 The Power and I/O Breakout cable provides access to trigger and high-speed outputs. For RS-232, use the Power Supply return path for ground. The figure on the left shows the plug on the device. Pin# Signal Names Wire Color Out 2/In 2 Yellow White/Yellow... -
Page 88: Cleaning And Maintenance
Cleaning and Maintenance Cleaning and Maintenance Clean the Housing To clean the outside of the reader housing, use a small amount of mild detergent cleaner or isopropyl alcohol on a cleaning cloth. Do not pour the cleaner on the reader housing. CAUTION: Do not attempt to clean any DataMan product with harsh or corrosive solvents, including lye, methyl ethyl ketone (MEK) or gasoline. -
Page 89: Regulations And Conformity
Regulations and Conformity Regulations and Conformity Note: For the most current CE and UKCA declaration and regulatory conformity information, see the Cognex support site: cognex.com/support. DataMan 280 readers have Regulatory Model numbers 50208, 50210, 50215, 50216, 50211 and 50213 and meet or exceed the requirements of all applicable standards organizations for safe operation. -
Page 90: 中 国 大陆 Rohs (Information For China Rohs Compliance)
Regulations and Conformity Safety and Regulatory TÜV DataMan 280 1.6 MP: Regulatory Model 50208 DataMan 280 1.6 MP L-shaped: Regulatory Model 50210 DataMan 280 2 MP: Regulatory Model 50215 DataMan 280 2 MP L-shaped: Regulatory Model 50216 DataMan 280 EC Straight: Regulatory Model 50211 DataMan 280 EC L-Shaped: Regulatory Model 50213 NRTL: TÜV SÜD SCC/NRTL OSHA Scheme for UL/CAN 61010-1. -
Page 91: For European Community Users
表 示用于本 部件的至 少一种 均 质 材料中所 含的危害 物 质超 过GB / T26572 - 2011 的限 制 要求 。 For European Community Users Cognex complies with Directive 2012/19/EU OF THE EUROPEAN PARLIAMENT AND OF THE COUNCIL of 4 July 2012 on waste electrical and electronic equipment (WEEE). - Page 92 Copyright © 2025 Cognex Corporation. All Rights Reserved.
Need help?
Do you have a question about the DataMan 280 Series and is the answer not in the manual?
Questions and answers