Advertisement
Table of Contents
- 1 User Manual
- 2 Table of Contents
- 3 Introduction
- 4 Important Safeguard
- 5 General Features
- 6 Preparation
- 7 Location and Function of Controls
- 8 Attaching Consideration
- 9 How to Installation
- 10 Notes on Use and Installation
- 11 Troubleshooting Guide
- 12 Specifications
- Download this manual
See also:
Use and Care Manual
User Manual
OUT DOOR CAMERA DRC-4BA/DRC-4BAN/DRC-4CA/DRC-4CAC//DRC-4CAN/DRC-4CANC
• Thank you for purchasing COMMAX products.
• Please carefully read this User's Guide (in particular, precautions for safety) before using a product and follow
instructions to use a product exactly.
• The company is not responsible for any safety accidents caused by abnormal operation of the product.
Advertisement
Table of Contents

Subscribe to Our Youtube Channel
Related Manuals for Commax DRC-4BA


Summary of Contents for Commax DRC-4BA
-
Page 1: User Manual
User Manual OUT DOOR CAMERA DRC-4BA/DRC-4BAN/DRC-4CA/DRC-4CAC//DRC-4CAN/DRC-4CANC • Thank you for purchasing COMMAX products. • Please carefully read this User’s Guide (in particular, precautions for safety) before using a product and follow instructions to use a product exactly. • The company is not responsible for any safety accidents caused by abnormal operation of the product. -
Page 2: Table Of Contents
Contents 1. Introduction .............3 2. Important Safeguard ........4 3. General Features..........6 4. Preparation .............7 5. Location And Function Of Controls....8 6. Attaching Consideration........10 7. How To Installation ........11 8. Notes On Use and Installation ......12 9. Troubleshooting Guide .........13 10. Specifications..........15... -
Page 3: Introduction
The model number is located on the bottom and record the serial number in the space provided below(available). Refer to these numbers whenever you call upon your COMMAX dealer regarding this product. Model No. -
Page 4: Important Safeguard
2. Important Safeguard ▲ Damage Requiring Service: This equipment from the power source and source and refer servicing to qualified service personnel under the following conditions: ⓐ when the power is damaged. ⓑ if liquid has been spiled or objects have hallen into the unit ⓒ... - Page 5 ▲ Power Line -The commax door aamera system should not be located near overhead power lines or other electric light or power circuits, or where it can fall into power lines or circuits. When installing a door camera system, avoid dangerous contact with power lines or circuits.
-
Page 6: General Features
3. General Features There is no where better than surveillance home, factory, office to make your house a security home COMMAX surveil- lance system are here to provide positive visual and convenience life. General Characteristics The system consists of : - For 12V DC Operation ( power supplied from the monitor). -
Page 7: Preparation
- Clean the cabinet, glass and controls with a drt soft cloth, or a soft cloth lightly moistened with mild detergent solution. - Do not use any type of solvent, such as alcohol or benzene, which might damage the finish. On Cleaning If you have any questions about this unit, contact your Commax dealer. -
Page 8: Location And Function Of Controls
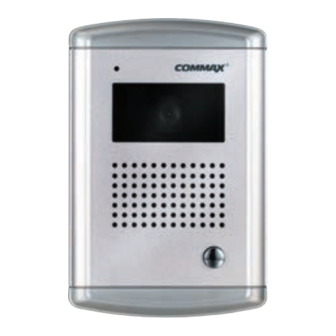
❶ Microphone When Turn on the [CALL] button on the panel, and con- versation with residents. ❷ C.C.D. Camera Lens Built-in Black & White C.C.D. 1/3°± lens (for DRC-4BA) and Color 1/4°± C.C.D lens (for DRC-4CA). ❸ Camera Protection Window Prevent the scratch from the other matters. - Page 9 ❾ Angular Field Of View For Camera Adjust the angular field of the camera for manually. ❿ Connection Wire Release Connection Terminal Use the connection with your residents. Note: Do not make any wire connections these terminals or level the cover off while the unit is plugged into an DC power supplier.
-
Page 10: Attaching Consideration
6. Attaching Consideration When selecting the location for attaching your unit, please remember... - Bottom should be of sufficient strength to permit attaching. - Allow adequate space on the both side of the unit for proper venti lation access to cable and unit for viewing easy. -
Page 11: How To Installation
7. How To Installation Connection Wires : 1. Connection wires to inside unit on the side of monitor. (Notice : Checking to screw dimension :M3 X 30mm (With washer) : 2 pieces -included). 2. Connection Terminal : Check the wire connection terminal level of the side of unit(Refer to wiring diagram). -
Page 12: Notes On Use And Installation
8. Note On Use and Installation Do Not Aim The Camera At The Do Not Slash Water On The Camera Install the camera where the camera can be kept dry. If the camera gets wet, turn off the power Do not aim the camera at the sun or and contact you dealer. -
Page 13: Troubleshooting Guide
Getting Help If you still can't correct an operating problem, contact your dealer. If your dealer is unable to solve your problem, contaact Commax Customer Service, Please don't open the cabinet and attempt to repair the unit, as this will void your warranty. - Page 14 9. Troubleshooting Guide Condition Checking Points Solution No Image - Are the camera and connected Make sure that system unit is plugged. equipment turned on ? Make sure that adjusted properly your desired. - Is the lens adjusted properly ? Make sure that system cable correct connection of the unit Noise Picture - Are cables connected correctly?
-
Page 15: Specifications
10. Specifications Model No. DRC-4BA, DRC-4BAN (B & W) DRC-4CA , DRC-4CAN(Color) , ±10% (Power supplied from the monitor) Input Voltage Connection Wire 4 Wires (Polarity) 2 Wires (Non-Polarity) Image Device 1/3" Black & White C.C.D. Camera 1/4" Color C.C.D Camera Video Transmission Standard EIA or CCIR NTSC or PAL STANDARD. - Page 16 Model No. DRC-4CAC / DRC-4CANC , ±10% (Power supplied from the monitor) Input Voltage Connection Wire 4 Wires (Polarity) 2 Wires (Non-Polarity) Image Device 1/4" Color CMOS Video Transmission Standard NTSC or PAL STANDARD. Communication System Synchronization Angular Field Of View Lens Horizontal : 68°Vertical : 50°...
- Page 17 - For ninety days from original date of purchase or receipt as a gift and manual, COM- MAX will, at its option, repair or replace a detective product at free charge to you. - For additional nine months COMMAX will furnish all to defective parts. Labor is not included during this period.
- Page 18 513-11, Sangdaewon-dong, Jungwon-gu, Seongnam-si, Gyeonggi-do, Korea Int’l Business Dept. : Tel.; +82-31-7393-540~550 Fax.; +82-31-745-2133 Web site : www.commax.com Printed In Korea / 2012.05.105 PM104BA00010...
Need help?
Do you have a question about the DRC-4BA and is the answer not in the manual?
Questions and answers
I want installation this model But in the back of door panel there is two wire Please help me for connecting to door lock How can I connecting this model
The Commax DRC-4BA supports both 4-wire (polarity) and 2-wire (non-polarity) connections. To connect it to a door lock with two wires on the back of the door panel, use the 2-wire non-polarity connection method. Ensure that the power is supplied from the monitor and follow the correct wiring configuration as specified in the manual. If unsure, consult your Commax dealer for further assistance.
This answer is automatically generated