Table of Contents
Advertisement
UK
UK
INSTALLATION AND SERVICING INSTRUCTIONS
BRAVA DGT HE
25 - 30 - 35
MURELLE ADVANCED HE ErP
INSTALLATION AND SERVICING INSTRUCTIONS
INSTALLATION AND SERVICING INSTRUCTIONS
USER, INSTALLATION AND SERVICING INSTRUCTIONS
25 - 30 - 35
BRAVA DGT HE
BRAVA DGT HE
Condensing wall mounted boiler
25 - 30 - 35
25 - 30 - 35
ENSURE THAT THESE
INSTRUCTIONS ARE LEFT
FOR THE USER AFTER
COMPLETION OF THE
BENCHMARK SECTION
IMPORTANT NOTICE
WITHIN THIS GUIDE
REGARDING YOUR BOILER
199838
Cod. 6316191 - 08/2013
INSTRUCTIONS ARE LEFT
REGARDING YOUR BOILER
INSTRUCTIONS ARE LEFT
PLEASE READ THE
REGARDING YOUR BOILER
199838
WARRANTY
Cod. 6316191 - 08/2013
6322848 - 04/2015 - R1
Cod. 6316191 - 08/2013
ENSURE THAT THESE
FOR THE USER AFTER
COMPLETION OF THE
BENCHMARK SECTION
PLEASE READ THE
IMPORTANT NOTICE
WITHIN THIS GUIDE
ENSURE THAT THESE
ENSURE THAT THESE
INSTRUCTIONS ARE LEFT
WARRANTY
FOR THE USER AFTER
FOR THE USER AFTER
COMPLETION OF THE
COMPLETION OF THE
BENCHMARK SECTION
BENCHMARK SECTION
PLEASE READ THE
PLEASE READ THE
IMPORTANT NOTICE
IMPORTANT NOTICE
WITHIN THIS GUIDE
WITHIN THIS GUIDE
REGARDING YOUR BOILER
WARRANTY
WARRANTY
199838
199838
BOILER DETAILS
please position here a sticker
from installation pack
Advertisement
Chapters
Table of Contents

Related Manuals for Sime MURELLE ADVANCED HE ErP


Summary of Contents for Sime MURELLE ADVANCED HE ErP
- Page 1 BRAVA DGT HE BRAVA DGT HE Condensing wall mounted boiler ENSURE THAT THESE 25 - 30 - 35 MURELLE ADVANCED HE ErP 25 - 30 - 35 25 - 30 - 35 INSTRUCTIONS ARE LEFT FOR THE USER AFTER COMPLETION OF THE...
-
Page 2: Safe Handling
For the first year all of our appliances are protected by our manufacturer’s guarantee which covers both parts and labour. As you would expect from Sime Ltd, it is our aim to provide our valued customers with the best in after sales and service. -
Page 4: The Benchmark Scheme
The Benchmark Scheme Sime is a licensed member of the Benchmark Scheme which aims to improve the standards of installation and com- missioning of domestic heating and hot water systems in the UK and to encourage regular servicing to optimise safety, efficiency and performance. - Page 5 – Do not use electrical devices or appliances such – The appliance must be used as intended. Sime Ltd as switches, electrical appliances etc if you can declines all responsible for any injury or damage smell gas.
- Page 6 EC, "Boiler Efficiency" Directive 92/42/EC and "Low Voltage" Directive 2006/95/EC, the manufacturer Fonderie SIME S.p.A., via Garbo 27, 37045 Legnago (VR), DECLARES THAT the boiler models Murelle Advanced HE ErP comply with the European Directives. These appliances comply with the S.E.D.B.U.K. scheme, band “A”.
-
Page 7: Table Of Contents
USER INSTRUCTIONS TABLE OF CONTENTS OPERATING THE MURELLE ADVANCED HE ErP MAINTENANCE Control panel ........8 Servicing. -
Page 8: Operating The Murelle Advanced He Erp
OPERATING THE MURELLE ADVANCED HE ErP pressing any one of these buttons for more than 30 Control panel seconds generates a fault on the display without preventing boiler operation.The warning disappears when the button is released. DISPLAY “SUMMER” . This symbol appears when the boiler is operating in "Summer"... -
Page 9: Preliminary Checks
Prior to use the Murelle Advanced HE ErP boiler must be installed alight until the tap is turned off. and commissioned by a Gas Safe Registered engineer. It may be necessary for the user to occasionally have to start the Once the boiler has been operated in "SUMMER mode"... -
Page 10: Fault / Malfunction Codes
Fault / malfunction codes Shutting down for long periods If a fault/malfunction is detected during boiler operation, the If the boiler is to be left unused for a long period, the following message “ALL” will appear on the display followed by the fault operations need to be carried out: code (eg. -
Page 11: Table Of Contents
DESCRIPTION OF THE APPLIANCE TABLE OF CONTENTS Main water circuit ......16 DESCRIPTION OF THE APPLIANCE Sensors. -
Page 12: Description Of The Appliance
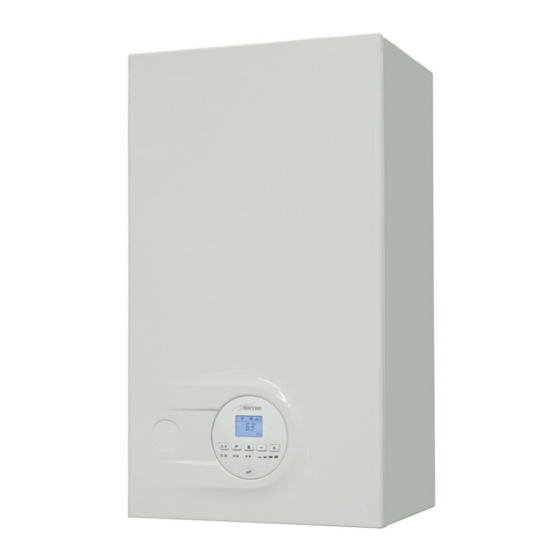
Characteristics Identification are condensing wall mounted boilers The Murelle Advanced HE ErP boilers can be identified by means Murelle Advanced HE ErP which Sime Ltd has produced for installation into domestic properties for heating and hot water production. The main... -
Page 13: Technical Data Plate
5.3.1 Technical Data Plate NAME APPLIANCE TYPE SERIAL NUMBER CODE YEAR OF MANUFACTURE REFERENCE DIRECTIVE WATER CONTENT IN BOILER PIN NO. MAX HEAT INPUT MIN HEAT INPUT MAX USEFUL OUTPUT (80-60°C) MIN USEFUL OUTPUT (80-60°C) MAX USEFUL OUTPUT (50-30°C) MIN USEFUL INPUT (50-30°C) MAX OPERATING PRESSURE MAX OPERATING TEMPERATURE D.H.W. -
Page 14: Structure
Structure Heat exchanger bleed point Heat exchanger bleed point Heat exchanger Domestic hot water filter Combustion chamber door System relief valve Air/gas duct Boiler drain Flame viewing window Pump Ignition/detection electrode Water pressure transducer Return sensor (SR) Automatic bleed valve Safety thermostat (TS) Air-gas mixer Delivery sensor (SM) -
Page 15: Technical Features
Technical features Murelle Advanced HE ErP DESCRIPTION CERTIFICATIONS Country of intended installation Fuel G20 / G31 PIN number (CE) 1312CP5936 Category II2H3P Type C13 - C33 Class NO 5 (< 70 mg/kWh) HEATING PERFORMANCE (*) HEAT INPUT Nominal flow [Qn max]... -
Page 16: Main Water Circuit
Gas consumption at Max/Min flow rate (G20) 2.96 / 0.50 4.23 / 0.74 Gas consumption at Max/Min flow rate (G31) Kg/h 2.17 / 0.37 3.10 / 0.74 mbar 20 / 37 20 / 37 Gas supply pressure (G20/G31) 2 / 3.7 2 / 3.7 TEMPERATURE - PRESSURE Max operating temperature [T max]... -
Page 17: Expansion Vessel
5.9.1 Pump equipped with LED Expansion vessel The expansion vessel installed on the boilers has the following characteristics: Murelle Advanced HE Description Total capacity 10,0 Prefilling pressure Useful capacity Maximum system content (*) (*) Conditions of: Average maximum temperature of the system 85°C Start temperature at system filling 10°C. -
Page 18: Control Panel
DISPLAY 5.10 Control panel “SUMMER” . This symbol appears when the boiler is operating in "Summer" mode or if only the domestic hot water mode is enabled via the remote control. If the symbols are flashing, this indicates that the chimney sweep function is active. . -
Page 19: Wiring Diagram
– Connect the earth wire to an effective earthing system. Sime Ltd declines all responsible for any injury or damage to persons, animals,or property as a result of failure to provide adequate earthing... -
Page 21: Table Of Contents
INSTALLATION AND SERVICING INSTRUCTIONS TABLE OF CONTENTS INSTALLATION COMMISSIONING Receiving the product ......22 Preliminary operations . -
Page 22: Installation
INSTALLATION Receiving the product Murelle Advanced HE ErP Description appliances are delivered in a single Murelle Advanced HE ErP W (mm) unit protected by cardboard packaging. D (mm) H (mm) Weight (kg) 28,5 32,5 Handling Once the packaging has been removed, the appliance is to be handled manually, tilting it slightly, lifting it and applying pressure in the points indicated in the figure. -
Page 23: Cleaning The System
Naturally soft water areas can corrode aluminium heat exchangers. Adding Fernox F1 or Mb-1 will guard against corrosion. – Sime Ltd promote the fitting of TF1 System filter with any new boiler installation. ≥ 2 – It is important to check the inhibitor concentration after installation, system modification and annually on a service visit in accordance with the manufacturer’s instructions. -
Page 24: Plumbing Connections
6.11 Gas supply boilers leave the factory prearranged Murelle Advanced HE ErP for gas G20 (methane) and can also work with G31 (propane) without the need for any type of mechanical conversion.Simply select parameter “03” (see “Parameter setting and display"... -
Page 25: Connecting The Flue
6.12 Connecting the flue CAUTION – The appliance must be installed as a room sealed device and unless stated in writing from the manufacturer, in accordance with the current edition of BS 5440-1. The information shown in this manual is for guidance and parts identification. –... -
Page 26: Installation Of Coaxial Flues 60/100Mm - 80/125Mm
6.12.2 Installation of coaxial flues 60/100mm – 80/125mm Coaxial flue kits that are supplied separately. The diagrams below, illustrate some examples of fluing options allowed and the maximum lengths than can be achieved. It is essential that a flue gas analysis point is made available directly above the boiler. -
Page 27: 6.12.3 Installation Of Separate Ducts 80Mm
6.12.3 Installation of separate ducts 80mm The boiler can be installed with separate air inlet and exhaust ducts. The figure below illustrate some examples of the fluing options allowed and the associated losses of the accessories. The total load loss is the sum of the load losses of the accessories used. -
Page 28: Electrical Connections And External Controls
3 amps. If this cable needs to be replaced, an original spare must be requested from Sime Ltd . The heating control of the boiler can be achieved by connection of a volt free room thermostat, room thermostat/timer. For connection details see section "External timers and Room... -
Page 29: 6.13.1 External Sensor
EN607301 connected to TA (see section “Wiring diagram” ) or power supply through a fused mains switch, with by use of a dedicated Sime Remote Control (Home or Home at least 3mm spacing between contacts, fused at Plus). The boiler will automatically detect when a dedicated 3amps control is connected. -
Page 30: Refilling Or Emptying
MULTI ZONE system - with pump, air thermostat and 6.15.1 SYSTEM Filling external sensor. Remove the front panel: – remove the two screws (1), pull the front panel (2) forwards and release it from the top by lifting it. Fig. 29 Fig. -
Page 31: 6.15.2 Emptying Operations
Fig. 33 – check the pressure on the display and if necessary top up until the correct pressure reading appears – close the automatic bleed valve (3) – it is recommended that the condensate trap is filled prior to fitting the flue, by carefully pouring water into the exhaust connection. -
Page 32: Commissioning
COMMISSIONING Preliminary operations Before commissioning the appliance, check that: – the type of gas is correct for the appliance – the gas isolation valves for the heating system and the water system are open – the pump impeller rotates freely –... -
Page 33: Parameter Setting And Display
Parameter setting and display holding the buttons increases the speed of the scrolling movement. To go into the parameter menu: – from the selected mode (eg. WINTER) – once the required parameter has been reached, press the buttons > < to modify the value within the permitted range. -
Page 34: Fault / Malfunction Codes
Type Description Range Step Default CONFIGURATION External relay 1 function 0 = not used; 1 = remote alarm NO; 2 = remote alarm NC; 3 = zone 0 .. 8 valve; 4 = automatic filling; 5 = external request; 6 = recirculation pump;... -
Page 35: Display Of Operating Data And Counters
TABLE OF INFORMATION DISPLAYED Display of operating data and counters Type Description Range Step Once the boiler is operating a qualified technician can view the SW version operating data and the counters as follows:> External sensor - 9 .. – from the operating screen in the mode enabled at that °C (SE) or SUMMER... -
Page 36: Checks
Checks 7.7.1 Chimney sweep function The chimney sweep function is used by the qualified maintenance technician to check the mains gas pressure, detect the combustion parameters and to measure the combustion efficiency. A combustion analysis should not be conducted until a satisfactory inlet working pressure test has been completed. -
Page 37: Domestic Hot Water Comfort Function (Preheating)
"Chimney sweep Procedure”. – press the button models can work with G20 or G31 Murelle Advanced HE ErP The boiler water delivery temperature will appear on the without the need for any mechanical conversion. Simply select display parameter ”PAR 03”... -
Page 38: Maintenance
MAINTENANCE Servicing Burner Inspection As a condition of the warranty and to ensure correct operation 8.3.1 Burner access and efficiency, it is important that the boiler is serviced every 12 months, within 30 days of the anniversary of the installation To access the internal parts of the boiler: date ensure the required information is recorded in the Gas –... -
Page 39: Cleaning The Burner And The Combustion Chamber
– loosen the clips (6) and extract the air inlet pipe (7) CAUTION – unscrew the swivel joint (8) Work carefully when removing the assembly (13) to – extract the connectors (9) from the fan and disconnect the prevent any damage occurring to the internal insulation electrode cable (10) of the combustion chamber and the door seal. -
Page 40: Circuit Board Replacement
Circuit Board Replacement Type Fault Solution - Check the rotation Should the circuit board be replace, the engineer MUST set the of the system pump parameters as indicated in this table. No water circulating in impeller Setting for Murelle the system - Check the electrical Advanced HE ErP connections... -
Page 41: Any Pump Faults And Possible Solutions
Any pump faults and possible solutions LED colour Pump status Fault Possible solution Network voltage too high or too low; - Check network voltage (160V > Vn > 280V) Motor overload; rotor friction or blockage - Check the characteristics of the system due to the presence of debris water;... -
Page 42: Gas Boiler System Commissioning Checklist
GAS BOILER SYSTEM COMMISSIONING CHECKLIST This Commissioning Checklist is to be completed in full by the competent person who commissioned the boiler as a means of demonstrating compliance with the appropriate Building Regulations and then handed to the customer to keep for future reference. Failure to install and commission according to the manufacturer’s instructions and complete this Benchmark Commissioning Checklist will invalidate the warranty. - Page 43 SERVICE RECORD It is recommended that your heating system is serviced regularly and that the appropriate Service Interval Record is completed. Service Provider Before completing the appropriate Service Record below, please ensure you have carried out the service as described in the manufacturer’s instructions. Always use the manufacturer’s specified spare part when replacing controls.
-
Page 44: Exploded Views
EXPLODED VIEWS... - Page 48 Murelle Advanced HE Murelle Advanced HE Pos. Code Description Pos. Code Description Spring for heat exchanger 6264560 Boiler fixing bracket 6226601 connection 6264565 Boiler fixing bracket 6227539 Return pipe from C.H. system 6010890 Support exchangers bracket Spring for heat exchanger 6010894 Support exchangers bracket 6226619 connection...
-
Page 49: Appendix 1 (Guidance Hhic)
APPENDIX 1 (GUIDANCE HHIC) APPENDIX 1 (GUIDANCE HHIC) APPENDIX 1 (GUIDANCE HHIC) 10 APPENDIX 1 (GUIDANCE HHIC) INDUSTRY GUIDANCE FOR INSTALLERS ON CONDENSATE INDUSTRY GUIDANCE FOR INSTALLERS ON CONDENSATE INDUSTRY GUIDANCE FOR INSTALLERS ON CONDENSATE DRAINAGE PIPE INSTALLATION DRAINAGE PIPE INSTALLATION DRAINAGE PIPE INSTALLATION This guidance is endorsed by HHIC members. - Page 50 APPENDIX 1 (GUIDANCE HHIC) APPENDIX 1 (GUIDANCE HHIC) INDUSTRY GUIDANCE FOR INSTALLERS ON CONDENSATE INDUSTRY GUIDANCE FOR INSTALLERS ON CONDENSATE 2.1 INTERNAL TERMINATION: DRAINAGE PIPE INSTALLATION DRAINAGE PIPE INSTALLATION Wherever possible, the condensate drainage pipe should be terminated at a suitable internal foul water discharge point such as (a) an internal soil and vent stack or (b) an internal This guidance is endorsed by HHIC members.
- Page 51 APPENDIX 1 (GUIDANCE HHIC) APPENDIX 1 (GUIDANCE HHIC) INDUSTRY GUIDANCE FOR INSTALLERS ON CONDENSATE INDUSTRY GUIDANCE FOR INSTALLERS ON CONDENSATE The use of fittings, elbows etc should be kept to a minimum and any internal “burrs” on cut pipework should be removed so that the internal pipe section is as smooth as DRAINAGE PIPE INSTALLATION DRAINAGE PIPE INSTALLATION possible.
- Page 52 APPENDIX 1 (GUIDANCE HHIC) APPENDIX 1 (GUIDANCE HHIC) INDUSTRY GUIDANCE FOR INSTALLERS ON CONDENSATE INDUSTRY GUIDANCE FOR INSTALLERS ON CONDENSATE NOTES DRAINAGE PIPE INSTALLATION DRAINAGE PIPE INSTALLATION The Benchmark Commissioning Checklist should be completed as required to record details of the condensate drainage pipe installation. This guidance is endorsed by HHIC members.
- Page 53 APPENDIX 1 (GUIDANCE HHIC) APPENDIX 1 (GUIDANCE HHIC) Figure 1 – Connection of condensate drainage pipe to internal soil and vent stack INDUSTRY GUIDANCE FOR INSTALLERS ON CONDENSATE INDUSTRY GUIDANCE FOR INSTALLERS ON CONDENSATE DRAINAGE PIPE INSTALLATION DRAINAGE PIPE INSTALLATION This guidance is endorsed by HHIC members.
- Page 54 APPENDIX 1 (GUIDANCE HHIC) APPENDIX 1 (GUIDANCE HHIC) INDUSTRY GUIDANCE FOR INSTALLERS ON CONDENSATE INDUSTRY GUIDANCE FOR INSTALLERS ON CONDENSATE Figure 2(a) – Connection of a condensate drainage pipe downstream of a sink, basin, bath or shower waste trap DRAINAGE PIPE INSTALLATION DRAINAGE PIPE INSTALLATION This guidance is endorsed by HHIC members.
- Page 55 APPENDIX 1 (GUIDANCE HHIC) APPENDIX 1 (GUIDANCE HHIC) INDUSTRY GUIDANCE FOR INSTALLERS ON CONDENSATE INDUSTRY GUIDANCE FOR INSTALLERS ON CONDENSATE Figure 2(b) – Connection of a condensate drainage pipe upstream of a sink, basin, bath or shower waste trap DRAINAGE PIPE INSTALLATION DRAINAGE PIPE INSTALLATION This guidance is endorsed by HHIC members.
- Page 56 APPENDIX 1 (GUIDANCE HHIC) APPENDIX 1 (GUIDANCE HHIC) INDUSTRY GUIDANCE FOR INSTALLERS ON CONDENSATE INDUSTRY GUIDANCE FOR INSTALLERS ON CONDENSATE Figure 3 – Connection of a condensate pump - typical method (NB manufacturer’s detailed instructions should be followed). DRAINAGE PIPE INSTALLATION DRAINAGE PIPE INSTALLATION This guidance is endorsed by HHIC members.
- Page 57 APPENDIX 1 (GUIDANCE HHIC) APPENDIX 1 (GUIDANCE HHIC) Figure 4 – Connection of condensate drainage pipe to external soil and vent stack INDUSTRY GUIDANCE FOR INSTALLERS ON CONDENSATE INDUSTRY GUIDANCE FOR INSTALLERS ON CONDENSATE DRAINAGE PIPE INSTALLATION DRAINAGE PIPE INSTALLATION This guidance is endorsed by HHIC members.
- Page 58 APPENDIX 1 (GUIDANCE HHIC) APPENDIX 1 (GUIDANCE HHIC) INDUSTRY GUIDANCE FOR INSTALLERS ON CONDENSATE INDUSTRY GUIDANCE FOR INSTALLERS ON CONDENSATE Figure 5 – External termination to rainwater downpipe (NB only combined foul/rainwater drain) DRAINAGE PIPE INSTALLATION DRAINAGE PIPE INSTALLATION This guidance is endorsed by HHIC members. This guidance is endorsed by HHIC members.
- Page 59 APPENDIX 1 (GUIDANCE HHIC) APPENDIX 1 (GUIDANCE HHIC) INDUSTRY GUIDANCE FOR INSTALLERS ON CONDENSATE INDUSTRY GUIDANCE FOR INSTALLERS ON CONDENSATE Figure 6 – External drain, gully or rainwater hopper DRAINAGE PIPE INSTALLATION DRAINAGE PIPE INSTALLATION This guidance is endorsed by HHIC members. This guidance is endorsed by HHIC members.
- Page 60 APPENDIX 1 (GUIDANCE HHIC) APPENDIX 1 (GUIDANCE HHIC) INDUSTRY GUIDANCE FOR INSTALLERS ON CONDENSATE INDUSTRY GUIDANCE FOR INSTALLERS ON CONDENSATE Figure 7 – Example of a purpose-made soakaway DRAINAGE PIPE INSTALLATION DRAINAGE PIPE INSTALLATION This guidance is endorsed by HHIC members. This guidance is endorsed by HHIC members.
-
Page 61: Appendix
Turn off appliance and call SIME LTD Technical HelplIne for advice. NOTE - if no flue gas sampling point is present and the correct pro- cedure is not specified in the manual, contact SIME LTD Technical the appliance must not be commissio- Helpline for advice. - Page 64 Sime Ltd 1a Blue Ridge Park Thunderhead Ridge Glasshoughton, Castleford, WF10 4UA Phone: 0845 9011114 Fax: 0845 9011115 www.sime.co.uk Email: enquiries@sime.co.uk...
Need help?
Do you have a question about the MURELLE ADVANCED HE ErP and is the answer not in the manual?
Questions and answers