Clarion CMS5 Owner's Manual
Hide thumbs
Also See for CMS5:
- Owner's manual (42 pages) ,
- Quick start manual (11 pages) ,
- Owner's manual (65 pages)

Subscribe to Our Youtube Channel
Related Manuals for Clarion CMS5


Summary of Contents for Clarion CMS5
- Page 1 Owner’s Manual Mode d’ emploi et manuel Manual de instrucciones CMS5 MARINE BLACK BOX SOURCE UNIT WITH J1939...
-
Page 2: Table Of Contents
We can keep you informed of important product information. - Water Resistant Chassis and Display Controller - Dual 2.1A USB Ports Register at www.clarion.com - It is easy to keep your Clarion product up to date. - OEM Steering Wheel Interface Ready - Clarion Wired Remote Ready (MW1/MW2/MW4) -
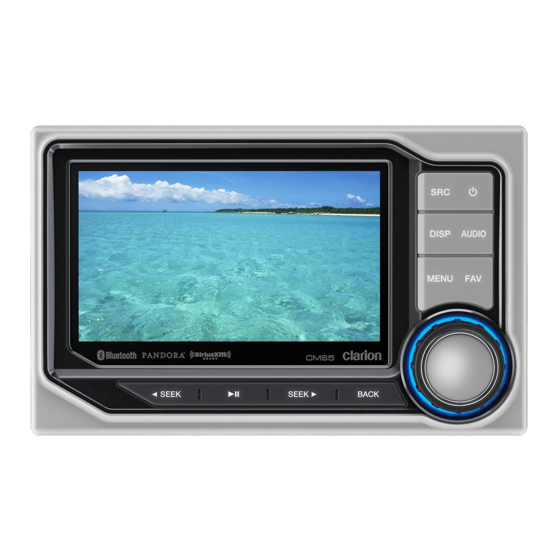
Page 3: Display Controller Buttons
- Subwoofer - Paired and Connected Phone Subwoofer Volume from “-10” to “+10). - Contacts have been synced Subwoofer Frequency (50/75/100/THROUGH). - You can now save contact as a favorite Subwoofer Phase (Normal and Reverse). Example: Home, Work, etc. CMS5 CMS5... -
Page 4: Name Of Buttons And Their Functions
- SiriusXM requires a SiriusXM Connect Tuner and Subscription (sold separately). - Press to backwards in multiple Menu Screens. - Pandora requires a iPod or iPhone to be connected to the CMS5. - Press to return to current source play screen from Menu or Settings Screen. -
Page 5: Radio (Am/Fm/Weather Band) Operation
Activating your SiriusXM Subscription - Press to select AM, FM, Weather Band, Local (LO) or Distance (DX). After installing your SiriusXM Connect Vehicle Tuner and antenna, power on your Clarion CMS5 Marine - Use the volume knob to scroll through options. - Page 6 ** Tag icon will be greyed out when the song is not taggable or when the song has already been tagged. *** Tag ID’s will remain on the CMS5 until the iPod/iPhone is connected. They will automatically be deleted after they are transferred.
- Page 7 * See Parental Controls for instructions to Set a Password, Change Password or to Lock Channels. 6. Now a pop-up window will appear with two options to choose from: “ABC” or “123”. 9. CMS5 DC shall display SiriusXM Category list on Single press of BACK Button when it is displaying - “ABC” is sorted alphabetically selected category channel - “123”...
-
Page 8: Ipod Audio Operation
10. You will now see a confirmation window appear displaying the new lock code. * Please remember this code. You will need it to listen to locked channels or to turn Off the Lock Mature Content Features. 14 CMS5 CMS5... - Page 9 16. Now you will return to the iPod Play Screen and the song will start playing be done in each level. 17. Now you will return to the iPod Play Screen and the first song in the Playlist will start playing. 16 CMS5 CMS5...
- Page 10 17. Now you will return to the iPod Play Screen and the first song from the Artist will start playing. be done in each level. 17. Now you will return to the iPod Play Screen and the first song from the Genre will start playing. 18 CMS5 CMS5...
- Page 11 Browsing sequence should go through the different levels like Composer->Album->Tracks. Search can be done in each level. 17. Now you will return to the iPod Play Screen and the first song from the Composer will start playing. 20 CMS5 CMS5...
- Page 12 3. Press in on the volume knob to select Simple Mode. 4. You can now select the option to turn Simple Mode “OFF”. 5. After you select “OFF” you will now return to the iPod Play Screen. 22 CMS5 CMS5...
-
Page 13: Ipod Video Operation
[MENU] Menu Button (While Video is Playing) Press to access additional options. - Menu (Subtitles ON and OFF). - Top (Plays video from the beginning of the current chapter). - Chapters (Search Chapters by “123”). - Repeat (Chapter, All and OFF). 24 CMS5 CMS5... - Page 14 17. Press in on the volume knob to select that TV Show. 18. Now you will return to the iPod Video Play Screen and the Movie will start playing. 18. Now you will return to the iPod Video Play Screen and the TV Show will start playing. 26 CMS5 CMS5...
- Page 15 Browsing sequence should go through the different levels like Episode->Tracks. Search can be done in each level. 15. Now you will return to the iPod Play Screen and the Podcast will start playing 28 CMS5 CMS5...
-
Page 16: Usb 1 And Usb 2 Operation
5. Press in on the volume knob to select your Repeat function. * If you change your mind and do not want to use the Repeat function, press the Back Button and you will return to the iPod Video Play Screen. 30 CMS5 CMS5... - Page 17 17. It will display the list of songs present in that folder. Then press in on the volume knob to select the song from the list. Now you will return to the play screen and songstarts playing 32 CMS5 CMS5...
-
Page 18: Pandora Operation
- Track rating failed 17. Now you will return to the USB Play Screen and the song will start playing - Fetching stations information Note: In all search option (for all source option), Searching is restricted to starting Alphabet/Number only 34 CMS5 CMS5... - Page 19 17. Station Art is display for each station, if available else generic station Art will be displayed. 5. Skip limit reached Note: In all search option (for all source option), Searching is restricted to starting Alphabet/Number only 6. Limited connectivity etc 36 CMS5 CMS5...
-
Page 20: Settings
7. Press in on the volume knob to set the Hour 5. When the CMS5 Information Icon is in the middle of the screen, Press in on the volume knob to enter 8. The halo will automatically shift to Minutes the CMS5 Information Screen 9. -
Page 21: Date
9. Use the volume knob to toggle between ON and OFF 10. Press in on the volume knob to select your choice 11. After your choice has been made, you will be taken back to the Bluetooth Settings Menu 40 CMS5 CMS5... - Page 22 Confirm the PIN Information from the CMS5 to the Device * Confirm that the PIN Number on the screen of the CMS5 is the same as the PIN Number that is being Displayed on the screen of the Bluetooth Device 14.
- Page 23 18. If you select “YES”, then you have now transferred Bluetooth Connection and you will return back to the Settings Screen Bluetooth Settings Screen 19. If you select “NO”, then you will return back to the Bluetooth Settings Screen 19. If you select “NO”, then you will return back to the Bluetooth Settings Screen 44 CMS5 CMS5...
-
Page 24: 2-Zone Operation
10. With 2-Zone OFF, you will return to the Main Source Menu NOTE: Once a source has been selected for each Zone, you can go to the source for Zone 1 or Zone 2 for operation and functionality. 46 CMS5 CMS5... -
Page 25: Aux 1 And Aux 2 Operation
** If you have a device that plays Audio and Video and you are not seeing the video image, please check cannot be changed the video input on the CMS5 has been connected to the video output from your Audio and Video Note: While 2 Zone setting is Turned ONand if you press any other source than (excluding FRONT Device. -
Page 26: Camera Operation
1. While in any source, listening to audio from that source and then view Camera Image 2. Provide a +12v signal to the Camera Trigger Wire (Purple) on the CMS5 from a +12v Switch or an Open [BACK] Back Button Accessory Switch. - Page 27 5. When AVRCP 1.4 profile is supported, then list of folder will appear when Folder Option is selected 6. To search the folder, Press Menu and select alphabet/Numbers. Then list of folders starting wiith entered alphabet/number will appear 52 CMS5 CMS5...
- Page 28 7. If you select “YES”, then you have now Deleted This Device and you will return back to the Bluetooth Audio Settings Screen 8. If you select “NO”, then you will return back to the Bluetooth Audio Settings Screen 54 CMS5 CMS5...
-
Page 29: Phone Operation
- Paired Devices (View Paired/Connected Phone Information, Switch Paired Device, Delete Device) 8. By pressing in on the volume knob to select a Contact, you will now place a phone call to that contact 4. Press in on the volume knob to make your selection 56 CMS5 CMS5... - Page 30 18. With the phone call in place, the display will show the Caller ID, Timer and a END CALL Button 19. When the call is ended, you will go back to the last played source Note: In all search option (for all source option) , Searching is restricted to starting Alphabet/Number only 58 CMS5 CMS5...
- Page 31 11. When the call is ended, you will go back to the last played source you had entered 10. If you select “YES” the phone call will be placed 11. If you select “CANCEL” you will return back to the Phone Menu Screen 60 CMS5 CMS5...
- Page 32 7. If you select “YES”, then you have now Deleted This Device and you will return back to the Last played source 8. If you select “NO”, then you will return back to the Phone Menu Screen 62 CMS5 CMS5...
- Page 33 Volume knob to answer the phone call 4. During an incoming (in band ringtone) or outgoing call the CMS5 cannot establish an audio connection 4. Use the volume knob to move the halo to the IGNORE Button and then press in on the volume knob to...
-
Page 34: Audio Settings (Button)
9. You will see the halo around the Bass sound adjustment slider 10. Rotate the volume knob to adjust the Bass Level (-10 to +10) 11. When you have completed adjusting the Bass Level, press in on the volume knob 66 CMS5 CMS5... - Page 35 11. Press in on the volume knob to select Normal or Reverse Phase (Default = Normal) When 2-Zone is ON you cannot select USB as a Front and Rear Source at the same time. 12. Press the Back Button to return to the Audio Settings Carousel 68 CMS5 CMS5...
-
Page 36: Display Settings (Button)
- Top (Default) Status Bar will be displayed on the Top of the Screen - Bottom (Status Bar will be displayed at the Bottom of the Screen) 5. When finished, press the Back Button to return to the Display Settings 70 CMS5 CMS5... -
Page 37: Favorites (Button)
7. After your selection has been made you will return to the source you are using 3. Press in on the volume knob to select Brightness 4. Rotate the volume knob to adjust the display Brightness 5. When finished, press the Back Button to return to the Display Settings 72 CMS5 CMS5... -
Page 38: Understanding The Graphical User Interface (Gui)
This screen will appear when the Battery Voltage drops to or below 10v. The audio will stop until voltage increases to 12v or above, then the audio will resume. This will help from draining too much current from the battery until the voltage increases. 74 CMS5 CMS5... -
Page 39: Troubleshooting
6. TROUBLESHOOTING PROBLEM CAUSE SOLUTION Unit will not power ON Verify Power Connector No Power or Ground to CMS5 is connected Properly Verify Battery Switch is ON Vessel Battery Switch is OFF Check in-line Fuse and Blown Fuse Vessel Accessory/Radio... - Page 40 Subscription Updated The radio has detected a change in your SiriusXM subscription status. Press OK to clear the message. Visit www.siriusxm.com or call 866-635-2349 if you have any questions about your subscription. 78 CMS5 CMS5...
-
Page 41: Specifications
Controller = 4” (H) x 6” (W) x 1” (D) Heat Sink: Magnesium/Aluminum CMS5 Quick Start Guide (English) - Printed ..............1 CMS5 Quick Start Guide (French) - On Owner’s Manual CD ........1 Supported Audio Formats CMS5 Quick Start Guide (Spanish) - On Owner’s Manual CD ........1 USB: MP3 and WMA 3. - Page 42 4. CMS5 BLACK BOX INSTALLATION 5. DISPLAY CONTROLLER INSTALLATION 1. Select an area with sufficient ventilation for the mounting of the CMS5 Black Box in order to prevent Drilling Holes for Display Controller: the Black Box from overheating. You may mount the Black Box in a horizontal or ve r tical position. If the **Place the display controller on the area on the dash that you would like the display controller to be mounted.
- Page 43 VIEWING A VIDEO SIGNAL ON ANY DASH MOUNTED MONITOR WHILE IN MOTION IS PROHIBITED BY LAW Video Interlock Wire: These steps must be followed to view a video on the CMS5 Display Controller. * Switch is NOT included, Illustration purpose only * 1.
- Page 44 1. Mount the included SXM Antenna with clear view to the sky 2. Run Antenna Cable to the SXM Tuner location 3. Connect SXM Antenna to the SXM Antenna Connector on Tuner 4. Connect SXM Cable from SXM Tuner to the SXM Connector (CN3) on the CMS5 Black Box White Antenna...
- Page 45 CMS5 Black Box View: Front of J1939 Connector CC510 or any backup Camera RCA Video Output from Camera to dedicated Camera Input on CMS5 Black Box When switched ON it will provide Ground a +12V to the Purple 12V (+)
- Page 46 Clarion Corporation of America All Rights Reserved. Copyright © 2013: Clarion Corporation of America Printed in China / Imprime` au Chine / Impreso en China 2013/07 CMS5...
Need help?
Do you have a question about the CMS5 and is the answer not in the manual?
Questions and answers