Table of Contents
Advertisement
Available languages
Available languages
Quick Links
Advertisement
Table of Contents

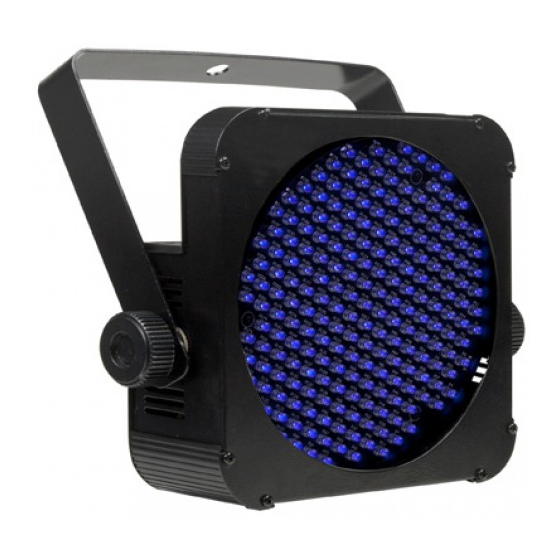
Related Manuals for JB Systems LED-UV212 black light


Summary of Contents for JB Systems LED-UV212 black light
- Page 2 EN - DISPOSAL OF THE DEVICE Dispose of the unit and used batteries in an environment friendly manner according to your country regulations. FR - DÉCLASSER L’APPAREIL Débarrassez-vous de l’appareil et des piles usagées de manière écologique Conformément aux dispositions légales de votre pays. NL - VERWIJDEREN VAN HET APPARAAT Verwijder het toestel en de gebruikte batterijen op een milieuvriendelijke manier conform de in uw land geldende voorschriften.
-
Page 3: Before Use
Refer servicing to qualified service personnel only. ® Thank you for buying this JB Systems product. To take full advantage of all possibilities and for your own The lightning flash with arrowhead symbol within the equilateral triangle is intended to alert the safety, please read these operating instructions very carefully before you start using this unit. -
Page 4: Electrical Installation
Refer to chapter HOW TO SETUP for more information. Done! Remark: You can connect a CA-8 remote controller to the master unit if you want to have more control over the master/slave operation. JB SYSTEMS 3/45 LED-UV212 JB SYSTEMS... -
Page 5: How To Set Up
Example: the first projector was set to DMX-address 100 when you perform the automatic addressing, the other projectors in the DMX-chain will receive addresses: 104, 106, 108, 110, … (given that the units are in 2ch mode) JB SYSTEMS 5/45 LED-UV212... -
Page 6: Maintenance
Connect all units to the mains and turn on the DMX controller. Since each unit has its own DMX-address, you can control them individually. Remember that each unit uses 1 or 2 DMX-channels as shown in the DMX chart below: JB SYSTEMS 7/45 LED-UV212... -
Page 7: Specifications
IEC input/output daisy chaining: 50pcs Sound Control: Internal microphone ® Merci d’avoir choisi ce produit JB Systems . Pour votre sécurité et pour une utilisation optimale de toutes les DMX connections: XLR 3pin possibilités de l’appareil, lisez attentivement cette notice avant utilisation. -
Page 8: Instructions De Securite
16. L'écran montre les différents menus et les fonctions sélectionnées. concernées pendant le montage, le démontage et les opérations de maintenance. Débranchez toujours l’appareil si vous ne l’utilisez pas de manière prolongée ou avant d’entreprendre des JB SYSTEMS 11/45 LED-UV212... -
Page 9: Installation Electrique
Appuyez sur la touche MENU jusqu’à ce que soit affiché à l’écran. qualité. Appuyez sur la touche ENTER. Utilisez les touches DOWN et UP pour changer l’adresse DMX512. JB SYSTEMS 13/45 LED-UV212 JB SYSTEMS 14/45 LED-UV212 ®... -
Page 10: Instructions D'utilisation
Quand l’appareil est utilisé en mode autonome, vous pouvez régler manuellement la fonction plus de contrôle. stroboscopique et le niveau de gradation. Appuyez sur la touche MENU jusqu’à ce que l’écran affiche Appuyez sur la touche ENTER. JB SYSTEMS 15/45 LED-UV212 JB SYSTEMS 16/45 LED-UV212 ®... - Page 11 Web: www.beglec.com Le canal 4 peut se comporter de différentes manières selon le mode canal dans lequel on se trouve (1, 2, 3 ou 4). Prière de se reporter au chapitre "COMMENT REGLER L'APPAREIL". JB SYSTEMS 17/45 LED-UV212...
-
Page 12: Voor De In Gebruikname
2 knoppen om de ophangbeugel vast te maken ® Hartelijk dank voor de aankoop van dit JB Systems product. Om ten volle te kunnen profiteren van alle mogelijkheden en voor uw eigen veiligheid, gelieve de aanwijzingen zeer zorgvuldig te lezen voor U begint VEILIGHEIDSVOORSCHRIFTEN: het apparaat te gebruiken. -
Page 13: Elektrische Installatie
90Ω tot 120Ω aan het eind van de keten gebruiken. Gebruik nooit een Y-splitkabel, dit zal eenvoudig niet werken! Weet zeker dat alle units op het lichtnet zijn aangesloten. JB SYSTEMS 21/45 LED-UV212... - Page 14 Wanneer u klaar bent met het instellen van beide parameters, druk dan gedurende ongeveer 2 seconden Stel het DMX adres in zoals hierboven beschreven. op de MENU toets om naar de gewone werkmodus terug te keren. JB SYSTEMS 23/45 LED-UV212...
- Page 15 Wanneer een optische lens klaarblijkelijk beschadigd is door barsten of diepe krassen, dan moet deze vervangen worden. De stroomkabels moeten in perfecte staat zijn en behoren vervangen te worden, wanneer er zelfs maar een klein probleem ontdekt werd. JB SYSTEMS 25/45 LED-UV212 JB SYSTEMS...
-
Page 16: Technische Kenmerken
Weitergabe des Geräts bitte Bedienungsanleitung beifügen. Packungsinhalt prüfen: Bitte überprüfen Sie, dass die Packung folgende Einzelteile enthält: Bedienungsanleitung LED-UV212 Hängender Haltewinkel 2 Drehknöpfe zur Befestigung des hängenden Haltewinkels JB SYSTEMS 27/45 LED-UV212 JB SYSTEMS 28/45 LED-UV212 ®... -
Page 17: Elektrische Installation
Sicherung niemals reparieren oder überbrücken, sondern immer durch gleichartige Sicherung ersetzen! Siehe Kapitel EINSTELLUNGSANLEITUNG für weitere Informationen. Bei Fehlfunktion Gerät nicht benutzen und sich mit Händler in Verbindung setzen. Fertig! JB SYSTEMS 29/45 LED-UV212 JB SYSTEMS... - Page 18 MENU-Taste drücken bis im Display angezeigt wird. Im Nachfolgenden ist die Menüstruktur dargestellt. EINGABE (ENTER) drücken. Benutzen Sie den DOWN- und UP-Knopf um einen der möglichen Kanal Moden zu wählen. JB SYSTEMS 31/45 LED-UV212 JB SYSTEMS 32/45 LED-UV212 ®...
- Page 19 WählenSie ein Dimmer-Wert Halten Sie die MENU-Taste ungefähr 2 Sekunden gedrückt um in den Betriebsmodus zurückzukehren. FUNCTION 2. Multi-Kanal Strobe zwischen 000 und 255 Dimmer Strobe MODE (LED AN) (LED AUS) JB SYSTEMS 33/45 LED-UV212 JB SYSTEMS 34/45 LED-UV212 ® ®...
-
Page 20: Technische Einzelheiten
Alle Teile stets gut abtrocknen. Äußere Optik mindestens alle 30 Tage säubern. Innere Optik mindestens alle 90 Tage säubern. Achtung: Wir empfehlen dringend, Reinigung im Innern des Geräts nur von qualifiziertem Personal durchführen zu lassen! JB SYSTEMS 35/45 LED-UV212 JB SYSTEMS 36/45 LED-UV212 ®... -
Page 21: Antes De Utilizar El Aparato
Asigne el mantenimiento y las reparaciones a personal Gracias por comprar este producto JB Systems®. Para sacar el máximo rendimiento a sus posibilidades y cualificado. por su propia seguridad, lea estas instrucciones de funcionamiento detenidamente antes de comenzar a El símbolo en forma de rayo con cabeza de flecha dentro de un triángulo equilátero se emplea... -
Page 22: Instalación Eléctrica
última vez. Consulte el capítulo CONFIGURACIÓN para obtener información sobre cómo cambiar los modos estático y de sonido. Observación: Si desea tener más control, puede conectar un controlador remoto CA-8 a la unidad. JB SYSTEMS 39/45 LED-UV212 JB SYSTEMS... - Page 23 Una vez configurados ambos parámetros, pulse el botón MENU durante aproximadamente 2 segundos, la dirección programada en la primera unidad. volverá al modo de ejecución. JB SYSTEMS 41/45 LED-UV212 JB SYSTEMS...
-
Page 24: Instrucciones De Funcionamiento
Cuando una lente óptica esté visiblemente dañada por grietas o rasguños profundos, deberá ser reemplazada. Los cables de red deberán estar en perfecto estado y deberán reemplazarse inmediatamente incluso si el problema detectado es pequeño. JB SYSTEMS 43/45 LED-UV212 JB SYSTEMS... -
Page 25: Especificaciones
15° Tamaño: consulte la tabla de abajo Peso: 1,6 kg Toda la información está sujeta a cambios sin previo aviso Puede descargar la última versión de este manual de usuario en nuestra página Web: www.beglec.com JB SYSTEMS 45/45 LED-UV212 ®...
Need help?
Do you have a question about the LED-UV212 black light and is the answer not in the manual?
Questions and answers