Table of Contents
Advertisement
Quick Links
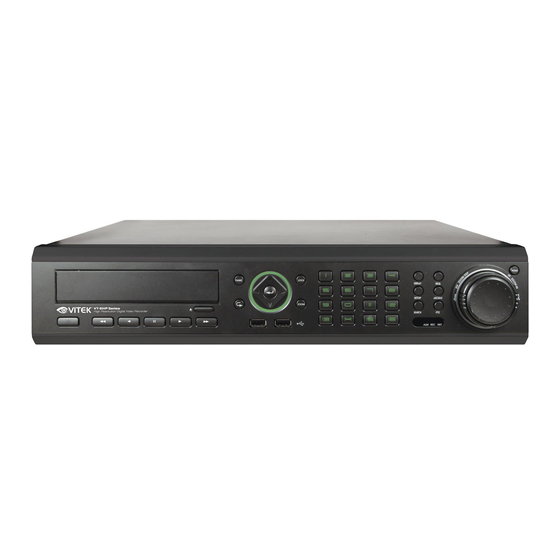
VT-EHP Series
8 & 16 Channel H.264 Digital
Video Recorders
• 8 or 16 Video Inputs with Main, Spot, and 1080P HDMI outputs
• H.264 Compression
• 4 Alarm Inputs / 1 Relay Out
• Up to 480fps Live Display & 480fps Recording (VT-EHP16) / 240/240 (VT-EHP8)
• Built-in Point-of-Sales support
• Built-in Data Redundancy
• Remote Viewing over a LAN or Internet
• Free Applications for iPhone, iPad, iTouch and Droid Devices
• 500GB to 8TB Internal Storage Options (up to 8TB @ 4x2TB)
• Email Event Notification with Snapshot
• CMS Central Management Software (Included)
• MAC Client Software (Included)
• Control locally via Front Panel, USB Mouse or with the Included IR Remote control
• PTZ Control over RS-485
Advertisement
Table of Contents

Related Manuals for Vitek VT-EHP Series


Summary of Contents for Vitek VT-EHP Series
- Page 1 VT-EHP Series 8 & 16 Channel H.264 Digital Video Recorders • 8 or 16 Video Inputs with Main, Spot, and 1080P HDMI outputs • H.264 Compression • 4 Alarm Inputs / 1 Relay Out • Up to 480fps Live Display & 480fps Recording (VT-EHP16) / 240/240 (VT-EHP8) •...
-
Page 2: Important Safety Instructions
VT-EHP IMPORTANT SAFETY INSTRUCTIONS Read these operating instructions carefully before using the unit. Follow all the safety instructions listed below. Keep these operating instructions handy for future reference. 1) Read these instructions. 2) Keep these instructions. 3) Heed all warnings. 4) Follow all instructions. - Page 3 VT-EHP OVERVIEW WARNING To reduce the risk of fire or electric shock, do not expose this appliance to rain or moisture. To prevent injury, this apparatus must be securely attached to the floor/wall in accordance with the installation instructions. 1) Be sure to use only the standard adapter that is specified in the specification sheet. Using any other adapter could cause fire, electrical shock, or damage to the product.
- Page 4 VT-EHP OVERVIEW CAUTION 1 ) Do not drop objects on the product or apply strong blows to it. Keep away from a location subject to excessive vibration or magnetic interference. 2 ) Do not install in a location subject to high temperature (over 50°C), low temperature (below -10°F), or high humidity.
-
Page 5: Before Installation
VT-EHP BEFORE INSTALLATION ● Installation should be carried out only by qualified personnel and in accordance with any electrical regulations in force at the time. ● The DVR must be placed on a stable surface or mounted in an approved cabinet. Adequate ventilation must be provided, taking particular care not to block any of the air vents on the DVR. -
Page 6: Main Features
PTZ CONTROL Full PTZ control is available from the front panel or remote connection. In addition to VITEK Xpress Domes, a wide number of speed dome protocols are supported. Protocols can be set individually for each channel and PTZ speed can... - Page 7 VT-EHP MAIN FEATURES TELEMETRY CONTROL Full telemetry control is available from the front panel or remote connection and a wide number of speed dome protocols are supported. Protocols can be set individually for each channel and telemetry speed can be adjusted to suit particular speed domes.
- Page 8 VT-EHP SYSTEM ORGANIZATION...
-
Page 9: Table Of Contents
VT-EHP TABLE OF CONTENTS SYSTEM CONFIGURATION ............................1 1 1. Front panel description............................1 1 2. Rear panel description............................1 2 3. Remote Controller description..........................1 4 CONNECT & POWER ON ............................1 5 ... - Page 10 VT-EHP SYSTEM: POS (Point of Sale) SETUP ........................3 4 USER ................................... 3 5 USER: USER MANAGEMENT ..........................3 5 USER: USER AUTHORITY ........................... 3 6 USER: LOG OUT ..............................3 7 CAMERA AUTHORITY ............................3 7 ...
- Page 11 VT-EHP SEARCH MODE: MULTI PLAYBACK ........................6 0 SEARCH : EVENT SEARCH ..........................6 2 SEARCH : POS EVENT SEARCH ........................6 4 ARCHIVING ................................6 6 NEW ARCHIVING ..............................6 6 RESERVED DATA MANAGEMENT ........................6 7 ...
-
Page 12: System Configuration
VT-EHP SYSTEM CONFIGURATION 1. Front panel description. DESCRIPTION Function Key POWER Turn On/Off the system power DISPLAY Selects various display modes in live display and playback Selects PTZ mode in live display SETUP Displays the setup menus SEARCH Displays the search menu Control Key CHANNEL SELECTION Used to display individual channels in live display and playback... -
Page 13: Rear Panel Description
VT-EHP SYSTEM CONFIGURATION 2. Rear panel description. CAMERA INPUTS and LOOP OUTPUTS: Connect up to 16 camera inputs. Loop outputs can be used for connection to other equipment. COMPOSITE AND S-VIDEO MAIN: MONITOR CONNECTIONS Both outputs can be used at the same time if more than one main monitor connection is required. - Page 14 VT-EHP SYSTEM CONFIGURATION The Selectable Video outputs are HD, VGA, and SD. Only one Video output selection may be selected. If the user selects multiple video outputs (two or more), the video may not be properly displayed. 1) If you select HD output, 2) If you select VGA output, 3) If you select SD output, USB PORT: Can connect USB mouse or USB device for backup.
-
Page 15: Remote Controller Description
VT-EHP SYSTEM CONFIGURATION 3. Remote Controller description. POWER SETUP: Open System Setup Menu System ON/OFF Channel Selection Buttons ID Button AUDIO: Not Supported Select DVR ID ENTER: Apply / Select /Go to Next Screen RETURN Cancel / Deselect Navigation Buttons : Used for Playback Control, Previous Screen Menu Navigation, and PTZ/Focus Control... -
Page 16: Connect & Power On
VT-EHP CONNECT & POWER ON • Connect up to 16 CAMERA INPUTS as necessary. • Connect a monitor to the DVR using the COMPOSITE, VGA, S-Video or HD MONITOR connections • Connect power to the DVR. The DVR will check for proper power connection and emit two beeps. Press the POWER BUTTON on the front panel of the DVR to begin operation. -
Page 17: Menu Control
VT-EHP MENU CONTROL ARCH DISP 2010/07/07 13:23:12 All menus can be controlled from above ‘Status Bar’ with mouse or front panel buttons. LIVE DISPLAY DIVISION SCREEN DISP Select the ‘DISPLAY” button and screen division menu will appear. Select the screen type (1, 4, 6, 8, 9, 16 and rotation sequence). Sequence mode Press the button. -
Page 18: Ptz
VT-EHP LIVE DISPLAY 1) CAM: Select the desired camera Channel 2) Presets: To Program a preset, move the camera to the desired field of view with the directional arrows, then choose the desired preset to be used, then select SET. 3) Moving to Preset: Select the preset you wish the camera to move to, then select GO TO 4) Zoom, Focus, IRIS: User can control each item with + or –... -
Page 19: Panic Recording
VT-EHP LIVE DISPLAY User can see the current log immediately. Caution - When POS function is activated, user can’t use Live LOG function. PANIC RECORDING This menu is used to start and stop the Panic recording. If the panic recording is started, record icon will change to red square with “P”. Select once more to return to previous record schedule. -
Page 20: Quick Menu
VT-EHP LIVE DISPLAY QUICK MENU User can use the quick menu by right-clicking the mouse on each live channel. 1. Freeze On/Off: User can stop the live display of channel that user wants. Even though other channels show live display, this particular channel display is stopped. Click once more to return to previous. 2. -
Page 21: System Setup Menu
VT-EHP SYSTEM SETUP Click the “MENU” and click the SYSTEM SETUP menu. SYSTEM SETUP MENU To navigate around any items in the setup menu, use the CURSOR KEYS and the ENTER RETURN buttons. In general, the ENTER button is used to select and change a particular item and the RETURN button is used to cancel a change or exit from a particular setup screen. -
Page 22: Camera
VT-EHP SYSTEM SETUP CAMERA Click the CAMERA menu. CAMERA: CAMERA SETUP To setup the various camera options, highlight CAMERA and press ENTER. TITLE: Input the camera title. COVERT: When set to ON, the camera image is not displayed in live display but continues to record. AUDIO: Determines the audio recording channel. -
Page 23: Camera : Ptz Setup
VT-EHP SYSTEM SETUP Click each value with button. The selected channel is displayed in full screen. BRIGHTNESS, CONTRAST, TINT and COLOR can be changed as necessary. To modify a different channel, highlight CAMERA and choose the desired channel. Press RETURN when all changes are complete. - Page 24 VT-EHP SYSTEM SETUP Click the “DETAIL” button and change the detail value with button. Note that some settings, such as AUTO FOCUS, may not be compatible with particular PTZ equipment. If this is the case, changing the value will have no effect on PTZ control. Click the “TOUR”...
-
Page 25: Camera : Motion Sensor
VT-EHP SYSTEM SETUP CAMERA : MOTION SENSOR Click the MOTION SENSOR menu and click the value on the SENSITIVITY menu. Change the value with button. SENSITIVITY: Between 1 (Lowest) and 10 (Highest) and determines the degree of motion required before recording is activated. Click the button. -
Page 26: Display
VT-EHP SYSTEM SETUP DISPLAY To setup the various display options, highlight DISPLAY and press ENTER. DISPLAY – OSD Click the menu. Then, click the button for ON/OFF or to change the value. STATUS BAR: Determines how long before status bar times out. CAMERA TITLE: Determines whether the camera title is displayed. -
Page 27: Display: Monitor
VT-EHP SYSTEM SETUP DISPLAY: MONITOR Click the MONITOR menu Then, click the button for ON/OFF or to change the value. SEQUENCE DWELL: The time each screen is displayed in a sequence operation. SPOT DWELL: The time each screen is displayed on the spot monitor outputs. DE-INTERLACE MODE: When recording any channel in D1 resolution, this should be set to ON to prevent shudder during playback. -
Page 28: Display: Sequence
VT-EHP SYSTEM SETUP DISPLAY: SEQUENCE Click the SEQUENCE menu. When the button is pressed, the default sequence will cycle through all 8 or 16 channels (depending on DVR model), one by one. Sequence setup allows the operator to define a custom sequence, using mixed multi screen views and any desired channels. - Page 29 VT-EHP SYSTEM SETUP Press ADD. Then, the “Sequence Setup” menu appears. Determine the “VIEW TYPE” and assign “CONFIGURE”. Then, click CONFIRM. To add an additional mode, click continuously. After finishing the setup, press CLOSE. To modify the current one, double click that mode. Then ‘Sequence Setup” window will appear again. The new sequence is now saved and can be started by pressing the button when in live view.
-
Page 30: Display: Spot-Out
VT-EHP SYSTEM SETUP DISPLAY: SPOT-OUT Click the SPOT-OUT menu. Under LIST, double-click the desired channel to turn it ON/OFF, or to edit the name. The DVR has 4 SPOT MONITOR OUTPUTS (Digital Spot). User can assign the SPOT OUT display for each channel. Double-click the desired spot out channel. -
Page 31: Sound
VT-EHP SYSTEM SETUP SOUND Click the SOUND menu. To setup the various sound options, highlight SOUND and press ENTER SOUND: AUDIO Click the AUDIO menu and click the ON/OFF menu. Then, click the button for ON/OFF. LIVE AUDIO: When it is set to ON, the selected audio channel can be monitored on the AUDIO OUTPUT. -
Page 32: System
VT-EHP SYSTEM SETUP SYSTEM Select the SYSTEM menu. To setup the various system options, highlight SYSTEM and press ENTER. DATE / TIME Click the DATE / TIME menu. DATE TIME: Allows the operator to set or modify the current date & time. DATE FORMAT: Determines how the date is displayed. -
Page 33: System: System Management
VT-EHP SYSTEM SETUP SYSTEM: SYSTEM MANAGEMENT Select the SYSTEM MANAGEMENT menu. SYSTEM INFORMATION: User can see the system information as below. S/W version: Shows the firmware version of the DVR. H/W version: Shows the hardware version of the DVR. VIDEO SIGNAL TYPE: Shows the video setting of the DVR. -
Page 34: System: Control Device
Firmware updates may be released periodically to enhance system performance and add extra features. The operator must upgrade the firmware using a USB memory stick. The firmware is available for download on the Vitek website http://vitekcctv.com/Downloads.asp Once the firmware has been downloaded, extract the firmware from the zip folder and put it onto a USB stick. -
Page 35: System: Pos (Point Of Sale) Setup
VT-EHP SYSTEM SETUP SYSTEM: POS (Point of Sale) SETUP POS ENABLE: This enables / disables the POS function. BAUDRATE: Must be set to match the baud rate of the POS device. PROTOCOL: Must be set in accordance with POS device. ADDRESS: This determines POS device address of each channel. -
Page 36: User
VT-EHP SYSTEM SETUP USER Click the USER menu. To setup the various system options, highlight USER and select ENTER. USER: USER MANAGEMENT By default, the DVR is configured with a user ID of ADMIN, belonging to the ADMIN group and with a password of 1234. As well as the ability to add new users, existing user details can be modified. -
Page 37: User: User Authority
VT-EHP SYSTEM SETUP To ADD a user, select ADD at the bottom then select OK. USER ID: Edit the user ID using the virtual keyboard. PASSWORD: Change the password using the virtual keyboard. GROUP: Users can be assigned to one of three groups - ADMIN, MANAGER or USER. E-MAIL: Enter the user’s email address if email notification is required. -
Page 38: User: Log Out
VT-EHP USER: LOG OUT AUTO LOGOUT: Determines the AUTO LOGOUT ON/OFF. DURATION: In case of selecting AUTO LOGOUT ON, determines the duration prior to logout. CAMERA AUTHORITY CAMERA AUTHORITY: Camera authority can be given to specific users. To give camera authority, select the desired user in the USER ID field, then check each box to give user access to corresponding camera. -
Page 39: Network
VT-EHP SYSTEM SETUP NETWORK Click the NETWORK menu and determine each value. NETWORK: IP SETUP Click the IP SETUP menu. DHCP : When enabled, the DVR will obtain an IP address automatically if it is connected to a DHCP server or router. IP ADDRESS : If DHCP is not being used, the IP address can be manually set. - Page 40 VT-EHP NETWORK: HOW TO OBTAIN AN IP ADDRESS One of the easiest ways to obtain an IP address for your DVR is to use the built-in DHCP feature of your DVR. HOW TO SET UP DHCP The purpose of DHCP is to obtain all of the network information from the connected router. In most cases, the best way to do this is to cycle the DHCP feature, or in other words, turn it on, then off again.
-
Page 41: Network: Ddns
VT-EHP SYSTEM SETUP NETWORK: DDNS DDNS : When enabled, the DVR can be accessed through a Dynamic DNS server. Commonly used if a broadband connection does not have a static IP address. ***CAUTION*** To use the DDNS function, ports 8080 and 5554 MUST be opened. (This is commonly known as port forwarding). a. -
Page 42: Network: Remote Access
VT-EHP SYSTEM SETUP NETWORK: REMOTE ACCESS You can remotely access your VT-EHP series DVR in the following ways: 1. The DVR’s MAC address 2. The DVR’s DDNS Host Name (by default this is set to the MAC address) 3. Your external static IP address (if you have one) - Page 43 VT-EHP SYSTEM SETUP 2. DDNS HOST NAME The EHP series allows you to name your DVR, and access it by that name. Steps to name your DVR 1. Access the DVR’s main menu by using the remote control, or by using the buttons on the front of the unit. 2.
- Page 44 VT-EHP SYSTEM SETUP 3. IP ADDRESS If you have a STATIC IP ADDRESS, you can use this to access your DVR. Accessing the DVR REMOTELY To access the DVR remotely via IP address, use the WAN IP address of the network the DVR is connected to. (Sometimes this IP address is referred to as the LIVE, PUBLIC or OUTSIDE IP address) Steps: 1.
-
Page 45: Network: E-Mail
VT-EHP NETWORK: E-MAIL Select the E-MAIL menu. SERVER : The SMTP outbound email server that should be used to send email notifications. PORT : The outbound email port number. SECURITY : Set to OFF if the SERVER does not require a username and password to connect. USER : Enter a username to identify the DVR in email messages. -
Page 46: Event / Sensor
VT-EHP SYSTEM SETUP EVENT / SENSOR Click the EVENT / SENSOR menu. To setup the various event handling options, highlight EVENT/SENSOR and press ENTER. EVENT / SENSOR: HDD EVENT Select the HDD EVENT menu. The DVR can monitor the hard drives and detect problems that may be developing. SMART ALARM : Enables SMART disk monitoring. -
Page 47: Event / Sensor: Alarm Output
VT-EHP SYSTEM SETUP EVENT / SENSOR: ALARM OUTPUT Select the ALARM OUTPUT menu and select each value. Determine the behavior and actions that will trigger each of the 16 alarm outputs. Behavior Settings ALARM OUT : Choose which alarm output to configure. OPERATION : The selected alarm output can be enabled or disabled. -
Page 48: Event / Sensor: Buzzer Out
VT-EHP SYSTEM SETUP EVENT / SENSOR: BUZZER OUT Select the BUZZER OUTPUT menu and select each value. Determine the behavior and actions that will trigger the internal buzzer. Behavior Settings OPERATION : The internal buzzer can be enabled or disabled. HDD EVENT : Determines whether a hard drive event sounds the buzzer. -
Page 49: Event / Sensor: Email Notification
VT-EHP SYSTEM SETUP EVENT / SENSOR: EMAIL NOTIFICATION Select the EMAIL NOTIFICATION menu and select each value. Determine the behavior and actions that will send an email to a remote user. Behavior Settings NOTIFICATION : Email notification can be turned ON or OFF. SETUP CHANGE : Determines whether a setup change sends an email. -
Page 50: Event / Sensor: Ptz (Pan-Tilt-Zoom) Presets
VT-EHP EVENT / SENSOR: PTZ (Pan-Tilt-Zoom) PRESETS Select the PTZ PRESET menu Behavior Settings CHANNEL: Determine the desired PTZ OPERATION: Set to ENABLE / DISABLE to turn feature ON and OFF Action Settings ALARM EVENT : Determines whether alarm inputs will trigger PTZ preset. VIDEO LOSS : Determines whether video loss on any of the selected channels will trigger PTZ preset. -
Page 51: Disk Manage
VT-EHP SYSTEM SETUP DISK MANAGE Select the DISK MANAGEMENT menu. To manage the internal hard drives, highlight DISK MANAGE and select ENTER. RECORD TIME LIMIT : In certain circumstances, it may be necessary to limit the amount of footage stored on the DVR (to comply with data protection laws for example). -
Page 52: Record Menu
VT-EHP RECORD MENU RECORD MENU Click the “MENU”. Input the password. The main menu will appear. Select the RECORD SETUP menu. To setup the recording behavior of the DVR, highlight RECORD SETUP menu and press ENTER. RECORD : RECORDING OPERATIONS Select the RECORDING OPERATIONS menu and select each... -
Page 53: Record: Continuous/Motion
VT-EHP RECORD MENU RECORD: CONTINUOUS/MOTION Select the CONTINUOUS/MOTION SETUP menu This setup screen allows the operator to configure scheduled and motion detection recording. There are 2 sections: SIZE/FPS/QUALITY: Recording settings for each channel can be defined across a 24 hour period, in blocks (for example between 09:00 and 18:00) or for each individual hour. - Page 54 VT-EHP RECORD MENU CHANGING THE SIZE/FPS/QUALITY IF USING A MOUSE : Click the TIME BAR and “drag” the time the user wants to have the values changed. After dragging, release the mouse button; then see pg 51. Each green cursor block represents one hour. To change the SIZE/FPS/QUALITY, highlight CONTINUOUS/MOTION RECORDING and press ENTER.
- Page 55 VT-EHP RECORD MENU SIZE QUAL AUDI Select the SIZE, FPS, QUALITY and AUDIO value. Then click the button to change. Press ENTER to activate menu. Recording settings for the selected time period are displayed. Maximum recording frame rate is 480FPS at resolution of D1. SIZE: Recording resolutions of CIF, 2CIF or D1 can be selected for each channel.
-
Page 56: Activation
VT-EHP RECORD MENU ACTIVATION Select the ACTIVATION menu. To change ACTIVATION settings, highlight CONTINUOUS/MOTION RECORDING and press ENTER. Use the CURSOR KEYS to highlight ACTIVATION and press ENTER. Press ENTER to highlight the schedule box. Press ENTER again to activate the green cursor, then press ENTER again to use the green cursor to select multiple grid boxes in the schedule. -
Page 57: Record: Alarm Setup
VT-EHP RECORD MENU RECORD: ALARM SETUP Select the ALARM RECORDING menu. NOTE: The setup is the same as CONTINUOUS/MOTION RECORDING This setup screen allows the operator to configure alarm input activated recording. SIZE/FPS/QUALITY: Recording settings for each channel can be defined across a 24 hour period, in blocks (for example between 09:00 and 18:00) or for each individual hour. -
Page 58: Record: Panic Setup
VT-EHP RECORD MENU RECORD: PANIC SETUP Select the PANIC RECORDING menu. Select the Size, Frame, Quality and audio. See pg. 50 for more details on how to change the SIZE/FPS/QUALITY During panic recording mode, the DVR will override all other recording settings and record continuously on all channels at the settings configured here. -
Page 59: Search
VT-EHP SEARCH SEARCH To search for a particular section of recorded footage, press the SEARCH button. To protect unauthorized viewing of footage, only ADMIN and MANAGER user levels can playback footage. To login as ADMIN, enter the default password of 1234 and press ENTER. SEARCH: TIME SEARCH Click the desired date on the calendar. - Page 60 VT-EHP SEARCH USING MOUSE : Drag the time bar with left mouse click to select the desired time, then click PLAY USING THE REMOTE / DVR Press ENTER to select the calendar and use the CURSOR KEYS to move to the required day. As different days are selected, the timeline display also changes to show recorded footage on that day.
-
Page 61: Search Mode: Multi Playback
VT-EHP SEARCH SEARCH MODE: MULTI PLAYBACK PLAY (Multi view): The default playback mode is 16 screen display. pressing DISPLAY using CHANNEL SELECTION buttons, it is possible to display single screen or other multi screen formats in a similar way to the live display mode. - Page 62 VT-EHP SEARCH During playback, user can reserve the recorded data that needs to be archived. Press button at the time the archive is to be started. Then playback is stopped and the menu below will appear. After inputting “TAG” name, press START. Then display is returned to playback. Press button again to end archiving.
-
Page 63: Search : Event Search
VT-EHP SEARCH To exit playback mode and return to the search screen to choose another time and date, press RETURN. To exit the search screen and go back to live view, repeatedly press RETURN. SEARCH : EVENT SEARCH The DVR event log stores events such as motion and alarm activated recording, video loss, etc. To search for an event and playback the recorded footage, press the SEARCH button and log in as ADMIN with the... - Page 64 VT-EHP SEARCH To playback footage for a particular event, select the event from the list using the CURSOR KEYS and press ENTER. Playback resumes from the moment when the selected event occurred and continues until stopped by the operator. During event search playback, the playback buttons can be used as normal. To stop playback and return to live view mode, repeatedly press RETURN.
-
Page 65: Search : Pos Event Search
VT-EHP SEARCH SEARCH : POS EVENT SEARCH The DVR POS event log stores events such as price, quantity, item keyword, date, etc. On SEARCH BY POS EVENT menu, it can search log price, quantity, item keyword, date, etc, and playback recorded video. - Page 66 VT-EHP To playback footage for a particular event, select the event from the list using the CURSOR KEYS and press ENTER. Playback resumes from the moment when the selected event occurred and continues until stopped by the operator. During event search playback, the playback buttons can be used as normal. To stop playback and return to live view mode, repeatedly press RETURN.
-
Page 67: Archiving
VT-EHP ARCHIVING NEW ARCHIVING To archive recorded footage to USB memory stick or CD/DVD, press the ARCHIVE button. To protect unauthorized viewing and distribution of footage, only the ADMIN user level can archive footage. To login as ADMIN, enter the default password of 1234 and press ENTER. Click each desired channel. -
Page 68: Reserved Data Management
VT-EHP ARCHIVING RESERVED DATA MANAGEMENT AVI ARCHIVING LIST: User can see the AVI archiving data that was reserved from new archiving menu or archiving of search. INFORMATION: The detailed information of Reserved AVI data. DELETE: User can delete the reserved AVI data BURN: Backup the selected AVI data. -
Page 69: Web Connection Setup
VT-EHP WEB CONNECTION SETUP BEFORE CONNECTING In order to view your DVR remotely you MUST port forward BOTH the Web Server Port (the default is 8080) an d the RTSP Service Port (the default is 5554). If you need assistance with port forwarding, please visit our website and review our tutorial videos: http://vitekcctv.com/VideoTutorials.asp If you need further assistance, please reference your router’s manual or contact your Network... - Page 70 VT-EHP User needs to install Active-X, click Run Add-on In case the user is unable to install Active-X, check the ActiveX option in IE security menu. Select Enable for all ActiveX related options. (ex, Download signed ActiveX control, Download unsigned ActiveX control….)
-
Page 71: Live Mode
VT-EHP WEB CONNECTION SETUP LIVE MODE Explanation for function LIVE mode Select live division screen (1, 4, 8,9,16 split mode) Sequence mode Move to next camera Full screen Select live channel – select a channel manually. Activate Mic to send a sound to DVR. On/Off Sound from DVR Save the live image. - Page 72 VT-EHP Status Show active status of DVR • Alarm – Indicator will be marked when system detects Alarm input. Motion- Indicator will be marked when system detects Motion Video Loss - Indicator will be marked when system detects Video Loss. Recording –...
-
Page 73: Search (By Timeline)
VT-EHP : Allows user to control connected PTZ camera. • Preset: Set a position of camera view. Position Step: Determines how many steps the PTZ moves when a directional arrow is clicked. SEARCH (by Timeline) Select a timeline on time table or set an exact time. Then press ‘Play’... - Page 74 VT-EHP Refresh: Refresh the recording table of data. Play: Start to display the recorded data from system. Backup: User can backup the recorded data on remote site. Backup 1. Select the desired Start and End Time 2. Select the desired channel(s) 3.
-
Page 75: Search (By Event)
VT-EHP SEARCH (by event) 1. Event: Select the desired event(s) for searching. 2. Period: Set the start and end time. 3. Search: Click SEARCH to query and list up all events 4. Select an event on the list; the DVR will immediately begin playback... -
Page 76: Setup Mode
VT-EHP SETUP MODE 1. CAMERA User can configure camera’s attribute such as title, live color, PTZ setup or motion Motion -- setup for detecting motion events. 1. Select Motion menu tab. 2. Select a channel and sensitivity. 3. Drag a mouse on image to select area of detection. 4. - Page 77 VT-EHP 2. Display 1. OSD – Choose text to display over the image. 2. Monitor - User can set dwell time for sequence, spot, and pop up function. 3. Sound Audio Setting Live Audio : Turn the live audio on or off Default Audio : Channel : Select the default audio channel Network Audio Tx : When set to ON, live and playback audio is transmitted...
-
Page 78: Information 8
VT-EHP 4. System User can configure system date, check system information and setup control device. 5. Recording Allows the operator to remotely configure the DVR for recording. Please see pages 48 – 54 for more details. Setting the SIZE/FPS/Quality... - Page 79 VT-EHP Activation : This section determines at what times the DVR will record and whether it is in Continuous, Motion, or Continuous/Motion recording. 6. User User Management : Add/edit user information.
- Page 80 VT-EHP User Authority : User can give the authority to the MANAGER and USER. To give authority, check each desired box, then select OK. Log Out : Auto Logout : Determines if Auto Logout is ON/OFF. Duration : Determines the duration before Auto Logout.
- Page 81 VT-EHP Camera Authority: Camera authority can be given to specific users. To give camera authority, select the desired user in the USER ID field, then check each box to give user access to corresponding camera. 7. Network Network : User can check the system’s network information and select the transmission speed. IP settings may not be changed from the remote site.
- Page 82 VT-EHP Email : For email notification, user can input the SMTP server information. Please see pg. 42 for more details. ***Please contact your ISP, Email Provider, and/or Network Administrator if help is needed obtaining your email information*** 8. Sensor User can setup the various event handling options: HDD EVENT, Alarm Input, Alarm output, Buzzer Out, E-mail notification option, and PTZ Presets for events.
-
Page 83: Information
VT-EHP INFORMATION Display Model name of DVR and WEB Remote Software version. -
Page 84: Backup Player
VT-EHP BACKUP PLAYER To view archives backed up from a DVR, double click BackupPlayer (located in the Player folder). NOTE: When archiving from the web browser to a PC, the BackupPlayer is NOT included. To obtain the BackupPlayer, user must physically archive from the DVR to a USB flash drive. Click to choose which archive file to playback. - Page 85 VT-EHP 2. Click the [Open file] button and open the backup file. 3. After opening file, select “Yes” to check the watermark. 4. If the backed up AVI file is modified, [Verification failed] message will appear.
-
Page 86: Smartphone Connection
VT-EHP SMARTPHONE CONNECTION CONNECTING WITH THE DEFAULT BROWSER OF THE PHONE iPHONE 1. Select the Safari browser. 2. Enter the IP address or URL to connect. And Click the [GO] button. 3. Enter the User name and Password, then you will see the following image. (Default: ADMIN / 1234) -
Page 87: Android
VT-EHP ANDROID 1. Select the Web browser 2. Enter the IP address or URL to connect. 3. . Enter the User name and Password, then you will see the following image. (Default: ADMIN / 1234) -
Page 88: Blackberry
VT-EHP BLACKBERRY 1. Select the Web browser. 2. Enter the IP address or URL to connect. Press the Enter button. 3. Enter the User name and Password, then you will see the following image. (Default: ADMIN / 1234) -
Page 89: Smart Phone App
SMART PHONE APP - (iPhone / iPad / Android) ‘DVR VIEWER’ GUIDE INSTALL AND CONNECT (iPhone & iPad) 1. Search and Install “Vitek DVR Viewer” in Apple APPstore 2. Run ‘DVR Viewer’ Application 3. ADD Connection List 4. Server Name This is just a way to differentiate between multiple DVR’s in the list. - Page 90 VT-EHP 5. Insert IP and ports then save 6. Insert ID, Password and login type select (Default: Auto Login) then save A D MIN ** ** 7. Select DVR in list 8. View CAMERA live video For further assistance, please visit our website: http://vitekcctv.com/VideoTutorials.asp...
-
Page 91: Install And Connect - Android
VT-EHP INSTALL AND CONNECT - ANDROID 1. Search and Install “Vitek EH DVR Viewer” in Android market 2. Run ‘Vitek EH DVR Viewer’ Application 3. ADD Connection List (Select menu button) - Page 92 VT-EHP 4. Insert name, URL, ports, ID, Password and select ID/Password save type then select ‘Save’ button 5. Long press DVR in list then select Connect button For further assistance, please visit our website: http://vitekcctv.com/VideoTutorials.asp...
- Page 93 VT-EHP DVR VIEWER (Pro) The “PRO” version of the app includes the following additional features: PTZ CONTROLS • SNAPSHOTS • LOG VIEW • SEARCH • SETUP • PTZ CONTROLS 1. Touch the ‘PTZ’ button 2. Control PTZ by pressing ‘+/-/ / /</>’ button. SNAPSHOT 1.
- Page 94 VT-EHP LOG VIEW 1. Touch the ‘log view’ button 2. Select start/end time and Filter Option select after touch ‘search’ button 3. View the log list...
- Page 95 VT-EHP Search 1. Touch the ‘Search’ button 2. Select date/time and touch play button 3. User can do the playback, rewind, Fast-forward and Split Screen Search.
- Page 96 VT-EHP SETUP 1. Touch the ‘Setup’ button 2. The Setup menu includes the same settings as the DVR.
-
Page 97: Eh Cms
VT-EHP EH CMS Create an unlimited number of views, each able to display up to 64 cameras from the VT-E, VT-EHL, VT-EH, and VT-EHP DVRs. (4, 8 &16ch models) 1. Download and install the EH CMS software. http://vitekcctv.com/Downloads.asp 2. Launch the software. The Default username is ‘ADMIN’, with a password of ‘1234’... - Page 98 VT-EHP 3. Click the ‘Setup’ tab (1). Click ‘Shared’ (2), then click the green plus sign (3) to add a new group. Give the new group a name (4)
- Page 99 VT-EHP 4. Click the green plus sign to create a view (1). NOTE: Make sure the group is highlighted first (2). Once the ‘Create View’ button is clicked, the display options are displayed. Select the desired display (3)
- Page 100 VT-EHP 5. Click ‘Resource’ (1), then click ‘Add’ (2). 6. Input the DVR information, then select OK NOTE: Port is the webport of the DVR. ID/Password is the username and password of the DVR.
- Page 101 VT-EHP 7. After adding the DVR to the Device List, click ‘Apply’ (1). The DVR will appear in the left column, under System Overview (2) 1 0 0...
- Page 102 VT-EHP 8. Click the ‘Live’ tab 9. Click on the DVR in System Overview (1). Either drag and drop individual cameras, or drag and drop the DVR to the viewing area (2) For further assistance, please visit our website: http://vitekcctv.com/VideoTutorials.asp 1 0 1...
-
Page 103: Eh Connect - Mac Compatiblity
VT-EHP EH CONNECT – MAC COMPATIBLITY Users can connect to the DVR with a Mac computer. Steps 1. Click the Add icon 2. Click on “Devices”, then click “+” to add a device. Once you have added your device, click “OK”. 1 0 2... - Page 104 VT-EHP 3. Click the Add icon again 4. Click “Group” a. Click the “+” to add a new Group. b. Give the new group a name next to “Group Name” c. Select “OK” 1 0 3...
- Page 105 VT-EHP 5. Click Add icon again Click “Group” a. Click on a device in the “Devices” section b. Click the “<<” button to move the device from the Devices list to the Members of the Group on the left. (See Fig A) c.
- Page 106 VT-EHP 7. Click the “Connect” button 8. Your DVR should now be connected. 1 0 5...
-
Page 107: Specifications
VT-EHP Specifications VT-CN840 VT-CN1680 Video Input 8"Channels 16"Channels H.264"Codec Video Compression IPS (Display / Recording) 240 / 240 480 / 480 Operating System Linux Quadplex Operation Mode 1"HDMI"&"1"VGA Video Output BNC Output Monitor:"1"Composite"(BNC)"/"Spot:"2"Composite"(BNC) Live: 1,4,9, PIP, Digital Live:"1,4,9,"PIP,"Digital"Zoom"/" Spit-Screen Zoom / Playback: 1,4,9, 13, Playback:"1,4,9,"PIP 16 PIP Audio In/Out... - Page 108 High Density 1/3” Sony EX-VIEW CCD & Effio-E DSP budget. They offer the most advanced features available and simple, 700TVL High Resolution worry free installation that have come to be a cornerstone of all VITEK E-WDR by Adaptive Tone Reproduction camera designs.
- Page 109 VT-EHP THE MIGHTY DOME THE ULTRA VERSATILE DOME CAMERA SERIES The Mighty Series Dome cameras include models produced with the new Pixim-Powered Seawolf Wide Dynamic Range DSP and the Sony Effio Day Night DSP. The Highest resolution Analog camera line up to date offers 700 TV Lines of Resolution, up the coax OSD Control and low light capability up to 0.00008 lux.
- Page 110 VITEK warrants to the pur- chaser that products manufactured by VITEK are free of any rightful claim of infringement or the like, and when used in the manner intended, will be free of defects in materials and workmanship for a period of three (3) years, or as otherwise stated above, from the date of purchase by the end user.
- Page 111 28492 Constellation Road ValenCia, Ca 91355 WWW.ViteKCCtV.CoM | 888-ViteK-70...
Need help?
Do you have a question about the VT-EHP Series and is the answer not in the manual?
Questions and answers