Table of Contents
Advertisement
Lacanche ranges ordered after May 1st, 2015, have the option to be manufactured with a new
minimum chassis height of 36 5/8'' (930mm) – as well as the default range height of 35 3/8''
(900mm). Please make note, as this change may impact necessary clearance allowances to
combustible surfaces above the cooktop surface in certain installations requiring permit/occupancy
inspections.
WARNING: If the information in this manual is not
followed exactly, a fire or explosion may result causing
property damage, personal injury or death.
- Do not store or use gasoline or other flammable vapors and
liquids in the vicinity of this or any other appliance.
- WHAT TO DO IF YOU SMELL GAS.
Do not try to light any appliance.
Do not touch any electrical switch.
Do not use any phone in your building.
Immediately call your gas supplier from a neighbour's phone.
Follow the gas supplier's instructions.
If you cannot reach your gas supplier, call the fire
department.
- Installation and service must be performed by a qualified
installer, service agency or the gas supplier.
Page 1 of 42– US –
F
ourneau
Cluny
«
WARNING:
THIS RANGE CAN TIP
INJURY TO PERSONS COULD RESULT
INSTALL ANTI-TIP DEVICE PACKED
WITH RANGE
SEE INSTALLATION INSTRUCTIONS
»
Advertisement
Table of Contents

Subscribe to Our Youtube Channel
Related Manuals for Lacanche Cluny


Summary of Contents for Lacanche Cluny
- Page 1 Lacanche ranges ordered after May 1st, 2015, have the option to be manufactured with a new minimum chassis height of 36 5/8’’ (930mm) – as well as the default range height of 35 3/8’’ (900mm). Please make note, as this change may impact necessary clearance allowances to combustible surfaces above the cooktop surface in certain installations requiring permit/occupancy inspections.
- Page 2 Page 2 of 42– US –...
- Page 3 TECHNICAL DATA CLUNY ’’ 1000 mm - 39 930 mm* 838 mm* 36 5/8’’ 33’’ Fig. 1 399 mm* ’’ 958 mm-37 ’’ ’’ 20 mm- Adjustable feet ’’ 1405 mm - 55 930 mm* 838 mm* 36 5/8’’ 33’’...
- Page 4 325 mm ’’ 399 mm* ’’ 22 mm-1 ’’ 958 mm-37 22 mm-1 ’’ ’’ 225 mm ’’ 60 mm ’’ Fig. 2a 625 mm ’’ 460 mm ’’ CLUNY 1400 Fig. 2b right Page 4 of 42– US –...
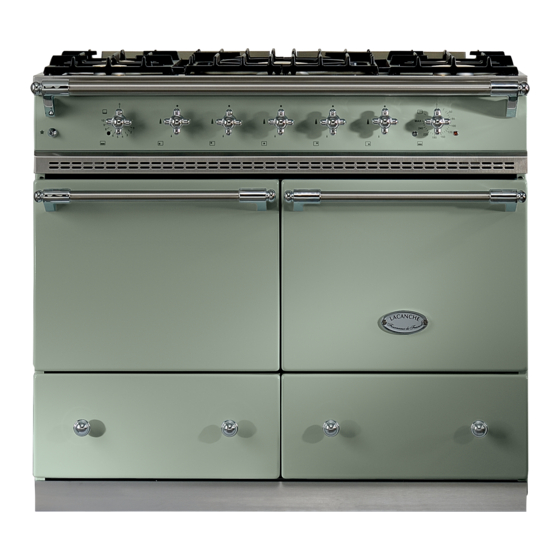
- Page 5 Layout: 5-burner cook’s stove, 2 ovens (Figure 2). The work surfaces adjacent (CLUNY 1400 & 1800, figures 2a, 2b, 2c & 2d) to the cooking surfaces are designed to accommodate one of the optional units in the LACANCHE range or to be used as a worktop (Figures 1, 1a,1b, 1c, 1d &...
- Page 6 TECHNICAL DATA CLUNY Ventilated electric oven (Option): ’’) x Heating provided by circular heating element surrounding a reaction fan. Dimensions L x D x H: 400 mm (15 ’’) x 280 mm (11 ’’). 3 shelf level with 70 mm spacing, 45 liters / 1.59 ft 420 mm (16 Electric grill 2100 W.
- Page 7 Cluny « » INSTALLER'S MANUAL Appliances must be installed in a workmanlike manner in accordance with the instructions in this manual and locally applicable regulations. This manual will be handed over to the user after installation. Page 7 of 42– US – Date de mise à jour: 12/03/10 - Indice: 14...
- Page 8 Page 8 of 42– US – Date de mise à jour: 12/03/10 - Indice: 14...
- Page 9 Fig. 3 a stub out in this area on range 1005 ’’ 18 36 5/8 5 Cabinet preparation (CLUNY 1400 – Left) Gas connection on range Place electrical and gas Electrical connection Fig. 3 b stub out in this area...
- Page 10 1410 ’’ 18 36 5/8 21 Cabinet preparation (CLUNY 1400 – Right – with right gas cooktop option) Gas connection on range Place electrical and gas Electrical connection Fig. 3 c stub out in this area...
- Page 11 INSTALLER’S MANUAL CLUNY Cabinet preparation (CLUNY 1800) Gas connection on range Place electrical and gas Gas connection Electrical connection stub out in this area on range on range Fig. 3 d I (a) Without right gas cooktop option 1810 ’’...
- Page 12 INSTALLER’S MANUAL CLUNY Recommended to be installed under an exhaust hood. In the commonwealth of Massachusetts, the appliance must be installed by a licensed plumber or gas fitter. Do not install this unit near combustible walls, partitions,...
- Page 13 INSTALLER’S MANUAL CLUNY Unscrew the screws C near the burner openings (Figures 6 and 7). Pull and raise the top after having loosened the 2 screws D (Fig. 8, CHAGNY and 9, CHAGNY 1400-1800), wedge the cooking surface. A pressure regulator (fig. 10) is located in the right rear corner under the hob, to gain access to the pressure regulator, remove the top.
- Page 14 INSTALLER’S MANUAL CLUNY In case of use with a gas other than that for which the appliance was initially set up, it is crucial to replace the orifices and modify the adjustments as defined below. Clé de 12 Wrench 12 (...
- Page 15 INSTALLER’S MANUAL CLUNY Table 4 Table 3 Top burners 5000 11000 15000 18000 Top burners 5000 11000 15000 18000 Pressure Opening / inches Pressure Natural gas 6" WC 2,5 / 2,5 / Natural gas 6" WC 0.90 1.30 1.45 1.70 L.P.
- Page 16 INSTALLER’S MANUAL CLUNY Fig. 20 Fig. 21 Oven orifice: Remove the base, CAUTION: when refitting place the base underneath the groove on the fascia (Figures 18 and 19). Remove the oven burner. Fig. 22 Disconnect the connection piece, unscrew screw M on the orifice holder (Figure 22).
- Page 17 INSTALLER’S MANUAL CLUNY ELECTRICITY ALL WORK ON OR REPAIR OF AN APPLIANCE MUST BE CARRIED OUT BY A QUALIFIED INSTALLER. IMPORTANT THE APPLIANCE WHEN INSTALLED, MUST BE ELECTRICALLY GROUNDED IN ACCORDANCE WITH THE LOCAL CODES OR The National Electrical Code, ANSI/NFPA 70-1996 or latest edition.
- Page 18 INSTALLER’S MANUAL CLUNY Fig. 28 BACK SPACER VENT FITTING: It is mandatory to mount the back spacer vent R to the wall supplied with the appliance. Screw the 2 brackets S to the wall according to figures 29, 30 and 31 (screws not supplied), then fit the back spacer vent onto these brackets by using the washers and nuts supplied with the range.
- Page 19 INSTALLER’S MANUAL CLUNY Fig. 32 SERVICE INSTRUCTIONS: - Lubricating gas valve. If the gas taps tends to stick slightly, you may follow this procedure: 1 - Shut off the valve and / or the main electrical supply of the unit.
- Page 20 INSTALLER’S MANUAL CLUNY GAS CIRCUIT DIAGRAMME Designation Part number Burner cap 1,5 kW 65.330004 Burner cap 3,0 W 65.330005 Burner cap 4,0 kW 65.330006 Burner cap 5,0 kW 65.330007 Burner bowl 1,5 kW 65.640008 Burner bowl 3,0 kW 65.640004 Burner bowl 4,0 kW 65.640005...
- Page 21 INSTALLER’S MANUAL CLUNY GAS CIRCUIT DIAGRAMME 65.39895 65.226006 1,5 kW = 65.064007 3,0 kW = 65.064007 4,0 kW = 65.064007 5,0 kW = 65.064007 65.080005 65.033018 65.103033 65.103029 65.5111 + 4 screws 65.129101 Page 21 of 42– US – + 4 disc 65.30932...
- Page 22 INSTALLER’S MANUAL CLUNY ELECTRIC CIRCUIT DIAGRAMMES Détail A: Détail B: 65.103032 (LP) 65.103031 (NG) 65.103033 Page 22 of 42– US –...
- Page 23 INSTALLER’S MANUAL CLUNY Item n° Designation Part number Oven thermostat 6553670 Valve switch 65.222002 Thermostat switch 65.222003 Thermostat switch 65.28979 Top burner electrode 65.226006 Oven electrode 65.103004 Gas valve 65.103027 Page 23 of 42– US –...
- Page 24 INSTALLER’S MANUAL CLUNY Item n° Designation Three pole limiting 65.224003 thermostat Regulating thermostat 65.53670 Electric oven switch 65.52194 Lower heating element 65.211027 Top heating broil element 65.211029 Red Lamp 65.231004 Orange Lamp 65.231005 Oven lamp 65.232004 Switch oven lamp 65.222011...
- Page 25 INSTALLER’S MANUAL CLUNY Vertical electric oven (code R) 240 V 60 Hz Item n° Designation Three pole limiting 65.224003 thermostat Regulating thermostat 65.53670 Electric oven switch 65.52194 Top heating broil element 65.211029 Convection heating element 65.211028 Red Lamp 65.231004 Orange Lamp 65.231005...
- Page 26 INSTALLER’S MANUAL CLUNY Page 26 of 42– US –...
- Page 27 LACANCHE « » USER'S MANUAL IMPORTANT Provide adequate air supply during use of the appliance. Provide adequate clearances for servicing and proper operation by not obstructing front or side of appliances. WARRANTY The warranty is stated on the sales contract.
- Page 28 Page 28 of 42– US –...
- Page 29 USER’S MANUAL CLUNY SAFETY INSTRUCTIONS If the range is to be installed on an area covered with linoleum or any other floor covering, make sure that the floor covering can withstand 90 F (65°C) above room temperature without warping, shrinking or discoloring. Do not install the range over carpeting.
- Page 30 USER’S MANUAL CLUNY AS SURFACE BURNERS ighly valued by chefs because of their fast heating and ease of use, gas flame burners have always been traditional heat sources for cooking in large kitchens. Other heat sources have appeared in recent years but just as many users still prefer gas.
- Page 31 USER’S MANUAL CLUNY Turn on main gas supply to range. O FF O FF - Depress handle & rotate burner valve handle anti-clockwise past the “IGN” position. I G N - Depress handle fully and wait for the burner’s thermocouple to heat up.
- Page 32 USER’S MANUAL CLUNY EATING PLATE he heating plate is a cast iron plate heated by a high-power gas burner. It can be used as a work surface and several saucepans can be placed on it at the same time. ast iron stores and retains heat uniformly over its entire surface and it is possible to cook or simmer dishes depending on the temperature.
- Page 33 USER’S MANUAL CLUNY Turn on main gas supply to range. O FF O FF - Depress handle & rotate burner valve handle anti-clockwise past the “IGN” position. I G N - Depress handle fully and wait for the burner’s thermocouple to heat up.
- Page 34 USER’S MANUAL CLUNY BEFORE USING OVENS n order to achieve optimum use and maximum benefit from your oven, please read the following hints carefully in order to familiarise yourself with the principles of oven cooking. n oven cooks and heats by using a heat source which is generally located inside the oven. This heat source heats the air and then the entire oven.
- Page 35 USER’S MANUAL CLUNY AS OVEN he gas oven is a high-performance oven. Some chefs are convinced that gas ovens do not dry out dishes during cooking. The results obtained are excellent and energy consumption is lower! as ovens are ideal for slow cooking, for instance dishes cooked in earthenware dishes (terrines, gratins, ragouts, etc.) as well as for meats that require fast cooking and need to be sealed (loin of lamb) or even roasts which do not...
- Page 36 USER’S MANUAL CLUNY se the oven: -Turn on main gas supply to range. -Depress oven valve handle & rotate anti-clockwise to the “IGN” position. -Depress handle fully. Igniters will continue to spark (click) until pilot flame has lit. Keep holding for 10-20 seconds after ‘Clicking” has stopped to wait for the pilot’s thermocouple to heat up.
- Page 37 USER’S MANUAL CLUNY lectric ovens are simple to use and are ideal for cooking all usual dishes. he electric oven has three heating elements and can be used as both an oven and a grill l. he electric oven is specially recommended for dry pastries such as almond biscuits, Genoese sponges, etc.
- Page 38 USER’S MANUAL CLUNY lectric grill: The electric oven is equipped with a grid that can be used to grill l meats and cook all types of dishes au gratin. The electric grill l is ideal to finish off crèmes brûlées or obtain perfect cooking of a rib of beef for example.
- Page 39 USER’S MANUAL CLUNY LECTRIC FORCED CONVECTION OVEN he forced convection oven is a recent development in cooking techniques. Its principle is straightforward: air circulates over a heating element, is heated when it comes into contact with the element and the heat thus obtained in the oven is used to cook food.
- Page 40 USER’S MANUAL CLUNY The oven must be pre-heated at the thermostat setting chosen for cooking. Turn the thermostat switch clockwise to the required mark. The indicator lamps (B and C) are lit. When indicator lamp (C) is no longer lit, the selected temperature has been reached and you can then place your dish in the oven.
- Page 41 USER’S MANUAL CLUNY CLEANING BEFORE ANY CLEANING WORK, CLOSE THE GAS SUPPLY AND/OR ISOLATE FROM THE MAINS SUPPLY Oven: Use no abrasive cleaners on the oven walls. Special oven cleaning foams or gels (i.e. Easy-Off) may be used but should be kept away from the heating elements. Towel dry and wipe away cleaning foam or gel after the cleaning process is complete.
- Page 42 USER’S MANUAL CLUNY AUTION Use NO chlorinated cleaners to clean this unit. Page 42 of 42– US –...
Need help?
Do you have a question about the Cluny and is the answer not in the manual?
Questions and answers
How to fix handle rail on Cluny