Chapters
Table of Contents

Related Manuals for TallyGenicom 7265


Summary of Contents for TallyGenicom 7265
- Page 1 7265 Operator’s manual Matrix printer Bedienungsanleitung Matrixdrucker Manuel d’utilisation Imprimante matricielle Manuale utente Stampante a matrice Manual de usuario Impresora matricial...
- Page 2 Important Information This device fulfils the European standards requirements by complying with the Directive of the Commission dated May 3, 1989 (89/336/EEC) relating to electromagnetic compatibility and the Directive dated February 19, This equipment generates and uses radio frequency energy and if not 1973 (73/23/EEC) relating to low-voltage electrical equipment.
-
Page 3: Table Of Contents
Quick start-up Table of contents Table of contents Operator’s Manual Introduction QUICK START-UP Symbols used Important safety instructions Using the Online-CD-ROM Contents of the Online CD-ROM Table of contents Hardware requirements Troubleshooting Printer at a glance Installation Unpacking the printer Placing your printer Connecting the printer Switching on the printer... -
Page 4: Introduction
Introduction Quick start-up Introduction This Operator’s Manual is intended as a quick introduction into working with the printer and also to enable inexperienced users to operate the device properly. It describes the most import- ant functions of the printer and contains the essential information for your everyday work Ah ha! with the printer. -
Page 5: Using The Online-Cd-Rom
Quick start-up Introduction Using the First install the Adobe Acrobat Reader on your hard disk, unless the program has already Online-CD-ROM been installed. To install it, follow the steps described in the README file in the READER directory. To start the online documentation, call the File Manager (Windows 3.1) or Explorer (Windows 95/98, Windows ME, Windows 2000, Windows NT4) and double click on the START.PDF file. -
Page 6: Printer At A Glance
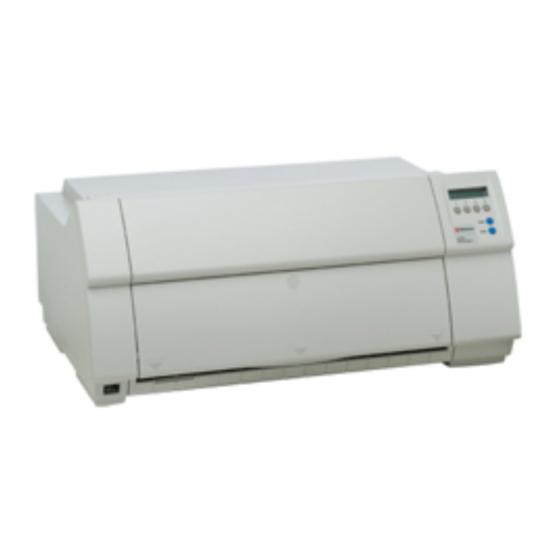
Printer at a glance Quick start-up Printer at a glance View from the front Printer in tractor mode Control panel Soundproofing cover Top cover Front cover Tractors Power switch Bottom cover View from the rear Printer in single-sheet mode Rear cover Paper support Interface connectors... -
Page 7: Installation
Quick start-up Installation Installation Unpacking the printer Place your printer on a solid base. Make sure that the “Up” symbols point in the correct direc- tion. Open the packaging, take out the accessory cassette and un- pack it. Pull the printer out of the cardboard box towards you and remove the remaining packaging material. -
Page 8: Placing Your Printer
Installation Quick start-up Placing your printer Place the printer on a solid, flat, surface, ensuring that the printer is positioned in such a way that it can not topple, and that there is easy access to the control panel and paper input devices. -
Page 9: Connecting The Printer
Quick start-up Installation Connecting the printer Make sure that the printer is set to the correct voltage (e.g. 230 V in Europe, 120 V in the U.S.A.). To do this, check the plate above the power inlet at the rear of the printer. If the setting is incorrect, set the coloured switch at the rear of the printer to the correct position, using a pointed object (e.g. -
Page 10: Control Panel
Control panel Quick start-up Control panel The control panel and the keys are used for controlling the printer operation. The upper line of the display shows whether the printer is in Online or Offline mode and the paper path selected (Tractor1 or Single). Online mode After switching on, the printer is automatically set to online mode. -
Page 11: Changing The Ribbon Cassette
Quick start-up Changing the ribbon cassette Changing the Before opening the cover, make sure that the printer is switched on so that it can execute auto- ribbon cassette matic preparations for ribbon changing (widening the print head gap). Move the paper to the park position. Open the printer top cover. - Page 12 Changing the ribbon cassette Quick start-up Move the coloured friction tab to the left (direction of the arrow) as shown in the figure and raise the friction mechan- ism. Remove the used cassette. We recommend use of genuine ribbon cassettes only.
- Page 13 Quick start-up Changing the ribbon cassette Raise the coloured insertion tongue A. Insert the coloured ribbon tension knob into the right-hand front location of the new ribbon cassette. Turn the knob in the direction of the arrow in order to take up the slack of the rib- bon.
- Page 14 Changing the ribbon cassette Quick start-up Insert the coloured tension knob into one of the two locations. Turn the tension knob to take up slack in the ribbon until it is seated correctly at the bottom in the ribbon support. Press down the coloured insertion tongue A.
- Page 15 Quick start-up Changing the ribbon cassette Move the print head carriage backwards and forwards several times. If the ribbon is correctly seated, there must be no per- ceptible resistance. The ribbon should be transported during the travel from left to right. If this is not the case, you should check that the ribbon cassette is correctly inserted on the right.
-
Page 16: Paper Handling
Paper handling Quick start-up Paper handling This section describes how to set the paper type, load fanfold paper and single sheets, trans- port paper and move the paper to the tear position. Changing the You can change the paper type either from an application program, by means of the paper paper type path quick selection feature or in the Setup menu. -
Page 17: Loading Paper
Quick start-up Paper handling Loading paper Your printer can process both fanfold paper and single sheets. For information on the supported paper sizes, please refer to page 25 (Paper specifications). You should only use those paper types which are approved for this printer. For more infor- mation, please refer to the Reference Manual on the Online CD-ROM. - Page 18 Paper handling Quick start-up Open the coloured latch lever of the right-hand tractor and align it to the paper width. Insert the fanfold paper into the right-hand tractor. Make sure that it is inserted by the same length as on the left- hand tractor in order to avoid any paper jam.
-
Page 19: Single Sheets
Quick start-up Paper handling Single sheets Some printer models are designed for fanfold paper operation only and therefore do not featu- re a single sheet feeder. The front cover can therefore not be opened on these models. Make sure that the printer is set to single sheet mode. If necessary, change the paper type (see page 14, Changing the paper type). -
Page 20: Paper Transport
Paper handling Quick start-up Insert the single sheet as far into the input tray as possible. Press the Online key to set the printer to ready status. The sheet is automatically loaded when the printer is in on- line mode and receives data from the computer. Press the Load (4) key to load paper before starting the printout. -
Page 21: Moving The Paper To The Tear Position
Quick start-up Paper handling Moving the paper to You can use the Tear key to move the paper to the tear position. the tear position Swing the soundproofing cover towards the front. Online Tractor1 Make sure that the printer is in online mode. If necessary, press the Online Online Tear key. -
Page 22: Settings
Settings Quick start-up Settings This section describes how to set the tear position, the first printing line, the print head gap as well as the font selection and the character density. Setting the tear If the tear position of the paper is not aligned with the tear edge of the top cover of the printer, position you can adjust it. -
Page 23: Setting The First Printing Line (Tof)
Quick start-up Settings Setting the first You can use the TOF function for setting the position of the first printing line for each paper printing line (TOF) source and each menu individually. Before using the TOF function (if fanfold paper is used), you should first set the tear position (see above). -
Page 24: Setting The Print Head Gap
Settings Quick start-up Confirm the input by pressing the Set (1) key. FormAdj= 17/72" Press the Setup key. The printer returns to the initial status. Online < > Exit Setup The setting made will be retained after switching off the printer. For more details, please re- fer to the Reference Manual on the Online CD-ROM. -
Page 25: Selecting Character Density And Font
Quick start-up Settings Selecting character You can use the CPI (= Characters Per Inch) key in setup mode to select the number of char- density and font acters per inch to be printed. You can use the Font key to select resident fonts. Press the Setup key, then the Char (4) key. -
Page 26: Technical Data
Technical data Quick start-up Technical data Printer specifications Printing method Serial with 24-needle print head Printing width 136 characters at 10 cpi Print speed (bidirectional mode, 10 cpi) HSQ (Matrix 12 x 10) 650 cps DPQ (Matrix 12 x 12) 600 cps CPQ (Matrix 24 x 12) 300 cps... -
Page 27: Paper Specifications
Quick start-up Technical data Paper Fanfold paper Tractor1 specifications Continuous single forms Paper weight 60–120 g/m Single set of forms No. of copies 1 + 6 (requires individual testing) Form thickness (max.) 0.60 mm Single sheet feeder Single sheets Paper weight 80–120 g/m Single set of forms No. -
Page 28: Accessories
Accessories Quick start-up Accessories Ribbon cassettes Order no. Black ribbon cassette 060097 Ribbon cassette 1 x red, 3 x black 060099 Ribbon cassette with yellow, magenta, cyan, black 060098 Ribbon cassette with red, green, blue, black 060100 For additional accessories, please refer to the Reference Manual on the Online-CD-ROM. - Page 29 Der schnelle Einstieg Inhalt Inhalt Bedienungsanleitung Einführung Zu den verwendeten Symbolen DER SCHNELLE EINSTIEG Wichtige Sicherheitshinweise Arbeiten mit der Online-CD-ROM Was ist auf der Online-CD-ROM Hardwarevoraussetzungen Fehlersuche Inhalt Auf einen Blick Installation Drucker auspacken Drucker aufstellen Drucker anschließen Drucker einschalten Bedienfeld Online-Modus Offline-Modus...
-
Page 30: Einführung
Einführung Der schnelle Einstieg Einführung Die Bedienungsanleitung dient dem schnellen Einstieg in das Arbeiten mit dem Drucker und soll auch dem ungeübten Benutzer den Umgang mit dem Gerät ermöglichen. Sie beschreibt Ah ha! die wichtigsten Funktionen des Druckers und enthält unerläßliche Informationen für die all- tägliche Arbeit mit dem Gerät. -
Page 31: Arbeiten Mit Der Online-Cd-Rom
Der schnelle Einstieg Einführung Arbeiten mit der Installieren Sie zuerst den Adobe Acrobat Reader auf Festplatte, falls dieses Programm nicht Online-CD-ROM schon vorhanden ist. Befolgen Sie zur Installation die in der Readme-Datei im Verzeichnis READER aufgeführten Schritte. Doppelklicken Sie zum Starten der Online-Dokumentation im Datei-Manager (Windows 3.1) oder Explorer (Windows 95/98, Windows ME, Windows 2000, Windows NT4) auf die Datei START.PDF. -
Page 32: Auf Einen Blick
Auf einen Blick Der schnelle Einstieg Auf einen Blick Ansicht von vorn Drucker im Traktorbetrieb Bedienfeld Schalldämmelement Obere Abdeckung Vordere Abdeckung Traktoren Netzschalter Untere Abdeckung Ansicht von hinten Drucker im Einzelblattbetrieb Hintere Abdeckung Papierstützen Schnittstellen- anschlüsse Netzanschlußbuchse Einzelblattzuführung Randsteller... -
Page 33: Installation
Der schnelle Einstieg Installation Installation Drucker auspacken Den verpackten Drucker auf eine stabile Unterlage stellen. Darauf achten, daß die Symbole für ,,Oben“ in die richtige Richtung zeigen. Verpackung öffnen, Zubehörkassette entnehmen und aus- packen. Drucker nach vorne aus dem Karton herausziehen, und die restliche Verpackung entfernen. -
Page 34: Drucker Aufstellen
Installation Der schnelle Einstieg Drucker aufstellen Den Drucker auf einer stabilen, ebenen und rutschfesten Oberfläche so aufstellen, daß er nicht herunterfallen kann. Der Zugang zum Bedienfeld und den Papiereinzügen muß gewähr- leistet und genügend Platz für das ausgeworfene Papier vorhanden sein. Wird Endlospapier häufig vor- und zurücktransportiert, den Drucker möglichst so aufstellen, wie im Bild gezeigt. -
Page 35: Drucker Anschließen
Der schnelle Einstieg Installation Drucker anschließen Vergewissern Sie sich, daß das Gerät auf die richtige Span- nung eingestellt ist (z.B. 230 V in Europa, 120 V in den USA). Siehe dazu das Typenschild über dem Netzanschluß auf der Rückseite des Druckers. Ist dies nicht der Fall, den farbigen Schalter an der Geräte- rückseite mit einem spitzen Gegenstand (z.B. -
Page 36: Bedienfeld
Bedienfeld Der schnelle Einstieg Bedienfeld Über das Bedienfeld und seine Tasten steuern Sie die Arbeit mit dem Drucker. Die obere Zeile der Anzeige gibt Aufschluß darüber, ob der Drucker sich im Online- oder im Offline-Modus befindet und welcher Papierweg (Traktor1 oder Einzel) gewählt ist. Online-Modus Nach dem Einschalten geht der Drucker automatisch in den Online-Modus. -
Page 37: Farbbandkassette Wechseln
Der schnelle Einstieg Farbbandkassette wechseln Farbbandkassette Vor dem Öffnen der Abdeckung sicherstellen, daß der Drucker eingeschaltet ist, damit er wechseln automatisch wichtige Vorbereitungen für den Farbbandwechsel (Druckkopfabstand vergröß- ern) ausführen kann. Fahren Sie das Papier in Parkposition. Die obere Abdeckung des Druckers aufklappen. Den Druckkopfschlitten vorsichtig bis zum Anschlag nach links (von der Druckervorderseite aus betrachtet) schieben. - Page 38 Farbbandkassette wechseln Der schnelle Einstieg Den farbigen Schieber der Friktion wie im Bild gezeigt nach links (in Pfeilrichtung) bewegen und die Friktion nach oben klappen. Die verbrauchte Kassette herausnehmen. Wir empfehlen die Benutzung von Original-Farb- bandkassetten.
- Page 39 Der schnelle Einstieg Farbbandkassette wechseln Die farbige Einlegehilfe A anheben. Den farbigen Spannknopf in rechte vordere Aufnahme der neuen Farbbandkassette setzen. Den Knopf in Pfeilrichtung drehen, um das Farbband zu spannen. Die Farbbandkassette etwas nach vorne neigen, das Farbband zwischen farbiger Einlegehilfe und Farbbandträger (trans- parente Kunststoffscheibe) einfädeln.
- Page 40 Farbbandkassette wechseln Der schnelle Einstieg Den farbigen Spannknopf in eine der beiden Aufnahmen ein- setzen. Durch Drehen des Spannknopfs in die jeweilige Pfeilrichtung das Farbband solange spannen, bis es unten im Farbband- träger aufliegt. Die farbige Einlegehilfe A nach unten drücken.
- Page 41 Der schnelle Einstieg Farbbandkassette wechseln Den Druckkopfschlitten mehrmals hin- und herbewegen. Sitzt das Farbband richtig, darf kein Widerstand spürbar sein. Bei der Bewegung von links nach rechts wird das Farbband transportiert. Wenn dies nicht der Fall ist, sollten Sie prüfen, ob das Farbband auf der rechten Seite eingerastet ist.
-
Page 42: Papierhandhabung
Papierhandhabung Der schnelle Einstieg Papierhandhabung In diesem Abschnitt wird beschrieben, wie Sie die Papierart einstellen, Endlospapier und Ein- zelblätter einlegen, Papier transportieren und Papier in die Abreißposition fahren. Papierart wechseln Der Papierartwechsel kann entweder über ein Anwendungsprogramm, die Papierweg-Schnell- umschaltung erfolgen oder im Menü Setup vorgenommen werden. An dieser Stelle wird die Schnellumschaltung beschrieben;... -
Page 43: Papier Einlegen
Der schnelle Einstieg Papierhandhabung Papier einlegen Ihr Drucker kann sowohl mit Endlospapier als auch mit Einzelblättern betrieben werden. In- formationen über zulässige Papierformate finden Sie auf Seite 24 (Technische Daten). Bitte verwenden Sie nur Papier, das für diesen Drucker geeignet ist. Nähere Informationen finden Sie im Referenzhandbuch auf der Online-CD-ROM. - Page 44 Papierhandhabung Der schnelle Einstieg Den farbigen Verriegelungshebel des rechten Traktors lösen und auf Papierbreite ausrichten. Endlospapier in den rechten Traktor einlegen. Darauf achten, daß es auf gleicher Höhe wie im linken Trak- tor liegt, da sonst Papierstau auftritt. Die Traktorklappe schließen und den Traktor durch Schwen- ken des Traktorhebels nach hinten arretieren.
-
Page 45: Einzelblätter
Der schnelle Einstieg Papierhandhabung Einzelblätter Manche Druckermodelle sind nur für den Endlospapierbetrieb konzipiert und verfügen des- halb über keine Einzelblattzuführung. Die Klappe kann daher nicht geöffnet werden. Sicherstellen, daß der Drucker auf Einzelblattbetrieb einges- tellt ist. Gegebenenfalls die Papierart wechseln (siehe Seite 14, Papierart wechseln). -
Page 46: Papiertransport
Papierhandhabung Der schnelle Einstieg Das Einzelblatt bis zum Anschlag in die Papierführung ein- führen. Die Taste Online drücken, um den Drucker betriebsbereit zu machen. Das Einzelblatt wird automatisch eingezogen, wenn der Drukker Online ist und Daten vom Computer erhält. Taste Load (4) drücken, um Papier vor Druckbeginn zu laden. -
Page 47: Papier In Abreißposition Fahren
Der schnelle Einstieg Papierhandhabung Papier in Abreiß- Endlospapier wird mit der Taste Tear in Abreißposition gefahren. position fahren Das Schalldämmelement nach vorne klappen. Online Traktor1 Sicherstellen, daß der Drucker Online ist. Gegebenenfalls Taste Online Tear Online drücken. Taste Tear (4) drücken. Der Drucker fährt die Perforationskante des Endlos- Setup papiers an die Abreißkante (siehe unten). -
Page 48: Einstellungen
Einstellungen Der schnelle Einstieg Einstellungen In diesem Abschnitt wird beschrieben, wie Sie die Abreißposition, die erste Druckzeile, den Druckkopfabstand sowie die die Schriftart und die Zeichendichte einstellen. Abreißposition Stimmt die Abreißposition des Papiers nicht mit der Abreißkante des Druckers überein, kann einstellen sie eingestellt werden. -
Page 49: Erste Druckzeile Einstellen (Tof)
Der schnelle Einstieg Einstellungen Erste Druckzeile Mit der TOF-Funktion kann für jeden Papiereinzugsschacht und jedes Menü einzeln die Posi- einstellen (TOF) tion der obersten Druckzeile eingestellt werden.. Vor Ausführen der TOF-Funktion sollte – bei Verwendung von Endlospapier – vorher die Abreißposition eingestellt werden (siehe oben). - Page 50 Einstellungen Der schnelle Einstieg Die Eingabe durch Drücken der Taste Setze (1) bestätigen. FormAdj= 17/72" Taste Setup drücken. Der Drucker geht in die Grundstellung zurück. Online Setze< > Exit Setup Die vorgenommene Einstellung bleibt auch nach Ausschalten des Druckers erhalten. Weitere Einzelheiten dazu finden Sie im Referenzhandbuch auf der Online-CD-ROM.
-
Page 51: Zeichendichte Und Schriftart Wählen
Der schnelle Einstieg Einstellungen Zeichendichte und Mit der Taste CPI (Character Per Inch = Zeichen pro Zoll) kann im Setup-Modus die Anzahl Schriftart wählen der Zeichen eingestellt werden, die pro Zoll ausgedruckt werden. Mit der Taste Font können interne Schriftarten ausgewählt werden. Taste Setup und anschließend Taste Char (4) drücken. -
Page 52: Technische Daten
Technische Daten Der schnelle Einstieg Technische Daten Druckerspezifikationen T2265 T2280 Druckprinzip seriell mit 24-Nadel Druckkopf Druckbreite 136 Zeichen bei 10 cpi Druckgeschwindigkeit (bidirektionaler Modus, 10 cpi) (bidirektionaler Modus, 10 cpi) HSQ (Matrix 12 x 10) 650 cps 800 cps DPQ (Matrix 12 x 12) 600 cps 700 cps CPQ (Matrix 24 x 12) -
Page 53: Papierspezifikationen
Der schnelle Einstieg Technische Daten Papierspezifikationen Endlospapier Traktor1 Einfachformat Papiergewicht 60–120 g/m Formularsatz Zahl der Durchschläge 1 + 6 (muß individuell getestet werden) Formularsatzdicke (max.) 0,60 mm Einzelblattzufuhr Einzelblatt Papiergewicht 80–120 g/m Formularsatz Zahl der Durchschläge 1 + 5 (muß individuell getestet werden) Formularsatzdicke (max.) 0,60 mm Formularsätze... -
Page 54: Daten Zur Langlebigkeit Und Umweltverträglichkeit
Zubehör Der schnelle Einstieg Daten zur Langlebig- Leistungsaufnahme T2265 T2280 keit und Umwelt- Ruhezustand = 20 W = 24 W Ruhe Ruhe verträglichkeit Aktivierungszeit = 0 Minuten = 0 Minuten Ruhe Ruhe Betriebszustand ,,Aus“ = 0 W = 0 W Geräuschpegel T2265 T2280... - Page 55 Initiation rapide Table des matières Table des matières Manuel d’utilisation Introduction Symboles utilisés INITIATION RAPIDE Consignes importantes de sécurité Utilisation du CD-ROM Online Que contient le CD-ROM Online Configuration matérielle requise Table des matières Recherche des pannes Vue d’ensemble Installation Déballage de l’imprimante Mise en place de l’imprimante Connexion de l’imprimante...
-
Page 56: Introduction
Introduction Initiation rapide Introduction Ce manuel d’utilisation est une initiation rapide sur la manière d’utiliser l’imprimante et permet également aux utilisateurs inexpérimentés de se servir de l’imprimante. Il décrit les fonctions principales de l’imprimante et contient des informations indispensables à connaître Ah ha! pour le travail quotidien avec l’imprimante. -
Page 57: Utilisation Du Cd-Rom Online
Initiation rapide Introduction Utilisation du Installer d’abord l’Adobe Acrobat Reader sur le disque dur dans la mesure où ce programme CD-ROM Online n’est pas déjà disponible. Pour l’installation, suivre les opérations détaillées dans le fichier Readme du répertoire READER. Pour démarrer la documentation Online dans le Gestionnaire de fichiers (Windows 3.1) ou l’Explorateur (Windows 95/98, Windows ME, Windows 2000, Windows NT4), double- cliquez sur le fichier START.PDF. -
Page 58: Vue D'ensemble
Vue d’ensemble Initiation rapide Vue d’ensemble Vue du devant Imprimante en mode continu Panneau de Elément insonorisant commande Capot supérieur Capot avant Tracteurs Capot inférieur Interrupteur secteur Vue de l’arrière Imprimante en mode feuille à feuille Capot arrière Guide-papier Connecteur d’interface Prise secteur Alimentation feuille à... -
Page 59: Installation
Initiation rapide Installation Installation Déballage de l’imprimante Placer l’imprimante emballée sur un support stable. Veiller à ce que les symboles «Haut» soient orientés dans la bonne direction. Ouvrir l’emballage et sortir et déballer la cartouche du ruban encreur. Sortir vers vous l’imprimante du carton d’emballage et enlever les restes de l’emballage. -
Page 60: Mise En Place De L'imprimante
Installation Initiation rapide Mise en place de Placer l’imprimante sur un support stable, plan et antidérapant de façon à ce qu’elle ne puisse l’imprimante pas tomber. Veiller à ce que le panneau de commande et les magasins d’alimentation du papier soient aisément accessibles et à ce qu’il y ait suffisamment de place pour l’éjection du papier. -
Page 61: Connexion De L'imprimante
Initiation rapide Installation Connexion de l’imprimante S’assurer que l’imprimante est réglée à la tension appropriée (p. ex. 230 V en Europe, 120 V aux USA). Voir à ce sujet la plaque signalitique placée au-dessus de la prise secteur au dos de l’imprimante. -
Page 62: Panneau De Commande
Panneau de commande Initiation rapide Panneau de Le panneau de commande et les touches permettent de contrôler le fonctionnement de l’impri- commande mante. La première ligne de l’affichage indique si l’imprimante se trouve en mode Online ou Offline- et la fonction papier sélectionnée (Tracteur1 ou Insert). Mode Online Dès que l’imprimante est mise sous tension, elle passe automatiquement en mode Online. -
Page 63: Mode Setup
Initiation rapide Panneau de commande Mode Setup Dans ce mode, les réglages suivants sont disponibles: Touche Setup: Règle l’imprimante en mode Setup dans lequel les réglages Ajuster Chem-Pap suivants peuvent être sélectionnés: Online Menu Char Touche Menu (1): autres paramètres de menu. Touche Ajuster (2): position de séparation, première ligne d’impression et Setup écartement de la tête d’impression. -
Page 64: Remplacement De La Cartouche Du Ruban Encreur
Remplacement de la cartouche du ruban encreur Initiation rapide Remplacement de la Avant d’ouvrir le capot, s’assurer que l’imprimante est hors tension de façon à pouvoir cartouche du ruban effectuer les préparations automatiques pour le changement de ruban (agrandissement de l’écart de la tête d’impression). - Page 65 Initiation rapide Remplacement de la cartouche du ruban encreur Déplacer le poussoir de friction de couleur comme illustré sur la figure (dans le sens de la flèche) et relever le dispositif de friction. Déposer la cartouche usagée. Nous conseillons l’emploi de cassettes à ruban encreur d’origine.
- Page 66 Remplacement de la cartouche du ruban encreur Initiation rapide Lever l’aide à l’insertion A. Placer la molette de tension de couleur dans le logement devant à droite de la nouvelle cartouche de ruban encreur. Tourner la molette dans le sens de la flèche pour tendre le ruban encreur.
- Page 67 Initiation rapide Remplacement de la cartouche du ruban encreur Introduire la molette de tension de couleur dans un des deux logements. En tournant la molette de tension dans le sens de la flèche respectif, tendre le ruban encreur jusqu’à ce qu’il repose en bas dans le support de ruban encreur.
- Page 68 Remplacement de la cartouche du ruban encreur Initiation rapide Faire aller et venir plusieurs fois le chariot de tête d’im- pression. Quand le ruban encreur est correctement installé, aucune résistance ne doit être perceptible. Le ruban encreur est transporté au mouvement de gauche à...
-
Page 69: Manipulation Du Papier
Initiation rapide Manipulation du papier Manipulation Ce chapitre explique comment régler le type de papier, mettre en place le papier continu et du papier l’alimentation feuille à feuille, transporter le papier et déplacer le papier en position de séparation. Changement du type Le changement du type de papier peut se faire soit grâce à... -
Page 70: Chargement Du Papier
Manipulation du papier Initiation rapide Chargement du papier Votre imprimante peut aussi bien imprimer sur du papier continu que sur du papier feuille à feuille. Pour des informations concernant les formats de papier autorisés, consulter la page 26 (Spécifications du papier). N’utiliser que du papier approprié... - Page 71 Initiation rapide Manipulation du papier Desserrer le levier de verrouillage du tracteur de droite et l’ajuster sur la largeur du papier. Charger du papier continu dans le tracteur de droite. Veiller à ce qu’il soit à la même hauteur que dans le tracteur de gauche pour éviter un bourrage du papier.
-
Page 72: Papier Feuille À Feuille
Manipulation du papier Initiation rapide Papier feuille Certains modèles d’imprimante ne sont conçus que pour le mode de papier continu et ne sont à feuille donc pas équipés d’une alimentation feuille à feuille. C’est pourquoi le couvercle avant ne peut pas être ouvert sur ces modèles. S’assurer que l’imprimante est réglée sur le mode feuille à... -
Page 73: Transport Du Papier
Initiation rapide Manipulation du papier Insérer la feuille simple dans le guide-papier jusqu’à la butée. Appuyer sur la touche Online pour que l’imprimante soit prête à fonctionner. La feuille simple est chargée automatiquement quand l’impri- mante est Online et reçoit des données de l’ordinateur. Appuyer sur la touche Load (4) pour charger le papier avant l’impression. -
Page 74: Déplacer Le Papier En Position De Séparation
Manipulation du papier Initiation rapide Déplacer le papier en Le papier continu est transporté en position de séparation en appuyant sur la touche Coupe. position de séparation Rabattre l’élément insonorisant vers l’avant. Online Tract 1 S’assurer que l’imprimante est en mode Online ; si nécessaire, appuyer sur la Coupe Online touche Online. -
Page 75: Réglages
Initiation rapide Réglages Réglages Cette partie décrit le réglage de la position de séparation, de la première ligne d’impression, de l’écartement de la tête d’impression, ainsi que de la police et de la densité des caractères. Réglage de la position Si la position de séparation ne correspond pas à... -
Page 76: Réglage De La Première Ligne D'impression (Tof)
Réglages Initiation rapide Réglage de la première La fonction TOF permet de régler la position de la première ligne d’impression pour chaque ligne d’impression (TOF) bac de chargement du papier et chaque menu individuellement. Régler d’abord la position de séparation (voir plus haut) - en cas d’utilisation de papier continu - avant d’exécuter la fonction TOF. -
Page 77: Réglage De L'écartement De La Tête D'impression
Initiation rapide Réglages Valider la sélection en appuyant sur la touche Valid (1). Ligne-1= 17/72"* Appuyer sur la touche Setup. L’imprimante revient en position initiale. Valid < > Quit Online Setup Le réglage effectué reste conservé même après mise hors tension de l’imprimante. Vous trou- verez d’autres détails dans le manuel de référence sur le CD-ROM Online. -
Page 78: Sélection De La Densité Des Caractères Et De La Police
Réglages Initiation rapide Sélection de la densité Avec la touche CPI (Character Per Inch = Caractères par pouce), vous pouvez régler en des caractères et de mode Setup le nombre de caractères imprimés par pouce. Avec la touche Police, vous pouvez la police sélectionner la police souhaitée. -
Page 79: Données Techniques
Initiation rapide Données techniques Données techniques Spécifications de Type T2265 T2280 l’imprimante Principe d’impression Série avec tête d’impression 24 aiguilles Largeur d’impression 136 caractères en mode 10 cpi Vitesse d’impression (Mode bidirectionnel, 10 cpi) (Mode bidirectionnel, 10 cpi) HSQ (matrice 12 x 10) 650 cps 800 cps DPQ (matrice 12 x 12) -
Page 80: Spécifications Du Papier
Accessoires Initiation rapide Spécifications Papier continu tracteur1 du papier Formulaire simple Grammage 60–120 g/m Liasse de formulaires Nombre de copies 1 + 6 (doit être testée individuellement) Epaisseur de formulaire (maxi) 0,60 mm Alimentation feuille à feuille Feuille simple Grammage 80–120 g/m Liasse de formulaires Nombre de copies... - Page 81 Per cominciare subito Indice Indice Istruzioni per l’uso Introduzione Simboli utilizzati PER COMINCIARE SUBITO Indicazioni di sicurezza importanti Utilizzo del CD-ROM online Cosa c’è sul CD-ROM online Requisiti hardware Indice Diagnostica Vista d’insieme Installazione Rimozione dell’imballaggio Installazione della stampante Collegamento della stampante Accensione della stampante Pannello comandi Modo Online...
-
Page 82: Introduzione
Introduzione Per cominciare subito Introduzione Le presenti istruzioni per l’uso consentono di cominciare subito a lavorare con la stampante, anche a utenti inesperti. Vi sono descritte le principali funzioni della stampante e vi sono riportate le informazioni indispensabili per il lavoro giornaliero con la stessa. Una descrizione Ah ha! dettagliata della stampante e delle sue caratteristiche, unitamente ad altre informazioni, è... -
Page 83: Utilizzo Del Cd-Rom Online
Per cominciare subito Introduzione Utilizzo del Se Adobe Acrobat Reader non è già caricato, installare innanzitutto questo programma sul CD-ROM online disco fisso. Per l’installazione, attenersi alle indicazioni riportate nel file Readme, nella directory READER. Per lanciare la documentazione online da File Manager (Windows 3.1) o in Explorer (Windows 95/98, Windows ME, Windows 2000, Windows NT4), cliccare due volte sul file START.PDF. -
Page 84: Vista D'insieme
Vista d’insieme Per cominciare subito Vista d’insieme Configurazione della stampante per l’uso dei Vista dal davanti trascinamoduli Pannello comandi Calotta insonorizzante Coperchio superiore Coperchio anteriore Trascinamoduli Interruttore di rete Coperchio inferiore Configurazione della stampante per l’uso di Vista posteriore fogli singoli Coperchio Supporti carta posteriore... -
Page 85: Installazione
Per cominciare subito Installazione Installazione Rimozione dell’imballaggio Collocare la stampante ancora imballata su una superficie stabile. Fare attenzione a disporre i simboli “sopra” nella direzione corretta. Aprire l’imballaggio, estrarre il kit degli accessori e disimballarlo. Estrarre la stampante dal cartone, dal davanti, e rimuovere gli altri elementi dell’imballaggio. -
Page 86: Installazione Della Stampante
Installazione Per cominciare subito Installazione della Collocare la stampante su una superficie stabile, piana e non scivolosa, per evitare che cada a stampante terra. Predisporre un agevole accesso al pannello operatore e alle guide carta, lasciando anche spazio adeguato per l’uscita della carta. Se si utilizzano frequenti comandi di avanzamento e ritorno della carta a moduli continui, collocare la stampante il più... -
Page 87: Collegamento Della Stampante
Per cominciare subito Installazione Collegamento della stampante Verificare che la stampante sia impostata sul valore di tensione corretto (ad esempio 230 V in Europa, 120 V negli Stati Uniti). A questo proposito, vedere la targhetta presente in corrispondenza della presa di rete sul retro della stampante. Se la stampante non è... -
Page 88: Pannello Comandi
Pannello comandi Per cominciare subito Pannello comandi Il pannello comandi e i relativi tasti consentono di controllare il funzionamento della stampante. La prima riga del display indica se la stampante si trova nel modo Online o Offline e qual è il percorso carta selezionato (Trattor1, o Foglio). -
Page 89: Modo Setup
Per cominciare subito Pannello comandi Modo Setup In questa modalità si possono effettuare le seguenti impostazioni: Tasto Setup: Commuta la stampante nel modo Setup, in cui si possono Regolaz Dir.Cart effettuare le seguenti impostazioni: Menu Char Online Tasto Menu (1): Ulteriori impostazioni di menu. Tasto Adjust (2): Posizione di strappo, prima riga di stampa e distanza Setup testina di stampa. -
Page 90: Sostituzione Della Cartuccia Colore
Sostituzione della cartuccia colore Per cominciare subito Sostituzione della Prima di aprire il coperchio, verificare che la stampante sia accesa e che possa quindi eseguire le funzioni di predisposizione automatica per il cambio della cartuccia nastro (aumento della cartuccia colore distanza della testina di stampa). - Page 91 Per cominciare subito Sostituzione della cartuccia colore Spostare il cursore colorato della frizione verso sinistra, come mostrato nella figura (direzione della freccia) e sollevare la frizione. Estrarre la cartuccia consumata. Utilizzare esclusivamente cartucce colore originali.
- Page 92 Sostituzione della cartuccia colore Per cominciare subito Sollevare la guida di inserimento colorata A. Inserire il pomello tendinastro colorato nel foro anteriore destro della cartuccia colore. Ruotare il pomello nella direzione della freccia per tendere il nastro. Inclinare la cartuccia lievemente in avanti in modo da inserire il nastro tra la guida di inserimento colorata e il supporto (finestrella in plastica trasparente).
- Page 93 Per cominciare subito Sostituzione della cartuccia colore Inserire il pomello tendinastro colorato in uno dei due fori. Ruotando il pomello nella direzione della freccia, tendere il nastro, finché non viene a contatto sotto con il supporto. Spingere la guida di inserimento A verso il basso.
- Page 94 Sostituzione della cartuccia colore Per cominciare subito Spostare ripetutamente da un lato all’altro il cursore della testina di stampa. Se il nastro è posizionato correttamente, non deve avvertirsi alcuna resistenza. Lo spostamento da sinistra verso destra determina il trasporto del nastro. In caso contrario, verificare se il nastro è...
-
Page 95: Modalità Di Gestione Della Carta
Per cominciare subito Modalità di gestione della carta Modalità di In questa sezione sono descritte le modalità di impostazione del tipo di carta, caricamento di moduli continui e fogli singoli, trasporto carta e posizionamento della carta nella posizione di gestione della carta strappo. -
Page 96: Caricamento Della Carta
Modalità di gestione della carta Per cominciare subito Caricamento della carta Nella stampante si possono caricare sia moduli continui che fogli singoli. Per maggiori infor- mazioni sui formati di carta compatibili, si rimanda alla pagina 26 (Specifiche della carta). Utilizzare esclusivamente tipi di carta idonei per questo modello di stampante. Per maggiori informazioni, si rimanda al manuale d’uso sul CD-ROM online. - Page 97 Per cominciare subito Modalità di gestione della carta Rilasciare la levetta colorata del trascinamoduli destro e posizionarlo in funzione della larghezza della carta. Agganciare i moduli continui al trascinamoduli destro. Fare attenzione a rispettare la stessa altezza del trascinamoduli sinistro, altrimenti si rischia di provocare inceppamenti.
-
Page 98: Fogli Singoli
Modalità di gestione della carta Per cominciare subito Fogli singoli Determinati modelli di stampante sono realizzati esclusivamente per la modalità di funzionamento a moduli continui e non dispongono pertanto di guida fogli singoli. In questi modelli risulta pertanto impossibile aprire il coperchio anteriore. Verificare che la stampante sia impostata sul funzionamento con fogli singoli. -
Page 99: Trasporto Carta
Per cominciare subito Modalità di gestione della carta Introdurre il foglio singolo fino in fondo nella guida carta. Premere il tasto Online per commutare la stampante nella condizione “pronta al funzionamento”. Se la stampante è nel modo Online, il foglio singolo viene automaticamente caricato non appena la stampante comincia a ricevere dati dal computer. - Page 100 Modalità di gestione della carta Per cominciare subito Posizionamento della Posizionare i moduli continui con il tasto Stp. nella posizione di strappo. carta nella posizione di strappo Richiudere il calotta insonorizzante. Online Trattor1 Verificare che la stampante si trovi nel modo Online. Se necessario, premere Stp.
-
Page 101: Impostazioni
Per cominciare subito Impostazioni Impostazioni Questa sezione descrive come impostare la posizione di strappo, la riga di inizio stampa, la distanza della testina di stampa, il font e la densità dei caratteri. Impostazione della Se la posizione di strappo della carta non corrisponde al bordo di strappo della stampante, la posizione di strappo si può... - Page 102 Impostazioni Per cominciare subito Impostazione della riga Con la funzione TOF (Top Of Form) si può impostare individualmente per ogni cassetto di di inizio stampa (TOF) alimentazione carta e per ogni menu la posizione della riga di inizio stampa. Prima di eseguire la funzione TOF – quando si utilizzano moduli continui – è necessario impostare la posizione di strappo (vedere le indicazioni riportate in precedenza).
-
Page 103: Regolazione Della Distanza Della Testina Di Stampa
Per cominciare subito Impostazioni Confermare il valore immesso premendo il tasto OK (1). Sel. 17/72" Premere il tasto Setup. La stampante torna nella posizione di riposo. < > Esci Online Setup L’impostazione effettuata resta in memoria anche allo spegnimento della stampante. Per maggiori dettagli a questo proposito, si rimanda al manuale d’uso sul CD-ROM online. -
Page 104: Selezione Della Densità Dei Caratteri E Del Font
Impostazioni Per cominciare subito Selezione della densità Nel modo Setup, con il tasto CPI (Character Per Inch = Caratteri per pollici) si può dei caratteri e del font impostare il numero di caratteri che deve essere stampato per pollice. Il tasto Fonte consente di selezionare i font interni. -
Page 105: Dati Tecnici
Per cominciare subito Dati tecnici Dati tecnici Specifiche della Tipo T2265 T2280 stampante Tecnologia di stampa seriale con testina di stampa a 24 aghi Larghezza di stampa 136 caratteri 10 cpi Velocità di stampa (modo bidirezionale, 10 cpi) (modo bidirezionale, 10 cpi) HSQ (Matrice 12 x 10) 650 cps 800 cps... -
Page 106: Specifiche Della Carta
Accessori Per cominciare subito Specifiche della carta Trascinamoduli (moduli continui) 1 Formato semplice Grammatura carta 60–120 g/m Modulistica multicopia Numero di copie 1 + 6 (da testare caso per caso) Spessore modulo (max.) 0,60 mm Alimentazione fogli singoli Foglio singolo Grammatura carta 80–120 g/m Modulistica multicopia... - Page 107 Introducción rapida Contenido Contenido Manual de usuario Introducción Símbolos convencionales INTRODUCCION RAPIDA Instrucciones de seguridad importantes Utilizar la documentación en línea en el disco CD-ROM Qué incluye la documentación en línea Contenido en el disco CD-ROM Condiciones de hardware Detección de errores Vista de conjunto Instalación Desembalar la impresora...
-
Page 108: Manual De Usuario
Introducción Introducción rapida Introducción El presente manual de usuario sirve como introducción rápida al uso de la impresora y para poner en condiciones de manejar el equipo incluso al usuario inexperimentado. Comprende Ah ha! una descripción de las funciones esenciales de la impresora e incluye las informaciones indispensables para el trabajo diario con el equipo. -
Page 109: Detección De Errores
Introducción rapida Introducción Utilizar la documentación Empiece con la instalación del Adobe Acrobat Reader en el disco duro si no se ha instalado en línea en el disco ya. Para instalar siga las instrucciones contenidas en el archivo README en el directorio CD-ROM READER. -
Page 110: Vista De Conjunto
Vista de conjunto Introducción rapida Vista de conjunto Impresora en modo de tractor Vista frontal Panel de mando Elemento insonoro Tapa superior Tapa delantera Tractores Conmutador de alimentación Tapa inferior Vista desde atrás Impresora en modo de hojas sueltas Tapa trasera Soporte de papel Enchufe de interfaces... -
Page 111: Instalación
Introducción rapida Instalación Instalación Desembalar la impresora Ponga la impresora embalada sobre una base estable. Asegúrese de que los símbolos de “Arriba” indiquen la dirección correcta. Abra el embalaje, quite y desempaquete la cajita de accesorios. Saque la impresora del cartón hacia delante y quite el resto del material de embalaje. -
Page 112: Colocar La Impresora
Instalación Introducción rapida Colocar la impresora Coloque la impresora sobre una base estable, plana y antideslizante, de manera que no pueda caer al suelo. Hay que asegurar el acceso al panel de mando y los mecanismos de alimentación de papel, y hay que proveer espacio suficiente para el papel expulsado. Si el papel continuo se arrastra con frecuencia hacia delante y atrás, intente colocar la impresora según se muestra en la figura. -
Page 113: Conectar La Impresora
Introducción rapida Instalación Conectar la impresora Asegúrese de que el equipo ha sido ajustado para la tensión correcta de la red (p. ej. 230 V en Europa, 120 V en los EE.UU.). Véase el rótulo encima de la conexión de corriente eléctrica en la parte trasera de la impresora. -
Page 114: Panel De Mando
Panel de mando Introducción rapida Panel de mando A través del panel de mando y los pulsadores correspondientes se controlan las operaciones. La líneas de arriba del visualizador indica si la impresora está en modo Online (en línea) o en modo Offline (fuera de línea) y el origen de papel seleccionado (Tractor1 o Sueltas). Modo Online Después de encender la impresora, se pone automáticamente al modo Online. -
Page 115: Modo Setup
Introducción rapida Panel de mando Modo Setup En este modo se pueden ajustar los siguientes parámetros: Pulsador Setup: Pone la impresora al modo Setup, en el cual pueden se Ajustar Aliment. leccionarse los ajustes siguientes: Online Menú Char Pulsador Menú (1): Opciones adicionales. Pulsador Ajustar (2): Posición de corte, primera línea de impresión y Setup distancia de cabeza. -
Page 116: Cambiar El Cartucho De Cinta
Cambiar el cartucho de cinta Introducción rapida Cambiar el Antes de abrir la cubierta, asegúrese de que la impresora esté encendida para que ésta pueda llevar a cabo automaticamente algunas preparaciones necesarias para el cambio de la cinta cartucho de cinta (alargar la distancia de cabeza de impresión). - Page 117 Introducción rapida Cambiar el cartucho de cinta Deje correr el pasador de color de la fricción hacia la izquierda (en dirección de la flecha), como se muestra en la figura y abra la fricción hacia arriba. Quite el cartucho usado. Le recomendamos el uso de cartuchos de cinta originales.
- Page 118 Cambiar el cartucho de cinta Introducción rapida Levante el dispositivo de carga A. Coloque el botón tensor colorado en la apertura delantera de la derecha que se encuentra en el cartucho de cinta nuevo. Gire el botón en el sentido de la flecha para tensar la cinta. Incline el cartucho de cinta un poco hacia delante, inserte la cinta entre dispositivo de carga colorado y soporte de cinta (arandela de material sintético transparente).
- Page 119 Introducción rapida Cambiar el cartucho de cinta Introduzca el botón tensor colorado en una de las dos aperturas. Tense la cinta girando el botón tensor en el sentido de la flecha correspondiente hasta que llegue a colocarse en el soporte de cinta. Presione el dispositivo de carga colorado A hacia abajo.
- Page 120 Cambiar el cartucho de cinta Introducción rapida Mueva varias veces el carro de cabeza grabadora. Si la cinta se encuentra en su posición correcta no se debe sentir ninguna resistencia. La cinta se transporta moviéndola de la izquierda a la derecha. En el caso que no sea así, controle si la cinta está...
-
Page 121: Manejo Del Papel
Introducción rapida Manejo del papel Manejo del papel En este capítulo se describe cómo se selecciona el tipo de papel, se coloca papel continuo y hojas sueltas, se transporta papel y se arrastra papel a la posición de corte. Cambiar tipo de papel Puede cambiarse el tipo de papel o por un programa de aplicación o por selección rápida del origen de papelo mediante el menú... -
Page 122: Cargar Papel
Manejo del papel Introducción rapida Cargar papel Su impresora puede procesar papel continuo así como hojas sueltas. Para más informaciones sobre los tamaños de papel admisibles, véase página 26 (Especificaciones del papel). Se ruega que utilice sólo los tipos de papel adecuados para esta impresora. Para más informaciones, véase manual de referencia en el disco CD-ROM. - Page 123 Introducción rapida Manejo del papel Afloje la palanca de fijación colorada del tractor derecho y ajústelo para alinearlo a la anchura del papel. Coloque papel continuo en el tractor derecho. Asegúrese de que esté posicionado igual como en el tractor izquierdo para evitar cualquier atasco de papel.
-
Page 124: Hojas Sueltas
Manejo del papel Introducción rapida Hojas sueltas Algunos modelos de la impresora han sido concebido solamente para la impresión de papel continuo, por lo cual no poseen ningún alimentador de hojas sueltas. No se puede abrir la tapa frontal en tales modelos. Asegúrese de que la impresora esté... -
Page 125: Transporte De Papel
Introducción rapida Manejo del papel Insierte la hoja suelta hasta el tope en el dispositivo de alimentación de papel. Presione el pulsador Online para poner la impresora en estado listo para el servicio. Se carga la hoja automáticamente si la impresora está en modo Online y recibe datos del ordenador. - Page 126 Manejo del papel Introducción rapida Transportar el papel a Se transporta el papel continuo a la posición de corte con el pulsador Tiro. la posición de corte Abra la elemento insonoro hacia delante. Online Tractor1 Asegúrese de que la impresora esté en modo Online. Si fuese necesario, Online Tiro presione el pulsador Online.
-
Page 127: Ajustes
Introducción rapida Ajustes Ajustes En este capítulo se describe cómo se ajustan la posición de corte, la primera línea de impresión, la distancia de cabeza grabadora, como también la fuente y la densidad de caracteres. Ajustar la posición Si la posición de corte del papel no coincide con la hoja de corte de la impresora, puede de corte ajustarla. -
Page 128: Ajustar La Primera Línea De Impresión (Tof)
Ajustes Introducción rapida Ajustar la primera línea Con la función TOF se puede ajustar la posición de la primera línea de impresión de impresión (TOF) separadamente para cada origen de papel y para cada menú. Antes de iniciar la función TOF – y cuando se utiliza papel continuo – debería ajustar la posición de corte (descrito anteriormente). -
Page 129: Ajustar La Distancia De Cabeza Grabadora
Introducción rapida Ajustes Confirme la entrada presionando el pulsador Set (1). FormAdj= 17/72"* Presione el pulsador Setup. La impresora vuelve al estado inicial. < > Salir Online Setup La selección realizada permanece también después de desconectar la impresora. Para más detalles véase el manual de referencia que se encuentra en manual de referencia en el disco CD-ROM. -
Page 130: Seleccionar Densidad Y Fuente
Ajustes Introducción rapida Seleccionar densidad Con el pulsador CPI (Character Per Inch = carácter por pulgada) se puede ajustar en el modo y fuente Setup el número de caracteres por pulgada para la impresión. Con el pulsador Font se pueden seleccionar fuentes internos. -
Page 131: Datos Técnicos
Introducción rapida Datos técnicos Datos técnicos Especificaciones Tipo T2265 T2280 de la impresora Tecnología de impresión En serie con cabeza de impresión de 24 agujas Anchura de impresión 136 caracteres en modo 10 cpp Velocidad de impresión (en modo bidireccional, 10 cpp) (modo bidireccional, 10 cpp) HSQ (Matriz 12 x 10) 650 cps... -
Page 132: Especificaciones Del Papel
Accesorios Introducción rapida Especificaciones Papel continuo tractor1 del papel Papel simple Peso de papel 60–120 g/m Copias múltiples Número de copias 1 + 6 (requieren pruebas individuales) Espesor de formulario (máx.) 0,60 mm Alimentación hojas sueltas Hoja suelta Peso de papel 80–120 g/m Copias múltiples Número de copias äge... - Page 133 “All rights reserved. Translations, reprinting or copying by any means of this manual complete or in part or in any different form requires our explicit approval. We reserve the right to make changes to this manual without notice. All care has been taken to ensure accuracy of information contained in this manual. However, we cannot accept responsibility for any errors or damages resulting from errors or inaccuracies of information herein.”...
- Page 134 TALLY REPRESENTATIVES GERMANY U.S.A. FRANCE Tally Computerdrucker GmbH Tally Corp. Tally S.A. Postfach 2969 P.O.Box 97018 19 avenue de L’lle Saint Martin D-89019 Ulm 8301 South, 180th Street F-92237 Nanterre Cedex Deutschland Kent, WA 98032 France Tel.: +49 7308 80 0 U.S.A.
Need help?
Do you have a question about the 7265 and is the answer not in the manual?
Questions and answers