Nibe F370 Installer Manual
Hide thumbs
Also See for F370:
- Installer manual (88 pages) ,
- User manual (84 pages) ,
- Installation instructions manual (12 pages)
Table of Contents
Advertisement
Quick Links
Advertisement
Table of Contents

Related Manuals for Nibe F370


Summary of Contents for Nibe F370
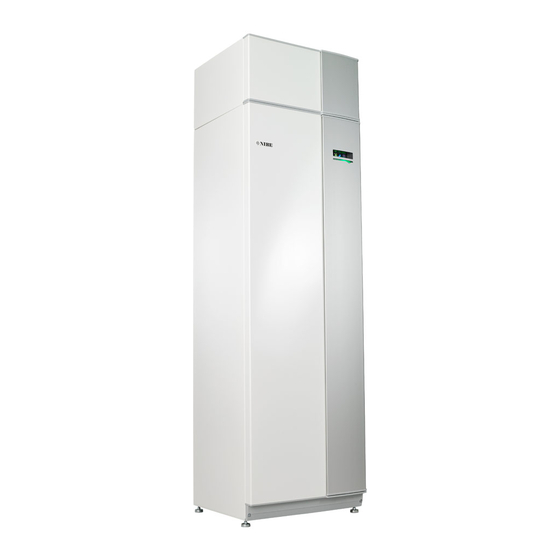
- Page 1 Installer manual NIBE™ F370 Exhaust air heat pump IHB GB 1338-1 231468...
- Page 2 A detailed explanation of the button functions can be found on page 29. How to scroll through menus and make different settings is described on page 31. The mode for setting the indoor temperature is reached, when in the start mode in the main menu, by pressing the OK button twice.
-
Page 3: Table Of Contents
Ventilation flow Troubleshooting Adjusting ventilation 11 Accessories 5 Electrical connections 12 Technical data General Dimensions and setting-out coordinates Connections Technical specifications Settings Electrical circuit diagram Optional connections Connecting accessories Item register 6 Commissioning and adjusting NIBE™ F370 Table of Contents |... -
Page 4: Important Information
F370 is CE marked and fulfils IP21. NOTE! Use of silicone seals can hamper the efficiency The CE marking means that NIBE ensures that the of certain types of leak tracing equipment. Components with built in safety do not need to be isolated before product meets all regulations that are placed on it starting work. - Page 5 This type of flushing must be carried Contact the manufacturer's technical department in out if hot work is to be performed on the pipe system. the event of any doubts. NIBE™ F370 Chapter 1 | Important information...
- Page 6 3. Before starting the procedure, ensure that: the event of any doubts. necessary equipment for mechanical handling of Return the collected refrigerant to the refrigerant the refrigerant container is available supplier in the correct collection container and with Chapter 1 | Important information NIBE™ F370...
-
Page 7: Serial Number
Warranty and insurance information by the ventilation engineer. Thank you for installing a new NIBE heat pump in your We recommend that the exhaust air is extracted via home. metal spiral seam pipes with fitting seals approved to sealing class D, or suitable equivalent UPVC plastic duct NIBE™... - Page 8 At the same time, fresh air should enter the building via NIBE wall vents into the living room, bedrooms and other living area. Factors such as street noise, exhaust fumes, wind, general noise, cold and pollen can be taken into ac- count choosing the right outside air vent.
-
Page 9: Inspection Of The Installation
Circulation pump setting Setting heating medium flow Boiler pressure Expansion vessel T&P valve Tundish Electricity (page 18) Fuses heat pump Fuses property Outside sensor Room sensor Safety breaker Earth circuit-breaker Miscellaneous Warranty Benchmark checklist NIBE™ F370 Chapter 1 | Important information... -
Page 10: Delivery And Handling
(80) (50) Assembly Position F370 on a firm base that can take the weight, preferably on a concrete floor or foundation. Use the product's adjustable feet to obtain a horizontal and stable set-up. -
Page 11: Supplied Components
1. Remove the air treatment hatch by pulling it straight out. 2. Remove the screws from the lower edge of the front cover. 3. Lift the cover out at the bottom edge and up. 4. Pull the hatch towards yourself. NIBE™ F370 Chapter 2 | Delivery and handling... -
Page 12: The Heat Pump Design
3 The heat pump design LE K Chapter 3 | The heat pump design NIBE™ F370... -
Page 13: Pipe Connections
RF 3 EMC-filter FL 1 Expansion relief valve, safety valve, hot water SF 1 Switch heater W130 Network cable for NIBE Uplink FL 2 Safety valve, climate system FL 5 T&P valve Cooling components FL 6 Vacuum valve EP 1... -
Page 14: Pipe And Ventilation Connections
See Usually, there should not be a problem in installing section Service actions on page 50. F370 in areas of hard water as the operating temperat- Before installing the heat pump in an existing system, ure is 50-60 °C. -
Page 15: System Diagram
System diagram NOTE Ensure that cleaning agent has been removed F370 consists of a heat pump, water heater, immersion heater, fan, circulation pump and control system.F370 from the entire system before adding inhibitor. is connected to the ventilation system and heating medium circuits. -
Page 16: Dimensions And Pipe Connections
XL2 Heating medium, return line Ø int. XL3 Cold water Ø int. XL4 Hot water Ø int. XL8 Docking connection, flow line Ø int. XL9 Docking connection, return line Ø int. Chapter 4 | Pipe and ventilation connections NIBE™ F370... -
Page 17: Symbol Key
Connecting the climate system When connecting to a system with thermostats on all radiators/underfloor heating coils, a relief valve must be fitted, or a thermostat must be removed to ensure sufficient flow. NIBE™ F370 Chapter 4 | Pipe and ventilation connections... -
Page 18: Installation Alternative
Connecting hot water circulation Installation alternative To reduce the risk of bacterial growth in systems with F370 can be connected in several different ways, some hot water circulation, the temperature of the circulating of which are shown below. water should not fall below 50 °C. There should not be any non-circulatory hot water pipes. -
Page 19: General Ventilation Connection
General ventilation connection Ventilation flow Ventilation installation must be carried out in accord- Connect F370 so that all exhaust air except exhaust air ance with current norms and directives. duct air (kitchen fan) passes the evaporator (EP1) in the heat pump. Lowest ventilation flow must fulfill To prevent fan noise being transferred to the ventila- applicable norms . -
Page 20: Electrical Connections
Disconnect the heat pump before insulation testing the house wiring. If the building is equipped with an earth-fault breaker, F370 should be equipped with a separate one. If a miniature circuit breaker is used it should have at least motor characteristic “C”. See page 58 for fuse size. -
Page 21: Cable Lock
Use a suitable tool to release/lock cables in the heat Removing the cover, immersion heater circuit board pump terminal blocks. 1. Insert the screwdriver (A) and pry the catch care- fully downwards (B). 2. Angle out the cover and remove it. NIBE™ F370 Chapter 5 | Electrical connections... -
Page 22: Connections
If a conduit is used it must be sealed to prevent con- densation in the sensor capsule. Power connection F370 must be installed via an isolator switch with a minimum breaking gap of 3mm. Minimum cable area must be dimensioned according to the fuse rating used. -
Page 23: Room Sensor
Room sensor F370 is delivered with a room sensor supplied (BT50). The room temperature sensor has up to three functions: 1. Show current room temperature in F370's display. 2. Option of changing the room temperature in °C. 3. Makes it possible to change/stabilise the room temperature. -
Page 24: Settings
NOTE Switch (SF1) must not be moved to " " or " " until F370 has been filled with water. Other- wise the temperature limiter, thermostat and the immersion heater can be damaged. Power in emergency mode Electrical addition - maximum output The immersion heater’s output in emergency mode is... -
Page 25: Optional Connections
In those cases external tariff blocking is used, this can ted to the correct connection in the software in F370. be connected to terminal block X6 on the input card (AA3), which is positioned behind the front cover. -
Page 26: Connecting Accessories
F1X45 Contact for activation of fan speed Externt An external contact function can be connected to F370 for activation of one of the four fan speeds. The switch must be potential free and connected to the selected input (menu 5.4, see page 49) on terminal block X6 on the input circuit board (AA3). -
Page 27: Commissioning And Adjusting
(approx. 1 bar) by opening the vent valve (QM20) or safety valve (FL2). 7. Check that there is water in the overflow cup (WM1). If the overflow cup requires topping up: 1. Turn the safety valve (FL1) anticlockwise carefully. NIBE™ F370 Chapter 6 | Commissioning and adjusting... -
Page 28: Start-Up And Inspection
1. Use the control knob to select the help symbol. 2. Press the OK button. The help text often consists of several windows that you can scroll between using the control knob. Chapter 6 | Commissioning and adjusting NIBE™ F370... -
Page 29: Setting The Pump Speed
The display to the right, above the switch must not be illuminated at all. Flöd (l/ ) Effekt (watt) 90%/100% Tillgängligt tryck (kPa) 10% 20% Luftflöde (l/s) 0,05 0,11 0,16 0,22 0,27 0,33 0,38 NIBE™ F370 Chapter 6 | Commissioning and adjusting... - Page 30 If gurgling sounds can be heard from the heat pump or climate system, the entire system will require additional venting. Vent the heat pump through venting valve (QM21). When venting, F370 must be off. Chapter 6 | Commissioning and adjusting NIBE™...
-
Page 31: Control - Introduction
The control knob can be turned to the right or left. You can: scroll in menus and between options. increase and decrease the values. change page in multiple page instructions (for example help text and service info). NIBE™ F370 Chapter 7 | Control - Introduction... -
Page 32: Menu System
Display of temperature and other operating informa- tion and access to the alarm log. See page 42. This symbol indicates whether F370 has contact with NIBE Uplink™. Menu 4 - HEAT PUMP Setting time, date, language, display, operating mode This symbol indicates whether solar etc. -
Page 33: Setting A Value
To select another option: 1. Mark the applicable option. One of the options is pre-selected (white). 2. Press the OK button to confirm the selected option. The selected option has a green tick. NIBE™ F370 Chapter 7 | Control - Introduction... - Page 34 1. Turn the control knob until one of the arrows in the top left corner (at the page number) has been marked. 2. Press the OK button to skip between the steps in the start guide. Chapter 7 | Control - Introduction NIBE™ F370...
-
Page 35: Control - Menus
Confirm the new setting by pressing the OK button. The new temperature is shown on the right-hand side of the symbol in the display. NIBE™ F370 Chapter 8 | Control - Menus... - Page 36 Without an activated room sensor the desired change is set (of setting in menu 1.1). One step is usually enough to change the room temperature by one degree, but in some cases several steps may be required. Chapter 8 | Control - Menus NIBE™ F370...
- Page 37 If you wish to set similar scheduling for every day of the week start by filling in “all” and then changing the desired days. NIBE™ F370 Chapter 8 | Control - Menus...
- Page 38 2. Press the OK button. 3. Follow the grey line up to the heat curve and out to the left to read off the value for the supply temperature at the selected outdoor temperature. Chapter 8 | Control - Menus NIBE™ F370...
- Page 39 If there is more than one climate system the setting 1.1 "temperature" (heating curve offset). can be made separately for each system. Houses with under floor heating** installed in a timber floor structure London = Area 15 (8). NIBE™ F370 Chapter 8 | Control - Menus...
- Page 40 Set the minimum temperature on the supply temper- temperatures for different outdoor temperatures. ature to the climate system. This means that F370 never calculates a temperature lower than that set Caution here.
- Page 41 4 until one of the conditions is no longer met. Caution Night cooling can only be activated when house heating has been deactivated. This is done in menu 4.2. NIBE™ F370 Chapter 8 | Control - Menus...
-
Page 42: Menu 2 - Hot Water
Schedule: The schedule to be changed is selected here. to the right. Activated: Scheduling for the selected period is activ- When the time has run out F370 returns to the mode ated here. Set times are not affected at deactivation. set in menu 2.2. - Page 43 "operating time" decide how long the hot water circu- lation pump must run per operating instance. "downtime" decide how long the hot water circulation pump must be stationary between operating instances. NIBE™ F370 Chapter 8 | Control - Menus...
-
Page 44: Menu 3 - Info
Information about the additional heat settings, operat- ing status and statistics can be obtained here. No changes can be made. The information is on several pages. Turn the control knob to scroll between the pages. Chapter 8 | Control - Menus NIBE™ F370... -
Page 45: Menu 4 - Heat Pump
Uplink™ without requesting a new connection string. Menu 4.1.3 - internet Here you make settings for connecting F370 to the in- Menu 4.1.3.8 - tcp/ip settings ternet. You can set TCP/IP settings for your installation here. - Page 46 If you want to receive an SMS message in the event of ation. You can deselect the function when you do not the alarm mark the box to the right of the telephone wish to have heating running. number. Chapter 8 | Control - Menus NIBE™ F370...
- Page 47 Menu 4.3 - my icons completed. You can select what icon should be visible when the door to F370 is closed. You can select up to 3 icons. If Caution you select more, the ones you selected first will disap- pear.
- Page 48 Caution If the stop time is before the start time it means that the period extends past midnight. Scheduling always starts on the date that the start time is set for. Chapter 8 | Control - Menus NIBE™ F370...
-
Page 49: Menu 5 - Service
2.9.1. Menu 5.1 - operating settings Operating settings can be made for the heat pump in the sub menus. NIBE™ F370 Chapter 8 | Control - Menus... - Page 50 F370. Menu 5.3 - accessory settings Here you set the max. electrical output of the internal electrical addition in F370 and the fuse size for the in- The operating settings for accessories that are installed stallation.
- Page 51 Caution Do not quick start the compressor too many times in succession over a short period of time as this may damage the compressor and its ancillary equipment. NIBE™ F370 Chapter 8 | Control - Menus...
-
Page 52: Service
Servicing should only be carried out by persons ference and in conjunction with service. with the necessary expertise. Emergency mode is activated by setting switch (SF1) When replacing components on F370 only to ” ”. This means that: replacement parts from NIBE may be used. - Page 53 12.51 2.399 10.00 2.245 8.045 2.083 6.514 1.916 5.306 1.752 4.348 1.587 3.583 1.426 2.968 1.278 2.467 1.136 2.068 1.007 1.739 0.891 1.469 0.785 1.246 0.691 1.061 0.607 0.908 0.533 0.779 0.469 0.672 0.414 NIBE™ F370 Chapter 9 | Service...
- Page 54 (always in English) of the most probable update that the update software has selected form the USB F370 is equipped with a USB socket in the display unit. memory. This USB socket can be used to connect a USB memory...
- Page 55 Setting range: 1 s – 60 min Default setting range: 5 s Set whether the present measurement values from F370 are to be saved in a log on the USB memory. Log for longer periods 1. Set the desired interval between loggings.
-
Page 56: Disturbances In Comfort
The Air in the heating system. status lamp will therefore continue to be red. Vent the heating system (see page 25). Closed valves (QM31), (QM32)to the heating system. Open the valves. Chapter 10 | Disturbances in comfort NIBE™ F370... -
Page 57: High Room Temperature
Wait until the temperature condition has been re- set. Minimum time between compressor starts has not been reached. Wait 30 minutes and check if the compressor has started. Alarm tripped. Follow the display instructions. NIBE™ F370 Chapter 10 | Disturbances in comfort... -
Page 58: Accessories
Docking kit gas DEH 41 Part no. 066 102 Extra shunt group ECS 40/ECS 41 This accessory is used when F370 is installed in houses with two or more different heating systems that require different supply temperatures. ECS 40 (Max. 80 m²) Part no. -
Page 59: Technical Data
12 Technical data Dimensions and setting-out coordinates Undvik rördragning inom markerat område NIBE™ F370 Chapter 12 | Technical data... -
Page 60: Technical Specifications
Sound pressure levels Sound pressure level in the boiler house (L dB(A) 42.5-44.0 P(A) Pipe connections Heating medium ext Ø Hot water ext Ø Cold water ext Ø Docking ext Ø Ventilation Ø Chapter 12 | Technical data NIBE™ F370... - Page 61 The value varies with the selected fan curve. For more extensive sound data including sound to channels visit www.nibe.eu.. The value can vary with the room’s damping capacity. These values apply with a damping of 4 dB. A20(12) exhaust air flow150 m NIBE™ F370 Chapter 12 | Technical data...
-
Page 62: Electrical Circuit Diagram
Electrical circuit diagram 1x230V Chapter 12 | Technical data NIBE™ F370... - Page 63 NIBE™ F370 Chapter 12 | Technical data...
- Page 64 Chapter 12 | Technical data NIBE™ F370...
- Page 65 NIBE™ F370 Chapter 12 | Technical data...
- Page 66 Chapter 12 | Technical data NIBE™ F370...
- Page 67 NIBE™ F370 Chapter 12 | Technical data...
-
Page 68: Item Register
Assembly, 8 Electrical addition - maximum output, 22 External connection options, 23 General, 18 Back button, 29 Miniature circuit-breaker, 18 NIBE Uplink™, 23 Optional connections, 23 Cable lock, 19 Outdoor sensor, 20 Cold and hot water, 15 Power connection, 20... - Page 69 Use the virtual keyboard, 32 When working in the refrigerant circuit, 2 Miniature circuit-breaker, 18 Wiring, 2 Scroll through the windows, 32 Selecting menu, 31 NIBE Uplink™, 23 Selecting options, 31 Serial number, 5 Service, 50 OK button, 29 Service actions, 50...
- Page 70 EXHAUST AIR HEAT PUMP COMMISSIONING CHECKLIST This Commissioning Checklist is to be completed in full by the competent person who commissioned the heat pump and associated equipment as a means of demonstrating compliance with the appropriate Building Regulations and then handed to the customer to keep for future reference. Failure to install and commission this equipment to the manufacturer’s instructions may invalidate the warranty but does not affect statutory rights.
- Page 71 MAINS PRESSURE HOT WATER STORAGE SYSTEM COMMISSIONING CHECKLIST This Commissioning Checklist is to be completed in full by the competent person who commissioned the storage system as a means of demonstrating compliance with the appropriate Building Regulations and then handed to the customer to keep for future reference. Failure to install and commission this equipment to the manufacturer’s instructions may invalidate the warranty but does not affect statutory rights.
- Page 72 Service Record It is recommended that your heating system is serviced regularly and that the appropriate Service Interval Record is completed. Service Provider Before completing the appropriate Service Interval Record below, please ensure you have carried out the service as described in the manufacturer’s instructions.
- Page 76 NIBE Energy Systems Ltd 3C Broom Business Park Bridge Way Chesterfield S41 9QG Phone 0845 095 1200 Fax 0845 095 1201 info@nibe.co.uk www.nibe.co.uk 231468...
Need help?
Do you have a question about the F370 and is the answer not in the manual?
Questions and answers