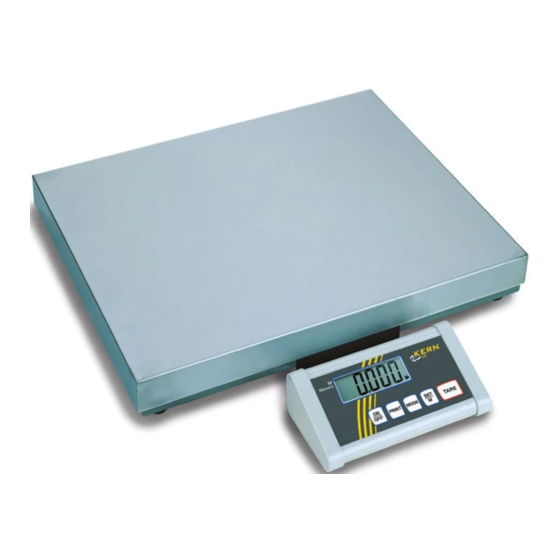
KERN DE3K1N Operating Manual

KERN DE3K1N Operating Manual

Electronic platform balance

Advertisement

GB

Table of Contents

1
Technical data ................................................................................................. 39
2
Declaration of conformity ............................................................................... 46
3
Basic Information (General) ........................................................................... 47
3.1
Proper use ................................................................................................ 47
3.2
Improper Use ............................................................................................ 47
3.3
Warranty.................................................................................................... 47
3.4
Monitoring of Test Resources................................................................. 48
4
Basic Safety Precautions................................................................................ 48
4.1
4.2
Personnel training.................................................................................... 48
5
Transport and storage .................................................................................... 48
5.1
Testing upon acceptance ........................................................................ 48
5.2
Packaging ................................................................................................. 48
6
Unpacking, Setup and Commissioning ......................................................... 49
6.1
Installation Site, Location of Use ............................................................ 49
6.2
Unpacking ................................................................................................. 49
6.2.1 Setup ...................................................................................................... 49
6.2.2 Scope of delivery .................................................................................... 49
6.2.3 Grundaufbau........................................................................................... 50
6.3
Mains connection ..................................................................................... 51
6.4
6.5
Connection of peripheral devices........................................................... 51
6.6
Initial Commissioning .............................................................................. 52
6.7
Adjustment ............................................................................................... 52
6.8
Adjustment ............................................................................................... 52
7
Operation ......................................................................................................... 53
7.1
Overview of display.................................................................................. 53
7.2
Weighing ................................................................................................... 53
DE-BA-defsi-0640
KERN DE
Version 4.0 12/2006
Operating Manual
Electronic Platform Balance
37

Advertisement

Table of Contents
loading
Need help?

Need help?

Do you have a question about the DE3K1N and is the answer not in the manual?

Questions and answers

Subscribe to Our Youtube Channel

Summary of Contents for KERN DE3K1N

  • Page 1: Table Of Contents

    KERN DE Version 4.0 12/2006 Operating Manual Electronic Platform Balance Table of Contents Technical data ....................39 Declaration of conformity ................46 Basic Information (General) ................47 Proper use ....................47 Improper Use .................... 47 Warranty....................47 Monitoring of Test Resources..............48 Basic Safety Precautions................
  • Page 2 Taring ......................54 PRE-Tare function ..................54 Plus/minus weighings................54 Parts counting ..................55 Net-total weighings .................. 55 Percent weighings..................56 Weighing units (Unit) ................57 7.10 Display background illumination ............59 7.11 Animal weighing function................ 60 Settings ......................61 Call-up menu structure ................
  • Page 3: Technical Data

    1 Technical data KERN DE3K1N DE6K0.5N DE6K2N DE12K1N Readability (d) 0.5 g Weighing range (max) (d) 3 kg 6 kg 6 kg 12 kg Taring range (subtractive) 3 kg 6 kg 6 kg 12 kg Minimum piece weight Reproducibility 0.5 g Linearity ±...
  • Page 4 KERN DE15K0.5N DE15K5N DE24K2N DE30K1N Readability (d) 0.5 g Weighing range (max) 15 kg 15 kg 24 kg 30.5 kg Taring range (subtractive) 15 kg 15 kg 24 kg 30.5 kg Minimum piece weight 10 g Reproducibility 0.5 g Linearity ±...
  • Page 5 KERN DE36K10N DE36K10NL DE60K2N DE60K5N Readability (d) 10 g 10 g Weighing range (max) 36 kg 36 kg 60 kg 60 kg Taring range (subtractive) 36 kg 36 kg 60 kg 60 kg Minimum piece weight 20 g 20 g...
  • Page 6 KERN DE60K5NL DE60K20N DE60K20NL Readability (d) 20 g 20 g Weighing range (max) 60 kg 60 kg 60 kg Taring range (subtractive) 60 kg 60 kg 60 kg Minimum piece weight 10 g 40 g 40 g Reproducibility 20 g...
  • Page 7 KERN DE120K10N DE120K10NL DE150K5N Readability (d) 10 g 10 g Weighing range (max) 120 kg 120 kg 150 kg Taring range (subtractive) 120 kg 120 kg 150 kg Minimum piece weight 20 g 20 g 10 g Reproducibility 10 g...
  • Page 8 KERN DE150K50N DE150K50NL DE150K50NXL Readability (d) 50 g 50 g 50 g Weighing range (max) 150 kg 150 kg 150 kg Taring range (subtractive) 150 kg 150 kg 150 kg Minimum piece weight 100 g 100 g 100 g Reproducibility...
  • Page 9 KERN DE240K20NL DE300K100N DE300K100NL Readability (d) 20 g 100 g 100 g Weighing range (max) 240 kg 300 kg 300 kg Taring range (subtractive) 240 kg 300 kg 300 kg Minimum piece weight 40 g 200 g 200 g Reproducibility...
  • Page 10: Declaration Of Conformity

    Any modifications of the appliances described above that are carried out without prior permission by KERN will render this declaration invalid. Date: 19.12.2006 Signature: Gottl. KERN & Sohn GmbH Management Gottl. KERN & Sohn GmbH, Ziegelei 1, D-72322 Balingen, Tel. +49-07433/9933-0,Fax +49-074433/9933-149 DE-BA-defsi-0640...
  • Page 11: Basic Information (General)

    The balance may only be used according to the described conditions. Other areas of use must be released by KERN in writing. 3.3 Warranty Warranty claims shall be voided in case •...
  • Page 12: Monitoring Of Test Resources

    Information is available on KERN’s home page (www.kern-sohn.com) with regard to the monitoring of balance test substances and the test weights required for this. In KERN’s accredited DKD calibration laboratory test weights and balances may be...
  • Page 13: Unpacking, Setup And Commissioning

    6 Unpacking, Setup and Commissioning 6.1 Installation Site, Location of Use The balances are designed in a way that reliable weighing results are achieved in common conditions of use. You will work accurately and fast, if you select the right location for your balance. Therefore, observe the following for the installation site: •...
  • Page 14: Grundaufbau

    6.2.3 Basic structure • Place the balance on a horizontal and solid base (refer also to „6.2.1 Installation“) • Pull off the protection foil from the weighing plate if existing. 6.2.3.1 Assembly instructions for the use of the tripod (option) DE-BA-defsi-0640...
  • Page 15: Mains Connection

    Before connecting or disconnecting of additional devices (printer, PC) to the data interface, always disconnect the balance from the power supply. With your balance, only use accessories and peripheral devices by KERN, as they are ideally tuned to your balance.
  • Page 16: Initial Commissioning

    6.6 Initial Commissioning In order to obtain exact results with the electronic balances, your balance must have reached the operating temperature (see warming up time chap. 1). During this warming up time the balance must be connected to the power supply (mains, accumulator or battery).
  • Page 17: Operation

    7 Operation 7.1 Overview of display 7.2 Weighing Switch on the balance using the The balance shows for approx. 3 seconds „88888“ in the display and then goes to „0“. Now it is ready for operation. Important: Should the display flash or not be on „0“, press the key.
  • Page 18: Taring

    Taring Switch-on the balance using the key and wait for the „0“ display. Put the tare vessel on the weighing plate and press the key. The balance display goes to „0“. The weight of the container is now internally saved. If after finishing the weighing process the key, is pressed again, „0“...
  • Page 19: Parts Counting

    7.6 Parts counting Switch-on the balance using the key and wait for the „0“ display. Press key shortly. Appears the reference unit number 5. By pressing the key several times, more reference quantities 10, 25 and 50 can be called up. Place as many pieces to count on the weighing plate as the set reference quantity requires.
  • Page 20: Percent Weighings

    7.8 Percent weighings Display symbol: Percent weighing allows to display weight in percent, in relation to a reference weight. Switch-on the balance using the key and wait for the „0“ display. Press the key several times shortly. The reference quantities of the counting function are passed through, after that „100%“...
  • Page 21: Weighing Units (Unit)

    7.9 Weighing units (Unit) Switch-on the balance using the key and wait for the „0“ display. Press the key and keep it pressed until „UNIT“ appears on the display. Press shortly, the selected unit appears in the display. Use the key to select between the different units (see table).
  • Page 22 The different weighing models have integrated different foreign weighing units. Details can be seen in this table: Model Units Gram Kilogram Pound Ounce Troy ounce Tael Hongkong Tael Taiwan Pennyweight Momme Tola Freely selectable Factor Model Units Gram Kilogram Pound Ounce Troy ounce Tael Hongkong...
  • Page 23: Display Background Illumination

    7.10 Display background illumination In the menu the functions of the background illumination can be switched on or off. Proceed as follows: Switch-on the balance using the key and wait for the „0“ display. Press the key and keep it pressed until „UNIT“ appears on the display. Press the key seven times, in the display appears „bl“.
  • Page 24: Animal Weighing Function

    7.11 Animal weighing function The balance has an integrated animal weighing function (mean value calculation). With this function it is possible to weigh domestic or small animals exactly, although they do not stand quiet on the weighing plate. Note: If they move too much, an exact weighing will not be possible. In the menu the animal weighing function can be switched on or off.
  • Page 25: Settings

    8 Settings 8.1 Call-up menu structure Switch-on the balance using the key and wait for the „0“ display. To enter into the menu structure keep the key pressed approx. 3 sec. until „UNIT“ appears. By pressing the key the different menu items are called up. Use the key to select a menu item.
  • Page 26: Leave Menu Structure

    8.2 Leave menu structure Everywhere in the menu it is possible to leave the menu structure and thereby save or reject the changes made. After pressing the key „Exit“ is displayed. A: Use the (YES) key, to confirm. After that „store“ is displayed. If it shall be saved, press the key repeatedly.
  • Page 27: Selection Of The Adjustment Weight

    8.4 Selection of the adjustment weight In the model series KERN DE, the adjustment weight can be selected from three pre- set nominal values (approx.1/3; 2/3; max) (refer also to table 1 below, factory setting with grey background). In order to achieve high-quality weighing results in the sense of the measuring technology, it is recommended to select the nominal value as high as possible.
  • Page 28: Interface Rs232C

    8.5 Interface RS232C Data output via interface RS 232 C General Information The previous condition for the data transfer between balance and a peripheral device (e.g. printer, PC ...) is that the appliances are set to the same interface parameters (e.g.
  • Page 29: Selection Printed Edition

    8.6 Selection printed edition Use this function to select which data are sent via the RS232C interface. To achieve this, follow the sequence of operations below: (is not valid for the data transfer mode BAPr ) Switch-on the balance using the key and wait for the „0“...
  • Page 30: Reset To Factory Setting

    8.7 Reset to factory setting With this function the manual changes of the menu settings are reset to factory setting. Switch-on balance using key and wait for „0“ display. Press the key and keep it pressed until „UNIT“ appears on the display. Press the key nine times, in the display appears „rst“.
  • Page 31: Data Output Rs 232 C

    Baud rate selectable at 1200, 2400, 4800 and 9600 Baud Miniature plug-in necessary (9 pole D-Sub) For operation with interface faultless operation is only ensured with the correct KERN – interface cable (max. 2m) 9.2 Pin allocation of the balance output socket (front view) Pin 2:...
  • Page 32: Au Pc

    9.3.3 AU PC The weighing values are sent automatically and continuously, no matter if the value is stable or unstable. e. Format for stable values for weight/quantity/percentage 10 11 12 13 14 15 16 17 18 f. Format in case of fault g.
  • Page 33: Output On Bar Code Printer

    The printer format is stored in the printer, i.e. in case of a failure the printer cannot be changed with a new one from factory, previously it is necessary that KERN installs the respective software. The Zebra printer and the balance must be connected to the delivered interface cable when they are switched off.
  • Page 34: Service, Maintenance, Disposal

    Spilled weighing goods must be removed immediately. 10.2 Service, maintenance The appliance may only be opened by trained service technicians who are authorized by KERN. Before opening, disconnect from power supply. 10.3 Disposal Disposal of packaging and appliance must be carried out by operator according to valid national or regional law of the location where the appliance is used.
  • Page 35: Instant Help

    11 Instant help In case of an error in the program process, briefly turn off the balance and disconnect from power supply. The weighing process must then be restarted from the beginning. Help: Fault Possible cause • The balance is not switched on. The displayed weight does not glow.

Table of Contents