Sign In
Upload
Download
Table of Contents
Contents
Add to my manuals
Delete from my manuals
Share
URL of this page:
HTML Link:
Bookmark this page
Add
Manual will be automatically added to "My Manuals"
Print this page
×
Bookmark added
×
Added to my manuals
Manuals
Brands
Nokia Manuals
Cell Phone
RM-632
Service manual
Nokia RM-632 Service Manual
Hide thumbs
1
2
3
4
5
6
7
8
9
10
11
12
13
14
15
16
17
18
19
20
21
22
23
24
25
26
27
28
29
30
31
32
33
34
35
36
37
38
39
40
41
42
43
44
45
46
47
48
49
50
51
52
53
54
55
56
57
58
59
60
61
62
63
64
65
66
67
68
69
70
71
72
73
74
75
76
77
78
79
80
81
82
83
84
85
86
87
88
89
90
91
92
93
94
95
96
97
98
99
100
101
102
103
104
105
106
107
108
109
110
111
112
113
114
115
116
117
118
119
120
121
122
123
124
125
126
127
128
129
130
131
132
133
134
135
136
137
138
139
140
141
142
143
144
145
146
147
148
149
150
151
152
153
154
155
156
157
158
159
160
161
162
163
164
165
166
167
168
169
170
171
172
173
174
175
176
177
178
179
180
181
182
183
184
185
186
187
188
page
of
188
Go
/
188
Contents
Table of Contents
Troubleshooting
Bookmarks
Table of Contents
Table of Contents
Warnings and Cautions
Battery Information
Product Selection
Phone Features
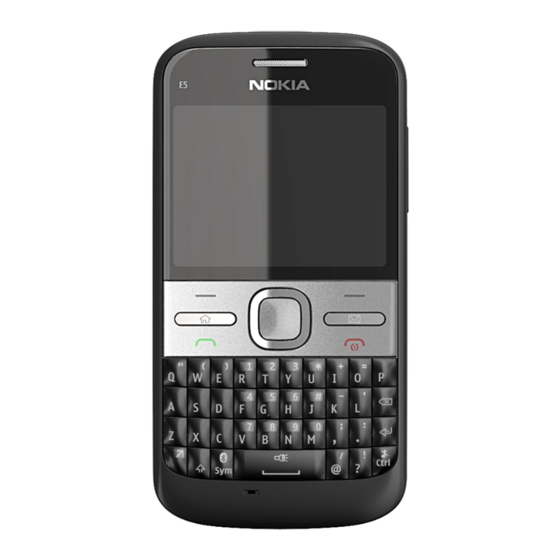
Figure 1 RM-632 (Nokia E5-00) Product Picture
Hardware Features
Software and User Interface Features
Accessories
Sales Package Contents
Technical Specifications
General Specifications
Table 1 Battery and Chargers
Table 2 Car Accessories
Table 3 Headsets
Main RF Characteristics for GSM850/900/1800/1900 and WCDMA Band I, II and VIII Phones
Battery Endurance
Environmental Conditions
Service Devices/Service Concepts
Table 4 Cables
Table of Contents
Rm-632; Rm-634; Rm
Service Devices
Product Specific Devices
General Devices
Cu-4
Fps-21
Fls-5
Pk-1
Sb-7
Cables
Ca-31D
Ca-58Rs
Ca-89Ds
Dau-9S
Service Concepts
POS (Point of Sale) Flash Concept
Xrs-6
Flash Concept with FPS-21
Flash Concept with FPS-21
Module Jig Service Concept
Service Concept for RF Testing and RF/BB Tuning
Bluetooth Testing Concept with
WLAN Functionality Testing Concept with
Issue 3 COMPANY CONFIDENTIAL Page
Table of Contents
Baseband Self Tests in Phoenix
Power and Charging Troubleshooting
Dead or Jammed Device Troubleshooting
Power Key Troubleshooting
General Voltage Checking Troubleshooting
General Power Checking
Charging Troubleshooting
USB Charging Troubleshooting
Battery Current Measuring Fault Troubleshooting
Clocking Troubleshooting
Interface Troubleshooting
Flash Programming Fault Troubleshooting
SIM Card Troubleshooting
Microsd Card Troubleshooting
USB Troubleshooting
USB Data Interface Troubleshooting
USB Charging Troubleshooting
User Interface Troubleshooting
Keyboard Troubleshooting
Navi Key Leds Troubleshooting
Keymat Leds Troubleshooting
Display Module Troubleshooting
General Instructions for Display Troubleshooting
Display Fault Troubleshooting
Display Backlight Troubleshooting
Ambient Light Sensor (ALS)
ALS Troubleshooting
ALS Functionality Check
ALS Retuning
GPS Troubleshooting
GPS Settings for Phoenix
GPS Control
GPS Quick Test Window
GPS Antenna
GPS Failure Troubleshooting
GPS Basic Checks Troubleshooting
Camera Module Troubleshooting
Introduction to Camera Troubleshooting
Camera Troubleshooting
Taking and Evaluating Test Pictures
Camera Troubleshooting
Camera Baseband Troubleshooting
Camera no Recognizable Viewfinder Image Troubleshooting
Camera Bad Image Quality Troubleshooting
Camera Flash Troubleshooting
Audio Troubleshooting
Audio Troubleshooting Test Instructions
Test Procedure
Internal Earpiece Troubleshooting
Internal Microphone Troubleshooting
Internal Handsfree (IHF) Troubleshooting
Acoustics Troubleshooting
Introduction to Acoustics Troubleshooting
Earpiece Troubleshooting
IHF Troubleshooting
Microphone Troubleshooting
Vibra Troubleshooting
Bluetooth and FM Radio Troubleshooting
Bluetooth Troubleshooting
FM Radio Troubleshooting
WLAN Troubleshooting
WLAN Functionality Test Using SB-7 and Phoenix
WLAN Layout and Test Points
WLAN Settings for Phoenix
WLAN Functional Tests
WLAN Failure Troubleshooting
Baseband Manual Tuning Guide
Certificate Restoring
Product Code Change
Energy Management Calibration
Table of Contents
General RF Troubleshooting
Introduction to RF Troubleshooting
RF Key Components
Auto Tuning
Introduction to Auto Tuning
Auto Tuning Procedure
Self Test Troubleshooting
Phoenix Self Test Troubleshooting
Receiver Troubleshooting
Introduction to Receiver (RX) Troubleshooting
GSM RX Chain Activation for Manual Measurements/Gsm RSSI Measurement
GSM Receiver Troubleshooting Flowchart
WCDMA RX Chain Activation for Manual Measurement
WCDMA RSSI Measurement
WCDMA Receiver Troubleshooting Flowchart
Transmitter Troubleshooting
Introduction to Transmitter (TX) Troubleshooting
GSM Transmitter Troubleshooting
GSM Transmitter Troubleshooting Flowchart
WCDMA Transmitter Troubleshooting
WCDMA Transmitter Troubleshooting Flowchart
Troubleshooting with RF-Shield Removed
Introduction
Voltage Checking
VCTCXO Troubleshooting
RF Component Reference
Rf Block Diagram
Antenna
Antenna Overview
Main Antenna Functionality
Table of Contents
Introduction
Phone Description
Key Components
System Module Block Diagram
Energy Management
Battery and Charging
Normal and Extreme Voltages
Power Key and System Power-Up
Modes of Operation
Clocking Scheme
Power Distibution
Microsd Card Interface
SIM Interface
Usb
USB Interface
Microusb Connector
User Interface
Display Interface
Keyboard Interface
Ambient Light Sensor (ALS) Interface
GPS Interface
Audio Interface
AV Connector
Bluetooth Interface
FM Radio Interface
RF Description
Receiver (RX)
Transmitter (TX)
General Information/Rf Troubleshooting
General Information
RM-634 Product Data
RF Troubleshooting
Differences between RM-632 and RM-634
Receiver Troubleshooting
WCDMA RX Chain Activation for Manual Measurement
WCDMA RSSI Measurement
WCDMA Receiver Troubleshooting Flowchart
Transmitter Troubleshooting
WCDMA Transmitter Troubleshooting
WCDMA Transmitter Troubleshooting Flowchart
Sales Package
Advertisement
Quick Links
1
Figure 1 Rm-632 (Nokia E5-00) Product Picture
Download this manual
Nokia Customer Care
Service Manual
RM-632; RM-634; RM-699 (Nokia E5-00; L3&4)
Part No: (Issue 3)
COMPANY CONFIDENTIAL
Copyright © 2010 Nokia. All rights reserved.
Table of
Contents
Previous
Page
Next
Page
1
2
3
4
5
Advertisement
Chapters
Table of Contents
15
Service Devices/Service Concepts
25
Table of Contents
45
Table of Contents
115
Table of Contents
143
General Information/Rf Troubleshooting
163
Table of Contents
Troubleshooting
Power and charging troubleshooting
49
Power key troubleshooting
51
General voltage checking troubleshooting
52
Charging troubleshooting
54
USB charging troubleshooting
55
Battery current measuring fault troubleshooting
56
Clocking troubleshooting
57
Interface troubleshooting
58
SIM card troubleshooting
61
MicroSD card troubleshooting
63
USB troubleshooting
64
USB charging troubleshooting
66
User interface troubleshooting
67
Navi key LEDs troubleshooting
68
Keymat LEDs troubleshooting
69
Display fault troubleshooting
71
Display backlight troubleshooting
72
Ambient light sensor (ALS)
73
GPS troubleshooting
76
GPS failure troubleshooting
78
GPS basic checks troubleshooting
79
Camera module troubleshooting
80
Camera troubleshooting
81
Camera baseband troubleshooting
82
Camera no recognizable viewfinder image troubleshooting
83
Camera bad image quality troubleshooting
84
Camera flash troubleshooting
85
Audio troubleshooting
86
Internal earpiece troubleshooting
88
Internal microphone troubleshooting
89
Internal handsfree (IHF) troubleshooting
90
Earpiece troubleshooting
91
IHF troubleshooting
92
Microphone troubleshooting
93
Vibra troubleshooting
94
Bluetooth and FM radio troubleshooting
95
FM radio troubleshooting
96
WLAN troubleshooting
97
WLAN failure troubleshooting
103
General RF troubleshooting
117
Auto tuning procedure
119
Receiver troubleshooting
121
GSM receiver troubleshooting flowchart
122
WCDMA receiver troubleshooting flowchart
125
Transmitter troubleshooting
126
GSM transmitter troubleshooting flowchart
130
WCDMA transmitter troubleshooting
131
WCDMA transmitter troubleshooting flowchart
134
Troubleshooting with RF-shield removed
135
VCTCXO troubleshooting
137
RF troubleshooting
166
Receiver troubleshooting
167
WCDMA receiver troubleshooting flowchart
170
Transmitter troubleshooting
171
WCDMA transmitter troubleshooting flowchart
174
Need help?
Do you have a question about the RM-632 and is the answer not in the manual?
Ask a question
Questions and answers
Related Manuals for Nokia RM-632
Cell Phone Nokia MOBILE TERMINAL Service Manual
(262 pages)
Cell Phone Nokia E5-00 Manual Del Usuario
Nokia e5-00 user guide in latin america spanish (260 pages)
Cell Phone Nokia RM-596 Service Manual
(253 pages)
Cell Phone Nokia E5-00 User Manual
Nokia e5-00 user guide in us english (243 pages)
Cell Phone Nokia RM-333 Service Manual
(242 pages)
Cell Phone Nokia N96 Service Manual
(234 pages)
Cell Phone Nokia RM-484 Service Manual
(232 pages)
Cell Phone Nokia RM-235 Service Manual
(222 pages)
Cell Phone Nokia RM-313 Service Manual
(208 pages)
Cell Phone Nokia E5-00 User Manual
(204 pages)
Cell Phone Nokia E5 User Manual
Nokia e5: user guide (202 pages)
Handhelds Nokia RM-529 Service Manual
(170 pages)
Cell Phone Nokia RM-598 Service Manual
Mobile terminal (166 pages)
Cell Phone Nokia E5-00 Service Manual
Rm-632, rm-634, rm-699 (21 pages)
Nokia E5-00 Service Schematics
(9 pages)
Cell Phone Nokia E63 User Manual
(96 pages)
This manual is also suitable for:
Rm-634
L4
Rm-699
E5-00
L3
Table of Contents
Print
Rename the bookmark
Delete bookmark?
Delete from my manuals?
Login
Sign In
OR
Sign in with Facebook
Sign in with Google
Upload manual
Upload from disk
Upload from URL


Need help?
Do you have a question about the RM-632 and is the answer not in the manual?
Questions and answers