Table of Contents
Advertisement
Available languages
Available languages
Quick Links
Operation Manual
Bedienungsanleitung
Guide de mise en oeuvre
Manuale di istruzioni
Not responsible for errors.
Losi, a Division of Horizon Hobby, Inc.
The Rockstar trademark is property of its
respective owners and is used under license by Horizon Hobby, Inc.
Before operating this vehicle, please read all printed materials thoroughly.
Advertisement
Table of Contents

Subscribe to Our Youtube Channel
Related Manuals for Team Losi Mini Rockstar LOSB0209i


Summary of Contents for Team Losi Mini Rockstar LOSB0209i
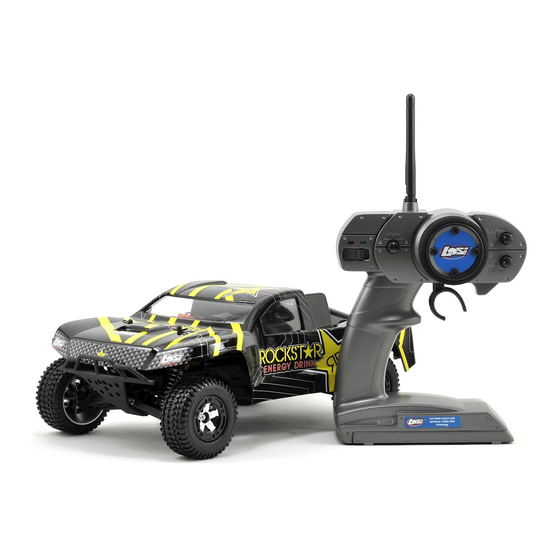
- Page 1 Operation Manual Bedienungsanleitung Guide de mise en oeuvre Manuale di istruzioni Not responsible for errors. Losi, a Division of Horizon Hobby, Inc. The Rockstar trademark is property of its respective owners and is used under license by Horizon Hobby, Inc. Before operating this vehicle, please read all printed materials thoroughly.
- Page 3 Operation Manual Not responsible for errors. Losi, a Division of Horizon Hobby, Inc. Before operating this vehicle, please read all printed materials thoroughly.
-
Page 4: Register Your Losi Product Online
Register your Losi Product Online Notice Register your 1/18 vehicle now and be the first to find out All instructions, warranties and other collateral about the latest option parts, product updates and more. Log documents are subject to change at the sole discretion on to www.LOSI.com and follow the product registration link of Horizon Hobby, Inc. -
Page 5: Getting Started
Charging Warnings and Precautions Getting Started Failure to exercise caution while using this product and StEp 1 comply with the following warnings could result in product malfunction, electrical issues, excessive heat, FIRE, and ultimately injury and property damage. • Read all safety precautions and literature prior to use of this product. - Page 6 StEp 4 StEp 7 Install the charged battery pack into the chassis as shown. Ensure the battery is laying flat on the chassis. Once the transmitter has been powered on, turn on your StEp 5 vehicle by sliding the switch on the ESC to the “ON” position. StEp 8 Left Right...
-
Page 7: Safety Precautions
Tools and Items You Will Find Handy AlwAyS: • Turn on the transmitter before the vehicle • Use caution when running your vehicle near people • Turn both the vehicle and transmitter “OFF” when done • Check the battery condition of the transmitter before running NEVER: •... -
Page 8: The Transmitter
Re-Binding the Transmitter thE tRANSMittER to the Receiver The Losi DSM radio system included in the Mini SCT operates on 2.4GHz. The communication between the transmitter and receiver starts in the few seconds after the transmitter and vehicle are both turned on. This is called the “binding process”. -
Page 9: Speed Control Programming
Resetting and adjusting the Battery Type Programming MSC-18BL ESC LED indicator After power is turned on, the LED will display the selected Battery Type for 2 seconds. FEAtuRES Red and Green LEDs are used to display selected Battery Type: Red LED Flashing = LiPo is selected Green LED Flashing = NiMH is selected To change from one battery type to another (colors described above), press the setup button during the first 2 seconds... -
Page 10: Chassis Tuning
Warning This model may only be powered by the stock 6-cell 7.2- volt NiMH battery pack (LOSB1212), a 2-cell 7.4-volt LiPo battery pack (LOSB9826) or 3-cell 11.1 volt LiPo battery pack (LOSB9827). Please consult the Motor/Battery Chart below for suggested motor/battery combos. The use of higher voltage battery packs will cause ESC damage and void any warranty. -
Page 11: Ride Height
Toe-In More Rate This is the relationship of the left and right side tire to one another. For sharper or additional steering, try turning the knob clockwise (to the right). Less Toe-In More Toe-In Camber Camber is the angle of the tires to the racing surface when Ideally, you want the front of the tires to be pointed inward viewed from the front or rear of the truck. -
Page 12: Setting The Gear Mesh
Rebuilding the Differential Reassembly The gears in the differential will wear over time. The same Replace the idler gear and shaft into the center of the same is true for the outdrives, driveshafts, and rear axles. We right side of the gearbox. Replace any shims removed from suggest using a small rag or paper towel to lay out the parts the right bevel gear and slide it through the lower bearing. -
Page 13: Warranty Period
Steering Servo Installation/Removal (c) Purchaser Remedy- Horizon’s sole obligation hereunder shall be that Horizon will, at its option, (i) repair or (ii) replace, Unplug the servo lead from the receiver. Remove the four any Product determined by Horizon to be defective. In small screws located on the bottom of the chassis that the event of a defect, these are the Purchaser’s exclusive secure the servo to the chassis. -
Page 14: Inspection Or Repairs
iNSpEctiON OR REpAiRS uNitEd StAtES If this Product needs to be inspected or repaired, please (Electronics and engines) use the Horizon Online Repair Request submission process Horizon Service Center found on our website or call Horizon to obtain a Return 4105 Fieldstone Rd Merchandise Authorization (RMA) number. -
Page 15: Compliance Information For The European Union
Compliance Information for the dEclARAtiON OF cONFORMity European Union (in accordance with ISO/IEC 17050-1) No. HH2010081902 dEclARAtiON OF cONFORMity (in accordance with ISO/IEC 17050-1) Product(s): 1/16 Mini Rockstar SCT BND No. HH2010081901 Item Number(s): LOSB0209BDi Product(s): 1/16 Mini Rockstar SCT RTR Equipment class: Item Number(s): LOSB0209i... - Page 16 Rebuilding/Refilling the Shocks Step 5 Step 1 If you plan on completely After removing the shock, changing the shock fluid push up on the lower spring (suggested), dump out the cup and remove it from the old fluid from the shock body. shaft.
- Page 17 VEHICLE TROUBLESHOOTING GUIDE Symptom Possible Cause(s) Possible Solution(s) Battery not charged or plugged in Charge battery/plug in Doesn’t operate Receiver switch not “On” Turn on receiver switch Transmitter not “On” or low battery Turn on/replace batteries Pinion not meshing with spur gear Adjust pinion/spur mesh Motor runs but rear Pinion spinning on motor shaft...
-
Page 18: Replacement Parts
Replacement Parts LOSB0805 Losi DSM Transmitter LOSB1212 7.2V 1100mAh NiMH Battery LOSB0813 MS20DSL Servo with Long Lead with EC2 Connector LOSB1009 Main Chassis LOSB1260 Pinion Gear Set (9T–12T) LOSB1018 Front Bulkhead, Kickplate & Brace LOSB1291 Front Shock Springs (pr) LOSB1020 F/R Pivot Block Set LOSB1292 Rear Shock Springs (pr) - Page 19 19 - EN...
- Page 20 Bedienungsanleitung Keine Haftung für Fehler Losi ist eine Division von Horizon Hobby Inc. Das Rockstar Warenzeichen ist Eigentum ihrer Besitzer und wird von Horizon Hobby unter Lizenz verwendet. Bitte lesen Sie vor der Inbetriebnahme alle Dokumente und Anleitungen sorgfältig durch...
- Page 21 Einleitung Hinweis Wir möchten uns sehr herzlich bedanken, dass Sie ich für den Mini SCT von LOSI entschieden haben. Diese Anleitung Alle Anweisungen, Garantien und dazugehörigen Dokumente enthält die Grundinformationen die Sie für den störungsfreie können ohne Ankündigung von Horizon Hobby geändert Inbetriebnahme benötigen.
-
Page 22: Zum Starten
Sicherheitshinweise und Warnung Zum Starten zu dem Laden von Akkus SchRitt 1 Falscher, unaufmerksamer oder nicht sachgemäßer Umgang mit dem Produkt kann zu Fehlfunktionen, Kurzschlüssen, großer Hitzeentwicklung, Feuer Verletzungen mit Todesfolge und Sachbeschädigung führen. • Bitte lesen Sie aufmerksam alle Anleitungen und Sicherheitshinweise vor Benutzung dieses Produktes durch. - Page 23 SchRitt 4 SchRitt 7 Setzen Sie den Akku in das Chassis wie abgebildet ein. Vergewissern Sie sich, dass der Akku flach im Chassis liegt. Haben Sie den Sender eingeschaltet, schalten Sie das SchRitt 5 Fahrzeug ein in dem Sie den Schalter am Regler auf die “ON”...
-
Page 24: Der Empfänger
Nützliche Hilfsmittel und Werkzeuge iMMER: • Schalten Sie immer den Sender vor dem Fahrzeug ein. • Seien Sie immer aufmerksam wenn Sie das Fahrzeug in der Nähe von Zuschauern fahren. • Schalten Sie immer das Fahrzeug und den Sender nach dem Fahren aus. -
Page 25: Der Sender
Erneutes Binden von Sender dER SENdER und Empfänger Das mit dem Mini SCT gelieferte Losi DSM RC System arbeitet auf dem 2.4 Ghz Band. Die Funkverbindung von Sender und Empfänger startet wenige Sekunden nach dem Sender und Empfänger eingeschaltet wurden. Diese Kommunikation wird als Binden bezeichnet. - Page 26 Einstellen und Reseten Programmierung des Akkutyps des MSC-18BL Reglers LED Indikator Nachdem das >Fahrzeug eingeschaltet wurde zeigt der Regler mit den LED für 2 Sekunden den gewähltern Akkutyp an . EiGENSchAFtEN Rote LED blinkt = LiPo ist ausgewählt Grüne LED blinkt = NiMh ist ausgewählt Um den Akkutyp zu wechseln drücken Sie bitte den Setup Button während der ersten 2 Sekunden nachdem der Regler eingeschaltet wurde.
- Page 27 Warnung Dieses Modell ist für den Antrieb mit einem 6 Zellen 7,2 Volt NiMh Akku Pack (LOSB1212) vorgesehen oder einen 2S 7,4 Volt LiPo Akku Pack (LOSB9826) oder einem 3S 11,1 Volt LiPo Akku Pack (LOSB9827) Bitte sehen Sie in der Motor und Akku Liste nach für möglich Kombinationen.
- Page 28 Vorspur Größerer Steuerausschlag Die Vorspur ist das Verhältnis des linken und rechten Rad zueinander. Für schärferes Einlenken drehen Sie bitte den Knopf nach rechts. Weniger Vorspur Mehr Vorspur Sturz Der Sturz beschreibt den Winkel in dem die Räder auf den Idealerweise stehen beide Räder von oben betrachtet mit der Boden stehen von hinten oder vorne betrachtet.
- Page 29 Demontage des Differentials Zusammenbau Die Zahnräder des Differential verschleissen mit der Zeit. Setzen Sie den neuen Kegelradkäfig und den Schaft in das Gleiches gilt auch für die Achsen und Antriebswellen. Wir Getriebegehäuse. Setzen Sie alle Unterlegscheiben wieder empfehlen bei der Montage die Teile auf ein Tuch zu legen. an ihre vorige Position.
-
Page 30: Fragen, Hilfe Und Reparaturen
Ein und Ausbau des Lenkservos Unfälle, Betrieb, Service oder Reparaturversuche, die nicht von Horizon verursacht wurden, aus. Rücksendungen Ziehen Sie den Servostecker aus dem Empfänger. Lösen durch den Käufer direkt an Horizon oder eine seiner Sie die vier Schrauben die das Servo mit dem Chassis Landesvertretungen bedürfen der schriftlichen Genehmigung verbinden. -
Page 31: Garantie Und Reparaturen
eingesendeten Einzelkomponenten. Weiterhin benötigen • Betreiben Sie Ihr Modell auf einem offenen Platz, weit ab wir die vollständige Adresse, eine Telefonnummer für von Verkehr, Menschen und Fahrzeugen. Rückfragen, sowie eine Email Adresse. • Betreiben Sie Ihr Fahrzeug nicht auf einer öffentlichen Straße. - Page 32 KONFORMitätSERKläRuNG GEMäSS GESEtz üBER FuNKANlAGEN uNd tElEKOMuNiKAtiONSEiNRichtuNGEN (FtEG) uNd dER DECLARATION OF CONFORMITY IN ACCORDANCE WITH THE RADIO AND TELECOMMUNICATIONS TERMINAL Konformitätserklärung gemäß Gesetz über Funkanlagen und Telekomunikationseinrichtungen (FTEG) und der EQUIPMENT ACT (FETG) AND DIRECTIVE 1999/5/EG (R&TTE) Richtlinie 1999/5/EG (R&TTE) Declaration of conformity in accordance with the Radio and Telecommunications Terminal Equipment Act (FETG) and directive 1999/5/EG Horizon Hobby GmbH (R&TTE)
-
Page 33: Entsorgung In Der Europäischen Union
KONFORMitätSERKläRuNG GEMäSS GESEtz üBER FuNKANlAGEN uNd tElEKOMuNiKAtiONSEiNRichtuNGEN (FtEG) uNd dER DECLARATION OF CONFORMITY IN ACCORDANCE WITH THE RADIO AND TELECOMMUNICATIONS TERMINAL EQUIPMENT ACT (FETG) AND DIRECTIVE 1999/5/EG (R&TTE) Horizon Hobby GmbH Hamburger Straße 10 Konformitätserklärung gemäß Gesetz über Funkanlagen und Telekomunikationseinrichtungen (FTEG) und der D-25337 Elmshorn Richtlinie 1999/5/EG (R&TTE) erklärt das Produkt:... - Page 34 Montage u. Auffüllen der Stoßdämpfer Schritt 5 Schritt 1 Sollten Sie das Dämpferöl Drücken Sie bei dem komplett wechseln entsorgen ausgebauten Stoßdämpfer Sie das alte und schütten den Federhalter herunter vorsichtig neues Öl ein. und nehmen in dann vom Stoßdämpferschaft. Nehmen Sie auch die Feder vom Schaft.
-
Page 35: Hilfestellung Zur Problemlösung
HILFESTELLUNG ZUR PROBLEMLÖSUNG Problem Mögliche Ursache Mögliche Lösung Akku nicht geladen oder angeschlossen Laden Sie den Akku Empfänger nicht eingeschaltet Schalten Sie den Empfänger ein Fahrzeug funktioniert nicht Sender nicht eingeschaltet oder Batterien leer Schalten Sie den Sender ein / Ersetzen Sie die Senderbatterien Zahnflankenspiel einstellen Ritzel hat keinen Kontakt zum Zahnrad... -
Page 36: Optionale Teile
Ersatzteile LOSB0805 Losi DSM Sender LOSB1212 7.2V 1100mAh NiMH Akku mit EC LOSB0813 MS20DSL Servo mit langen Kabel Anschluß LOSB1009 Chassis LOSB1260 Ritzel Set (9Z–12Z) LOSB1018 Front Platte, Unterfahrschutz und Halter LOSB1291 Dämpferfedern vorne (pr) LOSB1020 F/R V/H Kugel Set LOSB1292 Dämpferfedern hinten (pr) LOSB1024... - Page 37 37 - DE...
- Page 38 VEhiculE dE cOuRSE 4wd RtR cOuRt A l’EchEllE 1/16 Guide de mise en oeuvre Nous n'assumons aucune responsabilité pour les erreurs. Losi, une entreprise Horizon Hobby, Inc. La marque commerciale Rockstar est une marque commerciale et enregistrée appartenant à ses propriétaires respectifs et utilisée sous licence par Horizon Hobby, Inc. Avant de faire fonctionner ce véhicule, veuillez lire attentivement tous les documents papier.
- Page 39 Enregistrez votre produit Losi en ligne Remarque Enregistrez votre véhicule 1/18 maintenant et soyez le premier Toutes les instructions, garanties et autres documents de à en savoir plus à propos des dernières pièces optionnelles, garantie sont sujets à la seule discrétion de Horizon Hobby, des mises à...
-
Page 40: Pour Démarrer
Directives et avertissements liés à la charge Pour démarrer L'absence de précautions durant l'utilisation de ce produit et EtApE 1 le non-respect des conditions et directives suivantes peuvent provoquer un dysfonctionnement du produit, des problèmes électriques, une chaleur excessive, un incendie, des dégâts matériels ou des blessures. - Page 41 EtApE 4 EtApE 7 Montez le pack de batteries chargé dans le châssis comme l'illustre la photo. Assurez-vous que la batterie se trouve bien à plat sur le châssis. Une fois l'émetteur allumé, mettez en route votre véhicule en faisant glisser en position « ON » l'interrupteur présent sur le EtApE 5 CEV (ESC).
-
Page 42: Précautions Liées À La Sécurité
Outils et objets pouvant être pratiques tOuJOuRS: • Allumer l'émetteur d'abord, puis le récepteur. • Faire attention lors de l'utilisation de votre véhicule à proximité de personnes • Mettez votre véhicule et l'émetteur sur « OFF » lorsque vous avez fini de courir. •... - Page 43 Réaffectation de l'émetteur au récepteur l'éMEttEuR Le système radio DSM de Losi inclus avec le Mini SCT fonctionne à 2, 4 GHz. La communication entre l'émetteur et le récepteur démarre quelques secondes après la mise sous tension et de l'émetteur et du véhicule. C'est ce que l'on appelle le «...
-
Page 44: Programmation Du Variateur De Vitesse
Réinitialisation et réglage du CEV (ES) Pour passer d'un type de batterie à un autre (couleurs décrites ci-dessus), appuyez sur le bouton de réglage MSC-18BL au cours des 2 premières secondes suivant la mise en fonction du CEV (ESC). La tension de coupure sera réglée cARActéRiStiQuES automatiquement en fonction du type de batterie: Pour une batterie LiPo: Le CEV (ESC) détectera... - Page 45 Avertissement Ce modèle doit uniquement être alimenté à l'aide du pack de batteries NiMH 7,2 volts à 6 éléments standard (LOSB1212), du pack de batteries LiPo 7,4 volts à 2 éléments (LOSB9826) ou du pack de batteries LiPo 11,1 volts à 3 éléments (LOSB9827).
- Page 46 Pincement positif Plus de débattement Il s'agit là de la relation des pneus gauche et droite l'un par rapport à l'autre. Pour un guidage en direction plus franc ou pour avoir un peu plus de débattement en direction, faites des essais en Plus de pincement Moins de pincement tournant le bouton dans le sens horaire (vers la droite).
- Page 47 Remontage du différentiel 10. Extraire du réducteur le pignon “fou” monté au centre. Démonter l'arbre et repousser les roulements de part et Avec le temps, les engrenages du différentiel s'usent. Ceci d'autre. Monter ces roulements dans le nouvel engrenage. vaut également pour les cardans, les arbres de transmission Remontage et les axes arrières.
-
Page 48: Durée De La Garantie
Réglage de l'engrènement revendications en garantie seront acceptées sur fourniture d’une preuve d’achat valide uniquement. Horizon se réserve Les vis du moteur devraient être légèrement desserrées. le droit de modifier les dispositions de la présente garantie Faites glisser le moteur vers l'avant pour permettre au pignon sans avis préalable et révoque alors les dispositions de conique de s'engrener dans la couronne. -
Page 49: Questions, Assistance Et Réparations
la première mise en service. C’est uniquement ainsi qu’il sera possible d’éviter une manipulation erronée et des accidents entraînant des blessures et des dégâts. QuEStiONS, ASSiStANcE Et RépARAtiONS Votre revendeur spécialisé local et le point de vente ne peuvent effectuer une estimation d’éligibilité à l’application de la garantie sans avoir consulté... -
Page 50: Informations De Conformité Pour L'union Européenne
Informations de conformité pour l’Union Déclaration de conformité européenne (conformément à la norme ISO/IEC 17050-1) No. HH2010081902 Produit(s): 1/16 Mini Rockstar SCT BND Numéro d’article(s): LOSB0209BDi Catégorie d’équipement: Déclaration de conformité L’objet de la déclaration décrit ci-dessus est en conformité (conformément à... - Page 51 Etape 6 Etape 1 Tirez la tige de manière à de que le Après avoir déposé piston se trouve tout près de la l’amortisseur, appuyer sur la cartouche et remontez l’ensemble coupelle de ressort inférieure dans le corps d’amortisseur. Faites et démontez-la de la tige.
- Page 52 GUIDE DE DEPANNAGE DU VEHICULE Symptôme Cause(s) possible(s) Solution(s) possible(s) Batterie non chargée ou mal branchée Charger/brancher la batterie Récepteur pas sur « Marche » (ON) Mettre interrupteur du récepteur ou batterie faible Ne fonctionne pas sur marche (ON) Emetteur pas sur « Marche » (ON) Mettre en marche /remplacer les piles ou batterie faible Régler l'engrènement pignon/couronne...
-
Page 53: Pièces De Rechange
Pièces de rechange LOSB0805 Emetteur DSM Losi LOSB1100 Jeu de roulement à billes AV/AR (8) LOSB0813 Servo MS20DSL à raccord long LOSB1212 Batterie NiMH 7,2 V 1100 mAh avec LOSB1009 Châssis principal connecteur EC2 LOSB1018 Cloison AV, plaque pare-chocs & renfort LOSB1260 Jeu de Pignon conique (9T-12T) LOSB1020... - Page 54 54 - FR...
-
Page 55: Manuale Di Istruzioni
cAMiON iN ScAlA 1/16 ElEttRicO 4wd ShORt cOuRSE Manuale di istruzioni Non responsabile per refusi di stampa. Losi, una divisione di Horizon Hobby, Inc. Il marchio Rockstar appartiene al rispettivo proprietario ed è utilizzato con licenza di concessione di Horizon Hobby, Inc. Prima di azionare il veicolo si prega di leggere attentamente tutto il materiale cartaceo fornito. - Page 56 Registrate il vostro prodotto Losi online Avviso Registrate il vostro veicolo 1/18 adesso e sarete i primi Tutte le istruzioni, garanzie e altri documenti allegati a scoprire le ultime novità sui componenti, sui prodotti e tanto sono soggetti a cambiamenti a totale discrezione di Horizon altro ancora.
- Page 57 Precauzioni e avvertenze Iniziare per la carica delle batterie FASE 1 Se non si utilizza questo prodotto con attenzione e non si osservano le seguenti avvertenze potrebbero verificarsi malfunzionamenti del prodotto, problemi elettrici, eccessivo sviluppo di calore, incendi e in definitiva lesioni e danni materiali. •...
- Page 58 FASE 4 FASE 7 Installare un pacco batteria ben carico nello chassis come mostrato. Assicurarsi che la batteria sia in posizione piana sullo chassis. Una volta che il trasmettitore è stato attivato, accendere il veicolo facendo scorrere l'interruttore sull'ESC nella FASE 5 posizione "On".
-
Page 59: Precauzioni Di Sicurezza
Utensili e accessori che potrebbero SEMpRE: • Accendere il trasmettitore prima del veicolo. essere utili • Stare attenti quando si guida il veicolo vicino alle persone • Spegnere sia il veicolo che il trasmettitore dopo aver terminato. • Controllare la condizione della batteria del trasmettitore prima di ogni corsa. - Page 60 Effettuare nuovamente il collegamento il tRASMEttitORE al ricevitore Il sistema radio Losi DSM incluso nel Mini SCT funziona con 2.4GHz. La comunicazione fra il trasmettitore e il ricevitore inizia in pochi secondi dopo l'accensione del trasmettitore e del veicolo. Ciò è chiamato "processo di collegamento". Il sistema radio Losi DSM non interferirà...
- Page 61 Resettare e impostare Programmare il tipo batteria MSC-18BL ESC Indicatore LED Dopo che l'alimentazione è accesa il LED visualizzerà il tipo di batteria selezionato per 2 secondi. cARAttERiStichE I Led rossi e versi sono usati per visualizzare il tipo di batteria selezionato: LED rosso lampeggiante = LiPo selezionata.
-
Page 62: Tasso Di Sterzata
Attenzione: Il modello può essere alimentato solo da un pacco batteria a 6 celle da 7.2 volt NiMH (LOSB1212) un pacco batteria a 2 celle da 7.4 volt LiPo (LOSB9826) o un pacco batteria a 3 celle da 11.1 volt LiPo (LOSB9827). Consultare la tabella motore/batteria in basso per le combinazioni suggerite di motori e di batterie. -
Page 63: Manutenzione
Convergenza Ampiezza maggiore Questa è una relazione la la parte sinistra e destra degli pneumatici. Per uno sterzo più pronto o per avere più sterzo, provare a girare la manopola in senso orario (a destra). Meno convergenza Più convergenza Camber Si riferisce all'angolo delle ruote rispetto alla superficie di teoricamente si desidera che i pneumatici anteriori siano corsa vista davanti o da dietro del veicolo. - Page 64 Rimontaggio del differenziale Rimontaggio Gli ingranaggi nel differenziale si usurano nel tempo. Ciò Riposizionare l'ingranaggio del minimo e l'albero al centro vale anche per i bicchierini, gli alberi e gli assi posteriori. Vi dello stesso lato destro del cambio. Riposizionare qualsiasi suggeriamo di usare un piccolo panno di stoffa o carta per rondella rimossa dalla ruota dentata destra e farla scorrere posizionare le minuterie in modo da facilitare il rimontaggio.
-
Page 65: Durata Della Garanzia
o movimento prima che il motore sia forzato a girare. In caso o l’idoneità del prodotto a particolari previsti contrario, tirare la parte superiore del motore leggermente dall’utente. è sola responsabilità dell’acquirente il indietro e ricontrollare. Se c'è troppo sporco tra gli ingranaggi, fatto di verificare se il prodotto è... -
Page 66: Manutenzione E Riparazione
dOMANdE, ASSiStENzA E RipARAziONi Il vostro negozio locale e/o luogo di acquisto non possono fornire garanzie di assistenza o riparazione senza previo colloquio con Horizon. questo vale anche per le riparazioni in garanzia. Quindi in tale casi bisogna interpellare un rivenditore, che si metterà... -
Page 67: Informazioni Sulla Conformità Per L'unione Europea
Informazioni sulla conformità per Dichiarazione di conformità l’Unione Europea (in conformità con ISO/IEC 17050-1) No. HH2010081902 Prodotto(i): 1/16 Mini Rockstar SCT BND Numero(i) articolo: LOSB0209BDi Classe dei dispositivi: Dichiarazione di conformità Gli oggetti presentati nella dichiarazione sopra citata sono (in conformità con ISO/IEC 17050-1) conformi ai requisiti delle specifi che elencate qui di seguito, seguendo le disposizioni della direttiva europea R&TTE No. - Page 68 Rigenerazione/riempimento ammortizzatori Fase 5 Se si decide di cambiare Fase 1 completamente il fluido dell’ammortizzatore (consigliato) Dopo aver rimosso bisogna far scaricare prima il l’ammortizzatore, spingere la fluido vecchio dall’ammortizzatore. coppa inferiore della molla Riempire il corpo e rimuoverla dall’albero. dell'ammortizzatore con del fluido Rimuovere la molla dal basso delle filettature...
- Page 69 GUIDA ALLA RISOLUZIONE DEI PROBLEMI DEL VEICOLO Sintomo Possibile(i) causa(e) Soluzioni(e) possibile(i) Batteria non carica o non inserita Caricare / collegare la batteria Interruttore del ricevitore non “On” Accendere l'interruttore del ricevitore. Non funziona Trasmettitore non “on” o batteria scarica Accendere / sostituire le batterie Il pignone non ingrana con la ruota dentata Impostare pignone / ingranaggio cilindrico...
-
Page 70: Pezzi Di Ricambio
Pezzi di ricambio LOSB0805 Losi DSM Trasmettitore LOSB1100 Set cuscinetto a sfera F/R (8) LOSB0813 MS20DSL Servo con cavo lungo LOSB1212 Pacco batteria 7.2V 1100mAh NiMH con LOSB1009 Chassis principale connettore EC2 LOSB1018 Paratia frontale, piastra e staffa LOSB1260 Set ingranaggi ruota conica (9T–12T) LOSB1020 F/R Set blocco perno: LOSB1291... - Page 71 71 - IT...
- Page 72 © 2010 Horizon Hobby, Inc. Printed 10/2010 29708.i Not responsible for typographical errors. 800-0440 Printed in China...
Need help?
Do you have a question about the Mini Rockstar LOSB0209i and is the answer not in the manual?
Questions and answers