
Related Manuals for Teac AG-D8000


Summary of Contents for Teac AG-D8000
- Page 1 9A09987400 AG - D8000 AV Digital Home Theater Receiver OWNER’S MANUAL Thank you for choosing TEAC. Read this manual carefully to get the best performance from this unit.
-
Page 2: Table Of Contents
Contents Before Use Before Use ........2 Read this before operation <... -
Page 3: Connection (Am Antenna)
Connection (FM antenna) Connection (AM antenna) CAUTION: AM Indoor Loop Antenna < Turn off the power of all the equipment before making The high-performance AM loop antenna provided with this connections. unit is sufficient for good reception in most areas. <... -
Page 4: Connection
Connection DVD, CD, etc. DVD, CD, etc. VIDEO DIGITAL DIGITAL AC outlet CENTER FRONT SURROUND SUBWOOFER VIDEO VIDEO 5.1CH AUDIO OUT DVD player or Decoder TV (Monitor) - Page 5 CAUTION: < Turn off the power of all the equipment before making connections. < Read instructions of each component you intend to use with this unit. < Be sure to insert each plug securely. To prevent hum and noise, do not bundle the connection cords with the power cord or speaker cables.
- Page 6 Connection Example: Connection to Audio Components CD player LINE OUT LINE LINE Cassette tape deck, MD deck, etc.
- Page 7 Example: Connection to Video Cassette Recorders VCR (VIDEO 2) LINE OUT VIDEO OUT LINE LINE VIDEO VIDEO VIDEO IN VCR (VIDEO 1) TV (Monitor)
-
Page 8: Speaker Connections
Speaker Connections FRONT FRONT SPEAKER SPEAKER CENTER SPEAKER REAR REAR SPEAKER SPEAKER SUBWOOFER Caution: Caution: To avoid damaging the speakers with a sudden high-level The metal portions of the two separate wires should not signal, be sure to switch the power off before connecting the touch or an electrical short can occur. -
Page 9: Positioning Of The Speakers
Positioning of the Speakers Remote Control Unit The provided Remote Control Unit allows the unit to be operated The positioning of speakers differs according to the size and from a distance. acoustics of the listening room. While actually listening to a When operating the remote control unit, point it towards the program source, try various speaker positions to determine remote sensor on the front panel of the unit. -
Page 10: Names Of Each Control
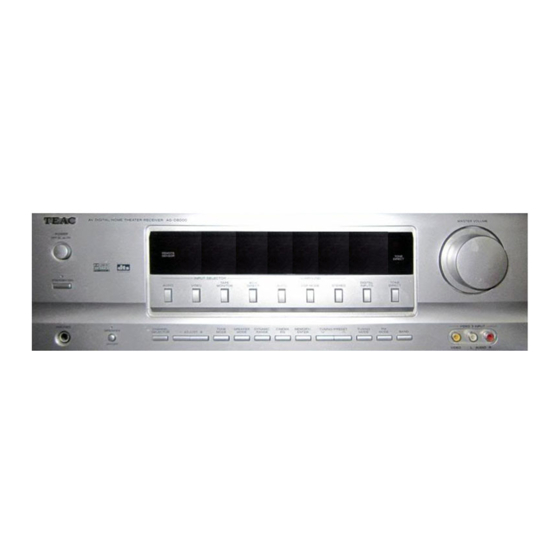
Names of Each Control Front Panel Remote Control Unit Front Panel Display displays current status. illuminates when the multi-channel sound is downmixed to stereo, or when an FM stereo broadcast is tuned. illuminates when a station is tuned. Illuminates when the tape monitor function is on. illuminates when preset tuning mode is selected. - Page 11 Front Panel and Remote MASTER VOLUME SPEAKER Turn this knob (or press the VOLUME Use this button to turn on or off the Control Unit buttons of the remote control unit) to speakers. POWER adjust the master volume. Press this switch to turn the unit on: Sound is output from the speakers.
-
Page 12: Speaker Configuration Speaker Setting
Speaker Configuration (Speaker Setting) It is important to perform speaker configuration prior to using Press the ADJUST buttons to change the Speaker Size the unit. setting. To enjoy multi-channel surround sound, such as 5.1, you need 5 speakers (Front Left, Center, Front Right, Surround Right, Surround Left) and a powered sub-woofer. -
Page 13: Delay Time
Speaker Configuration (Delay Time) Press the ADJUST buttons to change the Subwoofer If the speakers cannot be placed at the same distance from your listening position, adjust the delay time to improve the setting. surround effect. < The delay time works only when the surround mode is set to Dolby Digital, Dolby Pro Logic II or Dolby Pro Logic. -
Page 14: Test Tone
Speaker Configuration (Test Tone) Balancing relative volume between Adjust the volume of each speaker so that the test tone from each speakers sounds the same. speakers using Test Tone The test tone function is useful to adjust the relative volume between speakers. -
Page 15: Channel Selector
Speaker Configuration (Channel Selector) Balancing relative volume between Within 2 seconds, press the CHANNEL LEVEL buttons (or the ADJUST buttons of the main unit) to change the speakers during playback of DVD level. (During playback of DVD,) press the CHANNEL SELECTOR button. -
Page 16: Basic Operation 1
Basic Operation 1 Tape Monitor Function If you want to select the source connected to TAPE MONITOR jacks, press the TAPE MONITOR button to turn the tape monitor function on. “TAPE M” indicator lights. Press the TAPE MONITOR button again to cancel the tape monitor function. -
Page 17: Channel Direct Input
Speaker On/Off Cinema Equalizer Press the SPEAKER button to turn the speakers on or off. When ON is selected, the SPEAKER indicator lights. The Cinema Equalizer compensates for edgy or shrill movie sound tracks. Headphones When the CINEMA EQ button is pressed once, the current status (“C-EQ OFF”... -
Page 18: Tone Control
Basic Operation 2 Tone Direct Dimmer You can dim or turn off the front panel’s display by pressing the DIMMER button. < When the display is turned off, pressing any button will turn Press the TONE DIRECT button to turn on or off the tone the display on. -
Page 19: Recording A Source
Recording a Source Recording a Source Dubbing the audio and video signals separately Select a source to be recorded by pressing one of the INPUT SELECTOR buttons. While dubbing the video signal of VIDEO 2 or 3, you can replace the sound from VCR with the sound from an audio source such as CD. -
Page 20: Surround Mode
Surround Mode Each time the DSP MODE button is pressed, the surround < When 6CH DIRECT is selected, the DSP MODE and the AUTO mode changes. button do not work. If a digital device is connected to DIGITAL IN terminals, When Dolby Digital signals are input and IN-AUTO is selected, select desired decoding mode by pressing the AUTO the surround mode is set to DOLBY DIGITAL automatically. -
Page 21: Dolby Digital
DTS (DTS Digital Surround) Dolby Pro Logic During playback of a DVD disc recorded in DTS format, the Dolby Pro Logic is a matrix decoder that decodes the four surround mode is set to DTS automatically. channels of surround sound (front left, center, front right and surround) that have been encoded onto the stereo DTS Digital Surround delivers up to 5.1 channels with lower soundtracks of Dolby Surround encoded material such as VHS... -
Page 22: Stereo Mode
Stereo Mode Dynamic Range Compression In many listening situations, you may find loud passages objectionable. Adjusting this setting allows you to compress the sounds into a range that you may find more suitable for a particular listening situation. Dolby Digital satisfies these needs through the dynamic range controlling. -
Page 23: Dolby Pro Logic Ii Parameters
DOLBY PRO LOGIC II parameters You can adjust the parameters for DOLBY PRO LOGIC II MUSIC Within 5 seconds, press the ADJUST button to change and DOLBY PRO LOGIC II CUSTOM. the value. Select DOLBY PRO LOGIC II MUSIC or DOLBY PRO LOGIC II CUSTOM by pressing the DSP MODE button. -
Page 24: Tuner
Tuner Select the station you want to listen to (auto selection). < Make sure the antennas have been connected (see page 3). Select TUNER by pressing the AUDIO button (or the TUNER button of the remote control unit). Hold down the TUNING/PRESET button for more than 0.5 seconds. -
Page 25: Preset Tuning
Preset Tuning You can store up to 30 stations. How to select preset stations If “PRESET” indicator isn’t lit, press the TUNING MODE Manual Memory Presetting button to select the preset tuning mode. Tune in a station you want to listen to (see steps <... -
Page 26: Troubleshooting
Cannot listen to any station, or signal is too weak. moment to look through this chart and see if you can solve the e Make sure the antenna is properly connected. problem yourself before you call your dealer or a TEAC service e Tune in the station properly. center. -
Page 27: Specifications
Specifications Amplifier Section Output Power (Stereo, 0.7 % THD, 40 Hz to 20 kHz, 6 Ω)..... 100 W + 100 W Surround Output Power (0.7 % THD, 1 kHz, 6 Ω, only one channel driven). - Page 28 7733 Telegraph Road, Montebello, California 90640 Phone: (323) 726-0303 TEAC CANADA LTD. 5939 Wallace Street, Mississauga, Ontario L4Z 1Z8, Canada Phone: (905) 890-8008 TEAC MEXICO, S.A. De C.V Campesinos N°184, Colonia Granjas Esmeralda, Delegacion Iztapalapa, CP 09810, México DF Phone: (525) 581-5500 TEAC UK LIMITED 5 Marlin House, Croxley Business Park, Watford, Hertfordshire, WD18 8TE, U.K.
Need help?
Do you have a question about the AG-D8000 and is the answer not in the manual?
Questions and answers