Table of Contents
Advertisement
Advertisement
Table of Contents

Related Manuals for Novation TWITCH

Summary of Contents for Novation TWITCH
-
Page 1: User Guide
TWITCH User Guide FA0257-01... - Page 2 Disclaimer Novation has taken all possible steps to ensure that the information given here is both correct and complete. In no event can Novation accept any liability or responsibility for any loss or damage to the owner of the equipment, any third party, or any equipment which may result from use of this manual or the equipment which it describes.
-
Page 3: Important Safety Instructions
English IMPORTANT SAFETY INSTRUCTIONS Read these instructions. Keep these instructions. Heed all warnings. Follow all instructions. Clean only with dry cloth. Do not install near any heat sources such as radiators, heat registers, stoves, or other apparatus (including amplifiers) that produce heat. Do not defeat the safety purpose of the polarized or grounding-type plug. -
Page 4: Environmental Declaration
1. Do not modify this unit! This product, when installed as indicated in the instructions contained in this manual, meets FCC requirements. Modifications not expressly approved by Novation may void your authority, granted by the FCC, to use this product. 2. Important: This product satisfies FCC regulations when high quality shielded cables are used to connect with other equipment. -
Page 5: Copyright And Legal Notices
Health and Safety Code; Section 42475.2, Public Resources Code. COPYRIGHT AND LEGAL NOTICES Novation is a registered trade mark and TWITCH is a trade mark of Focusrite Audio Engineering Limited. ITCH is a trade mark of Serato Inc Limited Partnership. -
Page 6: Table Of Contents
TWITCH Connection ........ -
Page 7: Introduction
Serato which, among many other new features, can automatically beat-match tracks, freeing you to be creative with your DJ sets. TWITCH can also be used with other DJ software such as Native Instruments Traktor or Ableton Live, but please note that this manual is specific to its use with Serato ITCH. -
Page 8: Software Installation
1024 x 768 screen resolution • Available USB Port • Hard disk space for music OSX 10.4 is not supported by Novation TWITCH Windows XP Service Pack 2 or higher • 32 bit • Intel processor, 1.8 Core 2 duo •... - Page 9 Before installing, we recommend you download and install the latest ITCH version from http://www.serato.com/downloads. IMPORTANT: Do NOT connect your TWITCH to your PC before you are prompted to do so. The installer will prompt you to connect it at the appropriate time.
-
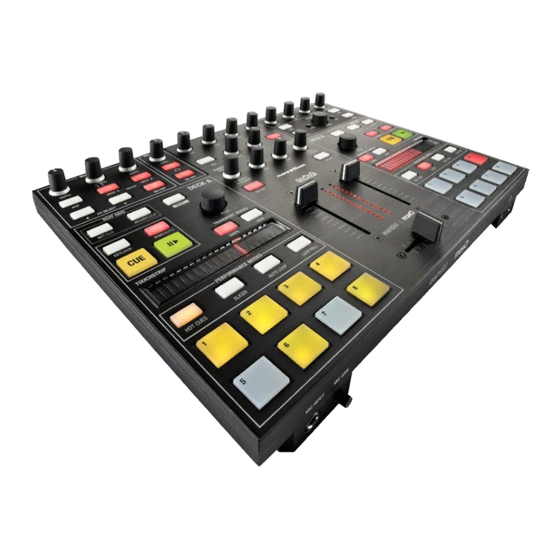
Page 10: Twitch Overview
English TWITCH Overview... - Page 11 Direct Monitoring switch (ON, OFF) – determines whether monitoring of the Mic and/ or Aux inputs is derived directly from within TWITCH (ON), i.e., exhibits zero latency; or is sourced via the computer (OFF) which results in latency (delay) being introduced.
- Page 12 MIC INPUT - ¼” (6.35 mm) 3-pole (TRS) electronically balanced jack socket for connecting a microphone for DJ, guest or announcement use. Always use a good quality dynamic microphone. Do not use a condenser (capacitor) microphone as TWITCH does not provide the phantom power this type of mic requires.
- Page 13 English Top Panel Browse SCROLL – rotary encoder used to navigate through libraries, track lists, crates and folders. Also has a “push” function, used in certain navigation actions. BACK – library navigation control. FWD - library navigation control. AREA – cycles through browsing modes; SHIFT+AREA provides a sort function. VIEW –...
-
Page 14: Mixer Controls
English Mixer Controls Two sets of mixer controls are provided (for Decks A and B); the following descriptions apply to either. Deck channel fader – the stereo fader adjusts the level of the deck’s audio sent to the master outputs. It can also function as FADER FX, see page 53. - Page 15 English Master MASTER HEADPHONE LEVEL – controls the level of the output at the front headphone sockets. MIX – the headphones may be used to monitor either the Cue system or the Master Output - or a mix of the two. The MIX control lets you adjust the mix; fully anticlockwise is Master only, fully clockwise is Cue only.
- Page 16 English Deck Controls Two sets of deck controls are provided (for Decks A and B); the following descriptions apply to either. PLAY/PAUSE B H – starts a loaded track playing; a second press pauses playback. The button is illuminated green when the track is playing, and flashes in pause.
- Page 17 See page 36. HOT CUES – TWITCH allows eight cue points to be stored “on the fly” by pressing the Performance pads, to which the playhead can then instantly be relocated. See page 44.
- Page 18 English Master FX ON/OFF – enables the Itch FX processor section. See page 50. FX SELECT I H – scroll through the available effects. DECK A – assigns the FX section to Deck A DECK B – assigns the FX section to Deck B.
-
Page 19: Twitch Connection
*When ending a session, reverse this operation by turning off the output devices first, then remove the USB connection and finally the auxiliary input sources. NOTE: Ensure you connect TWITCH directly to your computer’s USB port and not through a USB hub. -
Page 20: Getting Started
To start ITCH on Windows simply double click on the shortcut icon on your desktop, or browse your Start menu and click the ITCH.exe icon. NOTE: When ITCH launches it will automatically detect your TWITCH (if it is connected). Successful detection will result in you seeing this screen with two “virtual decks”: NOTE: The screenshots throughout this manual are taken from the Mac version of ITCH;... -
Page 21: Software Overview
English Software Overview The following screenshot provides an overview of the ITCH main screen. Each point is covered in more detail later in the manual. Album Art: click to display the cover art for the album selected (toggles off). Files: click to display the Files Panel, which enables you to search for tracks on your hard drive. - Page 22 English Status Bar: displays various status messages. Virtual Deck: rotates during playback. Tempo-Matching Display: displays tempos of both Decks to help the mixing process. Beat-Matching Display: shows “transients” (usually the drum hits) to aid beat-matching. Waveform: waveforms of the currently loaded tracks. The top waveform is that on Deck A; the bottom is that on Deck B.
-
Page 23: Importing Music
There are several ways to add files to your ITCH library: Press the AREA button on your TWITCH to open the files panel where you can browse your hard drives for music to add. (AREA scrolls through the Files > Browse > Prepare > History options for the uppermost Panel.) The FWD... -
Page 24: About Corrupt Files
English Showing your iTunes library ITCH can import your iTunes™ library into the Crates pane , allowing you to play your iTunes music and access playlists. To enable this feature go to the SETup screen, click the LIbrArY tab and tick the Show iTunes library checkbox. NOTE: The iTunes library can now be minimized by pressing the small triangle in the blue iTunes folder icon. -
Page 25: How To Analyse Files
English Preparing Your Files Analysing Files Before you play your music in ITCH it is very important to analyse your files first. The ANALYZE FILES function processes the tracks in your library to detect file corruption, prepare the waveform overviews, and if enabled, calculate the BPM values. How To Analyse Files To analyse your files, open ITCH with your hardware disconnected. - Page 26 *NOTE: ID3 tags contain data about your tracks and are saved inside the files themselves. Genre, track name and artist are examples of common tag information. Offline Player The offline player is available when your TWITCH is not connected and will route its audio output through the current default audio device (soundcard). In most cases, this will be from your computer speakers.
-
Page 27: Library Navigation
CTRL & -. Hardware Navigation Controls The SCROLL knob in the BROWSE section of TWITCH controls cursor movement in ITCH. Rotate the knob to navigate up and down through the Library; pressing the FWD and BACK buttons moves the cursor forward and back between the crates and Library. Use these same controls (or the SCROLL control’s push function) to move through the different browse... -
Page 28: Searching
Browsing To browse through all your files, just scroll up or down with the SCROLL knob on your TWITCH. Clicking Browse in ITCH will open the Browse panel above the main Library. This allows you to filter what is displayed in the Library area below. The filters are GENRE, BPM, ARTIST, and ALBUM. - Page 29 Click the PREPARE button in ITCH, or use the AREA button on TWITCH to open the Prepare Panel. Navigate through your library with the keyboard cursor keys and mouse, or the SCROLL , FWD...
-
Page 30: Starting Playback
Virtual Deck. Starting Playback To begin playback press the H B (PLAY/PAUSE) button for that deck on TWITCH. Playback will start from the beginning of the track. Pressing H B during playback will pause playback at the current position. Pressing it again will resume playback from that position. - Page 31 English Equalizing Each deck of TWITCH features a 3 band equaliser (EQ section) with low, mid and high controls. The EQ controls are used to cut or boost specific frequency bands. You can use them to balance the sound of two tracks that have been mastered differently, to make a track sound “right”...
-
Page 32: Main Screen Overview
English Main Screen Overview Virtual deck The virtual deck shows the speed and position of a track. When a track is loaded, it changes from black to white with a black ‘radius bar’. As the track progresses, the bar will rotate. The circular progress bar around the edge is a visual representation of the location within the track, and it will begin flashing when 20 seconds of the track is left to warn you that the track is coming to its end. - Page 33 English Tap Tempo If a track has no BPM value stored in its file, and the Beat Grid is not enabled, the tap tempo box is displayed in the track title bar instead of the BPM value. Click with the mouse, or press the keyboard shortcut ALT+SPACE BAR to activate the tempo tapper for the left deck (use the shortcut a second time to apply it to the right deck).
- Page 34 English Main Waveform Display This area provides a close-up view of the track waveform (for each deck; Deck A is the upper), including the same colour-coding system as the Overview Display (above) to indicate the spectral content of the sound. You can switch to a three-band spectral view by pressing the CTRL key and clicking on the waveform.
- Page 35 Waveform Display (remember that a kick drum will probably be red in colour, and a snare drum green or blue). This technique may speed up the process of beat-matching. notE: Other (usually faster!) methods of beat-matching are available within TWITCH; see page 42.
-
Page 36: Dropping A Track In
SWIPE - the default function of the Touchstrip is SWIPE mode. (Note that the SWIPE buttons are illuminated when TWITCH is first powered.) During playback, play speed is momentarily increased or decreased (and pitch correspondingly altered) by swiping the Touchstrip with a finger leftwards or rightwards respectively. -
Page 37: Mixing
TWITCH. You can also drag and drop with the mouse. Previewing in the Headphones When you load a track to a deck, the audio from that deck is is automatically routed to TWITCH’s Cue system; note that the Headphone Cue button is illuminated. - Page 38 Set a cue point at the point in the track at which you want to start your mix, so you can return to it easily and save it for next time. Playback Press the H B button on TWITCH to start playback. Pressing again will pause the track. Continuous Auto-play Click the PLAYBACK MODE button in ITCH’s virtual deck area to change it from SINGLE to...
-
Page 39: Beat Grid & Sync
English BEat Grid & Sync See also Auto-Tempo, page 43. Beat Grid A Beat Grid is a series of markers superimposed on the track waveform that indicates the beats or transients in the music structure. A Beat Grid allows ITCH to know precisely where each beat occurs, and locates the exact start of each bar. - Page 40 English creating a Beat Grid ITCH will attempt to determine the first transient (this could be a kick drum or bass note) and will use this for the location of the Downbeat Marker. Once the Downbeat Marker is set, ITCH uses the track’s BPM to automatically create a Beat Grid for the rest of the track.
- Page 41 English deleting a Beat Marker If you have set a Beat Marker incorrectly, you can delete it. To delete the closest marker to the playhead, press the SHIFT key while pressing BEAT GRID SET. Beat Marker deletion has multiple levels of “Undo”; pressing SHIFT + SET repeatedly will undo previously set Beat Markers.
-
Page 42: Synching Tracks
To take a deck out of sync, press SHIFT + SYNC. The deck’s number in the master clock is no longer green and the SYNC button on TWITCH is no longer lit. When a deck is taken out of sync, it will revert to its original BPM. -
Page 43: Master Clock
If the tracks fall out of sync, press SYNC again to re-sync the tracks. To take a deck out of sync, press SHIFT + SYNC. The SYNC button on TWITCH is no longer lit. When a deck is taken out of sync, it will revert to its original BPM. -
Page 44: Performance Modes
HOT CUES is the initial function for the Performance Pads. (Note the HOT CUES button illuminated when TWITCH is first powered on). Up to eight cue points may be captured “on-the-fly”. To create a cue point, press one of the Performance Pads for the deck. The button will light to show that a cue point has been set. -
Page 45: Temporary Cue
On TWITCH, the LEDs on the Touchstrip scroll from left to right during playback at the same rate as the rotating virtual deck. When a Cue is triggered, the LEDs restart their scrolling at the left. -
Page 46: Slicer Mode
English Slicer Mode notE: Beat Grid must be enabled in the Setup menu (Setup > Playback > General) for Slicer Mode to be active. SLicEr ModE 1: When Slicer Mode is selected (by pressing SLICER ), playback continues, but the timeline is divided into 8 equal length slices aligned to the Beat Grid, and you will note that the Performance Pads illuminate in sequence and blocks of red highlight the waveform display, indicating each slice in turn. - Page 47 English SLICER MODE 2: Pressing SLICER a second time enters Mode 2, which is indicated by the button flashing. Mode 2 immediately creates an eight-slice loop. When a Performance Pad is pressed and held, the corresponding slice is looped alone, as in Mode 1, and when the pad is released, playback reverts to the loop of the current eight slices.
-
Page 48: Loop Modes
English Loop Modes There are two types of loops, Auto Loop, and Loop Roll (see following section). auto Loop Pressing AUTO LOOP assigns the Performance Pads as loop triggers for loops of eight different lengths, whose values may be between 32 beats and 1/32 beat. The pads dimly glow green and illuminate when active. -
Page 49: Loop Roll
English A saved loop may be deleted by holding down SHIFT while pressing the pad corresponding to the slot to be cleared. toucHStriP action in auto LooP ModE: The Touchstrip may be used to select the Auto Loop range. The loop durations set will always be a “consecutive”... -
Page 50: The Fx Section
English the fX Section TWITCH features three effects processors. Each deck features fader fX, which allows an effect to be applied to the track, controlled by the Channel Fader. In addition, there is a Master FX section, which can generate an effect that can be applied to either or both decks. A greater degree of effect control is available using the Master FX Section. - Page 51 English The following effects are available: rEVErB Reverb simulates the natural acoustic of a real space such as a hall, cathedral, cave or other space. It is created by a carefully-generated, dense series of small delays of the audio signal. These mimic the sound reflections that would occur in a real space, with the sound bouncing around between walls and other surfaces.
- Page 52 English trEMoLo This effect is a cyclic modulation of the track’s volume, and can be used to lower and increase it rhythmically. rEPEatEr This effect repeats segments of audio in a manner similar to the Loop Roll function, though incorporating an element of randomness as well. As well as mix depth, the probability that the current audio section will be repeated can be set with the MOD control, and the count at which the audio section will be repeated with the X control.
- Page 53 English fader fX Fader FX is a TWITCH feature that allows the deck Channel fader to become an effects control, varying the FX Depth for each deck directly. Each deck may have an individual effect applied to the track playing on it, in addition to the effects programmed in the master FX section described above.
-
Page 54: Mic And Aux
English Mic and auX Mic and auX Mixing TWITCH has inputs for a microphone and an auxiliary stereo line source. The gain of each input is adjustable at the front and rear panels respectively, . The mono Mic signal and stereo Aux signal are summed, and their level and equalization is adjustable. -
Page 55: Recording
English recording Serato ITCH can make recordings of your Program Mix, or the MIC / AUX INPUT channel. Recording controls are grouped into a menu above Deck B in the software. To record: 1. Click the Record Source Selector and select the signal to be recorded from the drop-down menu. -
Page 56: Organizing Your Library
English organizing your Library ITCH can support an unlimited number of tracks – the only limitation is the size of your computer’s hard drive. A number of features are included to help you keep your music organized and find tracks quickly and easily. crates ITCH uses digital crates for quick access to your favourite collections. - Page 57 English Setting up columns The library can be customized to display columns with any or all of the fields listed below: • Added – date file was added to library • Album • Artist • Bitrate (kbps) • • Comment •...
-
Page 58: Editing Id3 Tags
English Editing id3 tags Many of a track’s textual fields can be freely edited in ITCH. Double-click on the field in the main library display to edit, and enter the revised text. Filename, length, size, bit rate and sampling cannot be edited, as this information is embedded in the file header itself. Note that the Protect library option (in SETUP >... -
Page 59: Library Management
English Library Management notE: The RESCAN ID3 TAGS and RELOCATE LOST FILES buttons & are only visible if the Files pane is open. The FILES button toggles the Files pane on and off. rescan id3 tags Use this function if you have edited or modified file tags in other software. It re-reads file tags for the entire library. -
Page 60: Serato Scratch Live Compatibility
(e.g. 10/09/10 01:38:16). deck - The virtual deck on which the track was played will be displayed in the deck column. Note that TWITCH’s Deck A is listed as ‘1’, Deck B as ‘2’. The offline player will be listed as Offline. - Page 61 English Starting or Ending a Session - To start or end a session, click the corresponding button. inserting a track - If you wish to add information to your session data for tracks not played in ITCH (i.e., if you also played vinyl discs or CDs), select the ITCH track you played immediately before, and click the INSERT TRACk button to create a blank track record.
-
Page 62: The Setup Screen
English the Setup Screen The SETUP screen allows you to alter system settings and to customize various aspects of ITCH. You can toggle between ITCH’s main screen and the SETUP screen at any time by clicking the SETUP button Software Version The version and build number of ITCH are displayed in the lower left hand corner. - Page 63 (or use a more powerful computer). Platter Speed Applies to virtual deck speeds of 33RPM or 45RPM. This function is not applicable to TWITCH hardware.
- Page 64 English PLAyBACk Tab GEnEraL Playback keys use shift - with this option on, all cue point, loop, and general playback keys on the computer keyboard require shift or caps lock to function. This is a useful feature to prevent accidental keypresses. Lock playing deck - with this option on, you can only load a track to a deck while it is paused.
- Page 65 RECORDING Bit depth - selects the recording bit depth to be 16 bit or 24 bit. Note that TWITCH only supports 16 bit recording. file format - choose the file format for the recording. Select from Wave (.WAV) or AIFF (.AIF).
- Page 66 English LiBrary tab SONG LIBRARy OPTIONS Show itunes library – when enabled, the current default iTunes library and iTunes playlists are included in the ITCH library. notE: The iTunes library can be minimized by clicking the small triangle in the blue iTunes folder icon.
- Page 67 English display tab uSER INTERFACE SETTINGS Maximum screen updates The slider lets you lower ITCH’s screen refresh rate and potentially use less CPU. Users with slower computers or those running a recording program at the same time might like to do this if they are having performance problems.
- Page 68 English MiXEr tab GENERAL croSSfadEr - the dropdown menu lets you configure the crossfader. There are three options: normal (standard crossfader action); reverse (crossfader works in opposite sense); disabled (the crossfader is disabled). EQ – sets the maximum cut/boost range of the EQ controls – 6 dB or 12 dB. outPut - allows you to set the audio output to be mono or stereo.
-
Page 69: Whitelabel
Running Whitelabel audio files through Mixed In key can cause the files to only play at 32kps in ITCH (even with a TWITCH attached). At this time we advise you not to use Mixed In key with Whitelabel audio files. -
Page 70: Troubleshooting
Disable sleep (hibernate/power saving) mode • Increase the USB buffer size • Connect TWITCH directly to a USB port on your computer, not via a USB hub • Try all USB ports, some may work better than others • Unplug any other USB devices •... -
Page 71: Technical Specification
English tEcHnicaL SPEcification Key Performance figures Real World ADC Dynamic Range: 102 dB (A-weighted) Real World DAC Dynamic Range: 100 dB (A-weighted) Chipset ADC/DAC Dynamic Range: 114 dB (A-weighted) Latency (Minimum Buffer Size): 77 samples Microphone inputs Dynamic Range (A-Weighted): 102 dB Frequency Response: 20 Hz - 20 kHz +/- 0.1 dB...
Need help?
Do you have a question about the TWITCH and is the answer not in the manual?
Questions and answers