GE Monogram ZV750 Technical Service Manual
Wall-mounted and island hoods
Hide thumbs
Also See for Monogram ZV750:
- Installation instructions manual (56 pages) ,
- Owner's manual (32 pages) ,
- Use and care manual (12 pages)

Related Manuals for GE Monogram ZV750


Summary of Contents for GE Monogram ZV750
- Page 1 GE Consumer Service Training TECHNICAL SERVICE GUIDE ® Monogram Wall-Mounted and Island Hoods MODEL SERIES: ZV750 ZV850 PUB # 31-9043 03/00...
- Page 2 If grounding wires, screws, straps, clips, nuts, or washers used to complete a path to ground are removed for service, they must be returned to their original position and properly fastened. GE Consumer Service Training Technical Service Guide Copyright © 2000 All rights reserved.
-
Page 3: Table Of Contents
Table of Contents Hood Nomenclature .................... 2 Features ....................... 3 Installation Highlights ..................3 Controls ....................... 5 Use and Care Information .................. 8 Halogen Lamp Assembly Replacement ............9 Filter Replacement ....................9 Component Access/Duct Cover Removal ............9 Control PCB Replacement ................. -
Page 4: Hood Nomenclature
Hood Nomenclature ZV750 Height to Ceiling* Nomenclature 25-1/2" Recommended 36" Min. Mini Manual Locator Label GEA00027 ZV750Y1: Early model wall-mounted hood. ZV750Y2: Later model wall-mounted hood with motor mount similar to Island-mounted hood. ZV850 Height to Ceiling* Nomenclature 8-1/4" 35-3/8" 27-1/2"... -
Page 5: Features
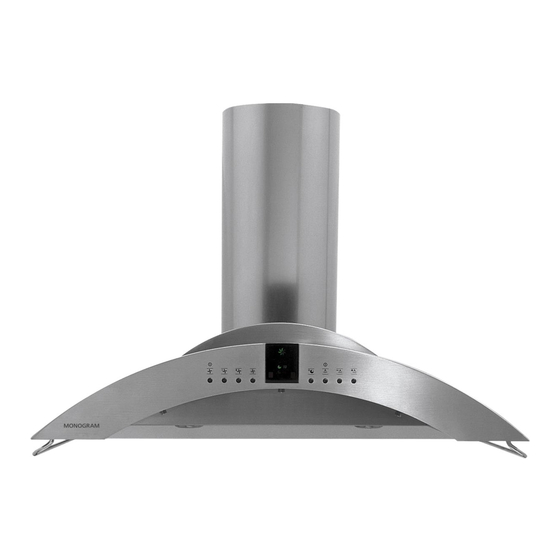
Features Stainless Steel Finish 36-Inch Width 350 CFM Vertical Exhaust Blower Rating Electronic Touchpad Controls 4 Halogen Lamps 3 Removable Filters with 30-Hour Filter Cleaning Reminder 6-Inch Round Duct Model ZV750 Wall Mount Model ZV850 Island Mount Installation Highlights Mount Dimensions and Clearances (See Hood Nomenclature) The vent hood must be installed at least 24 inches and not more than 30 inches above the cooking surface. - Page 6 Grounding Instruction WARNING: The improper connection of the equipment-grounding conductor can result in a risk of electric shock. Check with a qualified electrician if you are in doubt whether the appliance is properly grounded. The grounding conductor must be connected to a metal ground, permanent wiring system, or an equipment-grounding terminal or lead on the hood.
-
Page 7: Controls
Controls 9 10 5 6 7 1 2 3 4 GEA00014 CONTROLS CONFIGURATION Fan Keypad Operation ON/OFF Switch - Turns electrical power to motor on and off. Remembers the last fan speed used. Decrease Speed - Decreases current fan speed (4 speeds). Increase Speed - Increases current fan speed (4 speeds). - Page 8 ELECTRONIC HOOD CONTROL DESCRIPTION The electronic hood control system consists of the following parts: Entry/Display Assembly; Control PCB; Triac; Fuse Holder; Motor Capacitor; Transformer; Halogen Lamps; Filter Microswitch; and Induc- tion Fan Motor. CAUTION: Components are electrically HOT on the electronic control when voltage is connected to the hood even though the ON/OFF switch is in the OFF position.
- Page 9 The fuse holder is an in-line type, which is in series with 12V AC from the transformer and is located in the blackbox. An open fuse may be caused by a lamp failing or a wrong wattage lamp. Note: The fuse is 5 x 20 mm and rated at (8) A, 250V AC (GE part number WB02X10584). 5. MOTOR CAPACITOR The start/run capacitor is mounted in the black box and plugs into the Control PCB connector CN3.
-
Page 10: Use And Care Information
Use and Care Information If the consumer has any questions that the service person cannot answer, refer them to the GE Answer Center (800.626.2000). Care and Cleaning Stainless Steel Hood WARNING: Before servicing or cleaning the unit, switch power off at the service panel and lock the service panel to prevent power from being switched on accidentally. -
Page 11: Halogen Lamp Assembly Replacement
CAUTION: Replace the lamp with the same size bulb. These 12-volt, 20-watt halogen bulbs are available at specialty lighting stores. Ask for GE bulb or equivalent: Q20 MR16/FL 40°–BAB. Note: When reinstalling, ensure that all electrical connections are securely fastened. -
Page 12: Control Pcb Replacement
Bottom Component Access/Duct Cover Removal Duct AC Power Cover Install Stop Junction Model ZV850, Island Hood Screw In One of 3 Holes Provided Service WARNING: Stop screw must be installed in one Manual of the support frame holes. Failure to do so may Triac Envelope cause personal injury or damage to duct cover. -
Page 13: Entry/Display Assembly Replacement
Entry/Display Assembly Replacement Transformer Entry/Display Assembly Filter Entry/Display Assembly Filter Microswitch Microswitch Fan Motor 4 Lamps Motor mtg.-4 Hex Screws Fan Motor Lamps (4) (Use 9/32" Socket With Extension) ZV750 ZV850 GEA00017 1. Remove 3 filters from hood. Entry 2. Remove 2 screws (A) from hood and entry/display assembly. Control Enclosure 3. -
Page 14: Fuse Replacement
8 amps, 250V AC. Replace with fuse of the 2. Remove 4 screws and cover from black box. same rating only (GE part number WB02X10584). 3. Remove cap and fuse from fuse holder. 4. Replace fuse with new fuse. -
Page 15: Motor & Blower Assembly Replacement
Motor & Blower Assembly Replacement Model ZV750 ZV750 Note: This procedure requires that the unit be Wire Shield/Wire Guide Entry/Display Assembly removed from the wall. Filter Microswitch 1. Remove duct cover (refer to Component Change Access/Duct Cover Removal). Lamps 2. Disconnect power supply and exhaust ducting. Note: Two people are required to perform the next step. -
Page 16: Motor Capacitor Replacement
Motor & Blower Assembly Replacement Model ZV850 1. Raise duct cover (refer to Component ZV850 Access/Duct Cover Removal). 2. Remove filters (refer to Filter Replacement). Entry/Display Assembly Filter Transformer 3. Remove the black box cover (4 screws). Microswitch 4. From the black box, remove the following: a. -
Page 17: Transformer Replacement
Transformer Replacement Black Box (Control PCB) Transformer Junction Transformer Triac Service Manual Envelope ZV750 ZV850 GEA00118 Note: Model ZV750 transformer is located above the hood; Model ZV850 transformer is located inside the hood. 1. Access transformer (refer to Component Access/Duct Cover Removal). 2. -
Page 18: Triac Replacement
Triac Replacement Brown Motor Capacitor 3/16" 1/4" Terminal Terminals 1/4" Black Black Terminals Black Box Orange Triac Black Box Orange Fuse Holder 3/16" Brown Terminal Control PCB Transformer Triac Motor Capacitor Fuse Holder Control PCB ZV750 ZV850 GEA00016 1. Access triac (refer to Component Access/ Duct Cover Removal). -
Page 19: Service Diagnostic Flowchart
Troubleshooting SERVICE DIAGNOSTIC FLOWCHART WARNING POWER MUST BE DISCONNECTED BEFORE SERVICING THE APPLIANCE PUSH BUTTONS STUCK? UNSTICK/ADJUST NOTE #2 PUSH BUTTONS STUCK? ORDER/INSTALL ENTRY/DISPLAY SUBASSEMBLY REMOVE HOOD CONTROL RIGHT DEAD? FILTER RED DISPLA Y LIGHT BLINKING? CHECK/ADJUST MICROSWITCH RED DISPLA Y REMOVE/ LIGHT RE-SEA T... -
Page 20: Schematic & Strip Circuits
Schematic & Strip Circuits WARNING POWER MUST BE DISCONNECTED BEFORE SERVICING THE APPLIANCE ISOLATED TRIAC TRANSFORMER 8A250V - 5X20MM CONTROL PCB BLACK BROWN FUSE BROWN 120V 12VAC (2) BLUE WHITE GREY CN3 CN5 ORANGE CN4B LINE BLACK LOW VOLTAGE POWER SUPPLY GREEN 120V NEUT . - Page 21 STRIP CIRCUITS MOTOR CAPACITOR MOTOR CAPACITOR FM WINDING WHITE 12.5 F 250 VAC GEA00022 FILTER MICROSWITCH TO TRIAC GATE MICROPROCESSOR WHITE GREY CIRCUIT VIOLET FILTER CN4A MICRO- SWITCH GEA00024 ZV750Y1 TO TRIAC GATE MICROPROCESSOR WHITE CIRCUIT VIOLET FILTER CN4A MICRO- SWITCH GEA00064 ZV850 AND ZV750Y2...
- Page 22 STRIP CIRCUITS BLACK LINE 120V GREEN FILTER NEUT. WHITE MOTOR WHITE BLACK GREEN ORANGE BLUE MOTOR MICROPROCESSOR RELAYS CIRCUIT MOTOR CAPACITOR WHITE 12.5 F 250 VAC FAN TOUCH PCB DISPLAY LIGHT TOUCH PCB GEA00025 LAMPS TRANSFORMER ISOLATED 8A250V - 5X20MM BLACK TRIAC BROWN...
- Page 23 Notes – 21 –...
-
Page 24: Model Zv750 Illustrated Parts Breakdown
Model ZV750 Illustrated Parts Breakdown – 22 –... - Page 25 Model ZV750 Illustrated Parts Breakdown Reference # Description Part # GREASE FILTER WB02X10396 CONDENSER WB17X10001 LAMP BULB WB08X10014 MONOGRAM LOGO WB02X10353 KNOB WB03X10002 MOTOR & BLOWER ASM WB26X10071 CONNETION AIR OUTLET WB07X10005 NON-RETURN FLAP WB02X10397 BOTTON BRACKET WB03X10003 GLASS VISOR WB07X10007 PLEXIGLASS WB02X10642...
-
Page 26: Model Zv850 Illustrated Parts Breakdown
Model ZV850 Illustrated Parts Breakdown – 24 –... - Page 27 Model ZV850 Illustrated Parts Breakdown Reference # Description Part # GREASE FILTER WB02X10396 CONDENSER WB17X10001 LAMP BULB WB08X10002 MONOGRAM LOGO WB02X10645 MOTOR & BLOWER ASM WB26X10068 CONNECTION AIR OUTLET WB07X10005 NON-RETURN FLAP WB02X10397 BUTTON BRACKET WB03X10084 GLASS VISOR WB07X10007 PLEXIGLASS WB02X10642 BOTTOM DUCT 8 FT.CEIL.
- Page 28 Notes – 26 –...
-
Page 29: Warranty Information
To know what your legal rights are in your state, consult your local or state consumer affairs office or your state’s Attorney General. Warrantor: General Electric Company. If further help is needed concerning this warranty, write to: Manager—Consumer Affairs, GE Appliances, Louisville, KY 40225. – 27 –... - Page 30 800.626.2000 or service. Service You can have the secure feeling that GE Consumer Service will still be there after your warranty expires. Purchase a GE contract while your warranty is still in effect and you’ll Contracts receive a substantial discount. With a multiple-year contract, you’re assured of future 800.626.2224...
Need help?
Do you have a question about the Monogram ZV750 and is the answer not in the manual?
Questions and answers