
Related Manuals for CIGWELD TRANSMIG 220


Summary of Contents for CIGWELD TRANSMIG 220
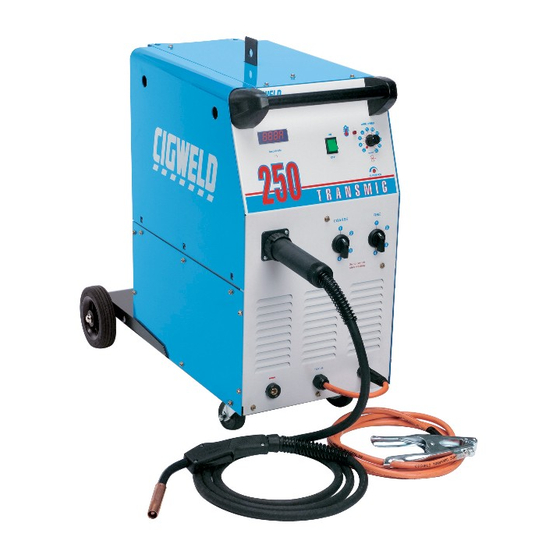
- Page 1 OPERATING MANUAL MIG POWER SOURCE Model Description Plant Power Source TRANSMIG 220 710024 710025 (Single Phase) TRANSMIG 250 710018 710019 (Single Phase) TRANSMIG 253 710009 710013 (Three Phase) PART NO. ISSUE DATE 719454...
- Page 3 71 Gower St, Preston Victoria 3072 Australia Description of equipment: Welding Equipment (Mig/Mag). CIGWELD Transmig 220, 250, 253 and associated accessories. * Serial numbers are unique with each individual piece of equipment and details description, parts used to manufacture a unit and date of manufacture.
-
Page 5: Table Of Contents
15 MIG Torch..........................22 16 Basic Welding Technique......................24 17 Routine Maintenance & Inspection ...................24 18 Basic Troubleshooting ......................25 19 Spare Parts..........................29 20 Transmig 220 & 250 Compact Power Source Circuit Diagram.........30 21 Transmig 253 Compact Power Source Circuit Diagram ............31 - i -... - Page 6 Figure 6 - Examples of the digital read outs..................20 Figure 7 - Standard 300mm spool set-up..................21 Figure 8 - Conduit trim length ......................23 Figure 9 - MIG Torch angle ......................24 Figure 10 - MIG Power Source Schematic for Transmig 220 & 250..........30 - ii -...
-
Page 7: Unpacking Your Transmig
Transmigs 220, 250 & 253 1 Unpacking Your Transmig Carefully unpack the Transmig and check that all items listed in table 1 are present. Description Quantity Cylinder Tray Chain Bracket Castor Swivel Wheel Axle Washer ½ inch Fastener (End Cap) Screw M8 Screw M5 Chain... -
Page 8: Rear Cylinder Bracket Assembly
Transmigs 220, 250 & 253 4 Rear Cylinder Bracket Assembly a) Install the cylinder bracket in the position as shown in Figure 2 using M5 fasteners b) Install the chain to cylinder bracket. Figure 2 - Cylinder Bracket Assembly 5 Introduction 5.1 Notes, Cautions and Warnings Throughout this manual, notes, cautions, and warnings are used to highlight important information. - Page 9 Transmigs 220, 250 & 253 GASES AND FUMES Gases and fumes produced during the welding process can be dangerous and hazardous to your health. • Keep all fumes and gases from the breathing area. Keep your head out of the welding fume plume.
- Page 10 Transmigs 220, 250 & 253 FIRE AND EXPLOSION Fire and explosion can be caused by hot slag, sparks, or the welding arc. • Be sure there is no combustible or flammable material in the workplace. Any material that cannot be removed must be protected. •...
- Page 11 Transmigs 220, 250 & 253 5.3 Publications Refer to the following standards or their latest revisions for more information: 1. OSHA, SAFETY AND HEALTH STANDARDS, 29CFR 1910, obtainable from the Superintendent of Documents, U.S. Government Printing Office, Washington, D.C. 20402 2.
-
Page 12: Electromagnetic Compatibility
Transmigs 220, 250 & 253 6 Electromagnetic Compatibility WARNING Extra precautions for Electromagnetic Compatibility may be required when this welding power source is used in a domestic situation. 6.1 Installation and use – User’s Responsibility The user is responsible for installing and using the welding equipment according to the manufacturer’s instructions. -
Page 13: Electromagnetic Compatibility - Methods Of Reducing Emissions
Transmigs 220, 250 & 253 7 Electromagnetic Compatibility - Methods Of Reducing Emissions 7.1 Mains Supply Welding equipment should be connected to the mains supply according to the manufacturer’s recommendations. If interference occurs, it may be necessary to take additional precautions such as filtering of the mains supply. -
Page 14: General Information
Should such repairs or replacements become necessary, it is recommended that such repairs be carried out by appropriately qualified persons approved by CIGWELD. Advice in this regard can be obtained by contacting CIGWELD. - Page 15 CIGWELD. 4. CIGWELD declares that, to the extent permitted by law, it hereby limits its liability in respect of the supply of goods which are not of a kind ordinarily acquired for personal, domestic or household use or consumption to any one or more of the following (the choice of which shall be at the option of CIGWELD).
-
Page 16: Safe Practices For The Use Of Welding Equipment
Accredited Distributor of the equipment. Notwithstanding the foregoing, in no event shall the warranty period extend more than the time stated plus one year from the date CIGWELD delivered the product to the Accredited Distributor. Unless otherwise stated the warranty period includes parts and labour. -
Page 17: Resuscitation For Electric Shock Victims
Transmigs 220, 250 & 253 9.2 Personal Protection The radiation from an electric arc during the welding process can seriously harm eyes and skin. It is essential that the following precautions be taken: ♦ Gloves should be flameproof gauntlet type to protect hands and wrists from heat burns and harmful radiations. - Page 18 Transmigs 220, 250 & 253 10.1 Resuscitation Efficient resuscitation requires training which is available from the St John’s Ambulance Association, Red Cross and other sources. 1 Don’t become a victim. Switch off power if 2 If unconscious, place victim on their side and possible.
-
Page 19: Specifications
310335 Regulator CO 704099 Work Lead 3m 719454 Operating Manual 7977036 Feed Roll 0.6/0.8 Hard(fitted) 11.4 Power Source Only Contents for Transmig 220, 250 or 253 Part Number Description 704099 Work Lead 3m 719454 Operating Manual 7977036 Feed Roll 0.6/0.8 Hard(fitted) -
Page 20: Machine Specifications
Transmigs 220, 250 & 253 11.5 Machine Specifications a) For the Single Phase Models Transmig 220 and 250 Description (Refer NOTE 2) TRANSMIG 220 TRANSMIG 250 Plant Assembly 710024 (710025*) 710018 (710019*) Plant Mass 87kg 91kg (*Deduct 2kg for Power Source Only model) -
Page 21: Optional Accessories
Transmigs 220, 250 & 253 b) For the Three Phase Model Transmig 253 Description (Refer NOTE 2) TRANSMIG 253 Plant Assembly 710009 (710013*) Plant Mass 91kg (*Deduct 2kg for Power Source Only model) Plant Dimensions H 1000mm x W 430mm x D 880mm (including wheels and cylinder carrier) Power Source Mass 86kg... -
Page 22: Installation Recommendations
Transmigs 220, 250 & 253 12 Installation Recommendations 12.1 Environment The TRANSMIG’s are NOT designed for use in environments with increased hazard of electric shock.. a) Examples of environments with increased hazard of electric shock are:- i) In locations where freedom of movement is restricted and operator is forced to perform the work in a cramped (kneeling, sitting or lying) position in physical contact with conductive parts. -
Page 23: Table 3 - Input Supply Circuit Requirements (Maximum Output)
220V Table 3 – Input Supply Circuit Requirements (Maximum Output) WARNING 1 CIGWELD advises that this equipment be electrically connected by a qualified electrical trades-person. WARNING 2 TRANSMIG Mains supply leads should be replaced with leads as specified in section 12.5 when TRANSMIG’S... -
Page 24: Set Up For Compact Transmig
Links Links BLUE (NEUTRAL) 240V 220V 380V Transmig 220 & 250 Transmig 253 Figure 4 – Input Supply Voltage Set 13 Set Up For Compact Transmig Remove all packaging materials. Refer to section 1 Unpacking Your Transmig CAUTION 1 Source To ensure adequate cooling for the Power the wheels must be fitted. -
Page 25: Power Source Controls, Indicators And Features
Transmigs 220, 250 & 253 Fit the spool of wire to the wire hub located behind the electrode wire compartment door. Ensure that the drive dog-pin engages the mating hole in the wire spool. Push the 'R' clip into place to retain the wire spool securely. The wire should feed from the bottom of spool. -
Page 26: Figure 6 - Examples Of The Digital Read Outs
Transmigs 220, 250 & 253 14.2 Coarse Voltage Control Switch and Fine Voltage Control Switch The Coarse Voltage Control sets the voltage level to the welding terminals as it is rotated in the clockwise direction. The Fine Voltage Control switch increases the voltage (in smaller increments than the Coarse switch) as it is rotated in the clockwise direction. -
Page 27: Figure 7 - Standard 300Mm Spool Set-Up
Transmigs 220, 250 & 253 14.8 Wirefeeder Drive Roller Pressure Adjustment The moveable roller applies pressure to the grooved roller via screw adjustable spring pressure. The adjustable spring screw should be adjusted to a minimum pressure that will provide satisfactory wire feed without slippage. If slipping occurs, and inspection of the wire contact tip reveals no wear, distortion or burn-back jam, the conduit liner should be checked for kinks and clogging by metal flakes and swarf. -
Page 28: Mig Torch
Transmigs 220, 250 & 253 15 MIG Torch 15.1 Tweco MIG Torch TD-15 (T161510302) ¨ Item Part No. Description T116103501 Nozzle 12mm Bore (refer to Table 5) Contact tips T118102504 Gas diffuser T116103501 Conductor tube T137100508 Handle Case ⎯ Euro Back End kit (refer to Table 6) Liner (Conduit) Table 4 –... -
Page 29: Figure 8 - Conduit Trim Length
Transmigs 220, 250 & 253 15.3 Installing A New Wire Conduit Be sure the MIG Torch cable is arranged in a straight line, free from twists, when installing or removing a wire conduit. Remove the old conduit by first removing the MIG Torches nozzle, contact tip and gas diffuser. -
Page 30: Basic Welding Technique
Transmigs 220, 250 & 253 16 Basic Welding Technique 16.1 Setting of the Power Source The setting of the Transmig requires some practice by the operator, the welding Power Source having two control settings that have to balance. These are the Wirespeed control and the Voltage Control switch. -
Page 31: Basic Troubleshooting
Power Source. If major components are faulty, then the Power Source should be returned to an Accredited CIGWELD Service Agent for repair. 18.1 Solving Problems Beyond the Welding Terminals The general approach to fix Gas Metal Arc Welding (GMAW) problems is to start at the wire spool then work through to the MIG torch. - Page 32 Transmigs 220, 250 & 253 6. Distance between the MIG torch - Keep the distance between the MIG torch nozzle and the work piece to a minimum. nozzle and the work piece. Refer to section 16.3 on page 24. Ensure that the gas holes are not blocked 7.
- Page 33 Transmigs 220, 250 & 253 7. Poor work lead contact to work piece. - If the work lead has a poor electrical contact to the work piece then the connection point will heat up and result in a reduction of power at the arc. 8.
- Page 34 E Slow the cooling rate by preheating part to be welded or cool slowly. 7 Cold weld puddle. A Faulty rectifier unit A Have an Accredited CIGWELD Service Agent to test then replace the faulty component. B Loose welding cable B Check all welding cable connection.
-
Page 35: Spare Parts
19 Spare Parts Description Part No. Description Part No. Main Transformer: Inductor / bracket: Transmig 220 706823PKD Transmig 220 706828PKD Transmig 250 706700PKD Transmig 250 706509PKD Transmig 253 706788PKD Transmig 253 706797PKD Rectifier: Voltage Switch:... -
Page 36: Transmig 220 & 250 Compact Power Source Circuit Diagram
9 BLK 12 DK BRN 22A WHT LG 24V 50Hz CONTACTOR 21A VIO LT BLU 15&15A LT BLU 1B LT BRN 15B LT BLU LT BLU Figure 10 - MIG Power Source Schematic for Transmig 220 & 250 - 30 -... -
Page 37: Transmig 253 Compact Power Source Circuit Diagram
Transmigs 220, 250 & 253 21 Transmig 253 Compact Power Source Circuit Diagram [ Not available at time of print ] - 31 -... - Page 38 Customer Service & Technical Support Line: 1300 654 674 International Enquiries: Telephone +61 3 9474 7508 Facsimile: +61 3 9474 7488 In the interest of continuous improvement, CIGWELD Pty. Ltd. reserves the right to change the specifications or design of any of its products without prior notice.
Need help?
Do you have a question about the TRANSMIG 220 and is the answer not in the manual?
Questions and answers