Table of Contents
Advertisement
Quick Links
Operating manual part 2
Basic functions and operation
ON
OFF
Receivers
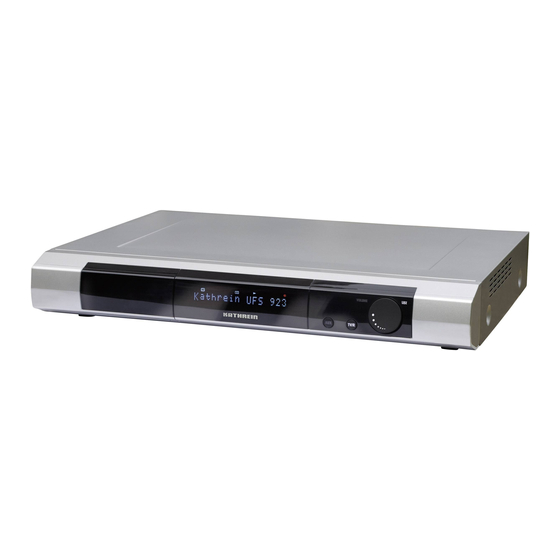
UFS 923si/sw
UFS 923si/sw
Manifactured under license from
Dolby Laboratories. Dolby and the
double-D symbol are trademarks
of Dolby Laboratories.
Order no.
20210182/20210183
20210190/20210191
Video
DIGITAL
TV
L
OUT
Hard Disk
Operating manual valid as of
Capacity
1 TB
250 GB
UFS 923
English
IF INPUT
950-2150MHz
DiSEqC 1.2
14/18V max.400mA
Y
22kHz
LNB2 IN
LNB1 IN
Pb
software version:
1.00
Advertisement
Table of Contents

Related Manuals for Kathrein UFS 923


Summary of Contents for Kathrein UFS 923
- Page 1 Operating manual part 2 UFS 923 English Basic functions and operation IF INPUT 950-2150MHz DiSEqC 1.2 Video 14/18V max.400mA 22kHz LNB2 IN LNB1 IN Manifactured under license from DIGITAL Dolby Laboratories. Dolby and the double-D symbol are trademarks of Dolby Laboratories.
-
Page 2: Preface
We wish you a good reception and hope you will enjoy using your new HDTV receiver. Your KATHREIN team... -
Page 3: Legal Information
Software changes/use of applications Any modifi cations to the receiver software or the use of applications not provided by Kathrein will invalidate the warranty! You will have to bear the costs yourself for shipping and repairing any receiver that requires attention due to modifi... -
Page 4: Table Of Contents
List of Contents Preface ..............2 Views using the EPG ........39 Legal information ..........3 “Current” view ............39 “Current” view ............39 Contents ............... 4 “Coming Up” View (Programme LISTINGS) ... 40 Safety Instructions – Important Notes ..... 6 Categories overview .......... - Page 5 First installation ..........105 Calling up chapters ..........74 Deleting chapters ............. 75 Basic Settings ..........105 Kathrein portal (Media centre) ......76 Video Settings ............106 Audio settings ............108 Main menu ............77 Date and time ............109 Calling up the main menu and introduction ..
-
Page 6: Safety Instructions - Important Notes
Safety instructions - important information These two pages contain important information about operation, installation location and connection of the unit. Read these instructions carefully before setting up the device. Mains power cable Moisture, direct sunlight, heat, naked fl ames Make sure that the mains cable Protect the unit against moisture, (power supply cable) is not damaged. - Page 7 Safety instructions - important notes Repairs Electronic equipment is not domestic waste - in accordance with directive Ensure that any repairs to your unit 2002/96/EC OF THE EUROPEAN are carried out by qualifi ed personnel. PARLIAMENT AND THE COUNCIL Opening the unit and attempting to Important! dated 27th January 2003 concerning repair it yourself will void all warranty...
- Page 8 Safety Instructions – Important Notes Product return/original packaging Please keep the original packaging in case you need to return the product at any time. The receivers are fragile due to their construction and are only adequately protected by the original packaging. If the receiver is not shipped correctly the guarantee/warranty on it will be voided.
- Page 9 Information on hard disk size data in these instructions The UFS 923 is available with two different sizes of hard disk (250 GB or 1 TB). The operating manual is the same for all versions and is based on the 1 TB version. Discrepancies may occur between data/on-screen displays and this operating manual with respect to the memory capacity of your device's hard disk (depend- ing on which version you are using).
-
Page 10: Basic Functions
Basic functions Following an overview of the remote control, a simple explanation will be provided of the receiver's most important functions (with all the required buttons on the remote control). The explanations in the sections entitled “I want to ...” merely demonstrate the most simple use of the relevant receiver functions without going into any great detail. -
Page 11: Remote Control For Live Operation (Tv/Radio)
= Fast rewind Call up Media Centre/ = Start playback Kathrein portal = Fast forward = Start timeshift (freeze-frame)/pause If an external device is connected to the VCR Scart socket, the TV signal present at the VCR Scart socket can be looped through to ... -
Page 12: I Want To Watch Tv
Basic functions I want to watch TV ... - Press to increase or decrease the volume - Press to switch channels - Press to display and hide additional channel information - Press to mute the sound ... -
Page 13: I Want To Listen To The Radio
Basic functions I want to listen to the radio ... - Press to change to radio mode. - Press to increase or decrease the volume. - Press to switch channels. - Press to display and hide additional channel information. ... -
Page 14: I Want To See Teletext
Basic functions I want to see teletext ... - Press to call up teletext. - Press to enter the required page directly - Press to page forward/backward - Press to return to TV. -
Page 15: I Want To Watch Timeshift Tv
Basic functions I want to watch timeshift TV ... - Press to start timeshift. Made a - Press to cancel timeshift. mistake? - Press to start playback. - Press during playback to fast forward or rewind. ... -
Page 16: I Want To Record A Programme Immediately
Basic functions I want to record a programme immediately ... - Press the (red dot) button to open the “Record” window. - Press to start recording the programme. - Press to change the dura- tion before recording. Made a ... -
Page 17: I Want To Record A Programme That Is Scheduled For Later (Timer List)
Basic functions I want to record a programme that is scheduled for later (timer list) - Press the button to open the Electronic Programme Guide. - Press to select the desired channel. - Press the (yellow) button to call up the programme preview. -
Page 18: I Want To Play Back A Recording
Basic functions I want to play back a recording ... - Press ) to open the “My Recordings” recording archive. - Press to select a recording. - Press to start playback and exit the recording archive. ... -
Page 19: I Want To Delete A Recording
Basic functions I want to delete a recording ... - Press ) to open the “My Recordings” recording archive. - Press to select a recording. - Press the button to open the “Edit” menu. - Press to select the “Delete”... -
Page 20: Editing And Selection Options In The Menus
Basic functions Editing and selection options in the menus In some menus/on-screen displays, this box will appear with a particular colour gra- dation. Each colour gradation stands for a specifi c view/selection. The table below shows which colours are assigned to which buttons. -
Page 21: Alphanumeric Entries
Basic functions Alphanumeric entries For entries such as names of favourites or search expressions, use the keyboard displayed on the screen (see example screenshot). The letters assigned to the number pad also apply to your remote control. They are used very similar to on a mobile phone. The following buttons can be used for entry or to select an action: Button... - Page 22 Basic functions Switch between letters and numbers/ special characters Switch to QWERTZ keyboard (control using the arrow but- tons and the OK button) - see screenshot at top right Switch between upper case and lower case letters Confi...
-
Page 23: Changing Between Tv And Radio Operation
Basic functions Changing between TV and Radio operation Press the button to change between TV and Radio mode. Setting the volume Adjust the volume using the buttons. Channel selection ...direct button allows you to select the channel in the sorted channel list/favourites list currently selected. If the channel slot is known from the channel list, you can call up the desired channel directly by entering the channel slot using the number pad on the remote control (e.g. - Page 24 Basic functions...
- Page 25 Basic functions Now use the relevant coloured button to select the category from which you want to open a channel list: (red) button: Call up the favourites lists Contains the following channel lists: - Favourites lists 1-8 (green) button: Call up the com- plete list Contains the following channel lists:...
-
Page 26: Channel Banners (Information)
Basic functions Select the desired channel list using the cursor buttons ( ) and call it up using button. After selecting the desired channel list, you select the desired channel using the cur- sor ( ) buttons and call this up using the ... - Page 27 Basic functions...
-
Page 28: Calling Up The Channel Options
Basic functions The following icons (symbols) may appear in the channel information: Broadcast transmitted in Audio selection is: Stereo HDTV standard 1080i In HDTV standard 720p Subtitles are available transmission broadcast Portal channel Teletext is available (channel options available) Receiver registers Dolby Digital audio the programme as track selected... -
Page 29: Select Audio Track
Basic functions Press the button if you want to be reminded of this function next time or the button if you don't want to see this message again. After selecting a channel option using the buttons, skip through the other channel options in your selected portal channel. -
Page 30: Subtitle Selection
Basic functions Subtitle selection If the channel banner includes the following symbol for subtitles , you can call up the “Subtitle” function as follows: Open the selection box (with the button) and press to select “Change sound, ... -
Page 31: Teletext
Basic functions Teletext This symbol in the channel banner indicates whether teletext is available for the selected channel. When you press the button, the receiver will prepare the teletext service data for your TV set to display, even if the signal is encrypted. During the scan, the page which is being searched for is displayed in the top left-hand corner with the time and date displayed at top right. -
Page 32: Automatic Timeshift
Automatic Timeshift This is a special function provided by the UFS 923. As soon as you switch to a channel, the receiver will auto- matically start recording the programme you are viewing to the hard disk in the background. If you change channel again, the previously stored data will be deleted and the recording will begin again from the start in the background. -
Page 33: One-Touch Recording (Otr)
Basic functions One-Touch Recording (OTR) To start recording directly to the hard disk, press the button. The following on-screen display will appear (example): Use the buttons to select the lines to be changed; make the changes using the buttons. - Page 34 Basic functions Selecting “On” means that, depending on the setting in the “System parameters” “Common Interface” “Multi- ple decoding” menu, you may not be able to view any other encrypted channels that use the same CA mod- ule for decoding (see Chapters “System parameters” “Common Interface” “Multiple decoding”). ...
-
Page 35: Picture-In-Picture
Basic functions Picture-in-picture The picture-in-picture function permits simultaneous viewing of two programmes. This allows you to see when a programme you want to watch begins without having to leave the programme you are currently watching. The PIP window is however only small since it is intended for monitoring purposes and not for viewing programmes in the normal way. -
Page 36: Electronic Programme Guide (Epg)
Could something other than the receiver be preventing the EPG from working? In case of receivers not produced by Kathrein, it may happen that EPG data cannot be transmitted. With such systems, the necessary transponder (12,603.75 MHz, symbol rate 22 MSymb/s, horizontal) is not being transmitted. -
Page 37: Calling Up The Epg
Electronic Programme Guide (EPG) Calling up the EPG Call up the EPG by pressing the button. You will automatically see the view selected in the menu (“Set- tings”, “User-Defi ned Settings”, “EPG Settings”) - irrespective of which view you were using last time you exited the EPG. -
Page 38: Navigation (Remote Control Buttons In Epg)
Electronic Programme Guide (EPG) Navigation (remote control buttons in the EPG) Button Function Call up “Current” view (displays all channels in the order of the com- plete list) (green) Call up the timer list (shows all pre-programmed recordings/reminders) (red) Navigation in the individual views (e.g. skip forward 15 minutes in the “Current”... -
Page 39: Views Using The Epg
Electronic Programme Guide (EPG) Views using the EPG ”Current” view “Current” view The “Current” view can be called up at any time in the EPG by pressing the (green) button. In the “Current” view all channels are displayed in the order of the complete channel list. -
Page 40: Coming Up" View (Programme Listings)
Electronic Programme Guide (EPG) “Coming up” view (Programme listings) The “Preview” view can be called up at any time in EPG by pressing the (yellow) button. In the “Preview” view you will see all pro- grammes to be shown for the channel previously selected in the “Current”... -
Page 41: Categories Overview
Electronic Programme Guide (EPG) Categories view The “Categories” view can be called up at any time in the EPG by pressing the (blue) button. In the “Category” view you can see all pro- grammes sorted by category and starting time. -
Page 42: Timer List View
Electronic Programme Guide (EPG) Timer list view The “Timer list” view can be called up at any time in the EPG by pressing the (red) button. The following on-screen dis- play will appear (example): The Timer list view shows you all record- ings and reminders scheduled (reminders are marked green). -
Page 43: Programme Present In Epg
Electronic Programme Guide (EPG) Programme present in the EPG Programme not present in the EPG Select the desired programme and press Select any programme on the channel on which the desired programme is to be broadcast at a button. The following on-screen ... -
Page 44: Specifying A Recording Mode
You can also record on an externally connected storage medium (USB storage media, NAS). For more information, refer to the “Media Centre/Network Interface” guide. You can download this on the Internet at: www.kathrein.de → “Service” → “Software and Downloads” → “Receiver” → “UFS 923”. - Page 45 Electronic Programme Guide (EPG) Daily: The recording will be made daily at a time speci- fi ed by you. Weekly: The recording will be made once a week on the same day and at the same time. Special instructions: Remember that the day of the week for the desired programme is loaded in the record- ing schedule and you can make no further manual corrections to this!
- Page 46 Electronic Programme Guide (EPG) If the “Series recording” function is used to program recording of every edition or episode of a series, the EPG will locate the series in question on the updated schedules and automatically program the recording of them.
- Page 47 Electronic Programme Guide (EPG) The settings “Avoid repeat episodes” and “Record only this scale” can only be made if the programmes are marked accordingly by tvtv or the broadcaster (season and episode number). If they are not, you can only make settings for the selection “Limit recording start from/to”.
-
Page 48: Reminder Function
Electronic Programme Guide (EPG) Reminder function If you want to be reminded that a pro- gramme is about to start, you can acti- vate the reminder function for the desired programme. The reminder function is set in exactly the same way as you program a recording. -
Page 49: Timer List View
Electronic Programme Guide (EPG) Timer list view The “Timer list” view can be called up at any time in the EPG by pressing the (red) button. The following on-screen display will appear (example): The Timer list view shows you all the recordings and reminders scheduled (marked green). ... -
Page 50: Editing A Recording
Electronic Programme Guide (EPG) Editing a recording When editing a recording, you can change all parameters apart from the recording mode. You make the changes using the cursor ( ) buttons and the number pad. Press the button to confi rm your changes and return to the Timer list view. -
Page 51: Timer Overlap
Electronic Programme Guide (EPG) Timer overlap If your scheduled recordings overlap, the Timer list view for the receiver will show the overlapping recordings with a blue background and the recording leading to the overlap will also appear in a red script against an orange background. -
Page 52: Search Function
For the “YouTube” function, please follow the instructions for the “Media Centre and Network (Web) Interface”. You can download these at: www.kathrein.de → “Service” → “Software and Downloads” → “Receiver” →“UFS 923”. More episodes... -
Page 53: Presenter - Actor
Electronic Programme Guide (EPG) Presenter - Actor Use the buttons to select an avail- able presenter/actor. Press the button to see a list of those programmes (if any) in which this actor/presenter appears. This depends on the name of this actor/pre- senter being included in the channel infor- mation. -
Page 54: Full Text Search
Electronic Programme Guide (EPG) Full-text search After calling up the search function, press button again to gain access to the full text search. The following on-screen display will appear (see example on the right): The last search term used may appear by default. Press- ... -
Page 55: Extras Menu
Electronic Programme Guide (EPG) Extras menu Open the “Extras” menu in the EPG by pressing the button. This menu offers you the following additional sorting/search options: - My hints - Actors list Make your selection using the buttons and confi... -
Page 56: Actors List
Electronic Programme Guide (EPG) Actors list In this section you can select an actor that appears in the actors list (using the cursor ) buttons). By pressing the but- ton, you can then search through all the available data for programmes in which this person appears. -
Page 57: Recording Archive (Playing Back/Editing Recordings)
Recording archive (Playing back/Editing recordings) Calling up the Recording Archive (My Recordings) The recording archive is called up by pressing the button or the button. Each time the EPG is opened, you will automatically see the view you selected the last time you exited the archive. The following on-screen display will appear (example): Recordings which have not yet been viewed have the suffi... -
Page 58: Navigation (Remote Control Buttons In Recording Archive)
Recording archive (Playing back/Editing recordings) Navigation (remote control buttons in the recording archive) Button Function 1 x Call up sort orders for recordings (ordered by date, ordered by title and ordered by duration) (green) 2 x Overview of sorting options 1 x Display recordings by channel 2 x Overview of channels for which recordings are available (yellow) -
Page 59: Recording Archive Views (Sort Order Of Recordings)
Recording archive (Playing back/Editing recordings) Recording Archive Views (Sort order of recordings) (green) You can use the buttons to choose between the sort criteria date, title or duration (recording length). (yellow) Ordered by channel (you can choose between the available channels using the ... -
Page 60: Playback Of A Recording
Recording archive (Playing back/Editing recordings) Playback of a recording Use the buttons to select the desired recording. Confi rm your selection by pressing the but- ton. Pressing the button again will exit the recording archive so you can view the desired recording in full-screen mode. - Page 61 Recording archive (Playing back/Editing recordings) Red button Call up chapter view/close chapter view Yellow button Call up option selection (sound selection, subtitles, HDMI/YUV format...) Call up the recording archive during playback. The playback continues to OK button run in the preview window Record button Creating chapters Using the number pad, you can jump to the desired minute in your record-...
-
Page 62: Editing Recordings
Recording archive (Playing back/Editing recordings) Editing recordings Select the recording to be edited using the cursor ( ) buttons. Tipp! To select simultaneous editing of several recordings where these are not listed immediately fol- lowing one another in the selected sort list, use the cursor ( ) buttons to select the fi... -
Page 63: Delete
Recording archive (Playing back/Editing recordings) Delete Deleted recordings are irrevocably deleted and can only be restored by re-recording the programme! Use the buttons to select “Delete” and confi rm your selection with the button. The selected recording(s) will be deleted. Lock ... -
Page 64: Change Category
Recording archive (Playing back/Editing recordings) Change category Use the buttons to select “Change category”. Now use the buttons to select the desired category (see example screenshot on the right), to which the recording(s) should be assigned. Con- fi... -
Page 65: Recordings: Cut, Split, Copy
Recording archive (Playing back/Editing recordings) Recordings: cut, split, copy Encrypted recordings can only be edited after decryption. Until the recording is decrypted, “Decrypt” will always be displayed instead of “Recording: Cut”. Confi rm your “Decrypt” selec- tion as described under “Decryption” in this chapter. Select the “Recording”... - Page 66 Recording archive (Playing back/Editing recordings) Copy The following on-screen display will appear (example): Now use the cursor ( ) buttons, the buttons or the button to select the desired start section for the copy and confi rm this by pressing the button.
- Page 67 Recording archive (Playing back/Editing recordings) The following on-screen display will appear (example): Now use the cursor ( ) buttons, the buttons or the button to select the desired start of the section to be cut from the recording and confi rm by pressing the button.
- Page 68 Recording archive (Playing back/Editing recordings) Split The following on-screen display will appear (example): Now use the cursor ( ) buttons, the buttons or the button to select the desired time at which the recording should be split and confi rm by pressing the button.
-
Page 69: Decryption
Recording archive (Playing back/Editing recordings) Decrypt The “Decrypt” option is only displayed if a recording was made from an encrypted channel with the “Decrypt: No” setting. Press the button to decrypt the record- ing. The symbol for an encrypted recording (key) is marked with a red dot (see screen- shot bottom right). -
Page 70: Folders In The Recording Archive
Recording archive (Playing back/Editing recordings) Folders in the recording archive The receiver offers you the option of creating folders in the recording archive. You can give these folders names of your choice and add recordings to them. Creating a new folder ... ... -
Page 71: Move To Folder
Recording archive (Playing back/Editing recordings) Move to folder ... You can use this function to move the recording selected to a folder you have created before calling up the edit menu. Use the buttons to select “Move to folder...” then press the button. -
Page 72: Editing Folders (Delete/Rename)
Recording archive (Playing back/Editing recordings) Editing folders (delete/rename) Use the buttons to select the folder to be edited and then press the button. The following on-screen display will appear (see example screenshot on the right): Use the buttons to select the line containing the editing option you want to use. -
Page 73: Copying To Usb Data Carriers (Or Nas)
Successful USB data carrier initialisation is indicated by the “USB” and “HDD” sym- bols on the front display. If both symbols are lit, the data carrier can be used. Tested only with hard disks from the Kathrein product range e.g. UFZ 111 (see also: www.kathrein.de → Service → FAQs) ... -
Page 74: Chapter View
Recording archive (Playing back/Editing recordings) Chapter view Creating chapters To create a chapter during playback of a recording, press the button. The receiver will automatically assign a chapter marker to the current position. To view chapters you have created for a ... -
Page 75: Deleting Chapters
Recording archive (Playing back/Editing recordings) Deleting chapters Use the buttons in the chap- ter overview to select the chapter to be deleted and press the button. The fol- lowing on-screen display will appear (see screenshot on the right). ... -
Page 76: Kathrein Portal (Media Centre)
Kathrein Portal (Media Centre) See the separate instructions on this entitled “Kathrein Portal (Media Centre) and Network (Web) Inter- face” (see screenshot below). This can be downloaded via the Internet at www.kathrein.de → “Service” → “Software and Download” → “Receiver” → “UFS 923”. -
Page 77: Main Menu
Main menu Calling up the main menu and introduction The main menu is called up by pressing the button. The following on-screen display will appear: Tipp! Always check the bar at the bottom of the on-screen display. Messages here will pro- vide information on what to do next. -
Page 78: Overview Of Main Menu Submenus
Main menu Overview of main menu submenus... -
Page 79: Main Menu - Edit Channel List
Tipp! You can also make changes to the channel list via your PC/laptop using “DVR Manager” by Kath- rein. The software is available free-of-charge for download from Kathrein. Software and instruc- tions are available at: www.kathrein.de → “Service” → “Software and Downloads” → “Receiver” → “UFS 923”. - Page 80 Main menu - Edit channel list...
-
Page 81: Navigation (Remote Control Buttons In "Edit Channel List" Menu)
Main menu - Edit channel list Navigation (remote control buttons in “Edit Channel List” menu) Button Function 1 x Call up the complete list 2 x Overview of available sorting orders for the complete list (list view) (green) 1 x Call alphabetical sorting 2 x Overview of sorting options (list view) (yellow) Change between TV and Radio channel lists... -
Page 82: Views (Sort Orders)
Main menu - Edit channel list Views (sort orders) (green) Complete list view. Using the buttons, you can choose between the com- plete list of sorting criteria sorted by satel- lite (e.g. ASTRA 19.2°) and tvtv channels (yellow) Alphabetical sorting order view Using the ... -
Page 83: Selection Of The Channel(S) To Be Edited
Main menu - Edit channel list Selection of the channel(s) to be edited Select a channel in your chosen channel list/favourites list using the cursor ( buttons (see example screenshot on the right). To select simultaneous editing of several channels at once, unless listed immedi- ately following one another in the selected ... -
Page 84: Move
Main menu - Edit channel list Move Use the buttons to select “Move” and confi rm your selection with the button. The following on-screen display will appear (see example screenshot on the right): Now use the cursor ( ) buttons or the number pad to select the new channel memory position(s) and confi... -
Page 85: Lock
Main menu - Edit channel list Lock Use the buttons to select “Lock” and confi rm your selection with the button. To lock the channel, you now need to enter your four-digit PIN code (factory setting: 0000). The following on-screen display will appear (see example screenshot on the right): The locked channel is now displayed in the channel list with a padlock on the right hand side and can in... -
Page 86: Tvtv On/Off
Main menu - Edit channel list tvtv on/off Because of the large amount of data being transmitted, the receiver can- not store all data for the channels supported by the EPG. The receiver confi guration is therefore factory-set to accept tvtv data for only a limited number of channels. -
Page 87: Start Block Highlighting
Main menu - Edit channel list Start Block Selection: Use the buttons to select “Start block selection” and confi rm your selec- tion with the button. You can now use buttons to start block selec- tion in the previously selected channel. This selects the channels in the sequence in which they appear in the previously selected channel list and applies a coloured background to them (see example screenshot):... -
Page 88: Edit Favourites Lists
Main menu - Edit channel list Editing favourites lists After selecting the channel(s) in a favour- ites list you want to edit, press the button. The following on-screen display will appear (see screenshot on the right). “Start Block Selection” will only appear if one channel only is selected. -
Page 89: Rename Favourites List
Main Menu - Edit Channel List Rename favourites list Use the buttons to select “Rename favourites list” and confi rm your selection with the button. You can now rename the favourites list you selected. The following on-screen display will appear (see example screenshot on the right). -
Page 90: Main Menu - Channel Search
Main menu - Channel search Opening the menu From the TV picture, press the button to open the main menu. Now select “Execute channel search” using the buttons and confi rm the call up from the menu using the button. -
Page 91: Automatic Channel Search
Main menu - Channel search Automatic channel search After calling up the menu, you will see the following on-screen display: buttons allow you to select the parameters you want to change for the search. Satellite and position Now use the buttons to select between the individual satellites you have set up or the setting “All”. - Page 92 Main menu - Channel search The following on-screen displays will appear TV channels Radio channels (example): found found During the search you will see the following on-screen display (example): The new channels found are identifi ed by the suffi x “New” (see example screenshot on the right).
-
Page 93: Manual Channel Search
Main menu - Channel search Manual channel search After calling up the menu, you will see the following on-screen display: buttons allow you to select the parameters you want to change for the search. Satellite and position Use the buttons to select the satellite on which the transponder you want to search is located. - Page 94 Main menu - Channel search Error rate Press the buttons to select the applicable error rate (Viterbi rate). When searching for DVB S(SD) transponders, you need not state the error rate. “Automatic” will appear permanently instead. When search- ing for DVB S2(HD) transponders, you must state the correct error rate. Either QPSK 1/2, 2/3, 3/4, 3/5, 4/5, 5/6, 8/9, 9/10 or 8PSK 2/3, 3/4, 3/5, 5/6, 8/9 or 9/10.
-
Page 95: Channel Search With Service Id95
Main menu - Channel search Search with Service ID After calling up the menu, you will see the following on-screen display: buttons allow you to select the parameters you want to change for the search. Satellite and position Use the buttons to select the satellite that is transmitting the channels to be searched. - Page 96 Main menu - Channel search Polarisation Press the buttons to select the correct polarisation (horizontal or vertical) Symbol rate Use the button or the number pad to enter the applicable symbol rate. Service ID Use the number pad to enter the service ID of the channel to be searched for. ...
-
Page 97: Main Menu - Service Menu
Main menu - Service menu Opening the menu From the TV picture, press the button to open the main menu Now select “Service menu” using the buttons and confi rm the call up from the menu using the button. -
Page 98: Automatic Software Update
“Software Update via satellite” or “Update via USB”, at any time. If new software or changes to the channel list are found, you will see the following on-screen display the next time you start the UFS 923 (the original on-screen displays may vary from these example screenshots): ... - Page 99 Main menu - Service menu After the software update, you will see the following on-screen display (only if there ! New Channel List available are any changes to the delta channel list): There is a channel list update available. The Press the button to perform the chan- sort order of your channel list will be retained.
-
Page 100: Software Update Via Satellite
Main menu - Service menu Software update via satellite After calling up the menu, you will fi rst see the following on-screen display: All available modules/components for your receiver will be loaded and then displayed. The loading process may take up to 60 minutes The following on-screen display will then appear:... - Page 101 You can also download the updates from the Internet. The address is: http://www.kathrein.de You will fi nd the software at “Service” → “Software and Download” → “Receiver” → “UFS 923” These updates can also be performed via the receiver's USB ports (see “Software Update by...
-
Page 102: Software Update By Usb
You can also download the updates on the Internet. The address is: http://www.kathrein.de You will fi nd the software at “Service” → “Software and Download” → “Receiver” → “UFS 923” Software Update First connect your USB device (containing the new operating software) to the receiver using a free USB port on the receiver. -
Page 103: Update Channel List
The function “Update Channel List” allows you to reload the channel list stored to the receiver at a later date, should you so require. The channel list “channel.xml” is copied to the USB storage medium using the follow- ing folder structure: Main folder: kathrein Subfolder: ∟ ufs923 Factory Reset... -
Page 104: Main Menu - Settings
Main menu - Settings Opening the menu From the TV picture, press the button to open the main menu. Now select the “Settings” item, using buttons and confi rm the call up from the menu using the button. -
Page 105: First Installation
Main Menu - Settings First installation: See part 1 of the operating manual “Connection and Start-up.” Basic Settings After calling up the menu, you will see the following on-screen display: Use the buttons to select the desired menu and confi rm your selection using the button. -
Page 106: Video Settings
Main Menu - Settings Video Settings After calling up the menu, you will see the following display (depending on the selected signal output): For output of the TV picture via the Scart-TV For output of the TV picture via the output: HDMI output: ... - Page 107 Main Menu - Settings Force 576i (must be supported by the TV set Picture Format otherwise you will not see a TV picture) Here you select the type of screen display depend- ing on the setting of your TV format. Either You can only and need only make this setting if you have selected the setting “Automatic”...
-
Page 108: Audio Settings
Main Menu - Settings Audio settings After calling up the menu, you will see the following on-screen display: Individual items are selected using the buttons. Changes to the current settings can be made using the buttons. Preferred Audio Language Select your preferred audio language here. -
Page 109: Date And Time
Main Menu - Settings Date and time After calling up the menu, you will see the following on-screen display: You can change the current setting using buttons. Local Time Offset Here you can select the local time offset to UTC (formerly GMT) (e.g. + 1 hour for Germany). You can set the offset in 30 minute steps. -
Page 110: Remote Control Code
After calling up the menu, you will see the following on-screen display: You can use this function to allow you to operate several receivers (e.g. four UFS 923 units) using the same remote control. You can assign each receiver its own remote control code. This pre-supposes that the receiver has been supplied with the RC 670 remote control (e.g. -
Page 111: Fan Control
Should you have another Kathrein receiver in use that was supplied with the RC 660 remote con- trol, you can use the UFS 923 remote control to operate that other receiver also. On the UFS 923 remote control, the codes for remotely controlling the RC 660 begin with “5”: ... -
Page 112: User-Defined Settings
Main Menu - Settings User Defi ned Settings After calling up the menu, you will see the following on-screen display: Use the buttons to select the desired menu and confi rm your selection using the button. Parental lock After calling up the menu, you will see the following on-screen display: In order to access this menu, you must... - Page 113 Main Menu - Settings Lock main menu Here you select whether the main menu should be locked. If the main menu is locked, the four-digit PIN code will be requested when you try to open it. Without the four-digit PIN code (factory setting: “0000”), the main menu cannot be viewed and no changes can be made to the device settings.
-
Page 114: Configuring The On-Screen Menu
Main Menu - Settings Customize Screen Menu After calling up the menu, you will see the following on-screen display: Individual items are selected using the buttons. Changes to the current settings can be made using the buttons. Sleep Timer You can use the “Sleep Timer”... -
Page 115: Epg Setup
Main Menu - Settings Front Display in Standby Here you can select whether the front display is illuminated in standby mode. To achieve the rated standby power consumption of less than one Watt, it must be set to “Off”. Front Display Notifi cation Select here whether, during operation, the front display should display the name of the channel currently being watched (setting: “Channel”) or whether, following a brief on-screen display after changing channel, the time should be shown continuously on the front display (setting: “Time”). -
Page 116: Pvr Settings
Main Menu - Settings Post-Recording time Here you select the number of minutes after the time set in the EPG the recording should run on for. You can choose a value between one minute and 30 minutes, in one minute increments. The recording will fi nish that number of minutes after the due time. -
Page 117: Media Centre Settings
Main Menu - Settings Media centre settings After calling up the menu, you will see the following on-screen display: Individual items are selected using the buttons. Changes to the current settings can be made using the buttons. Simple MP3 Mode ... -
Page 118: Antenna & Satellite
Main Menu - Settings Antenna & Satellite You should only make changes to the “Tuner confi guration”, “Edit satellites” and “Edit transponder” menus if you are very familiar with the confi guration of your satel- lite receiver. If you are not familiar with the confi guration of your satellite receiver, you should get in contact with your specialist dealer. -
Page 119: Tuner Configuration
Main Menu - Settings Frequency Use the buttons (transponder frequency already stored) or the number pad (transponder frequency not yet stored) to select the transponder frequency to be tested. At the bottom right of the on-screen display, the receiver shows the current signal strength and signal quality of the selected transponder. The “DVB Type”, “FEC”, “Polarisation”... -
Page 120: Editing Satellites
Main Menu - Settings Edit Satellites Only make changes if you are very familiar with the confi guration of your satellite receiver! If you are not familiar with the confi guration of your satellite receiver, you should get in contact with your specialist dealer. After calling up the menu, you will see the following on-screen display: Individual items are selected using the... - Page 121 Main Menu - Settings Symbol Rate The symbol rate is permanently assigned to each transponder stored and cannot be changed. Polarisation The polarisation is permanently assigned to each transponder stored and cannot be changed. Satellite Longitude A fi xed longitude is assigned to each satel- lite stored and cannot be changed.
-
Page 122: Edit Transponders
Main Menu - Settings Delete Satellite Press the button to delete the satellite currently selected. For security reasons, you are asked to confi rm again that you really want to delete the satellite by press- ing the button. Edit Satellite Name ... - Page 123 Main Menu - Settings Satellite Name Here you select the satellite for which you want to edit/delete the transponder or for which you want to add a new transponder. Pressing the button at this point will show you a list of the satellites stored in the receiver.
- Page 124 Main Menu - Settings Edit Transponder By pressing the button you can call up the input screen which allows you to edit/ change the settings of the transponder you selected previously. Frequency: The selected transponder you want to edit is shown here.
- Page 125 Main Menu - Settings DVB Type: Here you select whether standard channels (DVB-S (SD)) or HDTV channels (DVB-S2 (HD)) are to be received via the selected transponder. Error rate: Select the applicable error rate (Viterbi rate). You need not state the error rate for DVB S (SD) transponders. “Automatic”...
-
Page 126: Main Menu- Interfaces
Automatic decryption in standby Format Recording Archive Hard disk management Format Media Archive For this, please see the separate instructions “Kathrein Portal (Media Centre) and Network (Web) Interface”. You can download this via the Internet at: Ethernet Settings www.kathrein.de → “Service” → “Software and Down- loads”... -
Page 127: Common Interface (Ci)
Main Menu - Interfaces Common Interface (CI) After calling up the menu, you will see the following on-screen display (example): For insertion of CA module and smartcard in the receiver's CI slot, see Operating manual part 1 “Con- nection and Start-Up”, chapter enti- tled “Common Interface (CI)”. -
Page 128: Automatic Decryption In Standby
Main Menu - Interfaces If you select “On”, when recording an encrypted channel, unencrypted viewing of other encrypted channels of the selected transponder is possible at the same time with the CA module used. The number of other encrypted channels you can view depends on the CA module you are using. Automatic decryption in standby You can choose between the settings “On”... -
Page 129: Ethernet Settings
The Ethernet interface used in the receiver is a 10/100 base T Ethernet interface. See the separate instructions on this enti- tled “Kathrein Portal (Media Centre) and Manual English Network (Web) Interface” (see screenshot below). -
Page 130: Main Menu - Applications
Main menu - Applications Opening the menu From the TV picture, press the button to open the main menu. Now select the “Applications” item using buttons and confi rm the call up from the menu using the button. -
Page 131: Main Menu - Language Selection
Main Menu - Language Opening the menu From the TV picture, press the button to open the main menu. Now select “Language Selection” using buttons and confi rm the call up from the menu using the button. The following on-screen display will appear: ... -
Page 132: Operation From The Front Panel (Without Remote Control)
The Stop button allows you to stop recordings which are in process. The fi rst recording to be started is always stopped in each case. AUX button: Pressing the AUX button opens the Kathrein Portal (Media Centre). This is operated via the multi-function control. TV/R button: You can change between TV and radio mode using the TV/R button. -
Page 133: Software Updating Via The Front Usb Port
You can also download the updates on the Internet. The address is: http://www.kathrein.de You will fi nd the software at “Service” → “Software and Download” → “Receiver” → “UFS 923” 1. Use the remote control to switch the receiver to standby mode 2. -
Page 134: Symbol Explanation For The Receiver Display
Explanation of symbols on receiver display Various symbols are occasionally shown on the receiver's display above the normal display (channel name). These are not displayed permanently but only appear for specifi c functions, procedures or channel features. You will fi nd their meanings in the table below. ... -
Page 135: Brief Technical Glossary
Brief Technical Glossary 8PSK (8-Phase-Shift-Keying) DVB - Digital Video Broadcasting Digital modulation process used for HDTV satellite DVB-S refers to the transmission method (S = sat- transmission ellite, C = cable, T = terrestrial). AC 3 DVB-S2 Output for Dolby Digital signal An enhanced DVB-S signal for HDTV with better quality. - Page 136 Brief Technical Glossary FAT and FAT32 JPEG - Joint Photographic Experts Group File systems for storage media Image compression technique. LAN - Local Area Network FEC is the abbreviation for Forward Error Correc- Local network tion. A technique for reducing the error rate of data transmission.
- Page 137 Personal Identifi cation Number. For this unit the the matrix. PIN is a 4-digit numeric code which must be The Kathrein single-cable system satisfi es the sin- entered to unlock the unit to allow access to cer- gle-cable standard in accordance with EN 50494, tain functions and channels.
- Page 138 Brief Technical Glossary Timeshift function Timeshifted playback Transponder A transponder is a frequency converter which receives TV and radio signals broadcast from the earth, converts them and the rebroadcasts them to the earth at a different frequency. A satellite has several transponders.
-
Page 139: Troubleshooting
Troubleshooting In the event of a malfunction, fi rst check all the cable connections and operating states: 1. Receiver and TV set power plugs are connected to wall socket 2. Antenna cables are connected to the receiver input 3. Receiver and TV set correctly connected with a HDMI or Scart cable 4. -
Page 140: Service
Service If, despite studying this operating manual, you still have questions about getting started with the unit or using it correctly, or if unexpected problems occur, please contact your specialist dealer. -
Page 141: Subject Index
Subject Index 4GB Limit Channel Banner Duration Adjusting the volume Channel Information Alphanumeric entries Channel options Calling up the channel options Antenna & Satellite Channel Search Applications Automatic channel search 4GB Limit Manual channel search Start FTP at Booting Opening the menu Start UPnP at Booting Search with Service ID Automatic decryption in standby... - Page 142 EPG Setup I want to watch timeshift TV ... EPG updating I want to watch TV ... EPG updating time Ethernet Settings Kathrein portal (Media centre) Explanation of symbols in receiver dis- play Language Setting Legal information Factory reset Fan control...
-
Page 143: Select Subtitle
Subject Index Navigation (remote control Navigation (remote control buttons in buttons in the EPG) the recording archive) Reminder function Playing back a recording Search function Recording Archive Views (Sort order of recordings) Full text search Key word search in detailed information Reminder function More episodes Presenter - Actor... - Page 144 Subject Index Teletext Timer recording Timeshift Automatic timeshift 32, 116 Timeshift buffer size Troubleshooting Tuner-Confi guration...
- Page 145 For your notes...
- Page 146 For your notes...
- Page 147 For your notes...
- Page 148 936.4185/-/ZWT/0311/e - Subject to change! Internet: www.kathrein.de KATHREIN-Werke KG • Anton-Kathrein-Strasse 1 - 3 • Postfach 10 04 44 • 83004 Rosenheim • Germany • Tel +49 8031 184-0 • Fax +49 8031 184-385...
Need help?
Do you have a question about the UFS 923 and is the answer not in the manual?
Questions and answers