Table of Contents
Advertisement
Quick Links
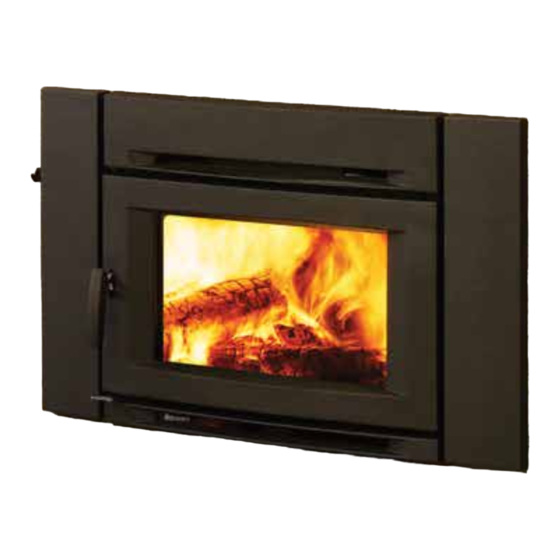
CI1200 / CI1250
Alterra
®
Wood Inserts
Owner's & Installation Manual
French Manual Download: http://ow.ly/MuZyo
Tested by:
Installer: Please complete the details on the back cover
and leave this manual with the homeowner.
Homeowner: Please keep these instructions for future reference.
FPI FIREPLACE PRODUCTS INTERNATIONAL LTD. 6988 Venture St., Delta, BC Canada, V4G 1H4
919-540
09.15.15
Advertisement
Table of Contents

Subscribe to Our Youtube Channel
Related Manuals for Regency Fireplace Products CI1200


Summary of Contents for Regency Fireplace Products CI1200
- Page 1 CI1200 / CI1250 Alterra ® Wood Inserts Owner's & Installation Manual French Manual Download: http://ow.ly/MuZyo Tested by: Installer: Please complete the details on the back cover and leave this manual with the homeowner. Homeowner: Please keep these instructions for future reference.
- Page 2 The following statements are required by the Environmental Protection Agency: “This manual describes the installation and operation of the Regency CI1200 and CI1250 wood heater. This heater meets the 2015 U.S. Environmental Pro- tection Agency’s crib wood emission limits for wood heaters. Under specific test conditions this heater has been shown to deliver heat at rates ranging from 10,600 BTU/hr to 34,700 BTU/hr.”...
-
Page 3: Table Of Contents
OPERATING INSTRUCTIONS SAFETY LABEL Seasoned Wood ............21 Copy of the Safety Decal (CI1200) ........4 First Fire ..............22 Copy of the Safety Decal (CI1250) ........4 Fan Operation (CS1250 Only) ........23 ord reversal ..............23 DIMENSIONS Ash Disposal ..............24 Some Safety Guidelines ..........24 Unit Dimensions CI1200 ..........6... -
Page 4: Copy Of The Safety Decal (Ci1200)
This is a copy of the label that accompanies each CI1200 Wood Insert. We have printed a copy of the contents here for your review. NOTE: Regency units are constantly being improved. Check the label on the unit and if there is a difference, the label on the unit is the correct one. - Page 5 9.1" W x 5.1" H (File at 100%) Nov. 25/14: Rev. B - Updated ETL logo June 15/10: WN# issued - ITS Apr. 15/10: Created draft Jan 10/13: Rev. A updated yrs. of manufacture. Regency CI1200 / CI1250 Wood Cast Insert...
-
Page 6: Dimensions
(refer to Masonry and Factory Built Fireplace Clearances section). 35-15/16 (912mm) 9-9/16 17-1/8 (436mm) (244mm) 15 (381mm) 25 (635mm) 6" (152mm) Diameter 6" (152mm) Diameter OFFSET FLUE ADAPTOR (171-936) STANDARD FLUE ADAPTOR (171-932) Regency CI1200 / CI1250 Wood Cast Insert... -
Page 7: Unit Dimensions Ci1250
(refer to Masonry and Factory Built Fireplace Clearances section). 35-15/16 (912mm) 9-9/16 17-1/8 (436mm) (244mm) 15 (381mm) 25 (635mm) 6" (152mm) Diameter 6" (152mm) Diameter OFFSET FLUE ADAPTOR (171-936) STANDARD FLUE ADAPTOR (171-932) Regency CI1200 / CI1250 Wood Cast Insert... -
Page 8: Optional Backing Plate Dimensions
OPTIONAL BACKING PLATE DIMENSIONS CI1200 Standard CI1250 Standard 40” (1016mm) 40” (1016mm) CI1200 Custom - Minimum Dimensions CI1250 Custom - Minimum Dimensions 37” (940mm) 37” (914mm) Regency CI1200 / CI1250 Wood Cast Insert... -
Page 9: Before Installing Your Insert
Code, ANSI/NFPA 70, or the Canadian Electrical insert to clean the chimney flue. code, CSA C22.1. Note: The CI1200 does not include a blower and 9) Inserts that project in front of the fireplace must one cannot be added to this appliance. If a blower Regency Inserts are designed to use either a 5.5"... -
Page 10: Masonry And Factory Built Fireplace Clearances
R = 1/k x T = 1/0.84 x .75 = 0.893. fied R of 0.893. Since proposed system R is greater than required, the system is acceptable. Thermal Resistance: R = (ft )(hr)( )(K) 10 | Regency CI1200 / CI1250 Wood Cast Insert... -
Page 11: Installing Your Insert
1/2 to 1 inch of the levelling bolt. Diagram 2 Flue Adaptor Secure adaptor using 3 screws - 1 in the front and 1 each on the left and right side. Regency CI1200 / CI1250 Wood Cast Insert... - Page 12 NOTE: The pull rod should not be thrown away. It should be kept if the stove is ever needed to be removed from the fireplace. Pull Rod Diagram 4 Diagram 5: Pull Rod In Place 12 | Regency CI1200 / CI1250 Wood Cast Insert...
-
Page 13: Installation Into Amasonry Fireplace
Ensure the heater is installed in areas that are not too close to neighbors or in valleys that would cause unhealthy air quality or nuisance conditions. 3a) Full Flue Liner (No Cleanout Required) Regency CI1200 / CI1250 Wood Cast Insert... -
Page 14: Stainless Steel Smoke Deflector Installation
To replace the deflector, loosen off both bolts and slide defector upward and out. Install new defector and hand tighten bolts. Ensure positive location of the defector prior to hand tightening. WARNING: Operation of the unit with out proper installation of smoke deflector will void warranty. 14 | Regency CI1200 / CI1250 Wood Cast Insert... -
Page 15: Cast Faceplate Installation
Line up the left side casting bracket with the left side bracket on the unit. Note: the CI1200 right/left sides are reversible. 5) Repeat Steps 2 and 4 to install right cast surround. Regency CI1200 / CI1250 Wood Cast Insert... - Page 16 9) Slide the upper cast surround down over the screws until it is level and in line with the side cast pieces. CI1250 10) Tighten both screws once all three cast pieces are level. CI1200 16 | Regency CI1200 / CI1250 Wood Cast Insert 918-895 08/30/10...
- Page 17 Then run the cord along the lower part of the lower cast surround and out in between the right cast and the unit. 17) With the cord re-routed, follow steps 13-15 to complete the installa- tion. Regency CI1200 / CI1250 Wood Cast Insert 08/30/10 918-895...
-
Page 18: Piece Backing Plate Installation
Diagram 4 5) Slide stove back into position after backing plate is installed. Diagram 2 Flush front face of backing plate Standard backing plate shown on the Diagram 5 CI1250 18 | Regency CI1200 / CI1250 Wood Cast Insert 06/29/10 918-930... -
Page 19: Door Reversal
4) Flip the door hinge 180° - install on the left side of the unit with 2 bolts. 5) Reattach the door catch assembly on the right side with 2 bolts from step Door 9) Reattach the door to the door hinge. Hinge Door Catch Regency CI1200 / CI1250 Wood Cast Insert... -
Page 20: Brick Flue Baffle & Secondary Air Tube Installation
Firebrick is included to extend the life of your insert and radiate heat more evenly. Check to see that all firebricks are in their correct positions and have not become misaligned during shipping. 20 | Regency CI1200 / CI1250 Wood Cast Insert... -
Page 21: Operating Instructions
Two dry pieces banged together sound hollow; wet pieces sound solid and dull. • Dry wood weighs much less than wet wood. • Split a piece of wood. If the exposed surface feels damp, the wood is too wet to burn. Regency CI1200 / CI1250 Wood Cast Insert... -
Page 22: First Fire
As you dry out your fire brick and your masonry flue (if applicable), your draft will increase. How to Light & Maintain a Wood Stove Fire Video 22 | Regency CI1200 / CI1250 Wood Cast Insert... -
Page 23: Fan Operation (Cs1250 Only)
Switching from "Auto" to "Manual" or "High" to "Low" may be done at any time. AUTO MANUAL Neutral Manual/ Green Live Ground Auto 120V AC Switch Switch 60 Hz Fan Thermodisc (normally open) White White Black Ground Fan Wiring Diagram Regency CI1200 / CI1250 Wood Cast Insert... -
Page 24: Ash Disposal
Moving parts of your insert damage to the heater If the insert or its flue require no lubrication. baffle begin to glow, you are overfiring. Stop adding fuel and close the draft control. 24 | Regency CI1200 / CI1250 Wood Cast Insert... -
Page 25: Door Gasket
Side. If tight or rubbing, loosen the 7/16 nuts and adjust the clearance and then re-tighten. Glass clip screw locations Avoid impact on glass doors such as striking or slamming shut. Cleaning & Maintaining a Wood Stove Video Regency CI1200 / CI1250 Wood Cast Insert... -
Page 26: Handle Replacement
Remove and replace the nuts, washer and spacer as shown. Spacer washers Cleaning & Maintaining a Wood Stove Video 26 | Regency CI1200 / CI1250 Wood Cast Insert... -
Page 27: Fan Removal Ci1250 Only
4) Lift fan housing up off pins on floor of unit. White 8) Disconnect the ground wire located on the left side of the fan housing. Ground wire 9) To install fan - reverse Steps 8-1. Fan Housing Pins on unit floor Regency CI1200 / CI1250 Wood Cast Insert... - Page 28 Replace if required. Clean blower motor Disconnect power supply. Remove and clean blower. *DO NOT LUBRICATE* Inspect and clean chimney Annual professional chimney cleaning recommended. Cleaning & Maintaining your Wood Stove Video 28 | Regency CI1200 / CI1250 Wood Cast Insert...
-
Page 29: Main Assembly Ci1200
Air Tube - 3/4" (Qty: 1) 16) 073-955 Baffle (2/set) 17) 171-932 Standard Flue Adaptor 171-936 Offset Flue Adaptor 18) 156-060N Draft plate arm 19) 820-483 Stainless smoke deflector *Not available as a replacement part. Regency CI1200 / CI1250 Wood Cast Insert... -
Page 30: Main Assembly Ci1250
Air Tube - 1" (Qty: 1) 15) 033-953 Air Tube - 3/4" (Qty: 1) 16) 073-955 Baffle (2/set) 17) 171-932 Standard Flue Adaptor 171-936 Offset Flue Adaptor 919-540 Manual *Not available as a replacement part. 30 | Regency CI1200 / CI1250 Wood Cast Insert... -
Page 31: Cast Faceplate
Brick Partial: 1-1/4" x 4-1/4" x 8" 6) * Brick Partial: 1-1/4" x 4-1/2" x 5-1/2" 7) * Brick Partial: 1 1/4" x 3" x 4 1/2" *Not available as a replacement part. Regency CI1200 / CI1250 Wood Cast Insert... - Page 32 32 | Regency CI1200 / CI1250 Wood Cast Insert...
- Page 33 Regency CI1200 / CI1250 Wood Cast Insert...
- Page 34 34 | Regency CI1200 / CI1250 Wood Cast Insert...
-
Page 35: Warranty
Wood Stoves and Inserts Warranty 2015 Regency Fireplace Products are designed with reliability and simplicity in mind. In addition, our internal Quality Assurance Team carefully inspects each unit thorough- ly before it leaves our door. FPI Fireplace Products International Ltd. is pleased to extend this limited lifetime warranty to the original purchaser of a Regency Product. - Page 36 Dealer Name & Address: ______________________________________________ ___________________________________________________________________ Installer: ___________________________________________________________ Phone #: ___________________________________________________________ Date Installed: ______________________________________________________ Serial No.: __________________________________________________________ CI1200 Video Regency, Alterra are trademarks of FPI Fireplace Products International Ltd ® Printed in Canada © Copyright 2015, FPI Fireplace Products International Ltd. All rights reserved.
Need help?
Do you have a question about the CI1200 and is the answer not in the manual?
Questions and answers