
Subscribe to Our Youtube Channel
Related Manuals for Zephyr AK7000AS


Summary of Contents for Zephyr AK7000AS
- Page 1 Tempest I AK7000AS AK7036AS AK7042AS Model number: Serial Number: Date of Purchase: Sales Dealer: SEP07.0101 © Zephyr Corporation READ AND SAVE THESE INSTRUCTIONS...
- Page 2 www.zephyronline.com...
- Page 3 SAFETY NOTICE ..............LIST OF MATERIALS ............INSTALLATION Ducting Calculation Sheet ........Mounting Height & Clearance ........ Ducting Options ............Speci cations ............... Mounting the Range Hood 9-10 ........Horizontal Conversion 11-12 ..........PBD-1100A Dual Blower 13-14 .......... ACCESSORY INSTALLATION Heat Lamp Kit ...............
- Page 4 www.zephyronline.com READ AND SAVE THESE INSTRUCTIONS WARNING TO REDUCE THE RISK OF FIRE OR ELECTRIC SHOCK, DO NOT USE THIS FAN WITH ANY SOLID-STATE CONTROL DEVICE. WARNING TO REDUCE THE RISK OF FIRE ELECTRIC SHOCK, OR INJURY TO PERSONS, OBSERVE THE FOLLOWING: a.
- Page 5 WARNING TO REDUCE THE RISK OF FIRE, USE ONLY METAL DUCTWORK. CAUTION To reduce risk of re and to properly exhaust air outside - Do not vent exhaust air into spaces within walls, ceilings, attics, crawl spaces or garages. OPERATION Always leave safety grilles and lters in place.
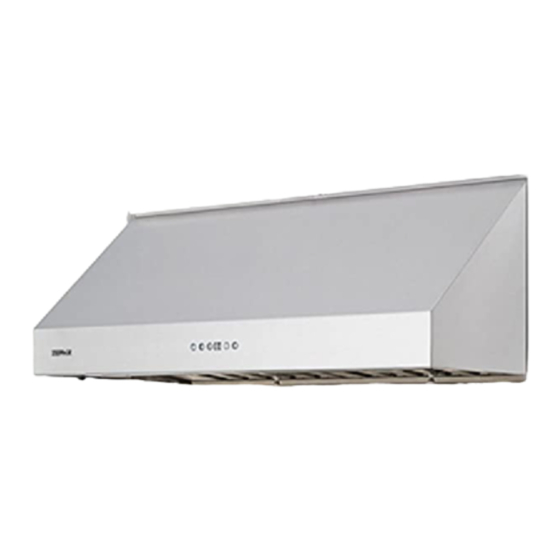
- Page 6 MODELS: AK7000AS, AK7036AS, AK7042AS PARTS SUPPLIED 1 - Hood 2 - Baf e lters (3 - AK7036AS and AK7042AS) 2 - Halogen light bulbs (pre-installed) 1 - Single internal blower and blower plate w/damper (pre-installed) 1 - Rectangular starting collar (for single blower horizontal ducting) 1 - 6”...
- Page 7 Equivalent number Equivalent number Duct pieces Duct pieces length x used T otal length x used T otal 3-1/ 4” x 10” 1 Ft. 6” Round 30 Ft. Rect., wall cap straight with damper 6” Round, 1 Ft. 6” Round, 30 Ft.
- Page 8 www.zephyronline.com Minimum mount height between range top to hood bottom should be no less than 26”. Maximum mount height should be no higher than 36”. It is important to install the hood at the proper mounting height. Hoods mounted too low could result in heat damage and re hazard;...
-
Page 9: Ducting Options
WARNING FIRE HAZARD NEVER exhaust air or terminate duct work into spaces between walls, crawl spaces, ceiling, attics or garages. All exhaust must be ducted to the outside. Use metal ductwork only. Fasten all connections with sheet metal screws and tape all joints with certi ed Silver Tape or Duct Tape. Some Ducting Options Side wall cap Side wall cap... - Page 10 www.zephyronline.com ” (30”) ” (36”) ” (42”) 13/16 ” 3/16 3” 12” elec ” (30”) 15/16” (36”) 15/16” (42”) 15/16” side ” (30”) ” (36”) ø 9 15/16” ” (42”) 13/16 3” 15/16” (30”) 15/16” (36”) 15/16” (42”) 15/16” back with 10”...
- Page 11 ELECTRICAL WARNING All Electrical work must by performed by qualifi ed electrician or person with similar technical know how and background. For personal safety, remove house fuse or open circuit breaker before beginning installation. Do not use extension cord or adapter plug with this appliance. Follow national electrical codes or prevailing local codes and ordinances.
- Page 12 www.zephyronline.com For dual blower installation instructions please refer to page 13. For Mounting Under a Kitchen Cabinet 5. Duct 1. Select preferred duct location (vertical or horizontal). opening cutout 2. Begin installation by removing the baf e lters. 3. Reinforce cabinet with 1”x2” wood strips if additional strengthening is required or if cabinets are framed.
- Page 13 This range hood is equipped standard with a 6” round vertical duct option. To convert from 6” round vertical to 3-1/4” x 10” horizontal ducting please following the instructions below. NOTE: Horizontal ducting is only available for the single internal blower. VERTICAL TO HORIZONTAL DUCTING CONVERSION 1.
- Page 14 www.zephyronline.com 6. On the back of the hood, remove the (6) screws 7. Place round to rectangular transition adapter holding the rectangular cap. inside hood and line it up with the rectangular opening. Attach with (4) M4x8 screws from the outside.
-
Page 15: Pbd-1100A Dual Blower
DUAL BLOWER INSTALLATION* *IMPORTANT: Dual blower and heat lamps may only be used together in 36” and 42” models. 30” models will only accommodate one or the other, not both at the same time. 1. Disconnect single blower wire. 2. Remove support screw from top of hood near the back. -
Page 16: Pbd-1100A Dual Blower
www.zephyronline.com 8. Place 10” round adapter (included with PBD- 7. Secure dual blower plate to hood by following 1100A) on top of hood and secure with (4) removal instructions in reverse. Attach blower M4x8 screws. Connect 10” duct work. wire to hood. The 10”... - Page 17 HEAT LAMP KIT INSTALLATION* *IMPORTANT: Dual blower and heat lamps may only be used together in 36” and 42” models. 30” models will only accommodate one or the other, not both at the same time. 1. Remove nuts from each of the (4) screws 2.
-
Page 18: Lights
www.zephyronline.com Lights On/Dim/Off Display (Speed level, Delay Off Indicator) 5 Min Delay Off Blower On/Off Adjust 3 Speed Levels Blower On/Off By pressing , the blower is switched On and Off. When switched on, the blower turns on at the same speed it was switched off at. - Page 19 1. Push lter toward back of range hood using handles. 2. Pivot front of lter downward. 3. Remove lter by pulling away from hood. Replacing Baffle Filters Hood Model: Part No. Qty. to Order. AK7000AS 50210004 AK7036AS 50210004 AK7042AS 50210004...
- Page 20 If bulbs are dif cult to turn due to prolonged use, rmly attach a glass suction cup approximately the diameter of the bulb or use a rubber/latex glove and turn counter clockwise. Replacement bulbs are available at specialty lighting stores. Purchase type MR16 (GU-10) 35W halogen. For Zephyr part numbers please turn to page 20 of the manual.
-
Page 21: Troubleshooting
TROUBLESHOOTING PROCEDURES FOR TEMPEST I AND TEMPEST II Issue Cause What to do After installation, 1. The power source is not turned ON. 1. Make sure the circuit breaker and the unit’s the unit doesn’t power is ON. work. 2. The power line and the cable locking connector 2. - Page 22 www.zephyronline.com DESCRIPTION PART # Replacement Parts Light Bulb MR16 (GU10) 35W (each) Z0B-0023 Baf e Filter (each) 50210004 Optional Accessories *Dual Internal Blower (w/ 1 blower) PBD-1100A Heat Lamp Kit (30”) AK0700AS Heat Lamp Kit (36”) AK0706AS Heat Lamp Kit (42”) AK0702AS Back Splash (30”) AK0710...
- Page 23 Product damaged through negligence, misuse, abuse, accident. Improper installation and failure to follow installation instructions. When product is used commercially or other than its intended purpose. Damaged because of improper connection with equipment of other manufacturers. Repaired or modi ed by anyone other than Zephyr’s Authorized Agents. What is Not Covered: Consumable parts such as light bulbs, lters, and fuses.
Need help?
Do you have a question about the AK7000AS and is the answer not in the manual?
Questions and answers