
Subscribe to Our Youtube Channel
Related Manuals for Zephyr Titan AK7636AS


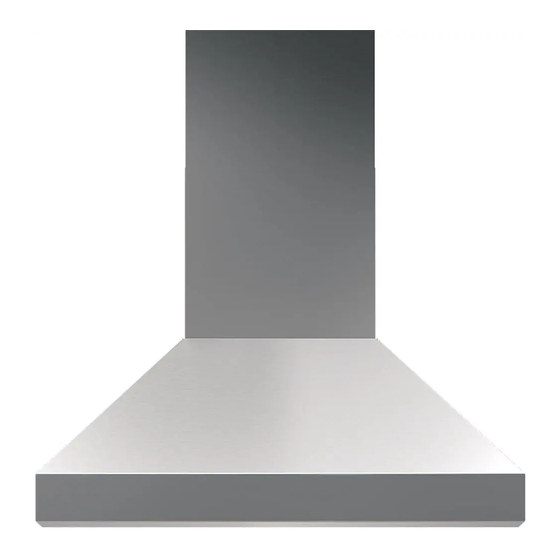
Summary of Contents for Zephyr Titan AK7636AS
- Page 1 Titan AK7636AS AK7642AS AK7648AS AK7654AS AK7660AS Model number: Serial Number: APR19.0401 © Zephyr Ventilation LLC. READ AND SAVE THESE INSTRUCTIONS...
- Page 2 www.zephyronline.com...
-
Page 3: Table Of Contents
SAFETY NOTICE ..............LIST OF MATERIALS ............INSTALLATION Ducting Calculation Sheet ........Mounting Height & Clearance ........ Ducting Options ............Specifications ............... Mounting the Range Hood ........Single Blower Horizontal Ducting Conversion 10-11 PBD-1300A Dual Blower Vertical Ducting ..PBD-1300A Dual Blower Horizontal Ducting FEATURES &... - Page 4 www.zephyronline.com READ AND SAVE THESE INSTRUCTIONS WARNING TO REDUCE THE RISK OF FIRE OR ELECTRIC SHOCK, DO NOT USE THIS FAN WITH ANY SOLID-STATE CONTROL DEVICE. WARNING TO REDUCE THE RISK OF FIRE ELECTRIC SHOCK, OR INJURY TO PERSONS, OBSERVE THE FOLLOWING: a.
- Page 5 WARNING TO REDUCE THE RISK OF FIRE, USE ONLY METAL DUCTWORK. CAUTION To reduce risk of fire and to properly exhaust air outside - Do not vent exhaust air into spaces within walls, ceilings, attics, crawl spaces or garages. OPERATION Always leave safety grilles and filters in place. Without these components, operating blowers could catch onto hair, fingers and loose clothing. The manufacturer declines all responsibility in the event of failure to observe the instructions given here for installation, maintenance and suitable use of the product.
- Page 6 www.zephyronline.com MODELS: AK7636AS, AK7642AS, AK7648AS, AK7654AS, AK7660AS PARTS SUPPLIED 1 - Hood 2 - Duct covers, 1 upper & 1 lower 1 - Duct cover bracket 2 - Baffle filters, AK7636AS & AK7642AS 3 - Baffle filters, AK7648AS, AK7654AS & AK7660AS 2 - LED light bulbs, AK7636AS & AK7642AS 4 - LED light bulbs, AK7648AS, AK7654AS & AK7660AS 1 - 8 in. round starting collar (for single blower ducting) 1 - Top cover plate (for horizontal ducting) 1 - Hardware package...
- Page 7 Equivalent number Equivalent number Duct pieces Duct pieces length x used T otal length x used T otal 3- 1/ 4” x 10” 1 Ft. 3- 1/ 4” x 10” 5 Ft. Rect., Rect. to straight 6” round transition 6”, 7”, 8”, 10” 1 Ft.
- Page 8 www.zephyronline.com transitions and turns. If long duct run is required, increase duct size. If turns or transitions are required; install as far away from hood duct output and as far apart, between the two as possible. x . B Minimum mount height between range top to hood bottom should be no less than 24”.
-
Page 9: Ducting Options
WARNING FIRE HAZARD NEVER exhaust air or terminate duct work into spaces between walls, crawl spaces, ceiling, attics or garages. All exhaust must be ducted to the outside. Use rigid metal ductwork only. Fasten all connections with sheet metal screws and tape all joints with certified Aluminum Tape or Duct Tape. Some Ducting Options Roof Pitch w/ Flashing & Cap side wall cap w/ gravity damper Soffit or crawl space side wall cap w/ gravity damper... - Page 10 www.zephyronline.com (36”, 42”) 15 7/8” (48”, 54”, 60”) 22” 13 15/16” 7 7/8” or Standard 9 15/16” Min. - 30” Max. - 42 1/2” Z1C-0076 Z1C-0176 Min. - 49” 6 1/4” Max. - 80” (36”) 35 15/16, (42”) 41 15/16”, (48”) 47 15/16” 24”...
- Page 11 CAUTION: At least two installers are required due to the weight and size of the hood. Duct Cover (36”, 42”) Bracket 1. Measure from range top to hood bottom and mark line A. (24” 11-13/16” minimum from range top). (48”,54”,60”) 2. Plum and mark center line. 17-11/16” 3. Mark mounting height line B. (15” from line A) 4. Mark mounting height line C. (4-3/4” from line A) 15” 5. Mark mounting spread from C/L on line B and C according to 4-3/4” diagram. (36”) 25-1/4”, (42”) 31-3/16” 6. Fasten (2) 6# x 2” screws into studs on line B. Fasten (2) or (4) (48”) 19-1/16”, (54”) 25-1/16”...
- Page 12 www.zephyronline.com This range hood is equipped standard with a 8” round vertical duct option. To convert from 8” round vertical to 8” round horizontal ducting or 3-1/4” x 10” rectangular horizontal ducting please following the instructions below. VERTICAL TO HORIZONTAL DUCTING CONVERSION 1. Disconnect blower plug and white and black 2. Remove (4) screws from interior of hood body power cables.
- Page 13 5. Position single blower with single blower plate 6. Attach 8” round duct collar to back of hood body as shown. Be sure to tuck back of single blower using (4) M4 x 8 screws. plate into tabs at back of hood. Secure single blower plate to back of hood using (4) screws removed from step 2. 8. Connect single and dual blower PCB blower plug 7. From inside hood body, position top cover plate and white and black power cables. to top of hood body. From outside hood body, attach top cover plate to top of hood body using (4) 3/16 x 3/8 screws.
- Page 14 www.zephyronline.com This range hood is equipped standard with a single blower vertical duct option. To convert from single blower vertical ducting to dual blower vertical ducting please following the instructions below. 1. Disconnect blower plug and white and black 2. Remove (4) screws from interior of hood body power cables. attaching single blower plate to top of hood body.
- Page 15 7. Attach dual blower PCB box to electronics 8. Connect single and dual blower PCB blower bracket by (4) screws. plug and white and black power cables. Follow Steps 1 through 4 on page 13, then continue PBD-1300A horiztantal ducting installation by following the steps below. 6. Position dual blower inside hood body. Attach by 5. Knock out plate A for dual blower horizontal (4) screws previously removed from step 2.
-
Page 16: Optional Remote Control
www.zephyronline.com Power / Delay Off Display Adjust 6 Speed Levels Lights On/Dim/Off 1. Power / Delay Off Power Button Function On/Off button will turn power on and off for entire hood (fan and lights). The hood will remember the last speed and light level it was turned off at. -
Page 17: Maintenance
The RF remote control is equipped with a magnet on the back for easy storage. The remote may be placed on any magnetic surface such as a refrigerator or the Zephyr remote holder, FIG. 1. The remote holder can be inserted into a standard electrical outlet for easy storage. Note: The remote holder does not charge the RF remote. -
Page 18: Replacing Light Bulbs
Remove by turning bulb counter clockwise. Note: Bulb does not unscrew; it turns 60 degrees, stops and falls out. If bulbs are difficult to turn due to prolonged use, firmly attach a glass suction cup approximately the diameter of the bulb or use a rubber/ latex glove and turn counter clockwise. FIG. 3. Directional Lighting The light bulbs can be tilted forwards and backwards to better direct light over your cooking surface. FIG. 4. Replacement bulbs are available to purchase directly from Zephyr. Purchase online at http://store.zephyronline.com or call us at 1.888.880.8368 FIG. 3 FIG. 4... -
Page 19: Troubleshooting
TROUBLESHOOTING PROCEDURES Issue Cause What to do After installation, 1. The power source is not turned ON. 1. Make sure the circuit breaker and the unit’s the unit doesn’t power is ON. work. 2. The power line and the cable locking connector 2. Check the power connection with the unit is is not connecting properly. connected properly. 3. The switch board and control board wirings are 3. Make sure the wirings between the switch disconnected. -
Page 20: Wiring Diagrams
Airflow Control Technology (ACT™) Some local codes limit the maximum amount of CFM a range hood can move. ACT™ allows you to control the maximum blower CFM of select Zephyr Ventilation range hoods without the need for expensive make up air kits. ACT™ enables the installer to easily set the maximum blower speed to one of two most commonly specified CFM levels; 590, 390 or 290 CFM. The usage of ACT™ may not be necessary for your installation. Please check your local codes for CFM restrictions. - Page 21 ACT 590 CFM - Fan Max. 175W @ 2.6A ACT 390 CFM - Fan Max. 94W @ 1.4A ACT 290 CFM - Fan Max. 63W @ 0.9A...
- Page 22 www.zephyronline.com DESCRIPTION PART # Replacement Parts LED Light Bulb MR16 (GU10) 6W (each) Z0B0040 Baffle Filter (each) 50210031 Optional Accessories Dual Internal Blower PBD-1300A Duct Cover Extension (36” & 42”) Z1C-0076 Duct Cover Extension (48”, 54” & 60”) Z1C-0176 Make-Up Air Kit (Single Blower) MUA008A Make-Up Air Kit (Dual Blower) MUA010A To order parts, visit us online at http://store.zephyronline.com or call us at 1.888.880.8368...
-
Page 23: Warranty
Zephyr Ventilation, LLC (referred to herein as “we” or “us”) warrants to the original consumer purchaser (referred to herein as “you” or “your”) of Zephyr products (the “Products”) that such Products will be free from defects in materials or workmanship as follows: Three Year Limited Warranty for Parts: For three years from the date of your original purchase of the Products, we will provide, free of charge, Products or parts (including LED light bulbs, if applicable) to replace those that failed due to manufacturing defects subject to the exclusions and limitations below. -
Page 24: Product Registration
PRODUCT REGISTRATION Congratulations on your Zephyr range hood purchase! Please take a moment to register your new range hood at www.zephyronline.com/registration IT’S IMPORTANT Prompt registration helps in more ways than one. Ensures warranty coverage should you need service. Ownership verification for insurance purposes.
Need help?
Do you have a question about the Titan AK7636AS and is the answer not in the manual?
Questions and answers