Gigaset S820 User Manual
Hide thumbs
Also See for S820:
- User manual (85 pages) ,
- Manual (43 pages) ,
- Setup & user manual (83 pages)

Related Manuals for Gigaset S820


Summary of Contents for Gigaset S820
- Page 1 Congratulations By purchasing a Gigaset, you have chosen a brand that is fully committed to sustainability. This product’s packaging is eco-friendly! To learn more, visit www.gigaset.com.
-
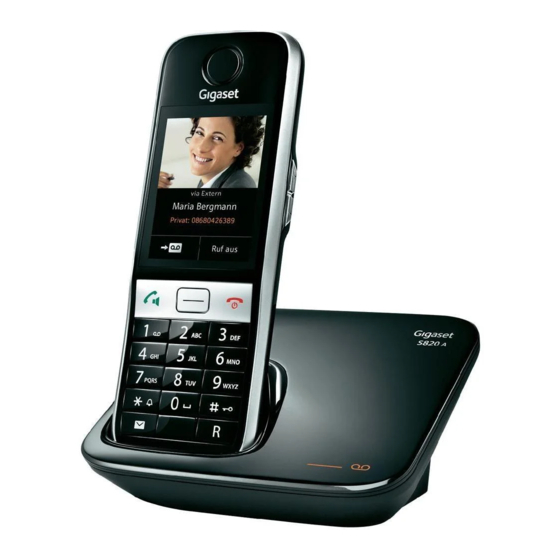
Page 3: Gigaset S820/S820A - Touch & Type
Gigaset S820/S820A – Touch & Type Gigaset S820/S820A Touch & Type – Touchscreen/display ¢ Status bar ( page 19) ¢ Icons ( page 58) show the telephone's current set- ¢ tings and operating status. Touch the status bar to open the status page ( page 19). - Page 4 Gigaset S820/S820A – Touch & Type Registration/paging key on the base ¢ Press briefly: start paging ( page 36) ¢ Press and hold: set base to registration mode ( page 35) Answer machine display (S820A only) No light: answer machine is deactivated or...
-
Page 5: Table Of Contents
Synchronisation with your PC (Gigaset QuickSync) ........ -
Page 6: Safety Precautions
Do not use the devices in environments with a potential explosion hazard (e.g., paint shops). If you give your Gigaset to a third party, make sure you also give them the user guide. Remove faulty devices from use or have them repaired by our Service team, as these could interfere with other wireless services. -
Page 7: Getting Started
Please note: Never expose the telephone to the effects of heat sources, direct sunlight or other electrical devices. Protect your Gigaset from moisture, dust, corrosive liquids and fumes. -
Page 8: Power Supply
Getting started Connecting the base with the phone network and the mains power supply ¤ Plug the telephone cable into the con- nection socket on the back of the base until it clicks into place; then push the cable into the clips. ¤... -
Page 9: Setting Up The Handset For Use
¢ Use only rechargeable batteries ( page 69) recommended by Gigaset Communications GmbH, as this could otherwise result in significant health risks and personal injury. For exam- ple, the outer casing of the batteries could be destroyed or the batteries could explode. The phone could also malfunction or be damaged as a result of using batteries that are not of the recommended type. -
Page 10: Attaching The Belt Clip
Getting started To reopen the battery cover to replace the battery: ¤ Insert your fingernail into the notch on the top of the cover and push down- wards. Attaching the belt clip The handset has notches on each side to attach the belt clip. To attach –... - Page 11 Getting started Setting up the base and handset – installation wizard The installation wizard starts automatically the first time your handset is connected to the base after switching on or after registration. It helps you to configure the following key settings on the handset and base.
- Page 12 Getting started If you want to adjust the settings at a later date: Welcome Welcome ¤ Touch the Skip Settings option at the bottom of the Time Time display. 00:00 00:00 The handset then switches to idle status. Date Date You can configure the settings at any time using the 01.04.2012 01.01.2012...
- Page 13 Getting started Setting the country Welcome Welcome The country in which you are going to use the phone Display Language Date and for which it is authorised must be indicated under English 01.01.2012 Country. If the setting is not correct: ¤...
- Page 14 Getting started Welcome Date 01.01.2012 Display Language English Country Australia The Welcome page is displayed again. ¤ Area (Dial Code) Touch the Save Settings option to save your settings. Skip Save Settings Settings...
-
Page 15: What Would You Like To Do Next
Download your personal ringtones and images to your handset Connect your handset to your PC via Bluetooth/USB and download ringtones and images to your handset with the help of our Gigaset QuickSync software. For the free download and more information, see www.gigaset.com/gigasets820. -
Page 16: Understanding The Operating Steps
Understanding the operating steps Understanding the operating steps In this user guide, the keys on your Gigaset handset are depicted as follows: c / v / a Talk key/menu key/end call key 0 to O Digit/letter keys * / # Star key/hash key... -
Page 17: Using The Telephone
Using the telephone Using the telephone The Gigaset S820/S820A has a unique operating concept. It combines the benefits of the touch- screen with those of a conventional keypad. You navigate around the menu settings and appli- cations and activate/deactivate functions via the touchscreen and can enter numbers and let- ters via the keypad. - Page 18 16 Mellow Call up submenus to adjust settings External Calls Current setting for External Calls 06 Gigaset Return to previous display view; settings are saved Switch: Switching functions on/off (activating/deactivating) or selecting functions Touch the switch briefly to activate/deactivate or select/ ‰...
-
Page 19: Correcting Incorrect Entries
Using the telephone Selection fields If two or three alternative settings are available for one Call Divert selection field parameter, these alternatives are displayed in the form of (example) selection fields. The current setting appears in orange. ¤ Call To change it, briefly touch the selection field you Divert Notification require. -
Page 20: Entering Text
Using the telephone Entering text Each key between 0 and O is assigned several letters and characters. The characters are displayed in a selection line at the bottom of the screen when you press a key. The selected character is highlighted. Briefly press the key several times in succession to select the required letter/character. -
Page 21: Making Calls
Making calls Making calls Making an external call ¤ Enter the number and briefly press c. ¤ Press and hold c; enter number. You can cancel dialling by pressing a. Dialling with the redial list ¤ Briefly press c to open the redial list. You have the following options: ¤... -
Page 22: One Touch Call
Accepting a call on the Gigaset L410 handsfree clip ( page 74): Press the talk key. You need to register your L410 with the Gigaset S820/S820A base before you can use it. Follow the instructions for the Gigaset L410. Call display For Calling Line Identification The caller's phone number is displayed. - Page 23 Enter the number, press c twice. Switching between earpiece and handsfree mode During a call, when establishing the connection and when listening to the answer machine (Gigaset S820A only): ¤ Press c. Place the handset in the charger during a call: ¤...
- Page 24 Making calls Please note To activate/deactivate the following services, a code is generally sent to the telephone network. ¤ After a confirmation tone from the telephone network, press a. All of the functions that you can activate under the Select Services menu item are ser- vices provided by your network provider.
-
Page 25: Changing Phone Settings
Screensaver Choose between an analogue clock/digital clock/picture/ slideshow. You can load pictures onto your handset using ¢ Activation the Gigaset QuickSync software ( page 55). To show the idle display again, briefly press a or the Selection display. Analogue Clock ¤... - Page 26 75or For missed calls 76or For new SMS Dis. mwi-led sig. MC For messages on the answer machine (Gigaset S820A only)/network mail- ¤ Þ . Confirm with You can see the message type (e.g., 7/5) in the header; the current setting (e.g., 0) is displayed in the input field.
-
Page 27: Setting Ringtones
‘ Go back with You can load additional ringtones onto your handset using ¢ the Gigaset QuickSync software ( page 55). Activating/deactivating the ringtone Permanently activate/deactivate the ringtone: Press and hold the star key *. When the ringtone is deactivated, ” appears in the status bar. - Page 28 Changing phone settings Setting the time format/date order Date and Time Menu key v ¤ Menu page Settings á ¤ Time Date + Time ¤ 00:00 Time Format ¤ Select time format ( ´ = selected) Time Format ¤...
- Page 29 Changing phone settings Protection from anonymous callers You can set your telephone so that anonymous calls (where the caller has suppressed calling line identification) are either rejected or only appear in the display. The setting applies for all registered handsets and the base. Menu key v ¤...
-
Page 30: Changing The System Pin
Changing phone settings Activating/deactivating repeater The Gigaset repeater can be used to increase the reception range between your Gigaset handset and the base. To do so, you must activate repeater operation. During activation, calls currently taking place via the base are cancelled. -
Page 31: Eco Dect
ECO DECT ECO DECT ECO DECT indicates low energy consumption and reduced transmission power. Reduced transmission power (radiation) In normal operation mode (factory setting): On delivery, the device is set to maximum range. This guarantees optimised wireless manage- ment. The handset does not emit a signal in idle status (no radiation). Only the base ensures con- tact with the handset is maintained through low-strength wireless signals. -
Page 32: Answer Machine (Gigaset S820A)
Answer machine (Gigaset S820A) Answer machine (Gigaset S820A) Activating/deactivating the Answer Machine answer machine Menu key v ¤ Activation Settings menu page Ì ¤ ¤ Answer Machine Activation on/off Mode Announcement Setting up the answer machine Announcements Defining Mode Menu key v ¤... -
Page 33: Playing Back Messages
Answer machine (Gigaset S820A) Additional setting options Set the recording parameters: ¤ Recordings Open the Recordings sub-menu. Recording Length Recording Length: 1 min., 2 min., 3 min. or 3 min. Maximum. Recording Quality: Longplay or Excellent. Recording Quality Excellent Ring Delay: No Delay, After 10 seconds, After... - Page 34 Answer machine (Gigaset S820A) More answer machine functions Pick up call during answer machine recording Press the talk key c or Accept. Divert call to answer machine: If the answer machine is switched on and the handset is displaying an external ...
- Page 35 Answer machine (Gigaset S820A) Calling the answer machine and playing back messages Prerequisite: The answer machine is activated. ¤ ¤ Call your phone line and press the 9 key while listening to your announcement Enter the system PIN for your phone.
-
Page 36: Network Mailbox
Network mailbox Network mailbox You cannot use the network mailbox unless you have requested it from your provider and saved the network mailbox number in your phone. ¤ ¤ Menu key v Settings menu page Network Mailbox ¤ ¤ Enter the number of the network mailbox: Access Number Enter the number for the net- ¤... -
Page 37: Multiple Handsets
In this case, de-register another handset that is no longer required and repeat the regis- tration procedure. You should start the registration procedure for other Gigaset handsets and handsets of other GAP-enabled devices in accordance with the respective operating instructions. -
Page 38: Making Internal Calls
Multiple handsets De-registering handsets Menu key v ¤ ¤ Settings menu page É HS + Base You want to de-register the handset currently being used: ¤ ¤ ¤ De-register If necessary, enter the system PIN and confirm with è Confirm de-reg- istration with Yes. -
Page 39: Call Waiting
Multiple handsets Internal consultation/internal transfer You are speaking with an external participant and want to consult an internal participant or transfer the call to him. ¤ ¤ ¤ Consultation Internal If more than two handsets are registered to the base, select one handset or All. - Page 40 Multiple handsets Optus (Australia) and Telecom (New Zealand): The handset you have purchased has the required information to work seamlessly with the Optus network in Australia and the Telecom network in New Zealand. However there are some settings that need to be changed before these settings are activated. To activate the Call Waiting feature for use on these networks please perform the following steps.
-
Page 41: Listening In To An External Call
Multiple handsets Call waiting Telecom (New Zealand) If you are in a call you will hear four call waiting tones. Please consider, that no CLIP-information is available. To accept the second call ¤ Press the recall key þ on your phone. To return to the first caller ¤... -
Page 42: Bluetooth Devices
You can exchange contacts entries using the data devices and load ringtones and pictures to the ¢ handset using the Gigaset QuickSync software ( page 55). Please note A headset must have the headset or handsfree profile. The handsfree profile is preferred. - Page 43 Bluetooth devices Trusting the device - adding the device to the known devices list ¤ ¤ ¤ Select the device in the Devices Found list Trust Device If necessary, enter the PIN of the device you want to register and press è to confirm. PIN for a data device: Enter any PIN on the handset and then also on the data device....
-
Page 44: Contacts (Address Book)
Contacts (address book) Contacts (address book) You can save up to four numbers, together with first names and surnames, eMail addresses, birthdays/anniversaries with signalling, VIP ringtone and caller picture in a contacts entry. You can synchronise the contacts with the Outlook contacts in your PC address book and upload ¢... -
Page 45: Editing Entries
Contacts (address book) Editing entries ¤ Touch N. ¤ Change/delete first name, surname, number or eMail address: Touch the entry Where nec- ¤ Delete data by touching ç ¤ essary, touch the relevant field Where necessary, enter new ¤ Touch è to confirm. Touch ‘... - Page 46 Contacts (address book) Transferring an entry/contacts to another handset Prerequisites: The sending and receiving handsets must both be registered to the same base. The other handset and the base can send and receive contacts entries. You can transfer the entire contacts, an individual entry or multiple individual entries. Please note An external call interrupts the transfer.
- Page 47 Contacts (address book) Receiving a vCard with Bluetooth Prerequisite: The handset is in idle status. Bluetooth is activated. ¤ ¢ If the sender is in the Known Devices list ( page 41), receipt occurs automatically. ¤ If the sender is not in the Known Devices list, enter the sender’s device PIN and touch è. Following the vCard transfer, state whether the device should be added (Yes) to the Known Devices list or not (No).
-
Page 48: Call List
Show Show by type Accepted: List of accepted calls by type and calls recorded by the answer machine (Ã, Gigaset S820A only) ¤ Show by type Outgoing: List of outgoing calls (dialled numbers) The last 20 entries are shown in the call list. -
Page 49: Contactability
Contactability SMS notification You can be notified about missed calls and/or new answer machine messages (Gigaset S820A only) via SMS. Alternatively, you can divert your calls to another number. SMS notification is not yet set up or you wish to change the current setting: Menu key v ¤... - Page 50 Calendar Saving appointments to the calendar ¢ Prerequisite: the date/time has already been set ( page 9). Menu key v ¤ } Calendar 2012 ¤ ¤ August Set the month using Touch the desired day ¤ Text New Entry Meeting The following information can be added: Time Text: Name for the appointment (e.g., dinner, meeting).
-
Page 51: Alarm
Alarm Showing/deleting stored appointments Menu key v ¤ ¤ } Calendar Touch the desired day to display the appointments list ¤ ¤ Delete appointment þ or select, edit and save the entry. Touch the desired appointment Delete all missed appointments: Menu key v ¤... -
Page 52: Baby Phone
Baby phone Baby phone When the baby phone is switched on, the stored (internal or external) destination number is called as soon as a defined noise level is exceeded in the vicinity of the handset. The baby phone call to an external number is cancelled after approximately 90 seconds. The talk key and menu keys are locked when the baby phone is activated. -
Page 53: Sms (Text Messages)
SMS (text messages) SMS (text messages) The following prerequisites must be satisfied if you wish to use the SMS function. Prerequisites: Calling Line Identification is enabled. Your network provider supports SMS within the fixed line network. ¢ You have entered the telephone number of at least one SMS centre ( page 53). -
Page 54: Receiving An Sms
SMS (text messages) Receiving an SMS Incoming SMS messages are saved in the inbox; linked SMS messages are, in general, displayed as one SMS. Activating/deactivating first ringtone muting Every incoming SMS is signalled by a single ring of the ringtone. If you accept such a "call" on the first ring, the SMS is lost. -
Page 55: Sms Centre
SMS (text messages) SMS centre If you wish to use the SMS function, you must have saved the telephone number of at least one SMS centre in the device. ¤ ¤ ¤ ¤ Menu key v μ SMS Check Active Send Centre: Menu page Settings ¤... -
Page 56: Sms Troubleshooting
SMS (text messages) SMS troubleshooting E0 Calling Line Identification permanently restricted (CLIR) or Calling Line Identification not activated. FE Error occurred during SMS transfer. FD Connection to SMS centre failed, see self-help. Self-help with errors You cannot send messages. 1. You have not requested the CLIP service (Calling Line Identification Presentation). ¥... -
Page 57: Synchronisation With Your Pc (Gigaset Quicksync)
- Screensaver 240 x 320 pixels To enable your handset to communicate with a PC, the "Gigaset QuickSync program (Version 7 or higher)" must be installed on your PC (free download and more information at www.gigaset.com/gigasets820). You can use this program to create a connection between PC ¢... -
Page 58: Connecting The Base Station To The Pabx/Router
Never: Deactivate the access code. ¤ Calls from Call Lists: The access code should only be prefixed when dialling from a list (SMS, calls, answer machine (Gigaset S820A)). ¤ All Calls: The access code should be prefixed to every number. * XES stands for "eXtended Echo Suppression". -
Page 59: Setting Pauses
Connecting the base station to the PABX/router Setting pauses Menu key v ¤ ¤ *#05# Then enter one of the following function codes: Pause after line seizure: ¤ ¤ ¤ ¤ è Delete current setting: ç è for 1 sec. ... -
Page 60: Display Icons
Display icons Display icons Options bar icons The following functions are available in the options bar depending on the operating situation: Icon Action Icon Action è ‘ Return to the previous display. Save/select – Mute handset microphone Edit entry, enter new appointment –... - Page 61 Display icons Signalling display icons < š Connection Connection cannot be Establishing a connec- established established/connection tion (outgoing call) terminated ð Ø Ù Ú Ø w Ú Ø Ú Internal/external call Alarm call Birthday reminder call Ø á Ú Answer machine Reminder call for is recording appointment...
-
Page 62: Setting Options
Setting options Setting options Open the Settings menu page: ¤ Briefly press menu key v when the handset is in idle mode. ¤ Touch Settings in the header. Please note Not all of the functions described in this user guide are available in all countries. á... - Page 63 Setting options Ï ECO DECT Maximum Range page 29 No Radiation page 29 System Repeater Mode page 28 Security System PIN page 28 Resets Handset Reset page 28 Base Reset page 28 Clean-up List Appointments page 18 Calls page 18 Messages page 18 Contacts...
- Page 64 Ì Activation page 30 Mode Announcement page 30 Answer Advisory Message Machine Time Control (Gigaset S820A) Announcements Announcement page 30 Advisory Message Recordings Recording Length page 31 Recording Quality Ring Delay Call Screening page 31 Play Time Stamp...
-
Page 65: Customer Service & Product Warranty - Australia And New Zealand
The defect was caused by an accident, misuse, abuse, improper installation or operation, ver- min infestation, lack of reasonable care, unauthorised modification, loss of parts, tampering or attempted repair by a person not authorised by Gigaset; or The product has been damaged by lightning or a mains power surge. - Page 66 Replacement or repair services are only offered for products purchased in Australia and New Zealand that bear Gigaset Communications GmbH local registered N Number and Telepermit markings. Please have your proof of purchase ready when calling.
-
Page 67: Questions And Answers
Customer service & product warranty – Australia and New Zealand Questions and answers If you have any queries about the use of your telephone, suggested solutions are available on the Internet at www.gigaset.com/service ¤ ¤ FAQ First steps for troubleshooting. - Page 68 You cannot listen to messages on the network mailbox. Your PABX is set to pulse dialling. ¥ Set your PABX to tone dialling. Gigaset S820A only: No time is specified for a message in the call list. Date/time are not set. ¥...
-
Page 69: Environment
Environment Our environmental mission statement We, Gigaset Communications GmbH, bear social responsibility and are actively committed to a better world. Our ideas, technologies and actions serve people, society and the environment. The aim of our global activity is to secure sustainable life resources for humanity. We are com- mitted to a responsibility for our products that comprises their entire life cycle. -
Page 70: Appendix
Appendix Disposal Batteries should not be disposed of in general household waste. Observe the local waste dis- posal regulations, details of which can be obtained from your local authority or the dealer you purchased the product from. All electrical and electronic equipment must be disposed of separately from general household waste using the sites designated by local authorities. -
Page 71: Specifications
Capacity: 1300 mAh Handset operating times/charging times The operating time of your Gigaset depends on the capacity and age of the battery and the way it is used. (All times are maximum possible times.) Standby time (hours) * Standby time in Eco mode+ (hours) * Talktime (hours) Operating time for 1.5 hours of calls per day (hours) *... -
Page 72: General Specifications
Appendix General specifications DECT DECT standard Supported GAP standard Supported No. of channels 60 duplex channels Radio frequency range 1880-1900 MHz Duplex method Time division multiplexing, 10 ms frame length Repeat frequency of the transmission pulse 100 Hz Length of the transmission pulse 370 μs Channel grid 1728 kHz... -
Page 73: Accessories
Accessories Accessories Upgrade your Gigaset to a cordless PABX: Gigaset S820H handset Brilliant sound quality in handsfree mode Illuminated keypad Side key for simple volume control 2.4" touchscreen Bluetooth® and mini USB Contacts capacity for 500 vCards Talk/standby time of up to 20 h/250 h, standard batteries Brilliant sound quality in speaker mode: ... - Page 74 Accessories Gigaset SL910H handset Full compatibility only available with firmware update (from version 70) approx. November/December 2012. Innovative touchscreen operating concept Handset with real metal frame 8.1 cm TFT colour display Brilliant sound quality in handsfree mode Bluetooth® and mini USB...
- Page 75 Accessories Gigaset S810H handset Brilliant sound quality in handsfree mode High-quality keypad with backlight Side key for simple volume control 1.8" TFT colour display Bluetooth® and mini USB Contacts capacity for 500 vCards Talk/standby time of up to 13 h/180 h, standard batteries Large font for call lists and contacts Brilliant sound quality in speaker mode: ...
-
Page 76: Gigaset Repeater
Weight approx. 15 g Talktime up to 7 h www.gigaset.com/gigasetzx600 Gigaset repeater The Gigaset repeater can be used to increase the reception range between your Gigaset handset and the base. www.gigaset.com/gigasetrepeater Compatibility You can find more information about the handset functions in connection with the individual Gigaset bases at:... -
Page 77: Index
Index ....Index changing system PIN ....connecting to PABX connecting to power/telephone . - Page 78 Index ......Call protection transferring a vCard (Bluetooth) Call screening during recording .
- Page 79 ......talk key ..registering another Gigaset...
- Page 80 Index Number ..as destination for baby phone ....Language + region ....copying to contacts .
- Page 81 ....answer machine ..Registering other Gigaset handsets ......telephone .
- Page 82 ....(Gigaset QuickSync) ......
Need help?
Do you have a question about the S820 and is the answer not in the manual?
Questions and answers