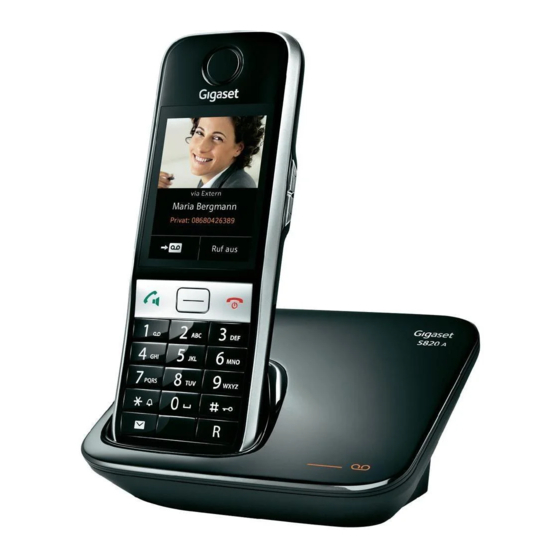
Gigaset S820 Manual
Hide thumbs
Also See for S820:
- User manual (85 pages) ,
- Setup & user manual (83 pages) ,
- User manual (83 pages)

Related Manuals for Gigaset S820


Summary of Contents for Gigaset S820
- Page 1 Congratulations By purchasing a Gigaset, you have chosen a brand that is fully committed to sustainability. This product’s packaging is eco-friendly! To learn more, visit www.gigaset.com.
-
Page 3: Gigaset S820/S820A - Touch & Type
Press and hold: activate/deactivate keypad and display lock Recall key Recall (flash) press and hold: enter dialling pause Message key ¢ Call up messages page ( enclosed poster) Mini USB connection socket Connect the handset to your PC (Gigaset QuickSync) da en fi no sv... - Page 4 Gigaset S820/S820A – Touch & Type Registration/paging key on the base Press briefly: start paging Press and hold: set base to registration mode Answer machine display (S820A only) No light: answer machine is deactivated or base in registration mode Light: answer machine is activated Ã...
-
Page 5: Table Of Contents
Gigaset S820/S820A – Touch & Type ........ -
Page 6: Safety Precautions
Do not use the devices in environments with a potential explosion hazard (e.g. paint shops). If you give your Gigaset to a third party, make sure you also give them the user guide. Remove faulty devices from use or have them repaired by our Service team, as these could interfere with other wireless services. -
Page 7: Getting Started
Please note: Never expose the telephone to the effects of heat sources, direct sunlight or other electrical devices Protect your Gigaset from moisture, dust, corrosive liquids and fumes Wall mounting the base (optional) 50 mm Approx. -
Page 8: Power Supply
Getting started Connecting the base with the phone network and the mains power supply ¤ Plug the telephone cable into the con- nection socket on the back of the base until it clicks into place, then push the cable into the clips ¤... -
Page 9: Setting Up The Handset For Use
Inserting the battery and closing the battery cover Caution Use only rechargeable batteries recommended by Gigaset Communications GmbH, as this could otherwise result in significant health risks and personal injury. For example, the outer casing of the batteries could be destroyed or the batteries could explode. The phone could also malfunction or be damaged as a result of using batteries that are not of the recom- mended type. -
Page 10: Attaching The Belt Clip
Getting started Attaching the belt clip The handset has notches on each side for attaching the belt clip. To attach – press the belt clip onto the back of the handset so that the protrusions on the belt clip engage with the notches To remove –... - Page 11 Getting started Setting up the base and handset – installation wizard The installation wizard starts automatically the first time your handset is connected to the base after switching on or after registration. It helps you to configure the following key settings on the handset and base.
- Page 12 Getting started If you want to adjust the settings at a later date: Welcome ¤ Touch the Skip Settings option at the bottom of the Time display 00:00 The handset then switches to idle status. Date You can configure the settings at any time using the 01.01.2012 Settings menu on your handset.
- Page 13 Getting started Setting the answer machine language ¤ Welcome Touch the AM Phrase Language field ¤ Display Language Set the answer machine language as described above English Setting the country AM Phrase Language The country in which you are going to use the phone and English for which it is authorised must be indicated under Coun- Country...
- Page 14 Getting started Welcome Display Language English AM Phrase Language English Country Sweden Area (Dial Code) The Welcome page is displayed again. ¤ Skip Save Touch the Save Settings option to save your settings Settings Settings Ã Þ ò Ð ô ó V Once you have configured all the necessary settings, your handset switches to idle status.
-
Page 15: What Would You Like To Do Next
Download your personal ring tones and images to your handset Connect your handset to your PC via Bluetooth/USB and download ring tones and images to your handset with the help of our Gigaset QuickSync software. For the free download and more information, see www.gigaset.com/gigasets820. -
Page 16: Display Icons
Display icons Display icons Options bar icons The following functions are available in the options bar depending on the operating situation: Icon Action Icon Action è ‘ Return to the previous display Save/select – Mute handset microphone Edit entry, enter new appointment –... - Page 17 Display icons Signalling display icons < š Connection Connection cannot be Establishing a connec- established established/connection ter- tion minated (outgoing call) ð Ø Ù Ú Ø w Ú Ø Ú Internal/external Alarm call Birthday reminder call call Ø á Ú Answer machine Reminder call for appoint- is recording...
-
Page 18: Setting Options
Setting options Setting options Open the Settings menu page: ¤ Briefly press menu key v when the handset is in idle mode ¤ Touch Settings in the header Please note Not all of the functions described in this user guide are available in all countries. á... - Page 19 Setting options Ï ECO DECT Max. Range No Radiation System Repeater Mode Security System PIN Resets Handset Reset Base Reset Clean-up List Appointments Calls Messages Contacts ã Call Waiting Cancel Ringback Select Services Time Control Activation Mode VIP Callers Call Pro- tection Anonymous Calls Protection Mode...
- Page 20 This quick user guide only describes a small proportion of your telephone's functions. You will find an extensive description of all functions contained in the menu overview in the detailed user guide for your Gigaset S820/S820A both on the enclosed CD and on the Inter- net atwww.gigaset.com.
-
Page 21: Answer Machine (Gigaset S820A)
Answer machine (Gigaset S820A) Answer machine (Gigaset S820A) Activating/deactivating the answer Answer Machine machine Menu key v ¤ Activation menu page Settings Ì ¤ ¤ Answer Machine Activation on/off Mode Announcement Setting up the answer machine Announcements Defining Mode Menu key v ¤... -
Page 22: Playing Back Messages
Answer machine (Gigaset S820A) Additional setting options Setting the recording parameters: ¤ Open the Recordings sub-menu ¤ Select your setting using the relevant parameter field ( ´ = selected), save and return ‘ with ¤ (Note about Ring Delay Automatic: 10 seconds if there are new messages, otherwise 18 seconds) -
Page 23: Using The Telephone
Using the telephone Using the telephone Switching the handset on/off ¤ Press and hold the end call key a in idle status to switch the handset off. You will hear a mel- ¤ Press and hold the end call key a again to switch the handset on again Returning to idle status ¤... - Page 24 Call up submenus to adjust Internal Calls settings External Calls Current setting for 06 Gigaset External Calls Return to previous display view; settings are saved Switch: switching functions on/off (activating/deactivating) or selecting functions Touch the switch briefly to activate/deactivate or select/ ‰...
-
Page 25: Correcting Incorrect Entries
Using the telephone Options and options bar Many displays have an options bar at the bottom. This dis- Options bar (example) plays all the actions that you can apply in the current con- text. ¤ Conf- Options erence Touch an option to perform the corresponding action or touch Options to display a list of further options Returning to the previous display ‘... -
Page 26: Making Calls
Making calls Making calls Making an external call ¤ Enter the number and briefly press c ¤ Press and hold c and then enter the number You can cancel dialling by pressing a. Dialling with the redial list ¤ Briefly press c to open the redial list You have the following options: ¤... - Page 27 Making calls Dialling with Contacts Menu key v ¤ œ Contacts ¤ Scroll through the contacts until the desired entry appears You have the following options: ¤ Press c to dial the number marked in green There is only one number saved: the number is dialled immediately There is more than one number saved: the detail view opens ¤...
-
Page 28: Making Internal Calls
If Auto Answer is activated, remove the handset from the charger ¤ ¢ Gigaset S820A: touch to divert the call to the answer machine ( page 20). Speaker If you are going to let someone listen in, you should tell the other party that this is happening. -
Page 29: Contacts (Address Book)
"Set up conference calls". These services are provided to you during an external call in the options bar (e.g., Consul-tation, Conference) For additional information on the network services, see the user guide on the enclosed CD and on the Internet at www.gigaset.com. Contacts (address book) Managing contacts entries Opening the contacts ¤... -
Page 30: Deleting An Entry
Select entry and ¤ - Add number: touch Add ¤ ¤ - Overwrite number: select corresponding number Touch Yes For more information see the user guide on the enclosed CD and on the Internet at www.gigaset.com. da en fi no sv... -
Page 31: Sms (Text Messages)
SMS (text messages) SMS (text messages) The following prerequisites must be satisfied if you wish to use the SMS function. Calling Line Identification is enabled Your network provider supports SMS within the fixed line network ¢ You have entered the telephone number of at least one SMS centre ( page 30). -
Page 32: Sms Centre
Touch Yes to confirm For information on setting SMS centres, see the user guide on the enclosed CD and on the Inter- net at www.gigaset.com. SMS centre If you wish to use the SMS function, you must have saved the telephone number of at least one SMS centre in the device. -
Page 33: Contactability
The activated setting is indicated in the idle display, from where it can also be deactivated. SMS notification You can be notified about missed calls and/or new answer machine messages (Gigaset S820A only) via SMS. Alternatively, you can divert your calls to another number. -
Page 34: Calendar
Calendar Calendar You can remind yourself of up to 30 appointments. Birthdays in the contacts are transferred to the calendar. The current date is highlighted in white in the calendar. Days with appointments are marked with a coloured bar. When you select a day, it is briefly highlighted in colour. Saving appointments to the calendar ¢... -
Page 35: Alarm
Alarm Alarm ¢ Prerequisite: the date/time has already been set ( page 9). ¤ ¤ Menu key v Ü Alarm on/off ¤ Touch N to change the settings for the alarm: ¤ ¢ Time Set the hour and minutes for the wake-up time (time setting page 10) ¤... -
Page 36: Eco Dect - Reducing Transmission Power (Radiation)
Completely deactivate the DECT-wireless module in idle status (Eco mode+) ¤ ¤ Open the status page No Radiation on For additional information see the user guide on the enclosed CD and on the Internet at www.gigaset.com. da en fi no sv... -
Page 37: Bluetooth Devices
Own Device Touch the name ¤ ¤ ¤ ç Touch to delete name Enter new name Touch è to confirm For additional information see the user guide on the enclosed CD and on the Internet at www.gigaset.com. da en fi no sv... -
Page 38: Customer Service & Assistance
Customer Service & Assistance Customer Service & Assistance Do you have any questions? As a Gigaset customer, you can find help quickly in this User Manual and in the service section of our Gigaset online portal www.gigaset.com/service. Please register your phone online right after purchase. -
Page 39: Authorisation
This device is intended for analogue phone lines in your network. Country-specific requirements have been taken into consideration. We, Gigaset Communications GmbH, declare that this device meets the essential requirements and other relevant regulations laid down in Directive 1999/5/EC. A copy of the Declaration of Conformity is available at this Internet address: www.gigaset.com/docs... -
Page 40: Index
Index Index Call screening during recording ..... (ans. mach.) ......Caller picture Calling . - Page 41 Index Lock ... . . activating/deactivating ......Getting started .
- Page 42 Index Switching microphone (handset) on/off ..Switching off wireless module QuickSync ....Synchronising Contacts (software for Windows and Mac) . . s. CD .
Need help?
Do you have a question about the S820 and is the answer not in the manual?
Questions and answers