Gigaset SL910 Manual
Hide thumbs
Also See for SL910:
- User manual (112 pages) ,
- Manual (112 pages) ,
- Quick start manual (2 pages)

Related Manuals for Gigaset SL910


Summary of Contents for Gigaset SL910
- Page 1 SL910-SL910 Congratulations By purchasing a Gigaset, you have chosen a brand that is fully committed to sustainability. This product’s packaging is eco-friendly! To learn more, visit www.gigaset.com.
-
Page 3: Gigaset Sl910/Sl910A - With The Special "Touch
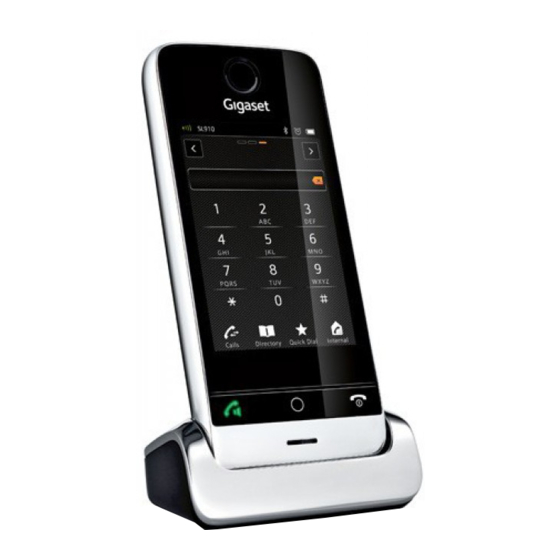
Gigaset SL910/SL910A – with the special "touch" Gigaset SL910/SL910A – with the special "touch" Message LED Proximity sensor Touchscreen/display ¢ Status bar enclosed poster) Icons show the telephone’s current settings and operating ò ô ó ¼ Ð Ã status. Touch the status bar to open the status page. - Page 4 Gigaset SL910/SL910A – with the special "touch" The base of the Gigaset SL910/SL910A is supplied in two variants. The functionality and fea- tures of both variants are identical. Base variant 1 Base variant 2 Registration/paging key Press briefly: start paging...
-
Page 5: Table Of Contents
Gigaset SL910/SL910A – with the special "touch" ........ -
Page 6: Safety Precautions
Do not use the devices in environments with a potential explosion hazard (e.g., paint shops). If you give your Gigaset to a third party, make sure you also give them the user guide. Remove faulty devices from use or have them repaired by our Service team, as these could interfere with other wireless services. -
Page 7: Getting Started
Please note: Never expose the telephone to the effects of heat sources, direct sunlight or other electrical devices. Protect your Gigaset from moisture, dust, corrosive liquids and fumes. en fr fa ar... -
Page 8: Power Supply
Getting started Connecting the base with the phone network and the mains power supply Base variant 1 Base variant 2 ¤ Insert the phone cable (cable slightly flattened) into the right/lower connection socket at the rear of the base until it clicks into place. ¤... - Page 9 Getting started Wall mounting the base (optional) Base variant 1 Base variant 2 48 mm Approx. 2.5 mm Connecting the charger cradle ¤ Connect the flat plug to the power adapter ¤ Plug the power adapter into the plug socket If you have to remove the plug from the charger cradle again: ¤...
-
Page 10: Setting Up The Handset For Use
Inserting the battery and closing the battery cover Caution Use only rechargeable batteries recommended by Gigaset Communications GmbH, as doing otherwise could result in significant health risks and personal injury. For example, the outer casing of the battery could be destroyed or the battery could explode. The phone could also malfunction or be damaged as a result of using batteries that are not of the rec- ommended type. -
Page 11: Charging The Battery
Getting started Charging the battery The battery is supplied with a partial charge. Please charge it com- pletely before use. ¤ Charge the handset in the charger cradle for 5 hours. Please note The handset must only be placed in the designated charger cradle. The battery is also charged if the handset is connected via a USB connection to a PC with a power supply of 500 mA The battery may heat up during charging. - Page 12 Getting started If you do not want to configure the settings at this Welcome point: ¤ õ Time Touch the [ Skip Settings] option at the bottom 00:00 of the display. Date The handset then switches to idle status. 01.07.2012 You can configure the settings at a later stage using the Display Language Settings menu on your handset.
- Page 13 Getting started ¤ Use the three number wheels to set the current Date date. The procedure is the same as for setting the Date time. 2014 The current mode for displaying the date is displayed 2013 under Date Order (here: Day Month Year). If you want 26.
- Page 14 Getting started This brings up a list containing all the available lan- Display Language guages. ± Ø The current language is marked with ¤ Deutsch ± Ø Touch the icon next to the required language. English If your language is not displayed, the list may be ±...
- Page 15 Getting started Please note If you have selected Other Country instead of a country, the Welcome page will also show the Country (Dial Code) entry. ¤ ’ Touch next to Country (Dial Code) and enter the International Prefix and Interna- tional Area Code for the international country code, as described below for the area (dial code).
- Page 16 Getting started The Welcome page is displayed again. ¤ Touch the [ è Save Setting] option to save your Welcome Time settings. 08:32 Date 26.04.2012 Display Language English Country United Arab Emirates Area (Dial Code) è õ Skip Settings Save Setting Once you have configured all the necessary settings, your handset switches to idle status.
-
Page 17: What Would You Like To Do Next
Download your personal ringtones and images to your handset. Connect your handset to your PC via Bluetooth/USB and download ringtones and images to your handset with the help of our Gigaset QuickSync software. For the free download and more information, see www.gigaset.com/gigasetsl910. -
Page 18: Display Icons
Display icons Display icons Options bar icons The following functions are available in the options bar depending on the operating situation. Icon Action Icon Action † ü Activate speaker mode Deleting è † Save/select (Speaker mode is activated) (orange) Deactivate speaker mode Ž... -
Page 19: Setting Options
Setting options Setting options Open the Settings menu page: ¤ Briefly press menu key v when the handset is in idle mode. ¤ Drag your finger horizontally across the display to switch to the Settings menu page. Please note Not all of the functions described in this user guide are available in all countries. Main menu Submenu Additional setting options... - Page 20 Setting options Main menu Submenu Additional setting options Settings Current setting Display + Screensaver Keypad Activation Selection Slideshow Analogue Clock Digital Clock 1 Digital Clock 2 (List of Screensavers images) Backlight In Charger Out of Charger Timeout 15 sec. / 30 sec. / 1 min. / 2 min. Number Info in Dial Lists Number Type Only Type and Number...
- Page 21 Setting options Main menu Submenu Additional setting options Settings Current setting É Handsets + This Handset Base Register De-register Rename Registered Handsets (Only if more than one handset is registered) (List of registered handsets) Connected to Base Base 1 Base 4 Best Base Ê...
- Page 22 Setting options Main menu Submenu Additional setting options Settings Current setting Ê System Only with base variant 2 (even after firmware update) Local Network 192.168.2.2 IP Address Type (Current IP address) Static Dynamic IP Address Subnet Mask Default Gateway Preferred DNS server Firmware Update Automatic Check Update Firmware...
- Page 23 This quick user guide only describes a small proportion of your telephone's functions. You will find an extensive description of all functions contained in the menu overview in the detailed user guide for your Gigaset SL910/SL910A both on the enclosed CD and on the Internet at www.gigaset.com.
-
Page 24: Answering Machine (Gigaset Sl910A)
Answering machine (Gigaset SL910A) Answering machine (Gigaset SL910A) Open the submenu for setting and operating the answering machine: ¤ ¤ ¤ Menu key v [ ¶ Answer Machine] Menu page Settings Activating/deactivating the Answer Machine answering machine Activation ¤ Activate/deactivate the answering machine with the Mode switch next to Activation. -
Page 25: Deleting All Messages
Answering machine (Gigaset SL910A) Additional setting options Answer Machine Setting the recording parameters: ¤ Scroll until you reach the desired recording Recording Length parameter: 2 min. - Recording Length: 1 min., 2 min., 3 min. or Maximum. Recording Quality Excellent - Recording Quality: Excellent or Long Play. - Page 26 Please note You will find further information about using the answering machine while you are away from home (remote operation) in the detailed user guide for your Gigaset SL910-SL910A on the enclosed CD and on the Internet at www.gigaset.com. en fr fa ar...
-
Page 27: Using The Telephone
Using the telephone Using the telephone Activating/deactivating the handset In idle status, press and hold the end call key a. Returning to idle status ¤ Briefly press end call key a. ¤ If you do not press any key and do not touch the display, the display automatically reverts to idle status after approximately three minutes. - Page 28 Using the telephone Scrolling in lists and menus (scrolling vertically) ¤ Drag the display in a vertical direction. If there are more list entries than can be displayed all at once, a drop shadow at the bottom or top edge of the display indicates the direction in which you have to scroll to view more of the list.
-
Page 29: Changing The Settings
Using the telephone Changing the settings Touch an icon on one of the menu pages to open the corresponding application/function. The display shows the configurable parameters and user interface elements as well as their current settings (orange in the display). Examples: Return to the previous Room Monitor... - Page 30 Using the telephone Entering numbers and text Touch a character on the display to enlarge it. Keep your finger on the display until you see the desired character enlarged. As soon as you remove your finger from the display, the character is copied to the text field in which the cursor is blinking.
-
Page 31: Making Calls
All Handsets (group call). Accepting a call ¤ Press c. ¤ If Auto Answer is activated, remove the handset from the charger. ¤ Gigaset SL910A: Touch [ Divert] to divert the call to the answering machine. en fr fa ar... - Page 32 "set up conference calls". These services are provided to you during an external call in the option slider (e.g., [ Consultation], [ Conference]). For additional information on the network services, see the user guide on the enclosed CD and on the Internet at www.gigaset.com en fr fa ar...
-
Page 33: Contacts (Address Book)
Contacts (address book) Contacts (address book) Managing entries in Contacts Opening Contacts ¤ ¤ Menu key v. [ œ Contacts] or ¤ Touch [ œ Contacts] on the dial page or during a call. Creatinga new entry New Entry ¤ ¤... - Page 34 Contacts (address book) Transferring an entry/Contacts to another handset The sending and receiving handsets must both be registered to the same base. The other handset and the base can send and receive Contacts entries. Transferring individual entries ¤ ¤ Touch [ = Copy]. Open the detail view for the entry.
-
Page 35: Sms (Text Messages)
SMS (text messages) Transferring the telephone number to the QuickDial shortcuts The QuickDial shortcuts can contain a maxim of 7 entries. ¤ ¤ ¤ Switch to the dial page and touch [ ¥ QuickDial]. Touch [d New Entry]. Select the ¤... -
Page 36: Sms Centre
SMS (text messages) Receiving, reading and managing SMS messages Received text messages are saved in the incoming message list. If text messages are saved in · this list the symbol is displayed on the messages page in the standby display. ¤... -
Page 37: Room Monitor
Room monitor Room monitor When the room monitor is switched on, the stored (internal or external) destination number is called as soon as a defined noise level is exceeded in the vicinity of the handset. Incoming calls are signalled only via the display, the lighting is reduced to 50%. Vibration alarm, ringtones, advisory tones and paging are switched off. -
Page 38: Alarm
Alarm Alarm Prerequisite: the date and time have already been set. ¤ ¤ Touch Ù Alarm. Open the status page. ¤ Touch [ N Edit] to change the settings for the alarm. ¤ Set the hour and minute for the wake-up time. ¤... -
Page 39: Bluetooth Devices
Bluetooth devices Bluetooth devices Up to 5 data devices (PC, PDA, mobile phone) and one Bluetooth headset can be registered on the handset. The distance to the Bluetooth device should not exceed 10 m. ¤ ¤ ¤ £ Touch ò Bluetooth. Open the status page. -
Page 40: Customer Service & Assistance
Customer Service & Assistance Customer Service & Assistance Do you have any questions? As a Gigaset customer, you can find help quickly in this User Manual and in the service section of our Gigaset online portal www.gigaset.com/service. In our constantly updated online service you can find:... - Page 41 (Preço de uma ligação local) - - - - - - - - - - - - - - - - (01800 999 GIGASET) - - - - - - - - - - - - - - - - - - - Demais localidades:...
-
Page 42: Manufacturer Warranty (Middle East)
Manufacturer warranty (Middle East) Manufacturer warranty (Middle East) On the purchase of your new Gigaset product, we guarantee that this equipment is a genuie manufacturer’s product and extend the following warranty: We guarantee this product against manufacturing defects for two full years from the date of purchase, unless specified otherwise. -
Page 43: Service Centres (Midde East)
Service Centres (Midde East) Service Centres (Midde East) Oman National Telephone Services Co. LLC Customer Service Hotline UAE P.O. Box 2786 PC:112, Sultanate of Oman TEL: 00971-4-4458255 / 00971-4-4458254 Tel: +968-709281 Ext. 45/21/75 Service Collection Point Fax: +968-791013 www.technocare-prodigy.com E-mail: isonts@omentel.net.om KARAMA Qatar Sea Shell Electronics... - Page 44 Switzerland) depending on national type approval. Country-specific requirements have been taken into consideration. We, Gigaset Communications GmbH, declare that this device meets the essential requirements and other relevant regulations laid down in Directive 1999/5/EC. A copy of the Declaration of Conformity is available at this Internet address: www.gigaset.com/docs...
-
Page 45: Index
Index Index ......Calendar Call ......accepting Activating . - Page 46 Index Correcting incorrect entries ... . Entering special letters .........
- Page 47 Index Keys ..... . end call/end key ......Navigation area end call/end key .
- Page 48 Index Recording SMS centre ....announcements (answering changing number ......
Need help?
Do you have a question about the SL910 and is the answer not in the manual?
Questions and answers