AMX MST-1001 Installation & Hardware Reference Manual
Modero s series
Hide thumbs
Also See for MST-1001:
- Quick start manual (2 pages) ,
- Instruction manual (48 pages) ,
- Configuration manual (100 pages)
Table of Contents
Advertisement
Quick Links
IN ST A L LATI O N & H A RDW A RE REFERE NCE M A N U A L
M O DE RO S S E R I ES TO U C H PA N E L S
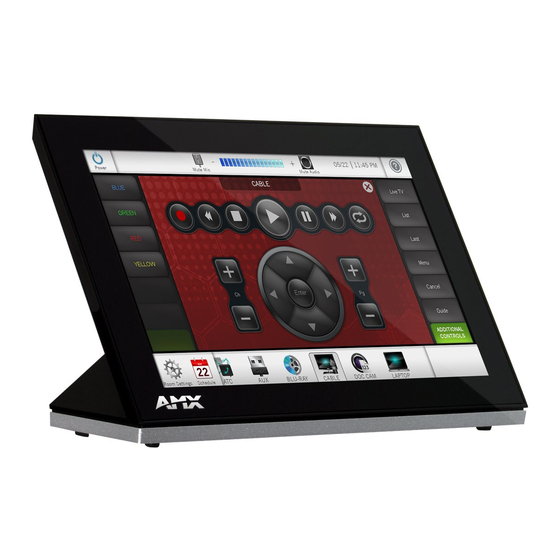
MST-1001 10.1" MODERO S SERIES TABLETOP TOUCH PANEL
MSD-1001-L 10 .1 " MODER O S SERI ES LAN DSCAPE WALL MOUN T TOUCH PANEL
MST-701 7" MODER O S SERI ES TABLETOP TOUCH PAN EL
MSD-701-L 7" MODERO S SERIES LANDSCAPE WALL MOUNT TOUCH PANEL
MST-431 4. 3" MODERO S SERI ES TABLETOP TOUCH P AN EL
MSD-431-L 4.3" MODERO S SERIES LANDSCAPE WALL MOUNT TOUCH PANEL
Advertisement
Table of Contents

Related Manuals for AMX MST-1001


Summary of Contents for AMX MST-1001
- Page 1 M O DE RO S S E R I ES TO U C H PA N E L S MST-1001 10.1" MODERO S SERIES TABLETOP TOUCH PANEL MSD-1001-L 10 .1 " MODER O S SERI ES LAN DSCAPE WALL MOUN T TOUCH PANEL MST-701 7"...
-
Page 2: Copyright Notice
COPYRIGHT NOTICE AMX© 2015, all rights reserved. No part of this publication may be reproduced, stored in a retrieval system, or transmitted, in any form or by any means, electronic, mechanical, photocopying, recording, or otherwise, without the prior written permission of AMX. Copyright protection claimed... - Page 3 Anyone performing field maintenance on AMX equipment should use an appropriate ESD field service kit complete with at least a dissipative work mat with a ground cord and a UL listed adjustable wrist strap with another ground cord WARNING: Do Not Open! Risk of Electrical Shock.
-
Page 4: Table Of Contents
Panel Calibration ....................... 9 Testing the Panel Calibration ......................... 9 Cleaning the Touch Overlay and Case................9 MST/D-1001 - 10.1" S Series Touch Panels ...........10 MST-1001 (Tabletop) ....................10 MST-1001 Specifications ........................10 MSD-1001-L (Wall Mount-Landscape) ................12 MSD-1001-L Specifications ......................... 12 Touch Panel Aspect Ratio ........................... - Page 5 MXD-431-L Dimensions ............................. 32 Upgrading Firmware ..................33 Overview .......................... 33 Downloading Firmware Updates From www.amx.com ........... 33 Upgrading Firmware via USB Flash Drive................ 33 Load the Firmware on a USB Flash Drive ....................33 Transfer the Firmware File From the Flash Drive to the Touch Panel ..........34 Upgrading from Previous Firmware ................
-
Page 6: Modero S Series G4 Touch Panels
FIG. 1 The Modero S-Series G4 Touch Panels covered in this manual include: Modero S-Series G4 Touch Panels Name Description Page Ref MST-1001 FG2265-05 10.1" Modero S Series Tabletop Touch Panel page 10 MSD-1001-L FG2265-01 10.1" Modero S Series Landscape Wall Mount Touch Panel... -
Page 7: Powering The Panel On/Off
Guide, available at www.amx.com. NOTE: Programming Modero S Series touch panels require the use of the latest versions of NetLinx Studio and TPDesign4, both available to download at www.amx.com. Bluetooth Support S Series touch panels allow the use of Bluetooth keyboard and mouse combinations, using HID Profile v1.1. -
Page 8: Starting Picture View
Touching any place on the display will result in the configuration popup to slide from the bottom of the display. Picture View goes into its Normal Mode when the MST-1001 goes into idle timeout while connected to a USB drive. Normal Mode displays images until the touchscreen is touched, or some other wakeup event is detected. -
Page 9: Panel Calibration
Modero S Series G4 Touch Panels Panel Calibration It is recommended that the panel is calibrated before its initial use and after completing a firmware download. Panel calibration is performed via the Calibrate page. The Calibrate page is accessed in one of two ways: By holding the Sleep button with a pointed instrument for ~6 seconds ... -
Page 10: Mst/D-1001 - 10.1" S Series Touch Panels
• Shutdown: 0.7W • Start-Up Inrush Current: Not applicable due to PoE standard EXTERNAL POWER SUPPLY Optimal performance requires use of one of the following AMX PoE power supplies (not included): REQUIRED • PS-POE-AF-TC, PoE Injector, 802.3AF Compliant (FG423-83) • NXA-ENET8-2POE, Gigabit PoE Ethernet Switch (FG2178-63) CERTIFICATIONS •... - Page 11 • Intercom: Full Duplex VoIP, SIP v2.0 (supported with AMX-CSG) GRAPHICS ENGINE AMX G4: AMX's exclusive, powerful G4 graphics engine – the driving force behind the advanced graphics and image processing capability on a variety of AMX Touch Panels and other devices (see TPD4...
-
Page 12: Msd-1001-L (Wall Mount-Landscape)
• Shutdown: 0.8W • Start-Up Inrush Current: Not applicable due to PoE standard EXTERNAL POWER SUPPLY Optimal performance requires use of one of the following AMX PoE power supplies (not included): REQUIRED • PS-POE-AF-TC, PoE Injector, 802.3AF Compliant (FG423-83) • NXA-ENET8-2POE, Gigabit PoE Ethernet Switch (FG2178-63) CERTIFICATIONS •... -
Page 13: Touch Panel Aspect Ratio
• Intercom: Full Duplex VoIP, SIP v2.0 (supported with AMX-CSG) GRAPHICS ENGINE AMX G4: AMX's exclusive, powerful G4 graphics engine – the driving force behind the advanced graphics and image processing capability on a variety of AMX Touch Panels and other devices (see TPD4... -
Page 14: Mst/D-701 - 7" S Series Touch Panels
• Shutdown: 0.7W • Start-Up Inrush Current: Not applicable due to PoE standard EXTERNAL POWER SUPPLY Optimal performance requires use of one of the following AMX PoE power supplies (not included): REQUIRED • PS-POE-AF-TC, PoE Injector, 802.3AF Compliant (FG423-83) • NXA-ENET8-2POE, Gigabit PoE Ethernet Switch (FG2178-63) CERTIFICATIONS •... - Page 15 • Intercom: Full Duplex VoIP, SIP v2.0 (supported with AMX-CSG) GRAPHICS ENGINE AMX G4: AMX's exclusive, powerful G4 graphics engine – the driving force behind the advanced graphics and image processing capability on a variety of AMX Touch Panels and other devices (see TPD4...
-
Page 16: Msd-701-L (Landscape Wall Mount)
• Shutdown: 0.7W • Start-Up Inrush Current: Not applicable due to PoE standard EXTERNAL POWER SUPPLY Optimal performance requires use of one of the following AMX PoE power supplies (not included): REQUIRED • PS-POE-AF-TC, PoE Injector, 802.3AF Compliant (FG423-83) • NXA-ENET8-2POE, Gigabit PoE Ethernet Switch (FG2178-63) CERTIFICATIONS •... -
Page 17: Touch Panel Aspect Ratio
• Intercom: Full Duplex VoIP, SIP v2.0 (supported with AMX-CSG) GRAPHICS ENGINE AMX G4: AMX's exclusive, powerful G4 graphics engine – the driving force behind the advanced graphics and image processing capability on a variety of AMX Touch Panels and other devices (see TPD4... -
Page 18: Mst/D-431 - 4.3" S Series Touch Panels
• Shutdown: 0.7W • Start-Up Inrush Current: Not applicable due to PoE standard EXTERNAL POWER SUPPLY Optimal performance requires use of one of the following AMX PoE power supplies (not included): REQUIRED • PS-POE-AF-TC, PoE Injector, 802.3AF Compliant (FG423-83) • NXA-ENET8-2POE, Gigabit PoE Ethernet Switch (FG2178-63) CERTIFICATIONS •... - Page 19 • Intercom: Full Duplex VoIP, SIP v2.0 (supported with AMX-CSG) GRAPHICS ENGINE AMX G4: AMX's exclusive, powerful G4 graphics engine – the driving force behind the advanced graphics and image processing capability on a variety of AMX Touch Panels and other devices (see TPD4...
-
Page 20: Msd-431-L (Wall Mount - Landscape)
• Shutdown: 0.7W • Start-Up Inrush Current: Not applicable due to PoE standard EXTERNAL POWER SUPPLY Optimal performance requires use of one of the following AMX PoE power supplies (not included): REQUIRED • PS-POE-AF-TC, PoE Injector, 802.3AF Compliant (FG423-83) • NXA-ENET8-2POE, Gigabit PoE Ethernet Switch (FG2178-63) CERTIFICATIONS •... -
Page 21: Touch Panel Aspect Ratio
• Intercom: Full Duplex VoIP, SIP v2.0 (supported with AMX-CSG) GRAPHICS ENGINE AMX G4: AMX's exclusive, powerful G4 graphics engine – the driving force behind the advanced graphics and image processing capability on a variety of AMX Touch Panels and other devices (see TPD4... -
Page 22: Installing Tabletop (Mxt) Panels
USB peripherals (mouse, keyboard, etc.) may be connected to the USB port on the rear of the device. Updates to the device’s firmware can also made via the USB port. Note that FIG. 12 shows a MST-1001, but the connector locations are similar for all MST panels: USB Port... -
Page 23: Installing Wall-Mount (Mxd) Panels
FIG. 13 shows an AMX device installed in a wall with a filled volume (such as with insulation or concrete), as well as with a closed volume (such as between studs in an otherwise finished wall). The diagram shows how heat generated by the device or other devices may have no way to escape, and may build up to levels that may affect device operation. -
Page 24: Installation Recommendations
Installing Wall-Mount (MXD) Panels Installation Recommendations During any installation, a lack of ventilation may produce conditions that may adversely affect the device’s operation. In these circumstances, special care must be made to make sure that temperatures within enclosed areas do not exceed the device’s maximum rated temperature. -
Page 25: Step 1: Install The Plastic Backbox
Installing Wall-Mount (MXD) Panels Locking Tab (X2) Locking Tab screw (x2) Mounting holes (X4) for use with mounting screws (not included) Use these mounting holes to install the Backbox into thin walls (less than 0.5” thick) or solid surfaces Mounting holes (X2) for installing the Backbox into a Rough-In Box (screws not included) 4"... - Page 26 Installing Wall-Mount (MXD) Panels MXD-701-L - Template, Backbox, 7.0" Touch Panel, Modero S Series (68-2265-02) FOR REFERENCE ONLY S Series Installation Templates FIG. 19 MXD-431-L - Template, Backbox, 4.3" Touch Panel, Modero S Series (68-2265-01) FOR REFERENCE ONLY S Series Installation Templates FIG.
- Page 27 Installing Wall-Mount (MXD) Panels 10.1” Wall Mount Backbox Locking Tab screw (x4) - tighten to extend each of the four Locking Tabs (max torque = 5 IN-LB) Locking Tab (x4) MSD-1001-L Backbox - Locking tab and locking tab screws (X4) FIG.
-
Page 28: Step 2: Insert Connectors On The Touch Panel
Installing Wall-Mount (MXD) Panels The Backbox is clear to allow visual confirmation that the tabs have been extended and are gripping the wall, as well as in assisting with removal if necessary. STEP 2: Insert Connectors on the Touch Panel Before installing the touch panel into the Backbox, connect the Ethernet and USB cables to the rear of the panel. -
Page 29: Removing The Msd-1001-L From The Backbox
Installing Wall-Mount (MXD) Panels Removing the MSD-1001-L from the Backbox The clips on the bottom edge of the Backbox lock down the MSD-1001-L and must be unlatched in order to remove the touch panel from the Backbox. To do this, you ll need a thin probe such as an straightened paper clip: With a straightened paper-clip, carefully press straight into the access holes indicated in FIG. -
Page 30: Installation Dimensions
Installing Wall-Mount (MXD) Panels Installation Dimensions MXD-1001-L Dimensions Notes: Dimensions in parenthesis are in millimeters Additional detailed installation and product drawings are available to view/download at www.amx.com MST-1001-L FIG. 28 Detailed specifications drawings for the MSD-1001-L are available to download from www.amx.com. -
Page 31: Mxd-701-L Dimensions
Installing Wall-Mount (MXD) Panels MXD-701-L Dimensions Notes: Dimensions in parenthesis are in millimeters Additional detailed installation and product drawings are available to view/download at www.amx.com MSD-701-L FIG. 29 Detailed specifications drawings for the MSD-701-L are available to download from www.amx.com. -
Page 32: Mxd-431-L Dimensions
Installing Wall-Mount (MXD) Panels MXD-431-L Dimensions Notes: Dimensions in parenthesis are in millimeters Additional detailed installation and product drawings are available to view/download at www.amx.com MSD-431-L FIG. 30 Detailed specifications drawings for the MSD-431-L are available to download from www.amx.com. -
Page 33: Upgrading Firmware
Upgrading Firmware Overview Programming the S Series touch panels require the use of NetLinx Studio and TPDesign4, both available from www.amx.com. Downloading Firmware Updates From www.amx.com Before attempting to upgrade the firmware, you must have the appropriate Kit file for your touch panel: NOTE: All S Series touch panels share the same f irmware. -
Page 34: Transfer The Firmware File From The Flash Drive To The Touch Panel
Upgrading Firmware Transfer the Firmware File From the Flash Drive to the Touch Panel Connect the USB Flash Drive to one of the USB Type A ports on the panel. NOTE: The Micro USB port cannot be used for f irmware upgrades. Go to the Install Firmware setup page (Conf iguration->Admin->Install Firmware): Press and hold the Sleep button with a pointed instrument for 3 seconds to open the Settings page. -
Page 35: Upgrading Firmware Via Netlinx Studio
S Series panels use Kit files for firmware upgrades. A Kit file (*.kit) is a package of several files, all of which are required to upgrade the firmware, and are available online via www.amx.com (refer to the device page for firmware updates). - Page 36 Upgrading Firmware Under Target, enter the Device number for the target touch panel in the Device field. Use the Online Tree to determine the device's assigned ID (as well as the current firmware version). Note that if this dialog was accessed by right-clicking on the touch panel in the Online Tree, the Device Number should ...
-
Page 37: Troubleshooting
Troubleshooting Troubleshooting Overview This section describes the solutions to possible hardware/firmware issues that could arise during the common operation of a Modero S touch panel. Panel Doesn’t Respond to Touches Symptom: The device either does not respond to touches on the touch screen or does not register the touch as being in the correct area of the screen. - Page 38 © 2015 Harman. All rights reserved. Modero, AMX, AV FOR AN IT WORLD, and HARMAN, and their respective logos are registered trademarks of Last Revised: HARMAN. Oracle, Java and any other company or brand name referenced may be trademarks/registered trademarks of their respective companies.
Need help?
Do you have a question about the MST-1001 and is the answer not in the manual?
Questions and answers