Table of Contents
Advertisement
Available languages
Available languages
MANUAL
INTRODUCTION
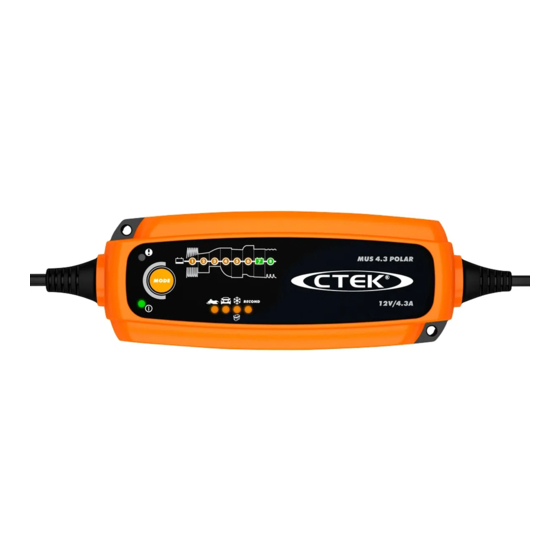
MUS 4.3 TEST&CHARGE (1077) is a switch mode charger
with both float and pulse maintenance and is a part of a
series of battery chargers from CTEK Sweden AB. These char-
gers represent the latest technology within battery charging.
A MUS 4.3 TEST&CHARGE (1077) gives the battery maxi-
mum life.
SUPPLY PLUG*
CTEK COMFORT CONNECT
CHARGE CABLE
CTEK COMFORT CONNECT – eyelet ¼" (M6)
.Supply plugs may differ to suit your wall socket*
20018888A MUS 4.3 Test&Charge, Manual, Print file.indd 3
MAINS CABLE
CTEK COMFORT CONNECT – clamp
IMPORTANT SAFETY
INSTRUCTIONS
CALIFORNIA PROPOSITION 65
WARNING: This product contains chemical known to the state
of California to cause cancer or reproductive toxicity.
SAVE THESE INSTRUCTIONS
1.
– This manual contains important safety and
operating instructions for battery charger model
MUS 4.3 TEST&CHARGE (1077).
2. Do not expose charger to rain or snow.
3. Use of an attachment not recommended or sold by CTEK
may result in a risk of fire, electric shock or injury to
persons.
4. To reduce risk of damage to electric plug and cord, pull
by the plug rather than cord when disconnecting charger.
5. An extension cord should not be used unless absolutely
necessary. Use of improper extension cord could result
in a risk of fire and electric shock. If an extension cord
must be used, make sure that: a) Pins on plug of exten-
sion cord are the same number, size and shape as those
of plug on charger; b) Extension cord is properly wired
and in good electrical condition; and c) Wire size is large
EN • 3
2013-01-15 16:28:27
Advertisement
Table of Contents

Subscribe to Our Youtube Channel
Related Manuals for CTEK MUS 4.3 TEST&CHARGE


Summary of Contents for CTEK MUS 4.3 TEST&CHARGE
- Page 1 MUS 4.3 TEST&CHARGE (1077). CTEK COMFORT CONNECT 2. Do not expose charger to rain or snow. 3. Use of an attachment not recommended or sold by CTEK may result in a risk of fire, electric shock or injury to CHARGE CABLE persons.
-
Page 2: Personal Precautions
REASON, IT IS OF OUTMOST enough for AC ampere rating of charger as specified in “RECOMMENDED MINIMUM AWG SIZE FOR AC IMPORTANCE THAT YOU EXTENSION CORDS”. 6. Do not operate charger with damaged cord or plug – FOLLOW THE INSTRUCTIONS return the charger to the retailer. -
Page 3: Preparing To Charge
f) Be extra cautious to reduce risk of dropping a metal tool d) Add distilled water in each cell until battery acid reaches onto battery. It might spark or short-circuit battery or level specified by battery manufacturer. Do not overfill. other electrical part that may cause explosion. -
Page 4: Dc Connection Precautions
DC CONNECTION d) Determine which post of battery is grounded (connected) to the chassis. If negative post is grounded to the chassis PRECAUTIONS (as in most vehicles) see (e). If positive post is grounded to the chassis, see (f). a) Connect and disconnect dc output clips only after setting e) For Negative-grounded vehicle, connect POSITIVE any charger switches to “off”... -
Page 5: Important Safety Information
CAUSE BATTERY EXPLOSION. • Check the charger cables prior to use. Ensure that no cracks have occurred in the cables or in the bend protec- TO REDUCE RISK OF tion. A charger with damaged cables must be returned to the retailer. A SPARK NEAR BATTERY: • Ensure that the cabling does not jam or comes into contact with hot surfaces or sharp edges. - Page 6 CONNECT AND • This appliance is not designed for use by young children or people who cannot read or understand the manual unless DISCONNECT THE they are under the supervision of a responsible person to ensure that they can use the battery charger safely. Store CHARGER TO A BATTERY and use the battery charger out of the reach of children, and ensure that children cannot play with the charger.
-
Page 7: Operating Instructions
OPERATING INSTRUCTIONS HOW TO CHARGE 1. Connect the charger to the battery. Lamp 4, 5 and 6 now start flickering indicating VOLTAGE TEST PROGRAM. Ignore this and continue with the next step. 2. Connect the charger to the wall socket. The power lamp will indicate that the mains cable is connected to the wall socket. - Page 8 HOW TO TEST 2. Press the MODE-button (3) to move between the test programs: BATTERY (9), START POWER (10), TESTING PROGRAMS AVAILABLE ALTERNATOR (11). • BATTERY – Reveals a battery’s current charge level. • START POWER – Monitors a battery’s output during BATTERY the strain of engine cranking, to evaluate overall 1.
-
Page 9: Ready To Use
TIPS CHECK THE RESULT LAMPS 1. If the error lamp (2) immediately illuminates, the battery FAIR If the result lamp is incorrectly connected. Unplug the charger, correct the is lit: connections to the battery, and return to step 1. 2. If the lamp don’t illuminate, this may be because the battery BELOW ABOVE BATTERY... - Page 10 CHARGING PROGRAMS AND OPTIONS Press the MODE-button to select between the charging programs and to add charging options. The lamps will indicate which programs and options that are selected. The selected program will be memorised and restarted next time the charger is connected.
-
Page 11: Error Lamp
ERROR LAMP POWER LAMP If the error lamp is lit, check the following: If the power lamp is lit with a: 1. Is the chargers positive lead connected 1. STEADY LIGHT to the battery´s positive pole? The mains cable is connected to the wall socket. 2. - Page 12 CHARGING PROGRAMS AND OPTIONS COMBINATIONS DESULPHATION SOFT START BULK ABSORPTION ANALYSE RECOND FLOAT PULSE 15.8V 0.8A until 12.6V Increasing voltage to Declining current Checks if voltage 13.6V 12.7V–14.4V 14.4V. 0.8A 14.4V drops to 12V 0.8A 0.8–0.4A 15.8V 0.8A until 12.6V Increasing voltage to Declining current Checks if voltage...
-
Page 13: Limited Warranty
Moreover, Choose the Recond program to add the Recond step to the CTEK Power Inc is not obligated to any other warranty other charging process. During the Recond step voltage increases than this warranty. -
Page 14: Technical Specifications
Weight 1.4 Ibs *) Back current drain is the current that drains the battery if the charger is not connected to the mains. CTEK chargers has a very low back current. **) The quality of the charging voltage and charging current is very important. A high current ripple heats up the battery which has an aging effect on the positive electrode. -
Page 15: Maintenance Instructions
CTM 405811 SUPPORT US7005832B2 RCD 081418 CTM 830545751 pending EP1716626 pending RCD 001119911-0001 CTM 1935061 pending CTEK offers a professional customer support: www.ctek.com. SE526631 RCD 001119911-0002 V28573IP00 For latest revised user manual see www.ctek.com. US7638974B2 RCD 081244 CTM 2010004118 pending By e-mail: info@ctek.se, by telephone: (330) 963-0981,... -
Page 16: Consignes De Sécurité Importantes
à la pointe de la technologie proposés chimiques reconnues par l'État de Californie comme étant par CTEK Sweden AB. Le chargeur MUS 4.3 TEST&CHARGE cancérigènes ou toxiques pour la reproduction. (1077) optimise la durée de vie de la batterie. - Page 17 UTILISATION NORMALE, LES doivent être identiques en nombre, taille et format à celles du chargeur; b) la rallonge doit être correctement BATTERIES PRODUISENT DES câblée et en bon état; c) le calibre des fils doit être suffisant pour l'intensité nominale CA (ampères) du GAZ EXPLOSIFS.
- Page 18 AVANT DE CHARGER UNE a) En cas de projections d'acide sur la peau ou les vêtements, rincer immédiatement à l'eau savonneuse. BATTERIE En cas de projection d'acide dans les yeux, rincer immédiatement à l'eau courante froide pendant un a) Si nécessaire, retirer la batterie à charger du véhicule en minimum de 10 minutes et consulter immédiatement un détachant toujours dans un premier temps la borne de médecin.
-
Page 19: Emplacement Du Chargeur
EMPLACEMENT DU SUIVRE CES ÉTAPES POUR CHARGEUR LA CHARGE D'UNE BATTERIE a) Installer le chargeur le plus loin possible de la batterie, INSTALLÉE DANS UN en fonction de la longueur des câbles. VÉHICULE. UNE ÉTINCELLE b) Ne jamais placer le chargeur directement au-dessus de la batterie en cours de charge. - Page 20 SUIVRE CES ÉTAPES POUR a) Déterminer quelle borne est mise à la masse (connectée au châssis). Si c'est la borne négative (comme dans LA CHARGE D'UNE BATTERIE la plupart des véhicules), aller à (e). Si c'est la borne positive, aller à (f). INSTALLÉE HORS D'UN b) Sur un véhicule à...
- Page 21 a) Pour déconnecter le chargeur, procéder dans l'ordre fréquentes persistent toujours. Ne pas laisser une batterie inverse du branchement et couper la première connexion en cours de charge sans surveillance pendant une période en se tenant aussi loin que possible de la batterie. de temps prolongée.
- Page 22 CALIBRE MINIMUM BRANCHEMENT ET RECOMMANDÉ POUR LES DÉBRANCHEMENT DU CORDONS DE RALLONGE CHARGEUR ET DE LA BATTERIE LONGUEUR DU CALIBRE MINIMUM CORDON (AWG) PIEDS (M) 25 (7.6) 50 (15.2) 100 (30.5) Comfort Connect 150 (45.6) – – Comfort Connect 24 • FR Comfort Connect 20018888A MUS 4.3 Test&Charge, Manual, Print file.indd 24...
-
Page 23: Directives D'utilisation
DIRECTIVES D’UTILISATION COMMENT CHARGER 1. Branchez le chargeur à la batterie. Les témoins 4, 5 et 6 clignotent pour confirmer le PROGRAMME DE CONTRÔLE DE TENSION. Ignorez-les et passez à l’étape suivante. 2. Branchez le chargeur dans la prise murale. Le témoin d’alimentation indiquera que le câble secteur est branché... - Page 24 PROGRAMMES ET OPTIONS DE CHARGE Enfoncez le bouton MODE pour choisir le programme de charge et pour ajouter de options de charge. Les témoins indiquent les programmes et options choisis. Le programme choisi sera mémorisé et redémarré lors de la prochaine connexion du chargeur. PROGRAMMES DE CHARGE CAPACITÉ...
- Page 25 COMMENT TESTER TEST (BRANCHEMENT SECTEUR NON NÉCESSAIRE) PROGRAMMES DE TEST DISPONIBLES 1. Branchez le chargeur à la batterie. Les témoins 4, 5 et 6 • BATTERY (BATTERIE) – Indique le niveau de charge actuel s'allument dans l'ordre pour montrer que le chargeur est en d'une batterie.
- Page 26 ALTERNATOR OBSERVEZ LES TÉMOINS DE RÉSULTAT 1. Sélectionnez ALTERNATOR (11) avec le bouton MODE (3) Si le témoin de DÉFAUT 2. Démarrez le moteur, maintenez-le à 2000 tr/min et résultat suivant observez les résultats. est allumé DÉFAUT (4) défaut du système de charge. BON (5) défaut du système de charge.
- Page 27 COMBINAISONS DE PROGRAMMES ET D'OPTIONS DE CHARGE DESULPHATION SOFT START BULK ABSORPTION ANALYSE RECOND FLOAT PULSE 15,8 V 0,8 A jusqu’à 12,6 V Tension augmentée à Réduction d'intensité Vérifiez si la tension 13,6 V 12,7 V – 14,4 V 14,4 V. 0,8 A 14,4 V chute à...
- Page 28 ÉTAPE 1 DESULPHATION (DÉSULFATATION) ÉTAPE 8 PULSE (IMPULSIONS) Détecte les batteries sulfatées. Impulsions d’intensité et Maintien de la capacité de la batterie à 95 - 100%. Le de tension, retire les sulfates des plateaux en plomb de la chargeur surveille la tension de la batterie et envoie si néces- batterie pour restaurer sa capacité.
-
Page 29: Témoin D'alimentation
été ouvert, manipulé avec négligence ou réparé par d'énergie. Ceci se produit si le chargeur n'est pas un intervenant autre que CTEK Power Inc ou ses représentants branché à une batterie dans les 2 minutes. agréés. CTEK Power Inc n’offre aucune autre garantie que cette garantie limitée et décline toute responsabilité... -
Page 30: Spécifications Techniques
1,4 Ib *) La consommation par retour de courant est le phénomène par lequel la batterie se vide si le chargeur n'est pas branché au secteur. Les chargeurs CTEK ont une consommation par retour de courant très faible. 32 • FR 20018888A MUS 4.3 Test&Charge, Manual, Print file.indd 32... -
Page 31: Service À La Clientèle
Une ondulation de tension élevée 2012–05–30 risque de détériorer les équipements connectés à la batterie. DES MARQUES Les chargeurs de batterie CTEK produisent une tension et une DES BREVETS DES MODÈLES COMMERCIALES intensité de haute qualité à très faible ondulation. -
Page 32: Instrucciones Sobre Seguridad
(flotante y por pulsos). Forma parte de la familia de PROPUESTA 65 DE CALIFORNIA cargadores de baterías de CTEK Sweden AB. Estos cargado- ADVERTENCIA: este producto contiene sustancias químicas res representan lo más avanzado en tecnología de carga de que el Estado de California reconoce como causantes de baterías. -
Page 33: Precauciones Personales
GENERAN GASES del mismo número, tamaño y forma que las del conector del cargador; b) El cable alargador está correctamente EXPLOSIVOS DURANTE conectado y en buenas condiciones eléctricas; y c) El calibre de los cables es suficientemente grueso para la EL FUNCIONAMIENTO corriente alterna nominal del cargador, según se espe- cifica en “CALIBRE AWG MÍNIMO RECOMENDADO... -
Page 34: Preparación De La Carga
PREPARACIÓN DE LA CARGA a) Lleve en todo momento protección completa para los ojos y la ropa. Evite tocarse los ojos mientras trabaja a) Si fuera necesario retirar la batería de un vehículo para cerca de una batería. cargarla, siempre quite primero el terminal de tierra de b) Si el ácido de la batería entrase en contacto con su piel la batería. - Page 35 HACERLA EXPLOTAR. PARA a) Nunca coloque el cargador directamente sobre la bate- ría que está cargando; los gases de la batería podrían REDUCIR EL RIESGO DE corroer y estropear el cargador. b) Nunca permita que gotee el ácido de la batería mientras CHISPAS CERCA DE LA lee el peso específico del electrólito o rellena la batería.
- Page 36 EXPLOTAR. PARA REDUCIR EL a) a piezas de chapa de la carrocería. Conecte la pinza a una pieza metálica de gran calibre del bastidor o del RIESGO DE CHISPAS CERCA bloque motor. b) Para vehículos con el borne positivo conectado a tierra, DE LA BATERÍA: conecte la pinza NEGATIVA (NEGRA) del cargador de baterías al borne NEGATIVO (NEG, N, –) que no va...
-
Page 37: Información Sobre Seguridad
¡INFORMACIÓN SOBRE • Controle siempre que el cargador haya conmutado a la ETAPA 7 antes de dejarlo desatendido y conectado SEGURIDAD! durante periodos prolongados. Si el cargador no ha con- mutado a la ETAPA 7 en un plazo de 50 horas, ello indica • No cargue otras baterías distintas a las especificadas en que hay un fallo. - Page 38 CALIBRE AWG MÍNIMO CONEXIÓN Y RECOMENDADO PARA DESCONEXIÓN DEL CABLES PROLONGADORES CARGADOR A UNA DE CA BATERÍA LONGITUD DEL CABLE CALIBRE AWG DEL CABLE (PIES) M 25 (7,6) 50 (15,2) Comfort 100 (30,5) Connect 150 (45,6) – – Comfort Connect 40 • ES Comfort Connect...
-
Page 39: Instrucciones De Funcionamiento
INSTRUCCIONES DE FUNCIONAMIENTO CÓMO CARGAR 1. Conecte el cargador a la batería. Los pilotos 4, 5 y 6 ahora empiezan a parpadear para indicar el programa COMPROBAR TENSIÓN. No lo tenga en cuenta y prosiga con la siguiente etapa. 2. Enchufe el cargador al enchufe de pared. El piloto de encendido indicará si el cable de alimentación está... - Page 40 PROGRAMAS Y OPCIONES DE CARGA Pulse el botón MODE para seleccionar entre los distintos programas de carga y opciones de carga. Los pilotos indicarán qué programas y opciones están seleccionadas. El programa seleccionado se memorizará y se volverá a iniciar la próxima vez que se conecte el cargador.
- Page 41 CÓMO COMPROBAR COMPROBACIÓN PROGRAMAS DE COMPROBACIÓN (NO SE REQUIERE CONEXIÓN A LA RED ELÉCTRICA) DISPONIBLES 1. Enchufe el cargador a la batería. Los pilotos 4, 5 y 6 se • BATTERY (Batería) – Muestra el nivel de carga actual iluminan secuencialmente para indicar que el cargador de la batería.
- Page 42 ALTERNATOR (Alternador) COMPRUEBE LOS PILOTOS DE RESULTADOS 1. Seleccione ALTERNATOR (11) con el botón MODE (3) Si el piloto de ACEPTABLE BIEN 2. Arranque el motor, manténgalo a 2000 rpm y monitorice resultado está los resultados. encendido: MAL (4) Falla el sistema de carga. MENOR 12,4–12,6 V MAYOR QUE ACEPTABLE (5) Falla el sistema de carga.
- Page 43 PROGRAMAS DE CARGA Y COMBINACIONES DE OPCIONES DESULPHATION SOFT START BULK ABSORPTION ANALYSE RECOND FLOAT PULSE 15,8 V 0,8 A hasta 12,6 V Tensión creciente Corriente Comprueba si la 13,6 V 12,7–14,4 V hasta 14,4 V. 0,8 A decreciente 14,4 V tensión cae a 12 V 0,8 A 0,8–0,4 A...
- Page 44 ETAPA 1 DESULPHATION (DESULFATACIÓN) ETAPA 8 PULSE (PULSOS) Detecta las baterías sulfatadas. Corrientes y tensiones Mantiene la batería al 95–100 % de su capacidad. El car- pulsantes eliminan los sulfatos de las placas de plomo de gador monitoriza la tensión de la batería y envía impulsos la batería y restablecen su capacidad.
-
Page 45: Instrucciones De Mantenimiento
MANTENIMIENTO es decir, no se hace responsable de daños consecuentes. Además, CTEK Power Inc no está obligada a otra garantía El MUS 4.3 TEST&CHARGE (1077) no precisa que la presente. mantenimiento. Nunca abra el cargador; ello anularía la garantía. -
Page 46: Especificaciones Técnicas
**) La calidad de la tensión de carga y de la corriente de carga es muy importante. Una corriente de ondulación (rizado) alta calienta la batería, lo cual acelera el envejecimiento del electrodo positivo. Una tensión de ondulación alta puede dañar otros equipos conectados a la batería. Los cargadores de baterías CTEK producen tensión y corriente muy limpia, con baja ondulación. -
Page 47: Soporte Técnico
SOPORTE TÉCNICO LOS PRODUCTOS DE CTEK ESTÁN PROTEGIDOS POR: CTEK ofrece asesoramiento profesional a los clien- tes: www.ctek.com. Para descargar la última revi- sión del manual, visite: www.ctek.com. 2012-05-30 Por correo electrónico: info@ctek.se. MARCAS PATENTES DISEÑOS Teléfono: (330) 963-0981, REGISTRADAS Por fax (330) 963-0982. - Page 48 50 • ES 20018888A MUS 4.3 Test&Charge, Manual, Print file.indd 50 2013-01-15 16:28:46...
Need help?
Do you have a question about the MUS 4.3 TEST&CHARGE and is the answer not in the manual?
Questions and answers