Table of Contents
Advertisement
Quick Links
Download this manual
See also:
User Manual
Advertisement
Chapters
Table of Contents
Troubleshooting

Subscribe to Our Youtube Channel
Related Manuals for SMART M680


Summary of Contents for SMART M680
-
Page 1: Interactive Whiteboard
Help us make this document better smarttech.com/docfeedback/170410 SMART Board® M600 series interactive whiteboard USER’S GUIDE FOR MODELS M680, M685, M680E, M685E, M680V AND M685V... - Page 2 © 2013—2016 SMART Technologies ULC. All rights reserved. No part of this publication may be reproduced, transmitted, transcribed, stored in a retrieval system or translated into any language in any form by any means without the prior written consent of SMART Technologies ULC. Information in this manual is subject to change without notice and does not represent a commitment on the part of SMART.
-
Page 3: Important Information
Important information Before you install and use the SMART Board® M600 series interactive whiteboard, read and understand the safety warnings and precautions in this user’s guide and the included warnings document. The included warnings document describes the safe and correct operation of the SMART Board interactive whiteboard and its accessories, helping you to prevent injuries and... -
Page 5: Table Of Contents
Contents Important information Chapter 1: Introducing the SMART Board M600 series interactive whiteboard Introduction Features Computer requirements How does the SMART Board interactive whiteboard work? Installation tips Accessories and replacement parts Chapter 2: Connecting the interactive whiteboard to a computer Overview Installing SMART Product Drivers... -
Page 7: Chapter 1: Introducing The Smart Board M600 Series Interactive Whiteboard
Accessories and replacement parts Introduction Your SMART product is a wall-mounted, front projection interactive whiteboard. It enables you to do everything that you can do at your computer—open and close applications, scroll through files, teach collaborative lessons, create or edit documents, visit websites, play video clips and more—... -
Page 8: Features
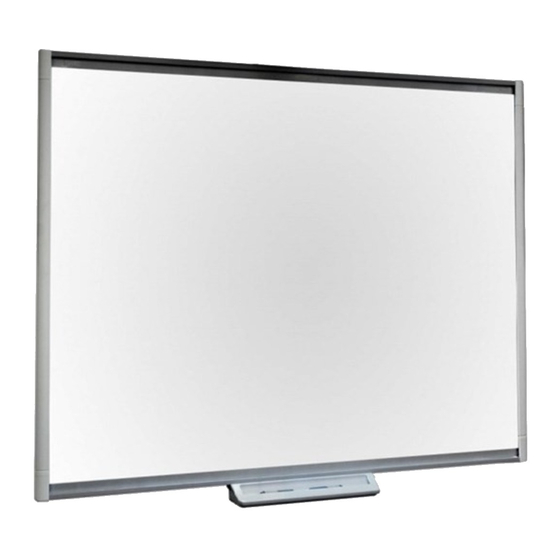
INTRODUCING YOUR SMART BOARD M600 SERIES INTERACTIVE WHITEBOARD Features The SMART Board M600 series interactive whiteboard is durable and reliable. It features a rugged, hardened interactive surface, two damage-resistant pens and SMART’s proprietary DViT® (Digital Vision Touch) technology. The SMART Board M680 interactive whiteboard measures 195.6 cm (77") diagonally and has a 4:3 aspect ratio, while the M685 interactive whiteboard... -
Page 9: How Does The Smart Board Interactive Whiteboard Work
Windows and Mac computers When you install SMART software, you can access all the features of the interactive whiteboard. SMART Notebook software includes SMART Ink™ and SMART Product Drivers. SMART Ink works with SMART Product Drivers to enable you to write the your screen in digital ink using the interactive product’s pen or your finger. - Page 10 (Part No. 1020342) from your authorized SMART reseller. Extending the USB cable The USB cable included with the SMART Board M600 series interactive whiteboard is within the limit defined by the USB standard for maximum length. The interactive whiteboard includes a 16' (5 m) USB cable.
-
Page 11: Accessories And Replacement Parts
INTRODUCING YOUR SMART BOARD M600 SERIES INTERACTIVE WHITEBOARD Accessories and replacement parts For a full list of items that you can order for your SMART Board M600 series interactive whiteboard, go to smarttech.com/accessories. Contact your authorized SMART reseller (smarttech.com/wheretobuy) to order accessories and standard replacement parts for the SMART Board M600 series interactive whiteboard. -
Page 13: Chapter 2: Connecting The Interactive Whiteboard To A Computer
Orienting the interactive whiteboard Overview The SMART Board M600 series interactive whiteboard’s USB interface enables you to connect the interactive whiteboard to a computer. The included USB cable provides a digital signal from the computer to the interactive whiteboard, and the included power supply provides power to the interactive whiteboard. -
Page 14: Installing Smart Product Drivers
Digital cameras in the corners of the interactive whiteboard track the position of the pens and your finger on the interactive surface, and then send the information to the SMART software. SMART software interprets this information as mouse clicks, digital ink or ink removal in the appropriate location. -
Page 15: Orienting The Interactive Whiteboard
To orient your interactive whiteboard 1. On the interactive surface, click the SMART Board icon in the notification area (Windows) or Dock (Mac), and then select Orient. The Orientation screen opens. - Page 16 CHAPTER 2 CONNECTING THE INTERACTIVE WHITEBOARD TO A COMPUTER 2. Pick up a pen from the pen tray. 3. Beginning at the first target on the screen, touch the center of the target firmly with the tip of the pen and hold the pen steady until the target turns green. When you lift the pen, the target moves to the next point.
-
Page 17: Chapter 3: Using The Interactive Whiteboard
WARNING Do not stand (or allow children to stand) on a chair to touch the surface of the SMART Board product. Instead, safely fix the product at the appropriate height on a wall or use a SMART floor stand. -
Page 18: Using The Pen Tray
The left side of the pen tray includes controls for power, volume, and input selection. The buttons on the right side of the pen tray enable the right-click, on-screen keyboard and orientation functions. (The following illustration shows the pen tray for the M680 and M685 models of the interactive whiteboard.) -
Page 19: Understanding The Select Button's Status Light
Flashing white The interactive whiteboard is receiving power and is communicating successfully with the computer’s USB HID driver, but SMART Product Drivers isn’t installed. NOTE In HID mode, interactive whiteboard tools such as the pens are unavailable, but you can move the mouse pointer and perform mouse functions by touching the interactive surface. -
Page 20: Customizing The Pen Tray Buttons
Keyboard and Right-Click button settings so that they perform another action. To customize the pen tray button settings 1. Press the SMART Board icon in the Windows notification area or Mac Dock, and then select SMART Settings. SMART settings opens. -
Page 21: Using Gestures, Dual Touch And Dual Write
CHAPTER 3 USING THE INTERACTIVE WHITEBOARD Number Function Left side USB A receptacle (for USB drives) NOTE USB drives that you connect to this receptacle are accessible only to the room computer (the computer connected to the USB 1 receptacle). Front Power button and status indicator light... -
Page 22: Displaying Menu Options (Right-Clicking)
Displaying menu options (right-clicking) Press and hold the screen with your finger. In SMART Notebook software, Windows and Microsoft® Office programs, the right-click menu appears. Dragging an object or scroll bar Press and hold an object or scroll bar on the screen. Keep your finger on the screen and slowly move the object or scroll bar. -
Page 23: Multi-Finger Gestures
CHAPTER 3 USING THE INTERACTIVE WHITEBOARD Multi-finger gestures You can perform some gestures using two or more fingers, including scaling, scrolling and manipulating objects. Multi-finger gestures include the following: Displaying menu options (right-clicking) Using two fingers on the same hand, press and hold the screen with one finger and then press the screen directly to the right of that point with a second finger. - Page 24 CHAPTER 3 USING THE INTERACTIVE WHITEBOARD Hold your fingers perpendicular (90°) to the interactive surface at the contact point. 90° 90° Keep your thumb and other fingers away from the interactive surface. They can generate unintentional commands. smarttech.com/kb/170410...
-
Page 25: Updating The Smart Software
SMART Product Update (SPU). To check for software updates 1. Click the SMART Board icon in the Windows notification area or the Mac Dock, and then select Check for Updates and Activation. The SMART Product Update dialog box appears listing the SMART software products installed on your computer. -
Page 27: Chapter 4: Maintenance And Troubleshooting
Transporting the interactive whiteboard Contacting SMART Support Tips for trouble-free performance The SMART Board interactive whiteboard is durable, but take care to prevent any damage to it and its parts. Replace the pen when the nib wears out. Don’t touch the interactive surface with sharp or pointed objects. - Page 28 CHAPTER 4 MAINTENANCE AND TROUBLESHOOTING Cleaning the interactive whiteboard With proper care, the interactive whiteboard will provide years of trouble-free service. Follow these tips to keep the interactive whiteboard clean. CAUTION Do not use harsh chemicals or abrasive cleaners on the interactive whiteboard. IMPORTANT Before you clean the interactive whiteboard, disconnect its USB and power cables.
-
Page 29: General Troubleshooting
To troubleshoot some common cable routing issues, try disconnecting accessories, such as USB hubs and USB extension cables, that are connected to the interactive whiteboard. The basic system consists of the SMART Board M600 series interactive whiteboard, a USB cable, a power cable, computer hardware, a computer operating system and SMART Product Drivers. You can try isolating and replacing each component to identify the cause of the connectivity issue. - Page 30 CHAPTER 4 MAINTENANCE AND TROUBLESHOOTING Symptoms Cause Solution No image is The projector isn’t receiving a video Check the video cable projected on the signal. connections. interactive Ensure that the correct video whiteboard, or a “No input is selected on the projector. Input”...
- Page 31 SMART Technologies > SMART System Menu. For Mac computers, select Finder > Applications > SMART Technologies > SMART System Menu. SMART Product Drivers isn’t installed Install SMART Product Drivers on your computer. For details about installing SMART Product Drivers, see Installing SMART Product Drivers on page 8. The orientation...
- Page 32 SMART System Menu isn’t running. Start SMART System Menu. In the Windows 7 operating system, select Start > All Programs > SMART Technologies > SMART System Menu.
-
Page 33: Troubleshooting Using The Status Light
SBM685E), you can also use the Select button's status light to help you identify and resolve issues with the interactive whiteboard. Refer to Using the Pen Tray on page 12 for information on the status light's states during normal operation. NOTE The pen ledge on SMART Board models SBM680V and SBM685V doesn’t have a status light. smarttech.com/kb/170410... - Page 34 If another user reassigned the pen, eraser or other button functions, the tools might not work as expected. You can return them to normal operation using SMART Settings to change the SMART hardware settings.
-
Page 35: Transporting The Interactive Whiteboard
MAINTENANCE AND TROUBLESHOOTING Transporting the interactive whiteboard Save the original SMART Board interactive whiteboard packaging so that it’s available if you need to transport the interactive whiteboard. When required, repack the interactive whiteboard with all of the original packaging. This packaging was designed to provide the best possible protection against shock and vibration. - Page 36 CHAPTER 4 MAINTENANCE AND TROUBLESHOOTING smarttech.com/kb/170410...
-
Page 37: Appendix A: Hardware Environmental Compliance
Appendix A Hardware environmental compliance SMART Technologies supports global efforts to ensure that electronic equipment is manufactured, sold and disposed of in a safe and environmentally friendly manner. For information about the interactive whiteboard’s environmental compliance, see the specifications for your product located at smarttech.com/SupportSBM600. -
Page 39: Index
31 input selection, 15 calibrating, 8 installation cleaning, 22 connecting to computer, 7 erasing ink, 23 SMART Product Drivers, 8 computer connecting to interactive whiteboard, 7 matching resolution to projector, 7 refresh rate, 7 maintenance, 21 system requirements, 2... - Page 40 5 WEEE and Battery Directives, 31 resetting the interactive whiteboard, 23 resolution computer, 7 projector, 7 serial number, 29 SMART Board M600 interactive whiteboard features, 2 how it works, 3 resetting, 23 SMART Ink, 3 SMART Notebook software, 1...
- Page 42 SMART TECHNOLOGIES smarttech.com/support smarttech.com/contactsupport smarttech.com/kb/170410...
Need help?
Do you have a question about the M680 and is the answer not in the manual?
Questions and answers