Table of Contents
Advertisement
Quick Links
KX3-2M 2-Meter and KX3-4M 4-Meter
Introduction ...................................................................................................................................... 2
Specifications ................................................................................................................................... 2
Setup and Operation ......................................................................................................................... 3
Configuring the KX3 for the KX3-2M or KX3-4M Module ..................................................................... 3
Antennas ..................................................................................................................................................... 3
Operation .................................................................................................................................................... 4
Frequency Stability ................................................................................................................................ 4
VHF Operating Frequencies ................................................................................................................... 4
KX3-2M/4M Tuning .............................................................................................................................. 5
FM Operation ......................................................................................................................................... 5
Basic Setup ......................................................................................................................................... 5
Repeater Operation ............................................................................................................................. 6
Sending DTMF Tones ........................................................................................................................ 9
Channel Hopping (Scanning) ............................................................................................................. 9
Monitoring the Repeater Input Frequency ......................................................................................... 9
Sleep Mode ....................................................................................................................................... 10
Troubleshooting .............................................................................................................................. 10
Circuit Description ......................................................................................................................... 11
Installing the KX3-2M or 4M Module ........................................................................................... 12
Preparing for Installation .......................................................................................................................... 12
Preventing Electrostatic Discharge Damage ........................................................................................ 12
Choosing an Anti-Static Mat ................................................................................................................ 12
Tools Required ......................................................................................................................................... 13
Parts Supplied ........................................................................................................................................... 13
KX3-2M or 4M Transverter Assembly Bag (E850580) ....................................................................... 13
Adapter Board ...................................................................................................................................... 13
Hardware Bag, KX3-2M or 4M (E850635) ......................................................................................... 14
Installation Procedure ............................................................................................................................... 15
Separate the Case Halves ..................................................................................................................... 15
Install the Internal Coaxial Cables ....................................................................................................... 16
Installing the Antenna Coaxial Cable ............................................................................................... 17
Installing the Local Oscillator Coaxial Cable .................................................................................. 20
Prepare the KX3 for the KX3-2M or 4M Module ................................................................................ 23
Installing the KX3-2M or 4M Board .................................................................................................... 26
Customer Service and Support ....................................................................................................... 32
Technical Assistance ............................................................................................................................ 32
Repair / Alignment Service .................................................................................................................. 32
Elecraft
Transverter Options
Installation and Operating Instructions
Revision C, March 11, 2016 (E740247)
Copyright © 2016, Elecraft, Inc., All Rights Reserved
®
KX3
1
Advertisement
Table of Contents

Related Manuals for ELECRAFT KX3-2M


Summary of Contents for ELECRAFT KX3-2M
-
Page 1: Table Of Contents
Specifications ........................... 2 Setup and Operation ......................... 3 Configuring the KX3 for the KX3-2M or KX3-4M Module ..............3 Antennas ..............................3 Operation ..............................4 Frequency Stability ..........................4 VHF Operating Frequencies ........................4 KX3-2M/4M Tuning ..........................5 ... -
Page 2: Introduction
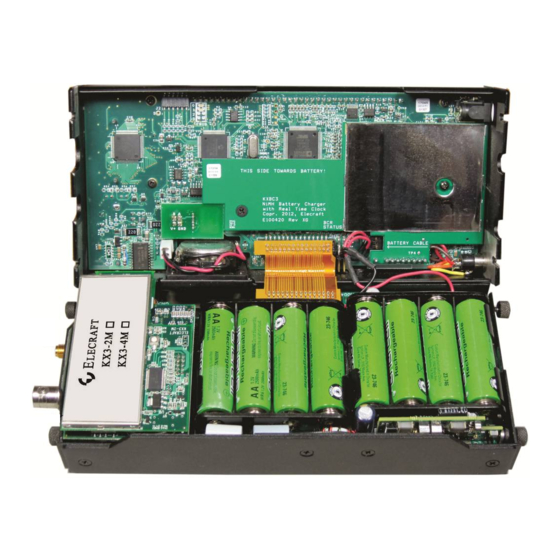
Introduction The KX3-2M or 4M transverter extends the frequency range of the KX3 to include the 2 meter or 4 meter Amateur bands and allows reception on frequencies near those bands. Either the 2-meter or the 4-meter transverter may be installed. The transverter plugs into existing connectors inside the KX3. All KX3 functions and modes are available when using either transverter. -
Page 3: Setup And Operation
Setup and Operation If you haven’t already done so, follow the instructions starting on page 12 to install the KX3-2M or KX3- 4M module. Before you can use the KX3-2M or KX3-4M module, you must configure the KX3 as follows. -
Page 4: Antennas
Complete operating information is included in your KX3 Owner’s Manual. The following is specifically to help you get the most from your KX3-2M or KX3-4M in FM mode. Additional information about your KX3-2M or 4M may be found in the FAQ on the Elecraft web site: http://www.elecraft.com/manual/KX3-2M%20FAQ.htm... -
Page 5: Kx3-2M/4M Tuning
KX3-2M/4M Tuning Tap the or the switch to select the 2 or 4 meter band, depending upon which transverter B AN D + B AN D ˗ you have installed. As on HF, the KX3 tuning can be done using direct frequency entry or with the VFO knobs. For FM... -
Page 6: Repeater Operation
See Troubleshooting on page 10 for more information. Simplex or Repeater Operation: Setting up your KX3-2M/4M for repeater operation is described below. For Simplex operation, hold repeatedly as needed to display... - Page 7 Frequency Editor program available from the Elecraft web site at: http://www.elecraft.com/K3/FreqMemEdit/K3_Freq_Mem_Editor.htm Note that the editor refers to the Elecraft K3 transceiver throughout. The same editor is used with the KX3. To use the editor, connect your computer to the KX3 using the same serial cable you use with the KX3 Utility Program and select the active comm.
- Page 8 Manual Frequency Entry You can set up the KX3-2M or 4M for repeater or simplex operation and store the information in the KX3’s memory without a computer as follows: Select FM mode: tap as needed so appears on the right end of the LCD.
-
Page 9: Sending Dtmf Tones
Sending DTMF Tones The KX3 can generate the Dual-Tone Multi-Frequency (DTMF) tones required to activate special services available through many repeaters. Press and hold the PTT to transmit. will appear in the VFO B area of the LCD. F R E Q E N T DTMF ON ... -
Page 10: Sleep Mode
General KX3 troubleshooting suggestions are included in the KX3 Owner’s manual. The most common symptoms and their causes relating to the KX3-2M or KX3-4M modules are listed below. If the problem persists, contact Elecraft Customer Support (page 32) or post a question on the Elecraft e-mail reflector. -
Page 11: Circuit Description
160 through 6 meters. Use a steady carrier to adjust the calibration. Circuit Description The KX3-2M transverter operates at an I.F. frequency in the 48 MHz range while the KX3-4M transverter operates at an I.F. frequency in the 23 MHz range. -
Page 12: Installing The Kx3-2M Or 4M Module
Leave the KX3-2M or 4M PC board in its anti-static packaging until you install it. Wear a conductive wrist strap with a series 1-megohm resistor that will constantly drain off any static charge that accumulates on your body. -
Page 13: Tools Required
5. Optional: 5/16” wrench for tightening the antenna connector nut (see Figure 11 on page 19). Parts Supplied Be sure you have the following components in your kit. If anything is missing, contact Elecraft customer support (page 18). KX3-2M or 4M Transverter Assembly Bag (E850580) -
Page 14: Hardware Bag, Kx3-2M Or 4M (E850635)
Hardware Bag, KX3-2M or 4M (E850635) ELECRAFT ILLUSTRATION DESCRIPTION QTY. PART NO. Lock Washer, #4 E700004 Spacer, M-F E700304 Screw, Pan Head, Stainless Steel, E700302 4-40, 5/32” (4.0 mm) Screw, Steel, Black, Flat Head, 4-40 E700253 1/4" (6.4 mm) Screw, Nylon, Black Flat Head, 4-40 E700092 1/4"... -
Page 15: Installation Procedure
Installation Procedure The KX3-2M or 4M module mounts over the exposed area of the RF board in the bottom cover next to the battery holders. It mounts above the KXAT3 Antenna Tuner. An adapter board is included in the kit for those KX3s that do not have the optional Antenna Tuner. -
Page 16: Install The Internal Coaxial Cables
Two miniature coaxial cables are used to carry RF signals. One cable carries a local oscillator signal from the KX3 main RF board to the KX3-2M or 4M module. The second cable carries RF signals between the KX3-2M or 4M module and an SMA antenna connector mounted on the end panel of the KX3 near the BNC antenna connector. -
Page 17: Installing The Antenna Coaxial Cable
Installing the Antenna Coaxial Cable Remove the KXAT3 Antenna Tuner board as follows. If your KX3 is not equipped with the KXAT3, skip the following steps and go directly to installing the antenna cable on page 18. On the KXAT3 module, unplug the connector for the cable leading to the BNC connector as shown in Figure 6. - Page 18 Figure 8. This is important to provide a good ground for the antenna connector and good contact for the KX3-2M or 4M module power transistor heat sink. In the unlikely event you need to clean the metal surface, hold the KX3 with the end downward so any debris from the cleaning will not fall on to the PC board.
- Page 19 Locate the miniature coaxial cable with the SMA connector at one end. If the connector has a nut and lock washer on it (see Figure 9), remove only the nut, sliding it down and off the end of the coax. If your connector does not have the nut and lock washer on it, locate them in the hardware bag and slide the lock washer onto the connector.
-
Page 20: Installing The Local Oscillator Coaxial Cable
Figure 11. Positioning L40 or L43 to Provide Clearance. Installing the Local Oscillator Coaxial Cable If your KX3 is equipped with the optional KXFL3 Filter option, remove the KXFL3 board as shown in Figure 12. Set it aside in an ESD-safe place. CAUTION Do not press on the large rectangular gray capacitors. - Page 21 Install the local oscillator cable as follows: If you have difficulty with the following steps to mate the ultra miniature coax connectors, a short video is available on the Elecraft web site at: http://www.elecraft.com/KX3/kx3.htm. Scroll down to UMCC Connector Montage near the bottom of the web page.
- Page 22 Figure 14. Orienting the Cable at J4. If you removed the KXFL3 filter board (see Figure 12 on page 20), replace it now. Replace the retaining screw and ensure it passes into the hole in the KXFL3 board.
-
Page 23: Prepare The Kx3 For The Kx3-2M Or 4M Module
Prepare the KX3 for the KX3-2M or 4M Module The KX3-2M or 4M PC board mounts on top of the KXAT3 Antenna Tuner board. If you do not have the KXAT3 option installed, your kit will include an adapter board to install in place of the KXAT3. - Page 24 (slotted) head screw through the lower opening as shown tightened just enough to hold the retainer. This screw will be loosened again in a later step when the KX3-2M or 4M board is installed. Figure 18. Installing the TO-220 Retainer.
- Page 25 Replace the KXAT3 board as shown in Figure 19 or, if your KX3 is not equipped with the KXAT3 Antenna Tuner option, install the adapter board furnished in its place. Do not disturb the location of the antenna coax you just positioned. ...
-
Page 26: Installing The Kx3-2M Or 4M Board
The locations of the coaxial connectors on the KX3-2M or 4M board are shown in Figure 21. Note that the KX3-2M or 4M board has no components directly behind the coaxial connectors. That allows you to place a solid object behind the PC board to support it while pressing the coaxial cable connectors in place as described below. - Page 27 Attach the coaxial cables to the KX3-2M or 4M board as follows: Connect the local oscillator coaxial cable to the L.O. connector (J4) on the KX3-2M or 4M board using a solid object to support the board from behind while you press the connector in place with a tool such as a plastic pen just as you did before at L.O connector J4.
- Page 28 (3 mm) gap between the retainer and the end panel as shown below. The heat sink on the transistor mounted on the KX3-2M or 4M board must fit in the space between the end panel and the retainer. Figure 24. Positioning the TO-220 Retainer to Receive the KX3-2M or 4M Board.
- Page 29 Mount the KX3-2M or 4M board on the KXAT3 Antenna Tuner board or, if no antenna tuner, on the adapter board you installed earlier: Orient the KX3-2M or 4M board as shown below. As you position the board, look through the upper screw hole in the end panel to be sure you can see the transistor heat sink move into place to confirm it is between the end panel and the retainer.
- Page 30 If you have the KXAT3 installed, route the antenna coax to the KX3-2M or 4M board around the end as shown in Figure 26. Be sure the coaxial cable does not pass over either of the nearby toroidal inductors. Figure 26. Routing the Antenna Coax Between the KXAT3 Inductors Locate the notch on one side of the shield (see Figure 27).
- Page 31 Place the shield over the metal frame on the KX3-2M or 4M board oriented as shown in Figure 28, and press it down so the small bumps on the frame are in the holes along all four sides of the shield. The bumps latch the shield in place.
-
Page 32: Customer Service And Support
Elecraft products transferred by the purchaser to a third party, either by sale, gift, or other method, who is not disclosed to Elecraft at the time of original order, are not covered by this warranty. If the Elecraft product is being bought indirectly for a third party, the third party’s name and address must be provided at time...
Need help?
Do you have a question about the KX3-2M and is the answer not in the manual?
Questions and answers