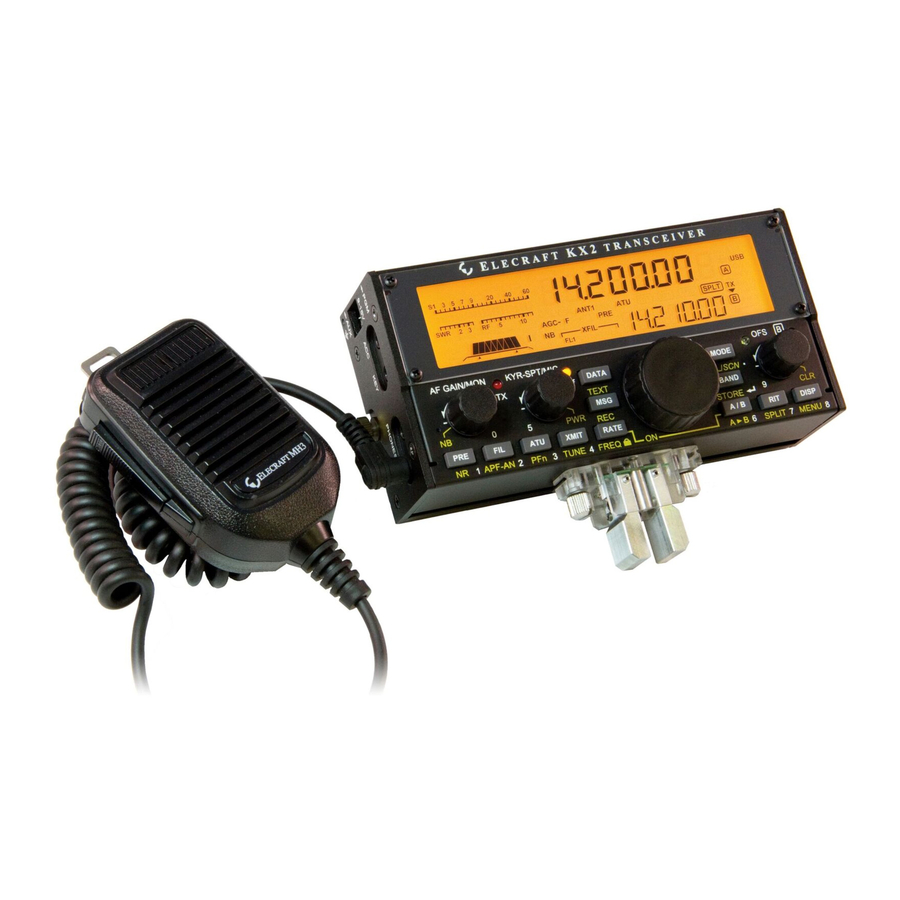
ELECRAFT KX2 Owner's Manual
Pocket-sized, 80-10 m ssb/cw/data transceiver
Hide thumbs
Also See for KX2:
- Setup manual (8 pages) ,
- Programmer's reference manual (33 pages) ,
- Manual (5 pages)
Table of Contents
Advertisement
Quick Links
See also:
Setup Manual
Advertisement
Table of Contents

Related Manuals for ELECRAFT KX2


Summary of Contents for ELECRAFT KX2
- Page 1 Ò LECRAFT , 80-10 SSB/CW/D OCKET IZED RANSCEIVER ’ WNER ANUAL Rev. A8, June 6, 2019 © 2019, Elecraft, Inc. All Rights Reserved...
-
Page 2: Table Of Contents
Options and Accessories 33 Getting Started 14 Band Selection 15 Firmware Upgrades 34 Mode Selection 15 Remote Control of the KX2 35 VFO A and B 16 Incremental Tuning (RIT and XIT) 16 Configuration 36 Special VFO B Displays 16... - Page 3 Receive Opposite Sideband 39 Transmit Bias 39 Transmit Gain 39 Transmit Carrier 40 Transmit Opposite Sideband 40 Menu Functions 41 Troubleshooting 54 Parameter Initialization (EEINIT) 58 Error Messages (ERR nnn) 59 Scrolling Alert Messages 62 Theory Of Operation 63 Glossary of Selected Terms 66 Specifications 68 Customer Service and Support 70 Index 72...
-
Page 4: Introduction
Weighing just 13 oz. (0.35 kg), it’s the perfect “grab and go” HF radio. Despite its small size, the KX2 is a full-featured HF transciever, with up to 10 W output. Its powerful digital signal processor (DSP) provides dual watch, built-in PSK and RTTY modes, digital voice recorder, stereo audio, noise reduction, and various filtering functions. -
Page 5: Installation
Operating Position As shown below, the tilt leg on the back of the KX2 can be used to optimize the viewing angle. Loosen the rear thumbscrew to adjust the tilt leg. The KX2 can also be operated hand-held, either vertically or horizontally. -
Page 6: Internal Battery
Internal Battery Note: Speaker wires are The KXBT2, shown here installed, routed between the small is an 11 V, 2.6 Ah li-ion battery board band-pass filter with protective circuitry. and the chassis. Battery installation: • Loosen the two thumb nuts at the ends of the bottom cover. -
Page 7: Utility Mounting Points (Bottom Cover)
The pack is fitted with a 2.1 mm DC barrel plug. The power supply connected to the KX2 (internal or KX2 has two DC barrel jacks: one inside, and one on external). the left side panel. These jacks are isolated from each other, but either can power the KX2. -
Page 8: Cw Key/Keyer Paddle
“mini” mics intended to plug directly into a computer. alternative is to use a device that retransmits the KX2’s Refer to the MIC BIAS and MIC BTN menu entries to audio output in the FM broadcast band. set up the KX2 for use with your mic or headset. -
Page 9: Computer/Amp Keying (Acc)
Auxiliary Outputs (AUX) Tip: RX Data If the KX2 is fitted with a KXIO2 (pg. 33), then a 2.5 mm AUX jack will be available. This jack provides * For external ampflier keying, the ACC jack’s key out two general-purpose outputs that can be programmed... -
Page 10: Antennas
A length of about 25 feet for each wire, matched to the “trailing ground” by those who operate KX2’s output using an antenna tuner (see ATU, pg. 11) pedestrian mobile (/PM). If you step will typically provide good performance on 40-10 m. - Page 11 Using An Automatic Antenna Tuner (ATU): An counterpoise is needed with many antennas. The ARRL ATU will allow the KX2 to “see” a good match in Antenna Book provides examples. This is definitely many cases (i.e., a low SWR) even with non-resonant needed when you use a whip, vertical, or random wire.
-
Page 12: Control Panel Reference
Control Panel Reference For details, refer to page numbers shown in parentheses) Power ON/OFF: Hold both the R A T E and A / B switches for 2 seconds (see “ON” label below the VFO A knob). Tap / Hold Functions, e.g. P R E / : Tap to use the function labeled on or above a control;... -
Page 13: Display (Lcd)
Shows that a VFO is locked. TX: SWR/RF output or compression/ALC (19) icon points to the transmit VFO, A or B (30). VFO A only in KX2) X F I L F L 1 VFO B Filter Passband Graphic (17): Mode Icons Auto-notch (18);... -
Page 14: Basic Operation
VFO B displays (pg. 23). O F S / B Turning the KX2 On/Off Using the Configuration Menu To turn the KX2 on or off, press and hold the R A T E To access the menu, hold until the... -
Page 15: Band Selection
24.89-24.99 Excellent DX band; no contests KX2’s display for received text, and a keyer paddle for 28.0-29.7 Great QRP DX band; CW beacons (28.2-28.3) show if band is open... -
Page 16: Vfo A And B
VFO A and B Incremental Tuning (RIT and XIT) The KX2 provides two VFOs (see glossary, pg. 66). RIT, or receive incremental tuning, adjusts the receive Each VFO has its own frequency, mode, and filter frequency without affecting your transmit frequency. -
Page 17: Receive Settings
A F / M O N can be used to adjust the filter passband as described used to set up the KX2’s receiver. On the display, below. Settings are stored per-mode. directly above these controls, is the filter passband graphic. - Page 18 , pg. 21). Signals can always be tuned in T E X T sound. Higher settings may attenuate weak signals. by ear, but the KX2 also provides a visual tuning aid Holding turns on noise reduction and displays its (CWT). With CWT on (MENU:CWT), the upper half setting, which can then be adjusted using the knob of the S-meter changes as shown below.
-
Page 19: Transmit Settings
The Transmit controls group (to the left of the VFO A (speech in voice modes, sidetone in CW mode). knob) is used to set up the KX2’s transmitter. The nearby TX LED turns on during transmit. switches from receive to transmit. However, in... -
Page 20: Ssb Mode
5 ALC bars (see below). Mic gain for typical continuous speech. the Elecraft MH3 is typically set to 15-25, and MENU:VOX INH (VOX inhibit, or anti-vox) can 30-40 for the internal mic. -
Page 21: Cw Mode
When calling a station, you should try to match your known as “full QSK.” (The QSK icon will appear.) frequency to theirs. To facilitate this, the KX2 provides MENU:CW WGHT provides two variations on both a visual tuning aid (CWT), as well as manual and QSK;... -
Page 22: Am Mode
To disable AM mode, use MENU:AM MODE. modes FSK D and PSK D. AM Receive: AM mode can provide a “warmer” Messages can only be recorded using the KX2’s sound that SSB mode when used to copy shortwave built-in keyer function (using either an external keyer broadcast stations. -
Page 23: Advanced Operating Features
Special VFO B Displays The reading will vary with preamp and attenuator settings. AFV is used along with dBV (below). The KX2 can display time of day and other parameters § Relative audio signal (dBV). Used to measure on the VFO B display. To access these displays, tap receiver sensitivity or or to compare signals. -
Page 24: Frequency Memories
To start scanning, first recall a general-purpose CW, 3 for data, etc. Memories can be set up manually frequency memory as described at left. Then hold or with the Elecraft Frequency Memory Editor (pg. 35). until appears on VFO B (~3 s). -
Page 25: Audio Effects
A U T O S U B Stereo headphones or dual external speakers can be If you turn dual watch on/off frequently, you may wish used with the KX2’s DSP audio effects (AFX). At to access it via (described below). P F n... -
Page 26: Receive Audio Equalization (Rx Eq)
Most microphones, including the Elecraft MH3 equalization via the RX EQ menu entry. RX EQ can and the KX2’s built-in mic, will provide good audio compensate for physical acoustics (of the room, quality with default (flat) TX EQ. Also, excessively headphones, internal speaker, external speaker), high TX EQ settings can cause distortion. -
Page 27: Data Modes
KEY jack, or attach a KXPD2 (or Mic gain, RX/TX EQ, and TX CMP are not KXPD3) paddle at the front of the KX2. (See the CW applicable to FSK D and PSK D modes. KEY1 and CW KEY2 menu entries.) When you send FSK D Mode (RTTY) CW, the KX2 will convert it to RTTY. - Page 28 PSK D Mode (PSK31/PSK63) Audio Data Modes (DATA A and AFSK A) PSK D is the KX2’s built-in version of PSK31 (or A computer, sound card, and appropriate software can PSK63) , which is highly reliable at low power levels.
-
Page 29: Text Decode And Display
DATA A and AFSK A modes. Text Decode And Display The KX2 can decode CW, PSK31 or PSK63 (PSK D) and RTTY (FSK D). CW speeds from about 8 to 70 WPM can be decoded. Decoded text is displayed on VFO B. -
Page 30: Split Operation
Split Operation allows you to transmit as much as to 23 kHz up. To do this, simply turn split OFF (VFO A will then be the TX Often you’ll hear a DX station being called by many VFO), and listen to the DX station with VFO B (using stations, creating a pileup. -
Page 31: Transmit Noise Gate
CW-in-SSB feature is enabled. See MENU:CW WGHT for details. Custom Power-On Banner Your KX2 can display a customized text “banner” on power-up, such as your name and callsign. The banner scrolls across the VFO B display. To set up a banner, use the Configuration screen of the... -
Page 32: Logging (Cw/Data Modes)
Logging (CW/Data Modes) Transverter Bands When using the KX2 hand-held, or if operating time is Seven user-definable band displays are provided for very limited, logging may be inconvenient. The KX2 use with external transverters, such as the Elecraft XV- can capture up to 2048 transmitted characters, along Series. -
Page 33: Options And Accessories
A KX2 Accessory Cable (KX2ACBL) is required mechanical keyer paddle that attaches directly to the to split the KX2’s ACC jack into two jacks: KEY OUT front of KX2 (or KX3). This eliminates the need for a (2.5 mm) and serial I/O (3.5 mm). The KXPA100 heavy keyer base. -
Page 34: Firmware Upgrades
RS232 port. the following: (1) Unplug the KX2 from the power At the KX2 end, connect this cable to the 3.5 mm ACC supply. If an internal battery pack is installed, jack. (ACC cable pinout is shown on pg. 9 for disconnect and remove it. -
Page 35: Remote Control Of The Kx2
With appropriate software, any computer with an packets from the transceiver’s serial port (ACC jack). RS232 or USB port can be used to control the KX2. To configure the KX2 to send these packets, set See Connecting the KX2 to a Computer (pg. 34). -
Page 36: Configuration
Auto Power-Off § KXAT2 Antenna Tuner (ATU): Set ATU MD to The KX2 can turn itself off after a specified period of . Exit the menu and turn the KX2 off, then A U T O inactivity (i.e., no use of the controls). Use the back on. - Page 37 If you’re using an external antenna tuner or amplifier ). Switch tones use the CW sidetone volume level, with the KX2, you may want to limit the power level which can be adjusted in CW mode using the used during .
-
Page 38: Calibration
If you’re using a signal generator, set P W R 0.0 watts to avoid damaging it. § Save your configuration using KX2 Utility. § Use direct frequency entry (pg. 15) to set VFO A to the exact frequency of your signal generator or... -
Page 39: Receive Opposite Sideband
Instructions available on request. To use automated gain calibration (recommended), Transmit Bias connect the KX2 to a computer, run KX2 Utility, and select the Calibration tab. Click on Calibrate This automated procedure sets the transmit bias current Transmitter Gain. Follow the on-screen instructions. -
Page 40: Transmit Carrier
Transmit Carrier Transmit Opposite Sideband In SSB and some data modes, a transmitter’s primary In SSB and some data modes, a transmitter’s primary signal may be accompanied by a weak unmodulated signal may be accompanied by a weak opposite signal called a carrier about 1 kHz away. The carrier sideband signal about 2 kHz away. -
Page 41: Menu Functions
Menu Functions Hold to enter the KX2’s menu. Tap or hold this switch to exit. Up to four menu entries that you’d like M E N U quick access to can be assigned to programmable functions PF1-PF4 using , the programmable function switch P F n (pg. - Page 42 off, the AGC icons on the LCD change to , with the “minus” sign meaning A G C - “off”. Turning AGC off also disables noise reduction.) If an uncomfortably-strong signal appears in your headphones or speaker with AGC off, reduce the threshold of the AGC-off audio limiter (MENU:AF LIM). This setting is stored per-mode.
- Page 43 AM operation is not planned. You can copy AM signals using SSB O F F modes. Shows total amp hours used by the KX2. This is useful for testing battery packs, AMP HRS estimating remaining battery charge, or tracking the amp hours needed to complete one or more objectives (e.g., a certain number of QSOs at a given power level).
- Page 44 ATU is in use, data for the current ATU DATA set is cleared. AUTO INF If set to , the KX2 will send band data (“automatic info”) to its ACC A N T C T R L jack for use with devices such as SteppIR™ antennas. The data is sent on every band or mode change, and once per second as the VFO is moved.
- Page 45 B A T L O W few minutes. Regardless of this setting, the KX2 will turn itself off if the supply voltage drops below 7.5 V. To extend battery life, turn the backlight and preamp off when not needed, and use headphones rather than the internal speaker.
- Page 46 , then exit the menu and N O R turn the KX2 off/on. To set the time, use the TIME menu entry. Use the RTC ADJ menu entry to improve the clock’s long-term accuracy if desired. Note: The real-time clock circuitry must normally be powered by either the KX2’s internal battery or an external power source.
- Page 47 LEDs (TX, delta-F, OFS, and VFO B LED). Does not set brightness of the LCD backlight itself (for that adjustment, use BKLIGHT). When using the KX2 hand-held, or if operating time is very limited, logging may LOGGING be inconvenient.
- Page 48 If PA MODE is set to P out CAL, a KXPA100 is connected via the remote-control cable, and PWR is set to CAL 75W, going into TUNE mode will calibrate the KX2’s drive level for 75 W output at the KXPA100, on the present band. This overrides the KXPA100’s factory aligned, per-band drive-power calibration, and should not be necessary under normal circumstances.
- Page 49 - 0 d B be aware of a previous gain reduction used under different band conditions. Note 3: As is the case with many software-defined transceivers, the KX2’s RF GAIN control is actually an input scaling factor applied within the DSP itself.
- Page 50 Also see the RTC ADJ menu entry, which may be used to improve the long-term accuracy of the real-time clock. Note: The clock circuitry must be powered by the KX2’s internal battery or an attached power supply. Refer to the KXIO2 menu entry for details.
- Page 51 If a KXPA100 amplifier is connected via the remote-control cable, PA MODE is ON, and PWR is 10 W or higher, the TX GAIN parameter shows the KX2 drive level for 75 W output at the KXPA100. If the drive value is preceded by the letter ‘A’, it was obtained from the KXPA100 (factory calibration value).
- Page 52 necessary for any operational purpose. In all modes, ALC is optimized for low distortion.) When ALC is turned off, a (-) sign is added to the parameter, e.g. . Also, an asterisk is added to the control value when it is being - A L C n n P W R adjusted (e.g.
- Page 53 M H z . (Tap – to select 2 4 9 9 9 applicable transverter band.) XVn IF Specify KX2 band to use as the I.F. for transverter band <n> ( . (Tap – select the transverter band.) I.F. selections include , and MHz.
-
Page 54: Troubleshooting
N / A § Mode icon flashes: This is a reminder that you’re about to set the KX2 up for cross-mode SPLIT operation (VFOs in different modes). Tap any key to clear. To view and change VFO B’s mode, tap... - Page 55 § KX2’s right side panel is hot to the touch: The right side is used as a heat sink, so it it normal for it to feel quite warm during long transmissions. The panel will run cooler if you use shorter transmissions, lower power, or a lower supply voltage.
- Page 56 The KX2 protects itself from high received signal H I R F I levels. First the preamp is turned off, if it was on. The second step taken by the KX2, if necessary, is to turn on the RF attenuator. The receive overload icon ( ), near the icon, will turn on.
- Page 57 KX2 VFO signal is heard in a nearby receiver: A receiver whose antenna is in very close proximity to the KX2’s may pick up the KX2’s VFO signal when both are set to about the same frequency (+/- 8 kHz). Try separating or reorienting the antennas.
-
Page 58: Parameter Initialization (Eeinit)
Restore all parameters using the Restore Configuration function of the KX2 Utility program. Then turn power off and on again. See if the original problem has been resolved. If not, contact Elecraft. Note: Elecraft maintains configuration files for all KX2s sold. Your original configuration file can be sent to you via email on... -
Page 59: Error Messages (Err Nnn)
Turn power off for 10 seconds, then back on. Reload MCU and DSP firmware. If this doesn’t correct the ERR DS2 DSP SPI echo not inverted problem, save your configuration using KX2 Utility, then ERR DSE, DSP command timeout. consult customer support to see if you should do an... - Page 60 ERR FW2 General firmware problem. Follow steps shown for ERR DS1. identifies the type of d = n n n error (report to Elecraft). ERR IOA RF board I/O expander Turn power on. Reload MCU and DSP firmware. If error unresponsive.
- Page 61 Transmit Gain calibration (pg. 39). If this doesn’t correct the problem, reload a known-good Configuration file using the latest version of the KX2 Utility. Customer support can supply the original Configuration file if you didn’t save one when you first received your KX2.
-
Page 62: Scrolling Alert Messages
FREQ switch for ~3 seconds. USE FSK-D, OR SSB WITH 2-TONE ON TX sideband nulling (MENU:TXSBNUL) requires that MENU:2 TONE be set to ON, and that the KX2 be in SSB or FSK-D mode. USE PHONES DUAL RX (dual watch) cannot be used with the internal speaker. -
Page 63: Theory Of Operation
RF Board The RF board contains all of the KX2’s RF circuitry as well as low-level baseband (AF) stages in the receive path. The relay-switched low pass filters are used during both transmit and receive. The signal on the antenna side of the filters pass through a forward/reflected power and SWR bridge to the antenna jack (BNC), or to the optional KXAT2 automatic antenna tuner. - Page 64 Control Panel (CP) Board The CP (Control Panel) circuit board contains all of the KX2’s control circuitry as well as IF and AF stages for the transmit and receive paths. It contains two on-board microcontrollers: one to manage the radio (MCU), and another to process all transmit and receive signals digitally (DSP).
- Page 65 KX2 Block Diagram W. Burdick, L. Johnson, R. Heineck, R. Friess Rev: 02 May 2016 +12V Ext +3.3V and +1.2V Switching Regulators +5V, +3.3V and +1.8V Linear Regulators (LM78L05, LM78M05, MIC5265, LP2985, LM2671, LM2831) ATU (Option) Rx AF Rx RF...
-
Page 66: Glossary Of Selected Terms
The advantage of a DC-DC converter is that when it steps voltage down, it steps current up (or vice- versa). In this case, the 300 mA the KX2 consumes at 3.3 V might require only 100 mA at the 12 V power source. - Page 67 MDS (minimum discernable signal): A measure of a radio’s sensitivity, expressed in dB (decibels) relative to 1 milliwatt (0 dBm). For example, the user of a KX2 with the 20 dB preamp turned on, can typically copy a CW signal at about -137 dBm, or 137 dB below 1 milliwatt. MDS is dependent on the receiver bandwidth, with 500 Hz normally used for standardized measurements.
-
Page 68: Specifications
Specifications GENERAL Frequency Range Receive, 500 kHz - 32 MHz. See 500 kHz to 3 MHz sensitivity note below. Transmit, 80/60/40/30/20/17/15/12/10 meter ham bands. (Consult factory for MARS or other non-ham-band coverage.) Transmit excluded in some ranges (by country). Frequency Stability +/- 1 ppm typical at 25 C after 5-minute warm-up. - Page 69 TRANSMITTER* Output Power 80-17 meters, 10 W PEP max (+/- 1 dB); 12 and 10 meters, 8 W PEP max (+/- 1 dB). Recommended transmit duty cycle: 50%, all modes. (If power amplifier temperature or current drain is too high, power will automatically be reduced.) NOTE: When using over 5 W in SSB, DATA-A and AFSK-A modes, the recommended supply voltage is 12 V or higher to minimize transmit intermodulation products.
-
Page 70: Customer Service And Support
Our repair location may be different from our factory location. We will give you the address to ship your KX2 to at the time of repair authorization. Packages shipped to Aptos without authorization will incur an additional shipping charge for reshipment from Aptos to our repair depot... - Page 71 Elecraft products transferred by the purchaser to a third party, either by sale, gift, or other method, who is not disclosed to Elecraft at the time of original order, are not covered by this warranty. If the Elecraft product is being bought indirectly for a third party, the third party’s name and address must be provided at time of order to ensure warranty...
-
Page 72: Index
Index ACC Jack, 9 Auto Info (AI Mode), 43 Advanced Operating Features, 23 Auto Power-Off, 35 AF Gain Control, 17 Automatic Antenna Tuner (ATU), 11, 19, 43, 65 AF Limiter, 40 Auto-Notch, 18 AFSK A Mode, 28 Auto-off, 43 AFV, 23 Auto-Spot, 21 AFX (Audio Effects), 25 AUX Outputs, 9, 43... - Page 73 Digital To Analog Converter (DAC, D-to-A), 65 Keyer Paddle, 8, 44 Digital Voice Recorder, 30 Keying Weight, 21, 45 Direct Frequency Entry, 15 KX2 Utility PC Application, 33, 34, 57 Display (LCD), 13 KXAT2, 32, 35 Dual Watch, 25, 45 KXIO2, 45...
- Page 74 Menu Settings, 14, 35 PSK31, 28 Message Record/Play, 22 QSK, 20, 21, 45 Message Repeat, 47 Quasi-Stereo (AFX), 40 MH3, 32 Quick Memories, 24 Mic Bias, 46 Quick-Start Guide, 12 Mic Function Buttons, 46 Real Time Clock, 36 Microcontroller Unit (MCU), 66 Receive Settings, 17 Microphone, 8 Reference Oscillator, 37, 47...
- Page 75 SSB/CW VFO Offset, 26 Tuning Rate, VFO, 36, 51 Standing Wave Ratio (SWR), 11 TX EQ, 26, 50 Switch Test, 49 TX Gain, 50 Switch Tones, 36, 49 TX LED, 33, 54 Tech Mode Menu Entries, 49 Variable Frequency Oscillator (VFO), 66 Terminal Emulator, 34 VFO B Parameter Displays, 16, 23 Text Decode and Display, 21, 29...
Need help?
Do you have a question about the KX2 and is the answer not in the manual?
Questions and answers