Table of Contents
Advertisement
SERVICE MANUAL
11Series
WARNING
This service information is designed for experienced repair technicians only and is not designed for use by the
general public. It does not contain warnings or cautions to advise non-technical individuals of potential dangers in
attempting to service a product. Products powered by electricity should be serviced or repaired only by experienced
professional technicians. Any attempt to service or repair the product or products dealt with in this service
information by anyone else could result in serious injury or death
©2010 Front Load Haier Washing Machine
All rights reserved. Unauthorized copying and distribution is a violation of law
SERVICE MANUAL
Front Load Washing Machine
Model Indicated:
L812WM12
L614WMS12
......
Front Load Washing Machine
1
Advertisement
Table of Contents
Troubleshooting

Related Manuals for Logik L812WM12


Summary of Contents for Logik L812WM12
-
Page 1: Service Manual
SERVICE MANUAL 11Series SERVICE MANUAL Front Load Washing Machine Model Indicated: L812WM12 L614WMS12 …… WARNING This service information is designed for experienced repair technicians only and is not designed for use by the general public. It does not contain warnings or cautions to advise non-technical individuals of potential dangers in attempting to service a product. -
Page 2: Table Of Contents
SERVICE MANUAL 2 11Series Contents Chapter 1 General Information ___________________________________________ 4 1-1. General Guidelines ________________________________________________ 4 1-2. Caution and Warning symbols _________________________________________ 4 1-3. Function indication symbols ___________________________________________ 4 Chapter 2 Product Feature _______________________________________________ 5 2-1. Features ______________________________________________________ 5 2-2. Specification ____________________________________________________ 6 Chapter 3 Matters needing attention _______________________________________ 8... - Page 3 SERVICE MANUAL 3 11Series 7-1. Name of parts _________________________________________________ 14 7-2. Net dimension _________________________________________________ 15 Chapter 8 Disassembly and Installation ___________________________________ 16 8-1. Remove packing materials _________________________________________ 16 8-2. Dismantle packing bolts ___________________________________________ 16 8-3. Adjusting the washing machine _______________________________________ 16 8-4.
-
Page 4: Chapter 1 General Information
SERVICE MANUAL 4 11Series 10-2-5. Water leaking _______________________________________________ 27 Chapter 11 Maintenance ______________________________________________ 28 Chapter 1 General Information 1-1. General Guidelines When servicing,observe the original lead dress.If a short circuit is found, replace all parts which are overheated or damaged by the short circuit.After servicing ,see to it that all the protective devices such as insulation barriers ,insulation papers shields are properly installed .Confirm that the screws,parts and wiring which were removed in order to service are put in the original positions, or whether there are the portions which are deteriorated around the service places serviced or not. -
Page 5: Chapter 2 Product Feature
SERVICE MANUAL 5 11Series Chapter 2 Product Feature 2-1. Features (1). 320mm diameter porthole, door may be open at a 175 degrees. Facilitate view of wash process, facilitate unloading and easy to use with large port. (2). Class AAA energy-saving Scientific design for tub can reduce the use of water heavy during washing, consequently upgrade the energy efficiency class to A A A,also use scientific washing (3). -
Page 6: Specification
SERVICE MANUAL 11Series 2-2. Specification washing machines L812WM12 L614WMS12 Product identification Description of appliance Washing machine Washing machine Type of appliance(FS = standing, BI = built-in) Supplier own brand Supplier bar code Europe Supplied by Supplied by Commercial Brand / Model... - Page 7 SERVICE MANUAL 7 11Series ● ● Motor overheating protection No heating without water ● ● (before drain 90°C boiled water) ● ● Auto water cool-down ● ● Water overflow protection Acqua Stop kit ● ● Child protection 5. Programs n° ●/●...
-
Page 8: Chapter 3 Matters Needing Attention
SERVICE MANUAL 8 11Series Chapter 3 Matters needing attention 3-1. BEFORE SWITCHING THE APPLIANCE ON FOR THE FIRST TIME DO ..Make sure that the transport bolt are removed..Use a separate earthed socket for the power supply.. -
Page 9: During Daily Use Of The Appliance
SERVICE MANUAL 9 11Series 3-2. DURING DAILY USE OF THE APPLIANCE DO ..Pull up zips and fix loose threads to prevent the items from being entangled. If necessary, put small items into a net bag or pillow..Turn off the machine after each wash program and switch it off at the mains to save electricity and for safety. Wipe clean the lower part of the porthole. -
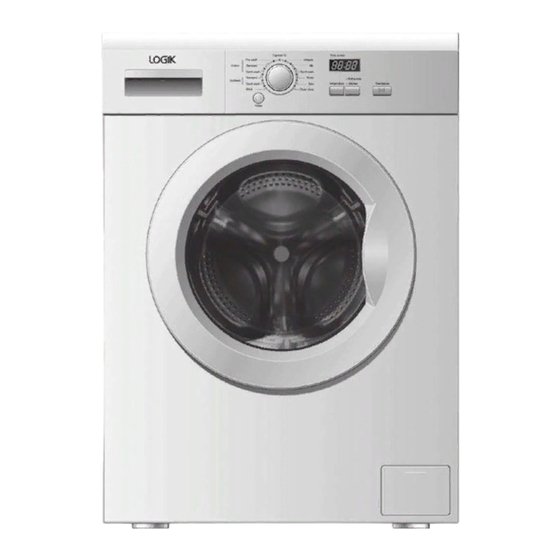
Page 10: Chapter 4 Operational Guidance
SERVICE MANUAL 10 11Series Chapter 4 Operational Guidance A Program knob B Power Switch C Start/Pause button D Intense and Extra Rinse button E Washing temperature button F Display G Detergent distribution drawer OPERATIONAL FUNCTIONS ¬ Program _By turning the knob clockwise/counterclockwise, the required program can be selected. There knob are 13 programs available. - Page 11 SERVICE MANUAL 11 11Series ¬Display _Information as remaining wash time and error messages will be shown here. Note: After power is switched on, the display will go on and the remaining wash time decreases. As the water pressure and temperature may differ, the remaining time maybe adjusted accordingly.
-
Page 12: Chapter 5 Program Introduction
SERVICE MANUAL 12 11Series Chapter 5 Program Introduction Front Load Washing Machine... -
Page 13: Chapter 6 Washing Mathods
SERVICE MANUAL 13 11Series Chapter 6 Washing Mathods 6-1. LOADING THE MACHINE Open the washer door, put in the laundry piece by piece. Close the door tightly. ¬ When first using the washing machine, let it run unloaded for one program to prevent the laundry from being tainted by oil or dirty water from the washing machine. -
Page 14: Chapter 7 Appearance Brief Introduction
SERVICE MANUAL 14 11Series Chapter 7 Appearance brief introduction Name of parts 7-1. Front Load Washing Machine... -
Page 15: Net Dimension
SERVICE MANUAL 15 11Series Net dimension 7-2. height:850mm / width:595mm / depth:650mm (For the model HW80-1411, H80-1211,HW80-1011) height:850mm / width:595mm / depth:510mm (For the model HW60-1411, H60-1211,HW60-1011) Front Load Washing Machine... -
Page 16: Chapter 8 Disassembly And Installation
SERVICE MANUAL 16 11Series Chapter 8 Disassembly and Installation Preparing The machine 8-1. Remove all the packing materials to prevent unsteadiness, including the polystyrene base. Upon opening the package, water drops may be seen on the plastic bag and the porthole. This is normal phenomenon resulting from water tests in the factory. -
Page 17: Drain Hose
SERVICE MANUAL 17 11Series Inlet Hose 8-4. 1. Connect the nut on the inlet hose to the connector on the water valve. 2. Apply inlet hose to a water tap with cold, fresh water. Note: Use the hose-set supplied with the appliance. Old hose-sets should not be reused. -
Page 18: Chapter 9 Wiring Circuit And Self Check
SERVICE MANUAL 18 11Series Chapter 9 Wiring circuit and Self check 9-1. Wiring circuit 9-2. Self check 1. How to start Press the "Intense" and "Extra Rinse” button at the same time, then plug on the machine, "88:88" and will be displayed by turn.Then prese the “Start/Pause”button, the model of the machine will be displayed. - Page 19 1470/1270/1070..“ will be displayed by turn. Then press “Temp ”button to choose correct load. Choose “1460/ 1260/1060 or1480/1280/1080 or 1470/1270/1070 then press the “Start/Pause” button to save. 3. For the model“L812WM12、L614WMS12”,Please choose“1280、1460”。 4. If you want to change the model again after storage, you can cut off the NTC and do the cycle adjustment.
-
Page 20: Chapter 10 Error Display And Troubleshooting
SERVICE MANUAL 20 11Series Chapter 10 Error Display and troubleshooting Error Display 10-1. Error message:Door is not properly shut 20s after program is started. Troubleshooting: Shut the door properly Pushing the door to Check Whether Door is properly shut or not? Cut off the power and then turn on again. - Page 21 SERVICE MANUAL 21 11Series Replace PCB Error message:Temperature sensor is not properly connected or damaged. Troubleshooting: Cut off power and measure the resistance of NTC exist open circuit. Replace it temperature sensor by multimeter, is it between 5-14kΩ ? Check if NTC is connected properly Connect NTC well Check the CN3-3 white wire and CN2-3 black wire of NTC, are they connected well?
- Page 22 SERVICE MANUAL 22 11Series The control wire may be broken, Otherwise the PCB must be broken; Please replace the broken. Error message: The required water level is not reached within 6 min. Troubleshooting: Check if water is leaking from washer Connect it well.
- Page 23 SERVICE MANUAL 23 11Series Error message. Motor overheat protection or is damaged. Troubleshooting: Cut off power,and check if motor wires are Reconnect well conneted well? Put the motor in normal temperature about ten minutes, and then test again. If the Measure if the resistance of motor binding by resistance is natural, it is caused by multimeter, is it as followed?
- Page 24 SERVICE MANUAL 24 11Series Without starting but electrifying, measure the Replace PCB import voltage of inlet valve, is it between AC 220-240V? Front Load Washing Machine...
-
Page 25: Examination & Troubleshooting
SERVICE MANUAL 25 11Series 10-2. Examination & Troubleshooting 10-2-1. Display nothing Troubleshooting: Repair power supply Measure the power supply ,is it exists 220V-240V AC voltage? Press the power switch Is power switch on? Make sure power supply cable assembly is Press power switch and check the voltage connected well and then replace power between two pins of power switch. -
Page 26: No Draining
SERVICE MANUAL 26 11Series 10-2-3. No draining Troubleshooting: Adjust the height of drainpipe to Is the height of drain pipe too high? 80-100 cm Turn filter anticlockwise,open and check if filter is jammed Clean and tighten filter clockwise. Check if hose-connecting cylinder to pump is bent or jammed Arrange hose and clean Turn on power and choose spin program to... -
Page 27: Water Leaking
SERVICE MANUAL 27 11Series 10-2-5. Water leaking Troubleshooting: Check if water is leaking from the inlet pipe Readjust it or the tap Is drain pipe broken? Replace drainpipe Check if there is foreign material nipped Remove clothes between cushion of sight window and sight indo Check if all tubes and tie-in is leaking water, including the connecting of tube and valve,... -
Page 28: Chapter 11 Maintenance
SERVICE MANUAL 28 11Series Chapter 11 Maintenance AFTER WASHING Turn off the water supply and pull out electricity plug after each wash. Open the washer door to prevent formation of moisture and odours. If the washing machine is left idle for a long period, drain the water in the machine and replace the drain hose. - Page 29 SERVICE MANUAL 29 11Series WATER INLET VALVE AND INLET VALVE FILTER To prevent blockage to the water supply by ingress of foreign substances, clean the water inlet valve and inlet valve filter regularly. MOVING THE MACHINE If the machine is to be moved to a distant location, replace the transportation bolts removed before installation to prevent damage as shown below.
Need help?
Do you have a question about the L812WM12 and is the answer not in the manual?
Questions and answers