Table of Contents
Advertisement
Advertisement
Table of Contents

Subscribe to Our Youtube Channel
Related Manuals for Bang & Olufsen BeoCom 6000


Summary of Contents for Bang & Olufsen BeoCom 6000
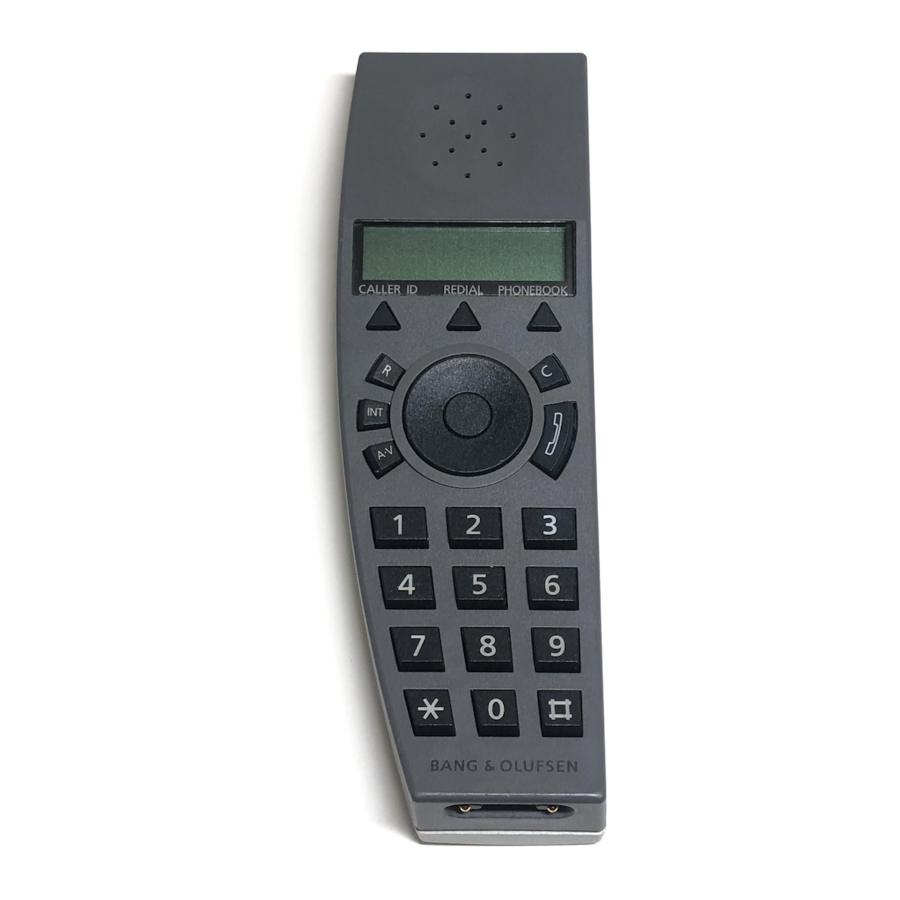
- Page 1 BeoCom 6000 Guide...
-
Page 3: Before You Start
Before you start… This Guide contains instructions in how to use the BeoCom 6000 handset with either a BeoLine ISDN, a BeoLine PSTN or a BeoCom 6000 base. ISDN or PSTN? ISDN and PSTN are two different telephone line networks. PSTN (Public Switched Telephone Network) is the most comon network. -
Page 4: Table Of Contents
Contents Get started with BeoCom 6000, 6 Find out how to register BeoCom 6000 to a base, name the handset, set the time and date, charge the handset battery, interpret the indicator lights on the handset and base, use the handset keys and navigate using the menu system and the handset display. -
Page 5: For Your Information
The chapter also includes an overview of the Handset/Base, Ringer and Setup menus. For your information…, 54 This chapter contains technical data for the BeoCom 6000, an overview of display messages, a troubleshooting section, special information about your BeoCom 6000 and a description of the conditions under which the product guarantee applies. -
Page 6: Get Started With Beocom
To register a handset, follow the procedure corresponding to the type of base you have: The BeoCom 6000 base. The PARK If you have a BeoCom 6000 base… number identifying the base is Press and hold the button on the base for two visible on the bottom. - Page 7 If you have a BeoLine PSTN base… > Ensure that the base and the charger are connected to the mains. > Press and hold the button on the back of the base for at least four seconds. The base is now open for registration for five minutes. >...
- Page 8 >> Get started with BeoCom 6000 If you have a BeoLine ISDN base… > If you are registering your first handset to this base, ensure that the base and the charger are connected to the mains. > Place your handset in the charger. Registration occurs automatically, and you can then name the handset, as described on page 9.
-
Page 9: Name The Handset
Name the handset When registration is complete, the display prompts you to name The naming function is also the handset and set the clock. You can enter these settings at a accessible via the HANDSET/BASE later date, if you wish. menu, and the clock function is accessible via the SETUP menu. -
Page 10: Set The Time And Date
>> Get started with BeoCom 6000 Set the time and date Some telephone companies provide After you name the handset, the display prompts you to set the a service that sets the clock time and date. The time is shown when the phone is not in use and automatically the first time you when there is no new information in the display. - Page 11 Phone feedback – indicator lights Indicator light Indicator light on the BeoCom 6000 base The two-colour indicator light on the base lights up in: Green… The base is on and the handset is placed correctly for charging. Red… Charging impossible. Place the handset correctly in the charger.
- Page 12 >> Get started with BeoCom 6000 The BeoCom 6000 handset The handset is automatically switched on when placed in the charger. If you switch off the handset, you cannot make a call and the handset does not signal incoming calls.
- Page 13 Navigate in the menu system Alternatively, if you know the Press and then MENU to access the main number of the desired menu, you MENU menu can select this menu directly from the main menu by pressing its Turn the wheel to select the menu item and number (1–7).
-
Page 14: Handset Keys
>> Get started with BeoCom 6000 Handset keys CALLER ID Access the Caller ID list Adjusts the volume of Bang & Olufsen audio systems REDIAL Access the Redial list Adjusts the volume of Bang & PHONEBOOK Olufsen video systems Access the Phonebook. Also used... - Page 15 Additional two-key functions (above 1-6) BeoCom 6000 contains additional Call another handset in the house, functions, identified by words or 1–6 are available symbols printed above the keys. To gain access to a function, press the MENU (above 7) key, followed by the key located...
- Page 16 Avoid the handset charging contacts touching metal or greasy parts. Cleaning Clean your BeoCom 6000 with a soft, damp cloth with a few drops of mild detergent added. Clean the charging contacts of charger and handset carefully with a cotton bud and spirit.
-
Page 17: Battery Status
Battery status 117 FREE ENTRIES 117 FREE ENTRIES The battery indicator in the display shows the capacity or talk time CALLER ID REDIAL PHONEBOOK left in the handset. 6 symbols are available for the battery 100% charged indicator: 80% charged 60% charged You can display the battery charging status in the handset at any time by pressing OK. -
Page 18: Daily Use
Make and answer calls To get a dial tone before entering button on the BeoCom 6000 is used to start and end a call. the number, press . During the call, the phone displays the duration of the call and the number or name of the person called. - Page 19 Lock the handset keypad You can lock the handset keypad to avoid inadvertent key Alternatively, you can lock the activation when, for example, you carry the handset in a pocket. handset by from the SETUP menu. If you lock the handset keypad, you can still answer calls, but you Refer to pages 52–53 for further have to unlock the keypad to make a call.
- Page 20 >> Daily use Store a number after a call You can make Phonebook entries After a call, you will be asked whether you want to store the easier to find: number in the Phonebook, if it is not already there. You can also enter a name with the number.
- Page 21 Search the Phonebook and make a call When the phone is not in use, you can turn the wheel to search If you change a number before you directly from the entire list of names in the Phonebook. dial, as described below, the Phonebook entry containing the When the phone is not in use…...
- Page 22 >> Daily use Use Redial You can store telephone numbers The Redial function stores the last 24 telephone numbers you from the Redial list directly in the called. In addition to the number called, you can also view the time Phonebook.
- Page 23 Use Caller ID The last 24 numbers you have received calls from are stored in the This function requires a Caller ID Caller ID list. If the number is in the Phonebook, the name is also subscription with your telephone shown.
- Page 24 >> Daily use Switch between two calls – Call Waiting In order to use this function, you If you receive an incoming call while you are already speaking on need to subscribe to the Call the phone, a beep sounds in the handset, and the display shows Waiting service.
-
Page 25: Advanced Operations
Advanced operations Enter a new name and number in the Phonebook At any time, you can store a name and number in the Phonebook. You can make a call directly from Numbers are stored once. A number can contain up to 48 digits, the Phonebook. - Page 26 >> Advanced operations Edit a name or number in the Phonebook When you have displayed a You can edit numbers or names in the Phonebook at any time. number from the Phonebook, you Delete characters or digits in reverse order, or place the cursor can edit it by pressing OK.
- Page 27 Delete names and numbers in the Phonebook You can delete names and numbers stored in the Phonebook. PHONEBOOK If the handset is in use, press PHONEBOOK. If the handset is in standby, go to the next step Turn the wheel to select an entry Press then MENU to access the main menu MENU...
- Page 28 >> Advanced operations Store Redial and Caller ID numbers Numbers which appear in the Telephone numbers from the Redial and Caller ID lists can be stored Redial and Caller ID lists as names and named in the Phonebook. or with names are already stored in the Phonebook.
- Page 29 Adjust volume level on audio/video products You can adjust the volume of your Bang & Olufsen audio and video products directly from your handset. First select which sound source, audio or video, you wish to adjust. If you have a Bang & Olufsen BeoLink system installed, you can also adjust the volume ®...
- Page 30 >> Advanced operations Call and store extension numbers in the Phonebook If you want to make a call to an extension number, a pause must be inserted before the extension number. Store the main number, the pause and the extension number in the Phonebook, and give the number a name.
-
Page 32: System Use With Several Handsets
System use with several handsets With several handsets registered to one base, you can make your own phone system. The handsets can all receive external calls, also during internal calls between handsets. Handsets in the system are numbered 1–6 and can be named as well. Each handset is initially set up as ‘common’. -
Page 33: Call Another Handset
Call another handset You can call one handset or call all handsets simultaneously. If you The phone system allows up to two call all handsets, the handset that responds first receives the call. internal calls and 1 external call to If you call one handset, the display shows which handset has been take place at the same time. - Page 34 Make a handset ‘personal’ or ‘common If you change your handset from You can set your handset to be ‘personal’ instead of ‘common’. ‘personal’ back to ‘common’, the The Phonebook, Redial list and Caller ID list of a personal handset personal Phonebook, Caller ID list are located in the handset and not the base.
- Page 35 Forward external calls You can forward an external call to one handset or to all handsets. You can speak with the person answering the internal handset, or you can forward the external call directly. When you forward an external call to all handsets, the call goes to the handset which answers first.
- Page 36 >> System use with several handsets Make a three-party call If you have a BeoLine ISDN, a During an external call, you can call another party on an internal three-party call is also possible handset to establish the three-party call. If one party hangs up, the between one internal handset and call continues with you and the remaining party.
-
Page 37: If You Have A Beoline Isdn Base
Set up handsets for ISDN services To set up your phone to meet your needs, consider how you want If you already have a BeoCom 6000 to make use of the individual handsets, and subscribe to the phone system and you want to supplementary services you find most useful. - Page 38 >> If you have a BeoLine ISDN base… A telephone number for each handset – MSN MSN stands for ‘Multiple Subscriber The MSN service allows you to give each of your handsets their own Numbering’. telephone number. This can be practical if you want to know for whom a call is meant, or if you want separate itemised bills.
- Page 39 An everyday situation A handset in the kitchen… Set up the handset to have the main number. If you choose code 0, the handset will always ring, no matter who the call is for. A handset in the living room… Set up the handset to have the main number with code 1.
- Page 40 >> If you have a BeoLine ISDN base… Two calls at the same time – Call Waiting If you do not want to be disturbed To be able to receive a second call on the same telephone number by ringing signals from other during a call, you must first activate Call Waiting.
- Page 41 Activate Call Waiting in all handsets… Both telephone lines are in use Press to activate Call Waiting during a three-party call and when you have set a call on hold. Press and await a dial tone Press to store the setting Handle an incoming call during a call…...
- Page 42 >> If you have a BeoLine ISDN base… Suspend an active call – Terminal Portability If you subscribe to this service, you can suspend an active call if, for example, you wish to use another ISDN handset in another room. You can give the call a code by which it can be identified when the call is retrieved.
- Page 43 Avoid interruptions – exclude a handset If, for example, you have a handset in your home office and do not wish to be disturbed by calls to other handsets in your phone system, you can prevent the handset from ringing by selecting up to two MSN numbers to be ignored by that handset.
- Page 44 Withheld Number – CLIR and COLR CLIR stands for ‘Calling Line If you do not want to reveal your telephone number during a call, Identification Restriction’, you can choose to be anonymous. CLIR gives anonymity to calls COLR for ‘Connected Line originating from your main number, while COLR gives the same Identification Restriction’.
-
Page 45: Call Forwarding
>> If you have a BeoLine ISDN base… Call Forwarding This service forwards calls coming in to a specific MSN number The following subscription types are onward to a designated number. If you subscribe to several extra available: MSN numbers and wish to use this service, you must activate Call –... - Page 46 Make a three-party call Refer to page 33 for further A three-party call is possible between 1 internal handset and 2 information about how to make a external callers, or between 2 internal handsets and 1 external three-party call between 2 internal caller.
-
Page 48: Preference Settings
Preference settings Choose a base to use with a handset Alternatively, you can choose AUTO If a handset is registered to several bases, you can choose which SELECT. The handset then searches base to use via the SELECT BASE menu. An available base is for another base if the signal to the identified in the display by its PARK number, which you also can current base is lost. - Page 49 Change the base PIN code The PIN code is a 4-digit access code. Enter your own PIN code to If you have problems changing prevent others from registering their handset to the base. the code, please contact your Bang & Olufsen retailer. Press then MENU to access the main menu MENU...
- Page 50 >> Preference settings Cancel registration of a handset to a base If your handset is registered to It is possible to remove one or more handsets from a specific base. several bases, and you remove If the base is out of reach, you can remove the base from the BASE 01, the handset becomes handset instead.
- Page 51 Register a handset to a base manually If you already have a BeoCom 6000 phone system and wish to To be able to register handsets register one or more of these handsets with a new base, follow the automatically to the new base, you procedure described below.
- Page 52 >> Preference settings The Ringer, Handset/Base, and Setup menus These menus contain several options which allow you to connect, disconnect or adjust BeoCom 6000 functions. The options and the functions they affect are described below. Choose settings in the menus…...
- Page 53 Options are YES and NO. SWITCHBOARD… Set BeoCom 6000 for use with a switchboard. Options are YES and NO. If you choose YES, use the number keys to enter a prefix code and turn the wheel to select a pause length. You can select...
-
Page 54: Display Messages
Display messages Display Cause Action PHONEBOOK You have not stored any numbers in the Store entries in the Phonebook. Refer to Phonebook. page 25. **** EMPTY ***** New entries cannot be stored. The Delete entries in the Phonebook. Refer to PHONEBOOK Phonebook is full. - Page 55 Display Cause Action REGISTER BASE 6 handsets are already registered to this Remove a handset from a base (page 50) base. or register the handset to another base ***** FULL ***** (page 51). The handset is not registered to any base. Register the handset.
-
Page 56: Troubleshooting
Troubleshooting Problem Cause Action The handset is not working. The handset batteries are flat. Charge the battery (page 10) or check that the battery is inserted correctly (page 17). The phone does not ring. – The ringing signal is switched off; –... - Page 57 Problem Cause Action The Phonebook, Redial and Caller You are using a common handset Set the handset as personal (page ID lists are not updated. not registered to base number 1, 34) or register the handset to base where the Phonebook and the number 1 (page 51).
-
Page 58: Technical Data
Alpha numeric display with 2 lines of 16 characters each. The light in the display is activated by action and incoming calls – and is switched off after 20 seconds Indicator lights: BeoCom 6000 Base Red/Green BeoLine ISDN Base Handset... - Page 59 BeoCom 6000 is manufactured. The national identity letters can be found above the lowest bar code on the label. If you are in any doubt about the use of your BeoCom 6000, please contact your retailer for further information.
- Page 60 Conditions of the guarantee Each Bang & Olufsen product purchased from an authorised Bang & Olufsen retailer carries a guarantee against defects in workmanship and materials. The guarantor is the authorised Bang & Olufsen retailer or subsequently the national Bang & Olufsen representative. The guarantee period is 24 months.
-
Page 61: Index
Index Accessories Calls Accessories, 16 Call another handset, 33 Attaching the clip, 16 Call and store extension numbers in the Phonebook, 30 Call from the Caller ID list, 23 Call from the Redial list, 22 Base Change a number before dialling, 18 Automatic registration of a handset, 6–8 Forward external calls, 35 Cancel registration of a handset, 50... -
Page 62: Indicator Lights
>> Index Delete Handset Caller ID call, 23 Call another handset, 33 Redial number, 22 ‘Common’ handset, 34 Name or number in the Phonebook, 27 Handset/Base menu options, 53 Handset keys, 14 Indicator light, 11 Lock the keypad, 19 Displays and menus Mute the ringing signal, 18 Display overview, 12 Name the handset, 9... - Page 63 Maintenance Redial Cleaning, 16 Store Redial and Caller ID numbers, 28 Replacing the battery, 17 Use Redial, 22 Technical data, 58 Registration Microphone Automatic registration of a handset, 6–8 Switch the microphone on or off, 19 Cancel registration of a handset, 50 First-time registration of the handset, 6–8 Manual registration, 51 PARK numbers, 6–8...
- Page 64 >> Index Switchboard Call and store extension numbers in the Phonebook, 30 Technical data BeoCom 6000 specifications, 56 Terminal Portability Suspend an active call, 40 Troubleshooting Display messages, 52 Troubleshooting, 54 Volume Volume and the microphone, 19 Adjust volume level on audio/video products, 29...
- Page 65 3507261 0204 Printed in Denmark by Bogtrykkergården a-s, Struer...
Need help?
Do you have a question about the BeoCom 6000 and is the answer not in the manual?
Questions and answers