Table of Contents
Advertisement
Quick Links
Great Planes Model Manufacturing Co , Inc guarantees this kit to be free of defects in both material
and workmanship at the date of purchase This warranty does not cover any component parts damaged
by use or modification In no case shall Great Planes' liability exceed the original cost of the purchased
kit Further, Great Planes reserves the right to change or modify this warranty without notice
In that Great Planes has no control over the final assembly or material used for final assembly, no
liability shall be assumed nor accepted for any damage resulting from the use by the user of the final user-
assembled product By the act of using the user-assembled product the user accepts all resulting liability
If the buyer is not prepared to accept the liability associated with the use of this product, he is
advised to immediately return this kit in new and unused condition to the place of purchase.
READ THROUGH THIS INSTRUCTION BOOK FIRST.
IT CONTAINS IMPORTANT INSTRUCTIONS AND
WARNINGS CONCERNING THE ASSEMBLY AND
USE OF THIS MODEL.
INSTRUCTION BOOK
WARRANTY
P 0 BOX 788
URBANA ILL NOIS 61801
Entire Contents ©1992 Hobbico, Inc
(217) 398-8970
F146P03
V1 1
Advertisement
Table of Contents

Related Manuals for GREAT PLANES F-14 TOMCAT


Summary of Contents for GREAT PLANES F-14 TOMCAT
- Page 1 INSTRUCTION BOOK WARRANTY Great Planes Model Manufacturing Co , Inc guarantees this kit to be free of defects in both material and workmanship at the date of purchase This warranty does not cover any component parts damaged by use or modification In no case shall Great Planes' liability exceed the original cost of the purchased...
-
Page 2: Table Of Contents
TABLE OF CONTENTS INTRODUCTION ......3 FINAL ASSEMBLY .......42 Precautions........3 Install Wing Tips ......43 Other Items Required....4 Install Ailerons ......43 Supplies and Tools Needed..4 Install Aileron Servo......44 Decisions You Must Make Now ..5 Install Exhaust Nozzles ....45 Common Abbreviations ....5 Cut Main Gear Retract Openings ..46 Types of Wood ......5 FINISHING........47 Die Patterns........6... -
Page 3: Introduction
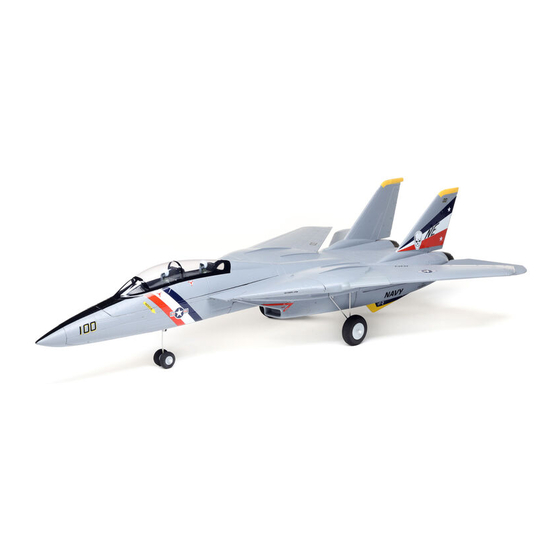
F-14 Tomcat In the air, the prop is invisible, adding to (stamped on the end of the carton) and have the realism The smoothness and speed of this airplane them ready when calling. -
Page 4: Other Items Required
You must use a proper R/C radio that is in first class condition and meets the c u r r e n t AMA and FCC requirements and the requirements of your local flying club, the correct sized engine and correct components (fuel tank, wheels, etc ) You must properly install all R/C and other components so that the model operates properly on the... -
Page 5: Decisions You Must Make Now
This kit includes a Great Planes MM60 engine mount You can also fly the plane with 4 standard servos by (or similar mount) that fits most 60 - 61 (2-Cycle) -
Page 7: Get Ready To Build
GET READY TO BUILD D 1. Unroll the plan sheets and re-roll them inside out. This will help them lie flat. D 2. Remove all parts from the box. As you do, determine the name of each part by comparing it with the plans and the parts list at the back of this book. -
Page 8: Build The Stabs And Elevators
D D 6. Using a sanding block and coarse (50 or 80- grit) sandpaper, sand both sides of the rudder to a taper D D 2. Glue the 1/4" balsa stab front (F146S01) to (see cross-section on plans). The trailing edge should the 1/4"... -
Page 9: Temporarily Install Hinges
D D 5. Using a sanding block and coarse (50 or 80- grit) sandpaper, sand both sides of the elevator to a taper (see cross-section on plans). The trailing edge should end up approximately 3/32" wide. (Do not sand to a sharp edge). -
Page 10: Wing
Because this wing has a lot of taper and sweep, it is not advisable to build it on a Great Planes Wing Jig. SPARS BUILD THE WING PANELS D 1. - Page 11 other semi-soft (and flat) surface, into which you may with the rear-most jig tab against the work surface. easily stick pins to firmly hold down the wing parts Use a 90-degree triangle to keep the ribs vertical. while building, to avoid warps. *Available from lumber companies and home centers.
-
Page 12: Assemble The Two Panels
cut the notch. Make sure you cut the notch perpendicular W3 and the slanted piece of LE already installed. Trim to the LE and notice that it does not need to go all the the LE flush with W2 and the slanted piece of LE. way through the LE. - Page 13 bolt plate (F146W18) to check the spacing. Make sure both panels are on a flat surface and lined up correctly with the jig tabs against the work surface. Refer to the plans and the following photo. NOTE: The notches for the middle spar should form a straight line when the proper amount of sweep is achieved.
-
Page 14: Install The Wing Sheeting
thin CA to help harden the wood. Cut four 1" long pieces of 1/2" triangle from the 1/2" x 36" triangle (WSTR001H) and glue them in place above and below the front wing bolt plate and against the W2 ribs. Add epoxy or thick CA around every joint in this area to make sure everything is securely glued in place. - Page 15 aft edge of the sheeting is approximately in the middle of the spar, then cut off the excess sheeting on the ends, NOTE: The edge of the TE sheet may not be exactly straight, but just position the sheet so it slightly overlaps leaving approx.
- Page 16 D 10. First glue the sheeting against the LE sheeting front edge of the spar. Immediately place the wing on already in place. Try to line up the edges as closely as your flat work surface and press the sheeting into place. possible.
- Page 17 D 16. I n s t a l l the r e m a i n i n g 1/16" l e a d i n g edge D 13. Test fit the triangle sheeting into place and sand sheeting, the strake sheeting and the center triangle sheet it if necessary to achieve a good fit.
-
Page 18: Install The Aileron Torque Rods
rods come up through it. Cut notches there to clear the torque rods. Test fit the wedge on the wing and sand it if needed to get a good fit. Test fit the torque rods in the groove to make sure they fit OK. If not, sand the groove and notch u n t i l they do. -
Page 19: Fuselage Assembly
top (F146F03), fuse side bottom (F146F01) and aft fuse side (F146F04) together, sanding as necessary for a good fit Make sure they line up with the plans and glue them together. ailerons) and cut a notch in both ends to clear the torque rods. - Page 20 side (F146F09) together over the plans Carefully sand them if needed to achieve close fitting joints When satisfied with the fit. add thin CA to all joints After the glue has cured, apply thick CA to any loose-fitting joints. Carefully position a turbine inner side on each D D 5.
-
Page 21: Prepare The Firewall
PREPARE THE FIREWALL (F1) ASSEMBLE FUSELAGE NOTE: Photos show a 60-size engine mount (Great D 1. Trial fit the die-cut 1/8" ply formers F-2, F-3, Planes MM60 i n c l u d e d ) set up for a side mounted F-4, F-5 (F146F15). - Page 22 D 4. Snap former F-5 into place and glue it to the fuselage. Sand the tank floor if necessary to get a good fuse sides only. Keep the fuse bottom pushed down for fit around the firewall and glue these in place with epoxy. now.
-
Page 23: Landing Gear (Fixed)
yet! Due to the bending of the turbine side. it is normal FIXED GEAR for formers F-2E to slant slightly. This is all right but try to make both slant the same amount. D 10. Locate the die-cut 1/8" balsa front turbine bottoms (F147F11) and rear turbine bottoms (F146F12) and assemble the turbine bottoms over the plans. - Page 24 D 3. Test fit the 7/16" x 5/8" x 5-1/8" basswood grooved landing gear blocks (F146F27) into the middle D 7. Insert the axle end of the 5/32" main gear wire slot on the landing gear doublers with the groove towards (WBNT165) from the top of the fuse through the 3/16"...
-
Page 25: Landing Gear (Retracts)
F-3 and LG-4 on the front of F-4. Sand them if necessary and then epoxy them in place. D 9. Glue the turbine bottoms into place. Make sure the die-cut strut opening is near the outside of the fuselage. Temporarily replace the main gear to check the size and location of the strut opening. - Page 26 D 4. Using the socket head sheet metal screws, install the retract (from the top), with the actuator arm pointing towards the rear. u s i n g the socket head sheet metal front as best as possible so you make the bend correctly screws.
-
Page 27: General Fuselage Assembly
pointing straight ahead in relation to the fuselage. Also GENERAL FUSELAGE ASSEMBLY check to be sure the top of the strut is flush with the retract mechanism. Gently tighten the set screw and then check to make sure they retract smoothly without the coils binding on anything. -
Page 28: Install The Nose Gear Retract
well for this because it allows you to hold them in position and then add the glue. After gluing them in position apply a bead of medium CA from the inside of the fuselage. top corner of the fuselage. Trim them if necessary to make them fully seat in the notches and insert a piece of 1/4"... -
Page 29: Install Radio
screws, we drilled 1/16" holes. Mount the retract using the screws you're going to use and then grind off any of the screws that protrude up i n t o the f u e l tank compartment. This will keep the screws from damaging the fuel tank. -
Page 30: Retract Pushrods
so they don't flex during operation. Install an E-Z connector approximately 9/16" from the center on a large servo arm. Put the retract servo in place with the servo arm on it to get an idea where the three pushrods must meet. -
Page 31: Pushrods
horn as shown in the next photo. Tighten the set screw it with another 3/32" wheel collar and check the operation of all three retracts. The actuating arms of all on the horn. three retracts should hit the front and back stops together. If they don't, adjust the steel clevises and the nylon aileron horn until they all work together. - Page 32 make up each EZ connector - halfway through the hole in the nylon swivels using a EZCONN01. EZCONN02 and 4-40 tap. IMPORTANT - We have noticed that the EZCONN03). The two inner swivels are sometimes looser than desired if you tap the connectors should be the same threads all the way through the swivel.
- Page 33 (SCRW020). Insert the nose gear strut into the engine the same (left) side of the servos. This is necessary mount and attach the mount to the firewall. The steering because the servos will both rotate the same direction arm should be on the same side as the rudder servo (left when hooked up to a Y-hamess.
-
Page 34: Drill Engine Mount
DRILL ENGINE MOUNT through F-1. Due to the length of the throttle pushrod, a (Great Planes MM60D90 or similar glass-filled nylon flexible plastic pushrod (not included) works well for mount) this. -
Page 35: Install Fuel Tank
with the top surface of the fuse side. You can cut relief slots in the triangle if needed to get it to bend easier. allow room for the nose sides. Route the outer guide tube through the openings in the formers back to the D 3. - Page 36 rear fuse top (F14614) in place. Trim it if necessary and Cut the 3/16" x 2" x 24" balsa sheet (F146F19) in half glue it in place. Glue it to the formers first then use thin lengthwise to make two 12" pieces. Glue these two CA to glue it to the fuse and turbine sides.
-
Page 37: Fit The Wing To The Fuselage
side. Cut two strips of 1/8" balsa approx. 3/8" wide and 5/64". Write on the front bottom of each hatch cover 2-7/8" long (from scrap around the die-cut sheets). Glue whether it is the right or left cover so you can keep them these strips underneath the front edge of each turbine straight. - Page 38 hold your finger there on the string. Swing the string over to the other tip and compare the measurement. Adjust the wing if necessary and repeat this again until the measurements are equal. When they are equal, make a mark on the wing and the fuse so you can tell when they are aligned.
-
Page 39: Build The Wing Turtle Deck
stick. Press the blind nuts into the holes in the wing BUILD THE WING TURTLE DECK from the top. Replace the wing on the fuse and use the 1/4-20 nylon bolts (NYLON 13) to screw the wing into place. Hold blind nuts w i t h... -
Page 40: Engine Compartment
center of T-l and T-4. Allow the glue to cure, then work it down into place a little at a time on one side and then the other until it is completely attached to T-l and T-4. Now poke a few holes with a pin where T-2 and T-3 are (use the parallel lines as a guide) and apply a couple drops of thin CA to each hole. - Page 41 D 3. Now center your 2-1/4" diameter spinner backplate (HCAQ3750 recommended) over the spinner ring, and tack glue it to the 1/16" spacers. nose gear pushrod in the cowl piece. Now remove the nose gear parts. D 4. Slide the s p i n n e r r i n g / s p i n n e r backplate assembly onto the drive shaft and temporarily hold it in place with the prop and prop nut.
-
Page 42: Final Assembly
D 10. Remove the prop nut and propeller. Carefully pop the spinner backplate loose with a screwdriver and remove the spacers. Remove the engine and mount in preparation for the next steps. You may have to cut away some of the scrap wood you just installed to get the engine out. -
Page 43: Install Wing Tips
D 2. Sand the outside of each W11 to obtain a square and flat surface to attach the wing tips. Also sand the TE sheeting flush with the TE. D 2. Line the centerline of each wing tip up with the centerline of each rib W11 and securely glue them in D 3. -
Page 44: Install Aileron Servo
0 2. Check the length of your ailerons against the actual aileron openings and trim the ailerons as necessary. You should provide approximately 1/16" gap at each end of the ailerons. D 8. Sand the leading edge of the ailerons to the same "V"-shape as shown on the wing rib detail drawing. -
Page 45: Install Exhaust Nozzles
D 3. Drill out the nylon INSTALL EXHAUST NOZZLES aileron connectors (NYLON 10) with a 7/64" drill bit and cut threads in them using a 6-32 tap. Screw the connectors onto the aileron torque rods until the highest holes are approximately 5/8" above the wing sheeting. -
Page 46: Cut Main Gear Retract Openings
CUT THE MAIN GEAR RETRACT OPENINGS The retract openings are made using a fit and cut type of operation that will take a little time but is not hard to do. D D 1. Insert the right main gear strut in the right side retract to the proper depth and tighten the set screw. -
Page 47: Finishing
F146F10. There are two sheets of each. Very lightly sand the edges of the seat back (SB), the seat cushion (SC) and the head rest (HR) with fine sandpaper to remove any burrs. Glue the seats together as shown in the photo. -
Page 48: Balance The Airplane Laterally
Now that you have the basic airframe nearly completed, this is a good time to balance the airplane laterally (side-to-side). Here is how to do it: D 1. Temporarily attach the wing and engine (with muffler) to the fuselage. D 2. With the wing level, lift the model by the engine propeller shaft and at the centerline of fuse rear (this may require two people). -
Page 49: Glue Fins And Stabs In Place
3 When covering inside the "tunnel" between the D 2. Glue the ventral fins (F146F32) in their slots turbines, take your time and allow the covering to with epoxy using the same procedure outlined above overlap about 1/8" to provide a fuel proof seal A lot of fuel residue will end up in this area 4 If you are using the color scheme we used on the GLUE THE AILERON HINGES... -
Page 50: Install Cockpit
Apply saw and/or a hobby knife to carefully cut between CB masking tape (Great Planes EZ Mask works well tor this) and TF. Carefully remove the wing from the fuselage around the front edges of the nozzles Make sure both and lightly sand the cut edges of the canopy smooth. -
Page 51: Wing Seating
RE-INSTALL ENGINE & RADIO you don't get over spray on it. We used a base coat of silver, then cut little trapezoids out of masking tape. These were evenly spaced out around the nozzles and we then sprayed flat black through an air brush to add the exhaust leak look. -
Page 52: Final Hookups And Checks
wing may have a twist due to uneven shrinking of the may wish to experiment by shifting the balance up to covering material VERY IMPORTANT!: You must 1/2" forward or back to change the f l y i n g check for this condition and correct it before the first characteristics Moving the balance forward may... -
Page 53: Pre-Flight
RANGE CHECK YOUR RADIO "PRE-FLIGHT" Check the operation of the radio every time before you fly. This means with the transmitter antenna collapsed and the receiver and transmitter on, you should be able to walk at least 100 feet away from the model CHARGE THE BATTERIES and still have control. -
Page 54: Ama Safety Code
AMA SAFETY CODE Read and abide by the Academy of Model Aeronautics The Great Planes F-14 is a great flying sport scale Official Safety Code, a portion ot which is reprinted airplane that flies smoothly and predictably, yet is highly... -
Page 55: Important Caution
Have a ball! But always stay in control and fly in a safe manner. GOOD LUCK AND GREAT FLYING! SEE THE FULL LINE OF GREAT PLANES AIRPLANES AT YOUR HOBBY DEALER WE HOPE YOU WILL SELECT ANOTHER "GREAT PLANE" AS YOUR NEXT PROJECT... -
Page 56: 2-View
GPMZ0435...
Need help?
Do you have a question about the F-14 TOMCAT and is the answer not in the manual?
Questions and answers