Table of Contents
Advertisement
Available languages
Available languages
Quick Links
Owner's Manual
Operating and Servicing Instructions
español - página e1
hoover.com
IMPOrTanT: reaD CareFullY BeFOre asseMBlY anD use.
Questions or concerns? For assistance, please call Customer Service at 1-800-944-9200
Mon-Fri 8am-7pm EST. PLEASE DO NOT RETURN THIS PRODUCT TO THE STORE.
THIs PrODuCT Is InTenDeD FOr HOuseHOlD use OnlY.
IF useD COMMerCIallY warranTY Is VOID.
©2013 Techtronic Floor Care Technology Limited. All Rights Reserved. #961151095 ID107223-R0
Advertisement
Table of Contents

Related Manuals for Hoover UH72003


Summary of Contents for Hoover UH72003
- Page 1 Owner’s Manual Operating and Servicing Instructions español - página e1 hoover.com IMPOrTanT: reaD CareFullY BeFOre asseMBlY anD use. Questions or concerns? For assistance, please call Customer Service at 1-800-944-9200 Mon-Fri 8am-7pm EST. PLEASE DO NOT RETURN THIS PRODUCT TO THE STORE.
-
Page 2: Table Of Contents
Troubleshooting ....................13 Service ........................14 Warranty ......................15 If you need assistance: Visit our website at hoover.com. Follow the authorized dealer locator link to find the Hoover authorized ® dealer nearest you or call 1-800-944-9200 for an automated referral of Hoover authorized dealer ®... -
Page 3: Important Safety Instructions
IMPOrTanT saFeTY InsTruCTIOns saVe THese InsTruCTIOns When using an electrical appliance, basic precautions should always be followed, including the following: reaD all InsTruCTIOns BeFOre usInG THIs aPPlIanCe. warnInG: TO reDuCe THe rIsK OF FIre, eleCTrIC sHOCK Or InJurY: • Fully assemble before operating. •... - Page 4 CauTIOn: TO reDuCe THe rIsK OF DaMaGe: • Avoid picking up hard, sharp objects with this product, as they may cause damage. • Store appropriately indoors in a dry place. Do not expose machine to freezing temperatures. • Brushroll continues to turn while product is turned on and handle is in upright position.
-
Page 5: Vacuum Assembly
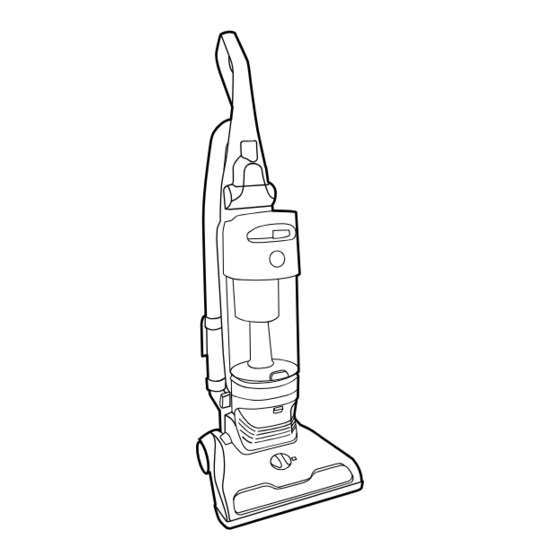
1. VaCuuM asseMBlY CarTOn COnTenTs A. Back Panel B. Dirt Cup C. Handle D. Nozzle E. Turbo Tool* F. Crevice Tool G. Dusting Brush* H. Hose I. (1) Handle Screw (2) Back Panel Screws *Varies per model. Remove all parts from carton and identify each item shown. -
Page 6: Attach Hose
aTTaCH HOse 1.7 Attach hose con- nector to back panel. 1.8 Wrap hose around top of hose guide and secure other end to connector on base. aTTaCH COrD 1.9 Guide cord from bottom of back panel upwards through 3 cord clips (C) and wrap onto cord wraps (D). -
Page 7: Carpet Height Adjustment
CarPeT HeIGHT aDJusTMenT* 2.4 To adjust height setting, TURN knob (A) to desired height setting. For maximum cleaning performance, the following carpet height settings are recommended: · ScatterGuard Hard Floor Setting (B) for bare floors. A retractable wiper helps capture dirt & debris that normally gets left behind for an enhanced bare floor cleaning. -
Page 8: Stair Cleaning
sTaIr CleanInG 3.4 Use the Hose and Turbo Tool (Tool varies per model) for stair cleaning. CauTIOn Use extra care when cleaning on stairs. To avoid personal injury or damage, and to prevent the cleaner from falling, always place cleaner at bottom of stairs on floor. -
Page 9: Filters
Allow filter to dry completely before replacing. the warranty period. If desired, additional filter is Dry filter on edge so air circulates on both sides available at Hoover.com or call 1-800-944-9200. of filter. This may take up to 24 hours. Ask for Hoover Part No. -
Page 10: Dirt Cup: How To Clean
Filter Made with HePa Media with activated Carbon Pad When used and maintained properly, your Filter should not need replacement within the warranty period. If desired, additional filter is available at Hoover.com or call 1-800-944-9200. Ask for Hoover Part No. -
Page 11: Brushroll
Replace the nozzle cover aligning the screw holes and re-install the 6 screws. what to Buy: Belt If desired, additional belts can be purchased at Hoover.com or 1-800-944- 9200. When purchasing a new belt for models ask for Belt - HOOVER part ®... -
Page 12: Hose
HOse warnInG 4.22 To reduce the risk of personal injury - Unplug before cleaning or servicing. How to Clean 4.22 To remove hose for tool use, pull hose end out by handle (A). Push both clips on hose end (B) on back panel and pull hose out. Clear away debris or obstructions from hose. -
Page 13: Troubleshooting
5. TrOuBlesHOOTInG If a minor problem occurs, it usually can be solved quite easily when the cause is found by using the checklist below. Any other servicing should be done by an authorized service representative. If appliance is not working as it should, has been dropped, damaged, left outdoors, or dropped into water, take it to a service center prior to continuing use. -
Page 14: Service
Warranty Service Dealer (Depot) by: • Checking the Yellow Pages under “Vacuum Cleaners” or “Household”. • Visit our website at hoover.com (U.S. Customers) or hoover.ca (Canadian customers). Follow the service center link to find the service outlet nearest you. • For an automated referral of authorized service outlet locations call 1-800-944-9200. -
Page 15: Warranty
BASED CONTRACT, due to misuse, acts of God, nature, vandalism or NEGLIGENCE, TORT OR STRICT PRODUCTS other acts beyond the control of Hoover , owner’s ® LIABILITY OR ARISING FROM ANY CAUSE acts or omissions, use outside the country in WHATSOEVER. - Page 17 Manual Del PrOPIeTarIO Instrucciones de Funcionamiento y Servicio hoover.com IMPOrTanTe: lea aTenTaMenTe anTes De ensaMBlar Y usar. ¿Tiene alguna pregunta o inquietud? Para obtener asistencia, llame al Servicio de atención al cliente al 1-800 944 9200, de lunes a viernes, de 8 a.m. a 7 p.m., hora del ESTE.
- Page 18 Garantía ......................E15 Si necesita ayuda: Visite nuestro sitio web en www.hoover.com. Haga clic en el enlace que permite localizar los vende- dores autorizados hoover para encontrar el vendedor más cercano, o marque el 1-800-944-9200 para escuchar un mensaje indicando la dirección de los vendedores autorizados Hoover (sólo en ee.
- Page 19 • Visite nuestro sitio web en hoover.com (clientes Cuando use un aparato eléctrico, siempre siga las precauciones básicas, estadounidenses) o hoover.ca (clientes canadienses). Siga el enlace del centro de servicio para encontrar el centro de servicio más cercano. que incluyen las siguientes: •...
- Page 20 escalera o en el suelo. No coloque el aparato sobre escaleras ni muebles, ya 5. sOluCIón De PrOBleMas que puede ocasionar lesiones o daños. Si ocurre un problema menor, generalmente puede resolverse con bastante facilidad cuando se halla la • No use este aparato para aspirar materiales inflamables o combustibles, como causa, usando esta lista de verificación.
- Page 21 ManGuera 1. ensaMBlaDO De la asPIraDOra aDVerTenCIa 4.22 COnTenIDO De la CaJa Para reducir el riesgo de lesiones ocasionadas - Desenchufe la aspiradora A. Panel posterior antes de realizar el mantenimiento. B. Contenedor para polvo C. Mango Cómo limpiar D. Boquilla 4.22 Para retirar la manguera para el uso de los accesorios, extraiga el extremo E.
- Page 22 Qué comprar: Correa Si se lo desea, se pueden adquirir correas adicionales en Hoover.com o en el 1 800-944-9200. Cuando compre una correa nueva para estos modelos, pida la correa HOOVER nº 562932001.
- Page 23 Si lo desea, hay filtros adicionales disponibles. Solicite la pieza n.° firmemente en posición. 440005116 de Hoover ® Filtro hecho con medios filtrantes HePa PreCauCIón Siempre que el uso y el mantenimiento se realicen correctamente, su filtro no necesita reemplazarse dentro del período de garantía.
- Page 24 Deje que el filtro se seque completamente Hoover.com o al 1-800-944-9200 Si lo desea, hay Para reducir el riesgo de lesiones ocasionadas por piezas en movimiento, antes de volver a colocarlo. Esto puede demor- filtros adicionales disponibles.
Need help?
Do you have a question about the UH72003 and is the answer not in the manual?
Questions and answers