Table of Contents
Advertisement
OWNER'S MANUAL
Operating and Servicing Instructions
Español - página E1
www.hoover.com
IMPORTANT: READ CAREFULLY BEFORE ASSEMBLY AND USE.
Questions or concerns? For assistance, please call Customer Service at 1-800-944-9200
Mon-Fri 8am-7pm EST. PLEASE DO NOT RETURN THIS PRODUCT TO THE STORE.
THIS PRODUCT IS INTENDED FOR HOUSEHOLD USE ONLY.
IF USED COMMERCIALLY WARRANTY IS VOID.
©2018 Techtronic Floor Care Technology Limited. All Rights Reserved. #961151059-R5
Advertisement
Table of Contents

Related Manuals for Hoover UH72600


Summary of Contents for Hoover UH72600
- Page 1 OWNER’S MANUAL Operating and Servicing Instructions Español - página E1 www.hoover.com IMPORTANT: READ CAREFULLY BEFORE ASSEMBLY AND USE. Questions or concerns? For assistance, please call Customer Service at 1-800-944-9200 Mon-Fri 8am-7pm EST. PLEASE DO NOT RETURN THIS PRODUCT TO THE STORE.
-
Page 2: Table Of Contents
Troubleshooting ......................15 Service .........................16 Warranty ........................17 If you need assistance: Visit our website at hoover.com. Follow the authorized dealer locator link to find the Hoover authorized ® dealer nearest you or call 1-800-944-9200 for an automated referral of Hoover authorized dealer ®... -
Page 3: Important Safety Instructions
IMPORTANT SAFETY INSTRUCTIONS SAVE THESE INSTRUCTIONS When using an electrical appliance, basic precautions should always be followed, including the following: READ ALL INSTRUCTIONS BEFORE USING THIS APPLIANCE. WARNING: TO REDUCE THE RISK OF FIRE, ELECTRIC SHOCK OR INJURY: • Fully assemble before operating. •... - Page 4 CAUTION: TO REDUCE THE RISK OF DAMAGE: • Avoid picking up hard, sharp objects with this product, as they may cause damage. • Store appropriately indoors in a dry place. Do not expose machine to freezing temperatures. • Do not use sharp objects to clean out hose as they can cause damage. •...
-
Page 5: Vacuum Assembly
Make sure all parts are located before disposing of packing materials. Additional parts may be ordered at Hoover.com or call 1-800-944-9200. ATTACH HANDLE Note: Remove the screw located in the vacuum base and set aside until instruction 1.3 1.2 Insert handle section into vacuum base. Push down firmly. -
Page 6: How To Use
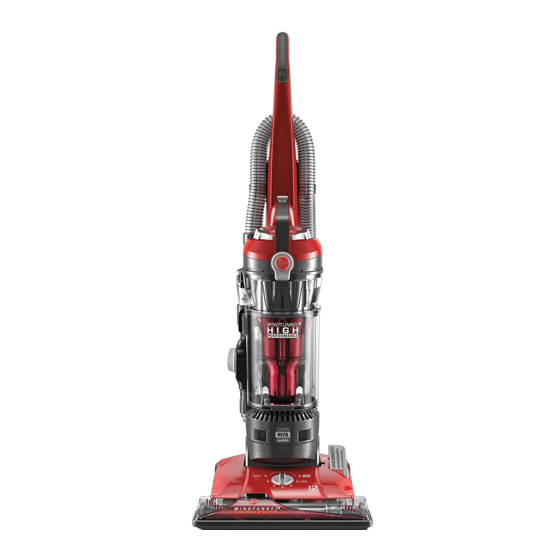
2. HOW TO USE VACUUM DESCRIPTION 1. Handle 2. ON/OFF Switch 3. Dirt Cup Release Button 4. Carry Handle 5. Dirt Cup 6. Stair Cleaning Handle 7. Headlight* 8. Height Adjustment 9. Furniture Guard 10. Brushroll On/Off Pedal (Suction Only Mode) 11. -
Page 7: Transporting Cleaner
TRANSPORTING CLEANER move your cleaner from room to room, put handle in upright position, tilt cleaner back on rear wheels push forward. HANDLE POSITIONS 2.7 The handle of your cleaner positions: 1) Upright for storage and when using cleaning tools. Operating position for general operation on carpets and floors. -
Page 8: Tools
3. TOOLS Tools allow for cleaning surfaces above the floor and for reaching hard to clean areas. The vacuum is ready for tool use when handle is in upright position. SELECT PROPER TOOL A. Use Upholstery Tool to clean upholstered furniture and carpeted stairs. -
Page 9: Stair Cleaning
STAIR CLEANING 3.4 Lift vacuum by Stair Cleaning Handle and position on stairs. Clean forward to back. Never leave the vacuum standing on stairs when not cleaning. Hose Turbo Tool (Tool varies per model) for stair cleaning. When using tools, always ensure handle is in upright position. CAUTION Use extra care when cleaning on stairs. -
Page 10: Maintenance
4. MAINTENANCE Familiarize yourself with these home maintenance tasks as proper use and care of your vacuum will ensure continued cleaning effectiveness. If appliance is not working as it should, has been dropped, damaged, left outdoors, or dropped into water, take it to a service center prior to continuing use. 4.1 The System Check Indicator located at (A), alerts you to possible system performance issues. -
Page 11: Filters
What to Buy: Filter Made With HEPA Media When used and maintained properly, your Filter should not need replacement within the warranty period. If desired, additional filter is available at Hoover.com Part No. 305687001. or call 1-800-944-9200. Ask for Hoover ®... -
Page 12: Brushroll
Carbon Filter may need to be replaced more Your Carbon Filter is located on the underside of often to maintain optimal odor absorbing the Filter made with HEPA media. effectiveness. Additional filter is available at Hoover.com or call 1-800-944-9200. Ask for IMPORTANT Part 902404001. Hoover ®... -
Page 13: Hose
Headlight Installing Bulb Additional bulbs may 4.21 Pull old bulb straight out of socket. Push new be ordered at Hoover. bulb straight into socket until locked in place. com or call 1-800- 944-9200. Ask for Do not use excessive force when installing bulb. -
Page 14: Belt
4.25 Remove used belt from brushroll (C) then from motor shaft (metal rod) (D) and discard. 4.27 4.28 What to Buy: Belt Use only genuine HOOVER belts with your ® vacuum. When purchasing a new belt for models with Brushroll On/Off (Suction Only Mode), ask for Flat Belt - HOOVER part No. -
Page 15: Troubleshooting
Headlight not 1. Bulb burnt out. 1. Replace bulb - Pg. 13. working 2. Loose electrical wires. 2. Call 1-800-944-9200 for nearest authorized Hoover dealer. ® Vacuum is 1. Carpet height setting is 1a. Set Carpet Height Adjustment knob to difficult to push or incorrect. -
Page 16: Service
Warranty Service Dealer (Depot) by: • Checking the Yellow Pages under “Vacuum Cleaners” or “Household”. • Visit our website at hoover.com (U.S. Customers) or hoover.ca (Canadian customers). Follow the service center link to find the service outlet nearest you. • For an automated referral of authorized service outlet locations call 1-800-944-9200. -
Page 17: Warranty
HOW TO MAKE A WARRANTY CLAIM Warranty Period will not be extended by any If this product is not as warranted, take or send replacement or repair performed under this the product to either a Hoover Authorized Warranty. ® Warranty Service Dealer along with proof of...
Need help?
Do you have a question about the UH72600 and is the answer not in the manual?
Questions and answers
What is the part number for a UH72600 rollerbrush?
The part number for a Hoover UH72600 roller brush is 304094004.
This answer is automatically generated
I took my vacuum apart to clean. I don’t remember where the clear plastic 5’ diameter gasket thingy goes. Help please. Also can I buy helps disposable filters?