Table of Contents
Advertisement
105921-R1
ID
#961151058
réservés.
droits
Tous
Limited.
Technology
Care
Floor
Techtronic
©2012
GARANTIE.
PRÉSENTE
LA
INVALIDE
COMMERCIALES
FINS
DES
À
PRODUIT
CE
DE
L'UTILISATION
MAGASIN.
AU
PRODUIT
CE
RETOURNER
PAS
NE
VEUILLEZ
(HNE).
h
19
à
h
8
de
vendredi,
au
lundi
du
9449200
800
1
au
clientèle
la
à
service
le
appeler
Veuillez
inquiétudes?
des
ou
questions
des
avez
Vous
L'ASPIRATEUR.
D'UTILISER
AVANT
ATTENTIVEMENT
INSTRUCTIONS
CES
LIRE
:
IMPORTANT
www.hoover.com
d'entretien
et
d'utilisation
Instructions
D'UTILISATION
GUIDE
Advertisement
Chapters
Table of Contents

Related Manuals for Hoover UH72400


Summary of Contents for Hoover UH72400
- Page 1 ©2012 GARANTIE. PRÉSENTE INVALIDE COMMERCIALES FINS À PRODUIT L’UTILISATION MAGASIN. PRODUIT RETOURNER VEUILLEZ (HNE). à vendredi, lundi 9449200 clientèle à service appeler Veuillez inquiétudes? questions avez Vous L’ASPIRATEUR. D’UTILISER AVANT ATTENTIVEMENT INSTRUCTIONS LIRE IMPORTANT www.hoover.com d’entretien d’utilisation Instructions D’UTILISATION GUIDE...
- Page 2 OWNER’S MANUAL Operating and Servicing Instructions Español - página E1 www.hoover.com IMPORTANT: READ CAREFULLY BEFORE ASSEMBLY AND USE. Questions or concerns? For assistance, please call Customer Service at 1-800-944-9200 Mon-Fri 8am-7pm EST. PLEASE DO NOT RETURN THIS PRODUCT TO THE STORE.
-
Page 3: Table Of Contents
Troubleshooting ....................14 Service ........................15 Warranty......................16 If you need assistance: ® Visit our website at hoover.com. Follow the authorized dealer locator link to find the Hoover authorized dealer nearest you or call 1-800-944-9200 for an automated referral of Hoover ® authorized dealer locations (U.S. - Page 4 MAGASIN. PRODUIT RETOURNER VEUILLEZ vendredi). lundi hne, à clientèle à service représentant à parler pour Seulement) (é.-U. Hoover autorisés marchands adresses indiquant message écouter pour 9200 composez vous, chez près plus marchand trouver pour Hoover autorisés ......................16 Garantie ........................15 Service ......................14...
- Page 5 BLESSURES ÉLECTRIQUE CHOC D’INCENDIE, RISQUES MINIMUM RÉDUIRE AFIN AVERTISSEMENT: APPAREIL. D’UTILISER AVANT INSTRUCTIONS TOUTES LIRE suivantes compris élémentaires, précautions respecter toujours électrique, appareil d’un l’utilisation Durant INSTRUCTIONS CONSERVER RANGER IMPORTANTES SÉCURITÉ CONSIGNES...
-
Page 6: Important Safety Instructions
IMPORTANT SAFETY INSTRUCTIONS SAVE THESE INSTRUCTIONS READ ALL INSTRUCTIONS BEFORE USING THIS APPLIANCE. WARNING: TO REDUCE THE RISK OF FIRE, ELECTRIC SHOCK OR INJURY: Unplug before connecting Air-Powered Hand Tool. WARNING: WASH HANDS AFTER HANDLING. - Page 7 CAUTION: TO REDUCE THE RISK OF DAMAGE: WARNING:...
- Page 8 dans uniquement polarisée courant prise dans insérée être GARDE MISE DOMMAGES RISQUES RÉDUIRE POUR GARDE MISE électrique. portatif accessoire fixer avant l’appareil Débrancher L’APPAREIL. L’UTILISATION APRÈS MAINS LAVER...
- Page 9 plat. suceur dans verticale à bien épousseter à brosse fixer rangement, mode mettre Pour ACCESSOIRES INSTALLER VIDEPOUSSIÈRE FIXER bouton appuyer manche, enlever Pour MANCHE FIXER manque. illustrées pièces matériaux pièces toutes Retirer modèles. certains *Seulement électrique* portatif Accessoire combiné Accessoire Vide-poussière Aspirateur/ Lances...
-
Page 10: Vacuum Assembly
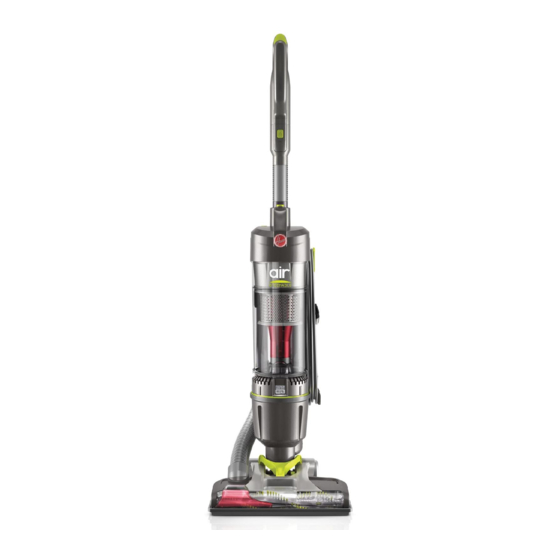
1. VACUUM ASSEMBLY CARTON CONTENTS A. Handle / Hose Assembly B. Wand C. Vacuum Base and Dirt Cup D. 2-in-1 Combination Tool E. Air-Powered Hand Tool* Remove all parts from carton and identify each item shown. Make sure all parts are located before disposing of packing materials. -
Page 11: How To Use
2. HOW TO USE VACUUM DESCRIPTION 1. D-Grip Handle 2. Short Handle Release Button 3. Wand 4. Dirt Cup Release Button 5. Carry Handle 6. Dirt Cup 7. Filter made with HEPA media 8. Brushroll Window 9. Hose Port (above floor cleaning) 10. - Page 12 (D). cordon dépose faciliter pour instantané cheur déclen- Tournez cordon fiche avec droite. vers cordon, pour chets cro- deux autour cordon Enrouler CORDON ENTRETIEN nouveau appuyer rouleaubrosse, étein- Pour (B). ARRÊT fois appuyer marche, brosse rouleau- mettre Pour nouveau appuyer éteindre Pour (C).
- Page 13 planchers. normale utilisation permettre pour GARDE MISE tuyau raccord insérer (C); raccord porte abaissant tuyau raccord Brancher rangement. position tuyau raccord Dégager TUYAU AVEC D’UTILISATION MODE au-dessus Nettoyage AVERTISSEMENT verticale. position à manche placer accessoires, utiliser Pour atteindre. à difficiles endroits élevées plus...
-
Page 14: Handle Positions
HANDLE POSITIONS CAUTION 2.6 The handle of your cleaner positions: upright for Not to be used for grooming a pet. storage when using cleaning tools; operating position for general operation on carpet and floors; hold nozzle with foot (E) and pull handle back. 3. -
Page 15: Handles
HANDLES D-Grip Wand/Handle Release D-Grip Handle Release Press handle 3.6 Push button (A) to release button down to release handle grip. release handle from unit. 3.4 Pull handle up and 3.7 Pull handle up and out of unit. out of unit. 3.5 Hold handle wand Tools by top of grip for easy... - Page 16 seulement. modèles certains avec *Offert plat. suceur utiliser pour modèles) vers glisser épousseter, à brosse dégager selon varient accessoires (Les moquette. pour verrouillage bouton Appuyer registres. volets rideaux, capitonnés, meubles pour plinthes, vénitiens, stores luminaires, livres, tables, dessus sculptés, meubles nettoyer à...
- Page 17 NETTOYAGE ACCESSOIRES verticale. position causer pourrait meuble, escaliers. nettoyer pour GARDE MISE 3.10 peuvent accessoires tuyau 3.10 D’ESCALIERS NETTOYAGE...
-
Page 18: Stair Cleaning
STAIR CLEANING CAUTION 3.10 3.10 The hose and tools can be used for stair cleaning. Use extra care when cleaning on stairs. To avoid personal injury or damage, and to prevent the cleaner from falling, always place cleaner at bottom of stairs or on floor. Do not place cleaner on stairs or furniture, as it may result in injury or damage. -
Page 19: Maintenance
Filter should not need replacement within the 4.6 Remove rinsable filter. warranty period. If desired, additional filter is Rinse with water for two minutes or until water available. Ask for Hoover ® Part No. 303903001. runs clear. Then squeeze out excess water. Allow IMPORTANT 24 hours for filter to dry completely. - Page 20 Faire IMPORTANT place. filtre Remettre heures. pendant complètement sécher 303173001. Hoover pièce possible besoin, garantie. période lavable. filtre Retirer façon entretenu utilisé lavable filtre acheter quoi lavable Filtre pour videpoussière couvercle Tourner 4.4. nettoyer :Comment...
- Page 21 440003905. Hoover pièce possible besoin, garantie. période appro- façon entretenu utilisé filtre acheter Quoi HEPA filtrante substance d’une composé Filtre FILTRE. CARTOUCHE LAVER RINCER IMPORTANT installé correctement filtre couvercle place filtre couvercle Remettre débris. saletés expulser pour tapoter poubelle. haut.
- Page 22 DO NOT RINSE OR WASH THE FILTER CARTRIDGE. Filter Made With HEPA Media: What to Buy When used and maintained properly, your Filter should not need replacement within the warranty period. If desired, additional filter is available. Ask ® for Hoover Part No. 440003905.
-
Page 23: Brushroll
To reduce the risk of injury from moving parts - Unplug before servicing. 4.14 Turn vacuum over so bottom side is facing up. Remove any debris and/or hair from brushroll. For additional maintenance required for belt or brushroll please contact a HOOVER ® service provider at 1-800-944-9200. 4.16 4.15 Vacuum is equipped with an automatic... - Page 24 Puis, (OFF). ARRÊT position à MARCHE/ARRÊT commutateur mettre rouleau-brosse, réinitialiser Pour 4.16 blocage. surcharge rouleau-brosse automatique 944-9200. 1-800- HOOVER services fournisseur avec communiquer veuillez rouleaubrosse, courroie effectuer à supplémentaire entretien tout Pour 4.16 rouleaubrosse. poils débris entretien. à...
- Page 25 équipés sont rouleau-brosse moteur LUBRIFICATION 562535001. figure. illustré pièce comme vis, revisser puis vis, trous numéro HOOVER alignant inférieure plaque Replacer 4.21 élastique Courroie protègerouleau. agitateur rouleaubrosse demander roie, cour- nouvelle vous agitateur, rouleaubrosse Tourner place.
-
Page 26: Belt
Use only genuine agitator. Should the agitator become dislodged ® HOOVER belts with while replacing the belt, reposition it as shown. your vacuum. When Grasp agitator firmly and fit it into position by first... -
Page 27: Troubleshooting
5. TROUBLESHOOTING If a minor problem occurs, it usually can be solved quite easily when the cause is found by using the checklist below. Any other servicing should be done by an authorized service representative. If appliance is not working as it should, has been dropped, damaged, left outdoors, or dropped into water, return it to a service center prior to continuing use. - Page 28 seulement. modèles certains avec *Offert 12-13. page dégage brûlé – rouleaubrosse débris Retirer/éliminer obstrué. rouleaubrosse odeur 12-13. page fumée – rouleaubrosse courroie Remplacer étirée. brisée Courroie utes. pas. fonctionne rouleau-brosse 12-13. rouleaubrosse présents débris retirer Éliminer obstrué. rouleaubrosse fonctionner refuse brosse rouleaubrosse rouleau-...
-
Page 29: Service
Téléphone 2P2. (AB) Edmonton Ave, 18129-111 Edmonton à 2W7; (ON) Scarborough Ave, Progress 755, Toronto à Canada, Hoover avec communiquer Canada, (HNE). à ven. lun. 1-800-944-9200 composer clientèle, à service représentant avec parler Pour Ohio, Glenwillow, à... - Page 30 To speak with a customer service representative call 1-800-944-9200; Mon-Fri 8am-7pm EST. In Canada, contact Hoover ® Canada, Toronto: 755 Progress Ave., Scarborough, ON M1H 2W7 OR Hoover ® Canada, Edmonton: 18129-111 Ave., Edmonton, AB T5W 2P2, Phone: 1-800-944-9200, Mon-Fri 8am-7pm EST.
-
Page 31: Warranty
God, nature, vandalism or WHATSOEVER. Some states do not allow the other acts beyond the control of Hoover ® exclusion of consequential damages, so the acts or omissions, use outside the country in above exclusion may not apply to you. - Page 32 également pouvez vous spécifiques; droits négli- acte tout à Hoover contrôle donne vous garantie présente cas. votre hors acte autre tout à vandalisme, naturelles, catastrophes fortuits à inadéquate, utilisation à...
- Page 33 Si este producto no se ajusta a las condiciones Período de Garantía no se prorrogará en función garantizadas, llévelo a un Concesionario autor- de ningún reemplazo o reparación realizados en izado de servicio de garantía de Hoover ® junto virtud de esta Garantía.
- Page 34 MANUAL DEL PROPIETARIO Instrucciones de Funcionamiento y Servicio www.hoover.com IMPORTANTE: LEA ATENTAMENTE ANTES DE ENSAMBLAR Y USAR. ¿Tiene alguna pregunta o inquietud? Para obtener asistencia, llame al Servicio de atención al cliente al 1-800 944 9200, de lunes a viernes, de 8 a.m. a 7 p.m., hora del ESTE.
- Page 35 Garantía ......................E16 Si necesita ayuda: Visite nuestro sitio web en www.hoover.com. Haga clic en el enlace que permite localizar los vende- dores autorizados hoover para encontrar el vendedor más cercano, o marque el 1-800-944-9200 para escuchar un mensaje indicando la dirección de los vendedores autorizados Hoover® (sólo en ee. Uu.) O para hablar con un representante de atención al cliente (de 8 am a 7 pm, hora estándar del este, de...
- Page 36 Hoover ® (depositario) más cercano: estadounidenses) o hoover.ca (clientes canadienses). Siga el enlace del centro de servicio para encontrar el centro de servicio más cercano. al 1-800-944-9200. No envíe su aspiradora a Hoover ®...
- Page 37 5. SOLUCIÓN DE PROBLEMAS Si ocurre un problema menor, generalmente puede resolverse con bastante facilidad cuando se halla la causa, usando esta lista de verificación. Cualquier otra tarea de mantenimiento debe ser realizada por un representante de mantenimiento autorizado. Si el electrodoméstico no está funcionando como debería, se ha dejado caer, se ha dañado, se ha dejado a la intemperie, o ha caído dentro del agua, devuélvalo a un centro de servicio antes de continuar con el uso.
-
Page 38: Salvaguardias Importantes
SALVAGUARDIAS IMPORTANTES ! ¡ ¡GUARDE ESTAS INSTRUCCIONES! LEA TODAS LAS INSTRUCCIONES ANTES DE USAR ESTE APARATO ADVERTENCIA: PARA REDUCIR EL RIESGO DE INCENDIOS, CHOQUES ELÉCTRICOS O LESIONES:... - Page 39 ADVERTENCIA: LÁVESE LAS MANOS DESPUÉS DE USAR EL PRODUCTO. ADVERTENCIA: PARA REDUCIR EL RIESGO DE DAÑOS: ADVERTENCIA:...
- Page 40 Utilice únicamente correas genuinas de HOOVER ® con su aspiradora. Al comprar una correa nueva, solicite la Correa n.° 562535001 de HOOVER ® LUBRICACIÓN: El motor y el rodillo de cepillos están equipados con rodamientos que contienen suficiente lubricación para su vida útil. Agregar lubricante podría provocar daños.
- Page 41 4.16 Para solicitar mantenimiento adicional para la correa o para el rodillo de cepillos, comuníquese con un proveedor de servicios HOOVER ® 4.15 La aspiradora está equipada con un rodillo de cepillos con apagado automático en caso de que se sobrecargue o atasque.
-
Page 42: Ensamblado De La Aspiradora
1. ENSAMBLADO DE LA ASPIRADORA CONTENIDO DE LA CAJA A. Manche/Assemblage du tuyau B. Tubos C. Cuerpo de la aspiradora/ Contenedor para polvo D. Accesorio 2 en 1 combinable E. Accesorio de mano turboaccionado* Retire todas las piezas de la caja e identifique cada artículo que se muestra. -
Page 43: Descripción De La Aspiradora
2. FUNCIONAMIENTO DESCRIPCIÓN DE LA ASPIRADORA 1. Mango con empuñadura en D 2. Botón de liberación del mango corto 3. Manguera 4. Botón para soltar el depósito para polvo 5. Asa para transportar 6. Contenedor para polvo 7. Acceso al filtro hecho con medios filtrantes HEPA 8. - Page 44 HEPA: Qué comprar Siempre que el uso y el mantenimiento se reali- cen correctamente, su filtro no necesita reempla- zarse dentro del período de garantía. Si lo desea, hay filtros adicionales disponibles. Solicite la pieza n.° 303902001 de Hoover ®...
-
Page 45: Depósito Para Polvo
Si lo desea, hay filtros adicionales disponibles. Solicite 4.6 Retire el filtro enjuagable. la pieza n.° 303903001 de Hoover ® Aclare con agua durante dos minutos o hasta que IMPORTANTE el agua corra limpia. Luego escurra para retirar el exceso de agua. - Page 46 POSICIONES DEL MANGO PRECAUCIÓN 2.6 El mango de su aspiradora tiene tres posiciones: vertical, No se debe utilizar para acicalar mascotas. para guardarla y usar accesorios limpieza; Sujete boquilla con el pie (E) y tire del mango hacia atrás. 3. USOS PARA LA MANGUERA Y ACCESORIOS Los accesorios le permiten limpiar superficies que están a mayor altura que el piso y llegar a áreas difíciles de limpiar.
- Page 47 AGARRADERAS Botón de liberación del mango/tubo Liberación del mango tipo D tipo D 3.3 Presione el botón 3.6 Presione el botón de liberación del mango (A) para liberar la agar- y tire el mango fuera de radera. la unidad. 3.4 Tire del mango 3.7 Tire del mango hacia arriba y hacia hacia arriba y hacia...
- Page 48 LIMPIEZA DE ESCALERAS 3.10 3.5 La manguera y los PRECAUCIÓN accesorios también pueden utilizarse para Tenga especial cuidado al limpiar escaleras. limpiar escaleras. Para evitar lesiones personales o daños, y evi- tar que la aspiradora se caiga, siempre colóquela al pie de la escalera o sobre el suelo. No coloque la aspiradora sobre escaleras ni muebles, ya que puede ocasionar lesiones o daños.
Need help?
Do you have a question about the UH72400 and is the answer not in the manual?
Questions and answers