Table of Contents
Advertisement
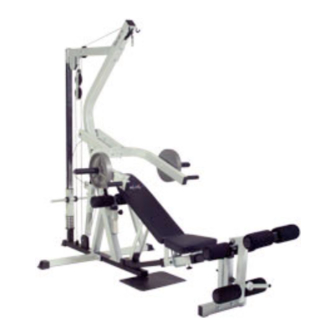
INSTRUCTION MANUAL
LEVER GYM
MODEL: PL1000
QUESTION?
As a quality home gym supplier we are committed to your complete satisfaction. If you have
questions, or find missing or damaged parts, we will guarantee your complete satisfaction through
our authorized dealer service centers or our home office customer service department. Please call
your local dealer for assistance or BodyCraft at 800-990-5556 (9:00 AM - 5:00 PM). Our trained
technicians will provide immediate assistance to you, free of charge.
Bodycraft is a division of Recreation Supply Inc.
P.O. BOX 181
Sunbury, OH 43074
70500
Advertisement
Table of Contents

Related Manuals for BodyCraft LEVER GYM PL1000


Summary of Contents for BodyCraft LEVER GYM PL1000
- Page 1 Please call your local dealer for assistance or BodyCraft at 800-990-5556 (9:00 AM - 5:00 PM). Our trained technicians will provide immediate assistance to you, free of charge.
-
Page 2: Before You Begin
7. Make certain all cables are seated within the pulleys before every use. 8. Exercise with care to avoid injury. 9. If unsure about the proper use of the BODYCRAFT LEVER GYM strength training system call your local BODYCRAFT dealer or our customer... -
Page 3: Parts List
PARTS LIST NO. DESCRIPTION QTY. BASE FRAME RIGHT STABILIZER LEFT STABILIZER MAIN CENTRAL FRAME TOP CENTRAL FRAME CHROME REAR UPRIGHT WEIGHT HOLDER TOP FRAME SPRING COIL LAT BAR HOLDER LINK PLATE PRESS SLIDER BLOCK PRESS ARM ADJUSTER CHROME ADJUSTER PRESS SUPPORT PRESS ARM SQUAT ARM ADJUSTABLE LEVER... - Page 4 PARTS LIST NO. DESCRIPTION QTY. 1" "T" SHAPE END PLUG 1" PLASIC TUBE 1" RUBBER DOUGHNUT (SMALLER) 1" RUBBER DOUGHNUT (LARGER) 1" ROUND END PLUG (SMALLER) STOPPER ADJ STOPPER 1" BUSHING 3/4" BUSHING 1/2" BUSHING SEALING RING HOOK PLATE COLLAR 8M X 80 "L"...
-
Page 5: Step 1 Main Frame Assembly
STEP 1 Main Frame Assembly Do Not Tighten Any Bolt, Until Instructed. 1.Attach Right Stabilizer (2) and Left Stabilizer (3) to Base Frame (1) using two 1/2” X 4” Hex bolts, four 1/2” Washers (106) and two 1/2” Nylon Nuts (111). Attach three 45 x 75 End Caps (52) and one 45 x 75 Rect. - Page 6 STEP 2 Bench Press Arm Assembly 1.Attach Press Support (15) to Top Central Frame (5) by inserting Axle for Press (21) through matching holes. Tighten to Axle using 5/16” X 1/4” Sunken Screw (102) as shown in Fig. 1. Attach 45 X 75 End Plugs (56) to Press Support. 2.Attach Press Slider Block (12) to Main Central Frame (4), using one 1/2”...
- Page 7 STEP 2A washer...
-
Page 8: Step 3 Bench Assembly
STEP 3 Bench Assembly 1.Attach two 45 x 75 End Plugs (56) to Bench Stabilizer (22). Attach Bench Stabilizer (22) to Bench Upright (23), using two 1/2” X 2-3/4” Hex Bolts (86), four 1/2” Washers (106) and two 1/2” Nylon Nuts (111). 2.Attach three 45 x 75 End Plugs (56) to Bench Main Frame (24). - Page 9 STEP 4 Bench Assembly Ⅱ 1.Insert three Foam Roller Bars (30) into holes in Leg Extension (32) and Leg Extension Adjuster (31). Wet Foam Roller Pads (40) and slide onto Foam Roller Bars (30). Insert 1" ID round End Plugs (60) onto each end of Foam Roller Bars (30). A rubber mallet is the best tool. 2.Slide Seat Hinges (26) onto axle on Seat Slider (25) as shown.
-
Page 10: Step 5 Cable Assembly
STEP 5 Cable Assembly Assemble cable and pulleys simultaneously. 1.Insert the steel ball end of Top Cable (47) through the slot of Top Frame (8) as shown T1, route over T2, down and around T3 on top of Pulley Block (33), up and around T4 welded on Top Frame, down to hook on bracket of Weight Holder (7). -
Page 11: Exploded View
EXPLODED VIEW 86 111 86 86 106 106 -10-... - Page 12 Rear Upright (6). 6.Enjoy many years of a Fit Lifestyle. Thank you for purchasing the Bodycraft LEVER Gym. If You have any questions, please call your local BodyCraft dealer or call our customer service department at 800-990-5556...
Need help?
Do you have a question about the LEVER GYM PL1000 and is the answer not in the manual?
Questions and answers