
Related Manuals for Hasler WJ20


Summary of Contents for Hasler WJ20
- Page 1 Operating Guide Mailing Systems HASLER And Solutions America’s better choice™ WJ20 An ISO 9001 Quality System Certified company...
- Page 2 Model Number ____________________ Serial Number ____________________ Dealer Phone ____________________ Hasler®, Inc. 19 Forest Parkway Shelton, CT 06484-6140 TEL 800-793-0180 203-926-1087 FAX 203/929-6084 E-Mail info@haslerinc.com Web: http://www.haslerinc.com...
- Page 3 HASLER Customer Comment Card WJ20 Operating Guide 06/2003 Form 50815 We at Hasler would like to hear your comments about this manual and our product. Please, fill out the following form and mail to: Jim Koonz or FAX to: Jim Koonz P.O.
- Page 4 This page intentionally left blank.
- Page 5 INFORMATION CONTAINED IN THIS MANUAL. Proprietary Notice This publication contains information proprietary and confidential to Hasler®, Inc. Any reproduction, disclosure, or use of this publication is expressly prohibited Hasler®, Inc. may otherwise authorize in writing. 16/2003 WJ20 Pub - 1...
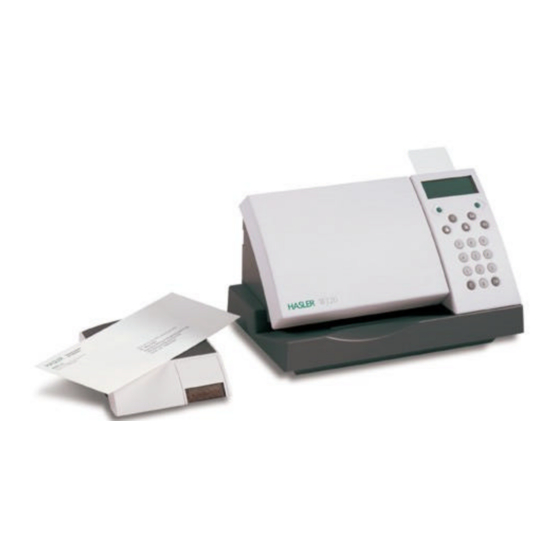
- Page 6 HASLER Introduction The WJ20 has many capabilities that will be important to your business: • Prints all postage values 24 hours a day, seven days a week at up to 20 envelopes per minute. • Automatically changes the date, ensuring that you always post your mail with the correct date.
- Page 7 Cautions & FCC Cautions Do not under any circumstances attempt to remove the machine covers or attempt to repair the WJ20. There are no operator serviceable parts. The WJ20 product is licensed for use under the auspices of the Post Office. This license is issued subject to the product being secure at all times.
- Page 8 WARNING: FOR SAFETY THIS EQUIPMENT MUST BE GROUNDED WARNING: DO NOT UNDER ANY CIRCUMSTANCES ATTEMPT TO REMOVE THE POWER SUPPLY OR METER COVERS. THERE ARE NO OPERATOR SERVICEABLE PARTS THEREUNDER. FCC - 2 WJ20 06/2003...
-
Page 9: Table Of Contents
Printing Postage Printing Tips Envelope Specifications Labels Printing Modes Print Mode Selection Pre-Dated Mail Advertisement Selection Memory Settings Programming A Memory Function Recalling A Memory Function Weigh Scale Benefits Of Using A Weigh-Scale Weigh-Scale Connections Weigh-Scale Postage/Rate Selection 06/2003 WJ20... - Page 10 Standard TMS Bank Accounts 7-12 Where To Mail Your TMS Bank Account Deposit 7-13 Contact Information 7-14 Memory Card Load Data Using A Memory Card Print Quality To Clean The Print Head To Replace (install) The Ink Cartridge WJ20 06/2003...
- Page 11 Other Telephone Setup Options (Prefix, Pause, Tone 11-11 Detect, Blind Dial) Registration Setup 11-15 Withdrawing Meter 11-16 Appendix A Contact Information How To Perform Common Functions Troubleshooting Tips Appendix B Country Codes Appendix C Display And Error Messages Index 06/2003 WJ20...
- Page 12 This page intentionally left blank.
-
Page 13: Installation Tips
The power plug on this equipment is intended to serve as the device for isolation of the power supply; where possible it is advisable to connect to a switched power outlet. Do not connect your WJ20 Postage Meter to the power outlet until you have attached the accessories. Installation Tips... - Page 14 D.C. input socket () at the back of the machine. Now set the switch on the power outlet socket to ON. When the machine is ready, the following displays will be observed: WELCOME TO WJ20 PLEASE WAIT Followed by: LOCKED 09:01...
- Page 15 The other side of the two-tape sheet can then be used for another item. Continued on the next page. 06/2003 WJ20 Page 1 - 3...
- Page 16 $0.00 the new postage value. The indicia will be printed on the envelope or tape. To Lock The Unit Press and the WJ20 will LOCKED return to the lock mode and 09:01 12/12/02 require the password entry to unlock.
-
Page 17: Controls & Features
HASLER Controls Section 2 Controls & Features The following pages detail the Controls and Features associated with your WJ20 mailing system, please take the time to read them carefully. Memory Card Control Locations Control Descriptions Menu Structure Memory Card A number of memory cards are available to enable the user to enter data into the machine memory. - Page 18 HASLER Controls Section 2 Page 2 - 2 WJ20 06/2003...
- Page 19 Access to Function Menu Lock Return to Standby/Locking Funds Access to Load Postage (Recredit) Clear Key Used to clear an entry Confirmation Used to confirm an entry or selection Numeric Keys through Used to enter numeric values 06/2003 WJ20 Page 2 - 3...
-
Page 20: Menu Structure
HASLER Controls Section 2 Menu Structure Page 2 - 4 WJ20 06/2003... -
Page 21: Printing Postage
Printing Section 3 Introduction In order to achieve the best impression, your WJ20 requires an even surface on which to print, therefore on bulky or uneven items correct folding of the contents will help considerably. Use a label if in doubt. -
Page 22: Printing Tips
For posting parcels or packets, a pre-cut self adhesive label approved by Hasler should be used. When feeding a label, select the postage value required and feed the label into the machine in the same way as you would an envelope. -
Page 23: Printing Modes
HASLER Printing Postage Section 3 Printing Modes Your WJ20 is capable of operating in various printing modes: Stamp (Postage) Mode Date Only Mode Advert Only Mode Advert + Date Mode Stamp No Date Mode In stamp (postage) mode, you can print postage, pre-date... - Page 24 RECEIVED In advert + date mode, you may select and print 09-30-02 an advertisements plus the date received. Stamp no date mode is used when preparing return envelopes. Page 3 - 4 WJ20 06/2003...
-
Page 25: Print Mode Selection
< ADVERT + DATE > PRINT MODE < STAMP:-NO DATE > After making your selection, press to confirm it. The unit will indicate it is ready. STAMP selected ADVERT ONLY selected Ready Ready $0.00 ADVERT ONLY 12/19/02 06/2003 WJ20 Page 3 - 5... -
Page 26: Pre-Dated Mail
Printing Section 3 Pre-Dated Mail Your WJ20 is fitted with its own calendar/clock, therefore the current date setting is automatic. If you wish to prepare mail ahead of time it is possible to advance the posting date by up to seven days. -
Page 27: Advertisement Selection
< Thank You > To confirm your selection press , the WJ20 will return to Ready Mode with the new Advertisement Message loaded. It is normal for a Advertisement Message to take a few seconds to load after you select it. - Page 28 This page intentionally left blank.
-
Page 29: Programming A Memory Function
HASLER Memory Settings Section 4 Introduction The WJ20 has the capability to program commonly used print combinations to help eliminate steps and save time. Programming A Memory Function Recalling A Memory Function Programming a Memory Function Choose your preferred print combination: Example Value 37 cents + Message URGENT First select the desired Advertising Messages. -
Page 30: Recalling A Memory Function
Recalling A Memory Function To recall a memory function, press and release , the MEMORY RECALL following display will be observed. < > Select the appropriate memory key Press to confirm. Page 4 - 2 WJ20 06/2003... -
Page 31: Weigh Scale
HASLER Weigh-Scale Section 5 Introduction The WJ20 has the capability to connect to an optional weigh scale. Benefits Of Using A Weigh-Scale Weigh-Scale Connections Weigh-Scale Postage/Rate Selection Benefits Of Using The Weigh-Scale • Used in conjunction with your WJ20, the weigh-scale will weigh and calculate the correct rate and value for items up to 4 pounds. - Page 32 Ensure that the weigh-scale platform is clear of any obstruction. Connect the weigh-scale to the connector (3) at the back of the machine. Connections To The Unit The WJ20 has 3 connection ports: 1) Power adapter, 2) Modem (phone line) 3) Optional weigh-scale Go to Ready mode.
- Page 33 < Mexico > 0.5 oz $0.60 Press to accept selection. < Group 3 > 0.5 oz $0.80 < Group 4 > 0.5 oz $0.80 < Group 5 > 0.5 oz $0.80 06/2003 WJ20 Page 5 - 3...
- Page 34 This page intentionally left blank.
-
Page 35: Available Registers
HASLER Meter Registers Section 6 Introduction Your postage meter is equipped with a series of electronic funds registers to monitor postage transactions. All register values shown here are examples. Available Registers Meter Register Selection Postage Available Register Postage Used Register... -
Page 36: Meter Register Selection
(How much money I have spent on postage to date). Total Items Counter The Items Counter will display < TOTAL ITEMS > the total number of items with a valid postage amount printed to date. Page 6 - 2 WJ20 06/2003... -
Page 37: Low Postage Warning
To allow completion of batch, an additional 200 printing operations are available, after which the ink cartridge MUST be changed. No Ink NO INK When the NO INK display is observed change the Ink Cartridge. 06/2003 WJ20 Page 6 - 3... - Page 38 This page intentionally left blank.
-
Page 39: Adding Postage
Bank Account. With TMS ® you maintain a TMS Bank Account into which you deposit money for postage by either mailing a check to Hasler or by automatically debiting an account that you designate. These ® funds are deposited into your TMS Bank Account and are then available to download at any time into the WJ20. -
Page 40: Modem Connection
Clear Lockout transaction. The modem dial-up phone number is 1-800-446-6029. Connect the analog phone line to the unit (3). A Fax line is usually an analog phone line. The WJ20 has 3 connection ports: 1) Power adapter, 2) Modem (analog phone line) 3) Optional weigh-scale... - Page 41 Press: Press to confirm, The Confirm Amount display will CONFIRM AMOUNT be observed: $500.00 If amount incorrect, press and enter again. If amount displayed is correct, press to confirm. Continued on the next page. 06/2003 WJ20 Page 7 - 3...
- Page 42 The following displays will be observed during the process: CONNECTING TRANSACTING PLEASE WAIT PLEASE WAIT On completion of the Add FUNDING DONE Postage transaction, the 578.64 new Postage Available value is displayed: Ready $0.37 Press 12/19/02 return to Ready mode. Page 7 - 4 WJ20 06/2003...
-
Page 43: Clearing A Po Lockout
CONNECTING PLEASE WAIT TRANSACTING PLEASE WAIT AUDIT DONE Press twice to return to Ready mode. When the CLEAR LOCKOUT transaction is completed, postage printing is enabled for another 3 months. 06/2003 WJ20 Page 7 - 5... - Page 44 On completion of the Add Postage transaction, press return to Ready mode. Note: The machine only requires connection to the telephone line outlet during the Add Postage and Clear Lock-Out transaction. Page 7 - 6 WJ20 06/2003...
-
Page 45: Maintaining Your Tms Account Number
TMS® account maintenance transactions. TMS Account Balance You can use the Hasler Automated TMS® system to check your bank account status and other important TMS® information. Simply call 1-800-248-8013 and use your touchtone phone to enter your TMS®... -
Page 46: Post Office Regulations
To clear the lockout, simply press the [C] key to clear the message and do an "audit" or do a TMS® postage load via modem connection. When the transaction is completed, postage printing is enabled for another 109 days. Page 7 - 8 WJ20 06/2003... -
Page 47: Postagenow
To begin using PostageNow™ TeleFunds™, simply fill out the ACH Customer Authorization and Agreement form, check the PostageNow™ TeleFunds™ option, and fax the form with a voided check. There is a one-time, $15 set-up fee for new accounts. Control your postage access 06/2003 WJ20 Page 7 - 9... -
Page 48: Postagenow™ Ondemand
Information Whenever You Want It Now TMS® customers can access all kinds of information at Hasler’s new TMS® website. Simply log on to www.InfoNowOnline.com for previous business day TMS® bank account balances, holiday schedules, meter operating guides, licensing forms, and payment addresses. -
Page 49: Managing Your Account
In addition, you can always access your account information At anytime by logging on to the TMS® website, www.infonowonline.com or calling Hasler’s automated phone service, InfoNow, at 800-248-8013. Call 800/248-8013 or visit www.InfoNowOnline.com anytime for information. -
Page 50: Standard Tms Bank Accounts
You will receive a package of coupons in the mail shortly after setting up your TMS® Bank Account. Replacements are re- ordered automatically when you submit your 8th coupon with your check. Page 7 - 12 WJ20 06/2003... -
Page 51: Where To Mail Your Tms Bank Account Deposit
New Castle, DE 19720 Wire Transfers Citibank, 111 Wall St., New York, NY 10043 ABA Routing # 021000089 CMRS / Hasler Account # 4067-8617 Detail Payment Field: TMS Bank Account # (include it to ensure credit for your transfer). ACH Transfers Citibank, 111 Wall St., New York, NY 10043... -
Page 52: Contact Information
HASLER Adding Postage Section 7 Contact Information Hasler ® , Inc. 19 Forest Parkway Shelton, CT 06484-6140 www.haslerinc.com Customer Service Helpdesk 1-800-243-6275 Call for customer service or for your local dealer telephone number for technical support. The Customer Service Helpdesk can also direct you on where to obtain supplies for your Hasler mailing system. -
Page 53: Load Data Using A Memory Card
HASLER Memory Card Section 8 Introduction Memory cards are used to load data into the WJ20. Examples include Advertising Messages (Slogans/Dies), and software/rate updates. Load Data Using A Memory Card Sample Memory Card – Back View 06/2003 WJ20 Page 8-1... - Page 54 Next, scroll (< >) to the message or rate option you want to load on the display: MEMORY CARD Press to confirm. < message > To return to Ready mode, LOADING …. press MEMORY CARD LOAD COMPLETE Page 8 - 2 WJ20 06/2003...
- Page 55 LOADING COMPLETE. LOAD COMPLETE If you wish to enter further data, press to return to previous display and repeat the procedure. To return to Ready mode, press Ready $0.37 12/30/02 06/2003 WJ20 Page 8 - 3...
- Page 56 This page intentionally left blank.
-
Page 57: To Clean The Print Head
Next, scroll (< >) to Clean: Press to confirm. The WJ20 will clean the cartridge heads internally. This may take a few minutes and be accompanied by noise. On completion of the cleaning process the display will return to the CARTRIDGE CLEAN display. - Page 58 Note: All horizontal lines in the test print must be clear and present. If horizontal lines are still missing, repeat the cleaning and test print process a second and/or third time, if this process fails to restore print quality, fit a new ink cartridge. Page 9 - 2 WJ20 06/2003...
-
Page 59: To Replace (Install) The Ink Cartridge
From Ready mode, press < CARTRIDGE > and scroll (< >) to the Cartridge display: CARTRIDGE Press to confirm. < REMOVE > Next, scroll (< >) to Remove: Continued on the next page. 06/2003 WJ20 Page 9 - 3... - Page 60 Open the Blue Latch Carefully withdraw the used cartridge and discard. Remove the new cartridge from its packaging and peel off the Blue tape seal that protects the print head. Continued on the next page. Page 9 - 4 WJ20 06/2003...
- Page 61 Close the blue latch and press gently until it locks the cartridge in place. Close the top cover and press Continued on the next page. 06/2003 WJ20 Page 9 - 5...
- Page 62 Remove the envelope or card. The following display will now ALIGNMENT be observed: Enter the number that corresponds to the straightest vertical line (for the example above line 5). Press to return to Ready mode. Page 9 - 6 WJ20 06/2003...
-
Page 63: Meter Summary Report
HASLER Reports Section 10 Introduction The WJ20 allows reports to be printed on self-adhesive labels using the postage meter’s own printer. Meter Summary, Postage Set, and Setup reports can be printed. Meter Summary Report 10-1 Postage Set Report 10-1 Setup Report... - Page 64 HASLER Reports Section 10 Setup Report Provides machine setup information, comprises two pages. Page 10 - 2 WJ20 06/2003...
- Page 65 If the report consists of more than one page e.g. Setup Report, you will be prompted for each page. Press to return to Ready mode after printing reports. 06/2003 WJ20 Page 10 - 3...
- Page 66 This page intentionally left blank.
-
Page 67: To Enter Setup Mode
HASLER Setup Mode Section 11 Introduction The WJ20 Setup Mode allows the user to configure the below functions. To Enter Setup Mode 11-1 High Value Setting 11-2 Low Postage Setting 11-3 User Pin Setting 11-4 Time Setting 11-5 Time Out (Sleep Mode) Setting... -
Page 68: High Value Setting
Press: If value incorrect press and start again. If value correct press to confirm. To return to Ready mode, press Ready $0.00 12/20/02 or scroll (< >) to the next SETUP mode to change. Page 11 - 2 WJ20 06/2003... -
Page 69: Low Postage Setting
Press If value incorrect press and start again. If value correct press to confirm. To return to Ready Mode, press or scroll (< >) to the next SETUP mode to change. Ready $0.00 12/20/02 06/2003 WJ20 Page 11 - 3... -
Page 70: User Pin Setting
Press If value incorrect press and start again. If value correct press to confirm. To return to Ready Mode, press or scroll (< >) to the next SETUP mode to change. Ready $0.00 12/20/02 Page 11 - 4 WJ20 06/2003... -
Page 71: Time Setting
14:30 If value incorrect press and start again. If value correct press to confirm. To return to Ready Mode, press or scroll (< >) to the next SETUP mode to change. Ready $0.00 12/20/02 06/2003 WJ20 Page 11 - 5... -
Page 72: Time Out (Sleep Mode) Setting
TIMEOUT (MINS) Press If value incorrect press start again. If value correct press to confirm. To return to Ready Mode, press or scroll (< >) to the next SETUP mode to change. Ready $0.00 12/20/02 Page 11 - 6 WJ20 06/2003... -
Page 73: Key Beep Setting
< > Scroll (<>) to the required setting (on or off). Press to confirm. To return to Ready Mode, press or scroll (< >) to the next SETUP mode to change. Ready $0.00 12/20/02 06/2003 WJ20 Page 11 - 7... -
Page 74: Preset Postage Setting
PRESET POSTAGE $0.37 If value incorrect press start again. If value correct press to confirm. To return to Ready Mode, press or scroll (< >) to the next SETUP mode to change. Ready $0.00 12/20/02 Page 11 - 8 WJ20 06/2003... -
Page 75: Modem Telephone Setup
Setup Mode Section 10 Modem Telephone Setup Using the Hasler TMS® re-setting system, postage can be purchased from the Post Office. The telephone number of the Hasler re-setting center is stored in the postage meter. This is used when you want to purchase postage. -
Page 76: Help Desk Telephone Setup
In the unlikely event of a machine failure requiring Help Desk action, an Error Number will be displayed along with the Help Desk telephone number. This should be the number of your local Hasler Dealer or of the Hasler TMS Call Center. < SETUP >... -
Page 77: Other Telephone Setup Options
Setup Mode Section 10 Other Telephone Setup Options The WJ20 also allows the user to setup the way the unit dials … by PREFIX, PAUSE, TONE DETECT, and BLIND DIAL. Prefix If your analog telephone line is routed through an internal... - Page 78 PAUSE To change the Pause number (delay in seconds), enter the new the new number using the PAUSE numeric keypad. Press to confirm. If the number is incorrect press and start again. Page 11 - 12 WJ20 06/2003...
- Page 79 Scroll (< >) to the Tone Detect option and press . The current Tone Detect setting is < TONE DETECT > displayed. TONE DETECT Select between on or off. TONE DETECT Press to confirm. If the setting is incorrect press and start again. 06/2003 WJ20 Page 11 - 13...
- Page 80 To change the Blind Dial number (delay in seconds), enter the new the new number using the TONE DETECT BLIND DIAL numeric keypad. Press to confirm. If the setting is incorrect press and start again. Press twice to return to the Ready Mode. Page 11 - 14 WJ20 06/2003...
- Page 81 Setup Mode Section 10 Set Up Registration Changing Address If you have changed your address, call the Hasler Helpdesk at 1-800-248-8013. A customer service representative will take your information and guide you through the update procedure. Audit Transaction USPS regulations require that your meter must be set at least once every three months.
-
Page 82: Withdrawing Meter
The Withdraw procedure is only required if you are cancelling your meter contract or if there is a technical problem with your meter. Call the Hasler Customer Care at 1-800-243-6275 and a customer service representative will take your information and guide you through the withdraw procedure. -
Page 83: Appendix A Contact Information How To Perform Common Functions Troubleshooting Tips
HASLER Q&A Appendix A Contacting Hasler Hasler®, Inc. 19 Forest Parkway Shelton, CT 06484-6140 www.haslerinc.com Customer Service Helpdesk 1-800-446-6027 Call for Product Questions and Support TMS Automated Account Information 1-800-248-8013 Call to check Account Balance, Last Deposit or Last Meter... - Page 84 Advance Date Date Advance, Advance Date, Print Label Label quantity, Recall memorized jobs Memory Recall, Memory 1 or 2, Recredit (example $100.00) Display Registers Registers, to choice, To print Registers As Registers, Page A - 2 WJ20 06/2003...
- Page 85 HASLER Q&A Appendix A Troubleshooting • Is the WJ20 connected to the power WJ20 will not start. supply? • Is the main power outlet switch set to ON? • Is the machine Top Cover properly closed? • Check that you have made the The unit does not print.
- Page 86 This page intentionally left blank.
- Page 87 British Virgin Islands Faroe Islands Brunei Darussalam Fiji Bulgaria Finland Burkina Faso France Burma (Myanmar) French Guiana Burundi French Polynesia Cambodia Gabon Cameroon Gambia Canada Georgia, Republic of Cape Verde Germany Cayman Islands Ghana Gibraltar 06/2003 WJ20 Page B - 1...
- Page 88 Japan Nepal Jordan Netherlands Netherlands Antilles New Caledonia Kazakhstan New Zealand Kenya Nicaragua Kiribati Niger Korea, Democratic People’s Republic Nigeria of (North) Norway Korea, Repub. of (South) Kuwait Kyrgyzstan Oman Laos Pakistan Latvia Panama Page B - 2 WJ20 06/2003...
-
Page 89: Country Codes
Wallis & Futuna Islands Sierra Leone Western Samoa Singapore Slovak Republic (Slovakia) Slovenia Yemen Solomon Islands Somalia South Africa Zambia Spain Zimbabwe Sri Lanka Sudan Suriname Swaziland Sweden Switzerland Syrian Arab Republic (Syria) Taiwan 06/2003 WJ20 Page B - 3... - Page 90 This page intentionally left blank.
- Page 91 SMALL INCREASE value reset. amount and retry. AMOUNT BAD CARD Memory card Request a new card. damaged. Call your local Hasler dealer or Customer Service Helpdesk at 1-800-446-6027. BAD STORAGE Loading of the Reload memory card. memory card failed. BUSY TRY LATER TMS Center Try again later.
- Page 92 Screen Display Cause Remedy CREDIT ERROR TMS error. Call TMS Helpdesk 1-800-248-8013. FILE NOT VALID Memory card Call your local Hasler damaged. dealer or Customer Service Helpdesk at 1-800-446-6027 and request a new memory card. FONT MISSING System error. Call your local Hasler...
- Page 93 Messages Appendix C Screen Display Cause Remedy NO SCALE Scale missing or Check connection. damaged. Call your local Hasler dealer or Customer Service Helpdesk at 1-800-446-6027. REPLACE FILE File exists in unity. Accept ‘Replace File’ … OK. WARNING DIE System error.
- Page 94 Error messages generally may be re-set; if error messages persist after taking the appropriate action and three attempts at reset have been made, call your local Hasler dealer or Customer Service Helpdesk at 1-800-446-6027. Always have your meter serial number and the error number for the Hasler Helpdesk.
- Page 95 Power ON/OFF Error 28 Power ON/OFF Error 29 Ensure that mail is removed Power ON/OFF Call your local Hasler dealer or Customer Service Helpdesk at 1-800-446-6027 Error 30 Ensure that mail is removed Power ON/OFF. Remove & reinstall ink cartridge.
- Page 96 This page intentionally left blank.
- Page 97 TMS statements FCC Compliance statement Advertisement selection 3-7 FCC-1 Cautions FCC-1 Help Desk Telephone Setup 11-10 Common Functions High Value Setting 11-2 Contact Information 7-14, Controls & Features Control descriptions Control locations Memory Card Menu structure 06/2003 WJ20 Index - 1...
- Page 98 Modem Connection Loading Funds 7-2, 11-9 see Adding Postage Modem Telephone Setup Low ink 11-9 Low Postage Setting 11-3 Modem Approval Requirements FCC-2 Low postage warning Memory Card Memory card Load data using a memory card Index - 2 WJ20 06/2003...
- Page 99 Printing a report 10-3 Labels Setup report 10-2 Pre-dated mail Printing modes Print mode selection Printing postage Printing tips Printing Report 10-3 Print Head Cleaning Print Quality To clean the print head To replace the ink cartridge 06/2003 WJ20 Index - 3...
- Page 100 11-1 User Pin setting 11-4 Withdrawing Meter 11-16 Withdrawing meter 11-16 Setup Report 10-2 Sleep Mode Setting 11-6 Specifications Envelope 3-2, A-1 Size Speed Weight Time Setting 11-5 Time Out Setting 11-6 see Adding Postage Index - 4 WJ20 06/2003...
- Page 101 This page intentionally left blank.
- Page 102 Form 50815 06/2003...
Need help?
Do you have a question about the WJ20 and is the answer not in the manual?
Questions and answers