
Subscribe to Our Youtube Channel
Related Manuals for Ayrton wild sun 200


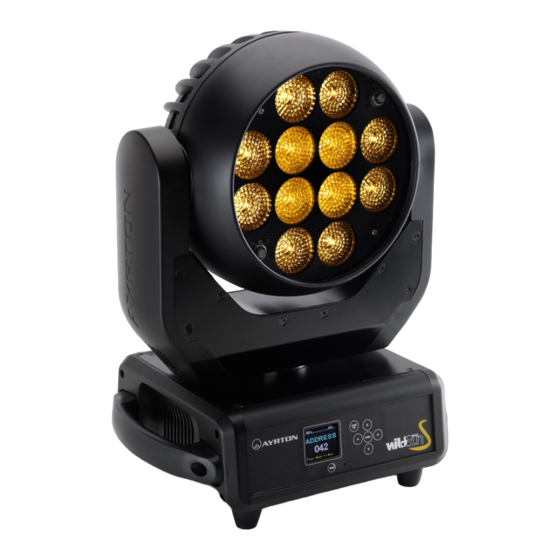
Summary of Contents for Ayrton wild sun 200
- Page 1 LED MOVING HEAD USER MANUAL Keep this manual for future needs V 1.0 10.2012 ENGLISH FRANÇAIS...
- Page 2 USER MANUAL...
-
Page 3: Table Of Contents
Summary Sommaire Introduction Introduction Safety instructions Instructions de sécurité General guidelines Conditions d’utilisation Description of the device Présentation Overview Description Installation instructions Instructions d’installation Installation method via clamp Méthode d’installation avec des crochets DMX-512 control connection Connexion DMX 512 DMX-512 connection with DMX terminator Connexion DMX 512 avec bouchon de terminaison Led Moving Head DMX starting address selection Réglage de l’adresse DMX du projecteur... -
Page 4: Introduction
Introduction If the device has been exposed to temperature changes due to environmental changes, do not switch it on immediately. The arising condensation could damage the device. Leave the Thank you for your patronage. We are confident that our device switched off until it has reached room temperature. excellent products and service can satisfy you. -
Page 5: General Guidelines
General guidelines Rechargeable back-up Battery for Display, no need external power supply, enable users to enter display menu for address setting or access other functions setting. This device is a lighting effect for professional use on stages, Software-upload by optional accessory via DMX line in discotheques, theatres, etc., the device was designed for Preset program: 7 built in programs can be called up via indoor use only. -
Page 6: Installation Instructions
CAUTION ! Before taking into operation for the first time, the installation has to be approved by an expert. Cautions : The effect should be installed outside areas where persons may reach it, walk by or be seated. Overhead mounting requires extensive experience, including amongst others calculating working load limits, installation material being used, and periodic safety inspection of all installation material and the device. -
Page 7: Dmx-512 Control Connection
DMX-512 control connection this starting address is achieved by setting the correct number on the display located on the base of the device. Connect the provided XLR cable to the female 3-pin or5-pin XLR You can set the same starting address for all fixtures or a group output of your controller and the other side to the male 3-pin of fixtures, or make different address for each fixture individually. -
Page 8: Menu
Menu Function mode Set DMX Address With this function, you can adjust the desired DMX-address via Set Dmx Address A001~AXXX DMX address setting the Control Board. Addr 1. Access the main menu. Set Dmx Address A001~AXXX DMX address setting 2. Tap the <Up/Down> button until “Set DMX Address” is Value Display PAN…... - Page 9 return to the main menu. 2. Press <Up/Down>, the display will show “Timer Password”. 3. Press < ENTER>, the display will show “Timer Password”. The time password is 038. Information 4. Press <ENTER> to confirm or press <MODE/ESC> to return to the main menu. Time information Clear Last Run With this function, you can clear last run time of the fixture.
- Page 10 <Up/Down> button until “Personality” is displayed. <Up/Down> button until the display will show “Status setting”. Press ENTER, the display will show “Personality”. Tap the Press ENTER, the display will show “Status setting”. <Up/Down> button until the display will show “Status setting”. 2.
- Page 11 Press ENTER, the display will show “Status setting”. shut off time. The default is 5 minute. 2. Press <Up/Down>, the display will show “Mic Sensitivity”. 3. Press <ENTER>, the display will show “Mic Sensitivity”. Display Reverse 4. The display show “70%”, Press <Up/Down>, the display With this function you can the entire display to be flipped by 180˚...
- Page 12 Reset-functions Program = CH 22, means in this User’s mode, the “Dimmer” is in Channel 16. With this function you can reset the device via the Control User mode Board. You can select the different reset functions by turning With this function, you can create user defined channel orders. the encoder.
- Page 13 Press the Enter button to confirm. Press the MODE/ESC button in order to return to the main The 3 Slave groups run the Auto Program in certain time menu. segments, as shown in the following picture: Part 1: 2. Automatic Program Run Scene 10 Scene 11 Scene 12...
-
Page 14: Dmx Chart
DMX chart Fonction des canaux DMX et valeurs correspondantes Fonction des canaux DMX et valeurs correspondantes Mode/circuit Valeur Fonction Mode/circuit Valeur Fonction PAN Movement 8bit : Green LED-array 5 : 0-255 Pan Movement 0-255 Green ( 0-Black , 255-100% Green ) Pan Fine 16bit Blue LED -array 5 : 0-255... - Page 15 Fonction des canaux DMX et valeurs correspondantes Fonction des canaux DMX et valeurs correspondantes Mode/circuit Valeur Fonction Mode/circuit Valeur Fonction 180--184 Blue/Green Red LED -array12 : Green/Red 185--189 0-255 Red ( 0-Black , 255-100% Red ) 190 --194 Red/Blue Green LED-array 12 : 195--199 Green/Blue 0-255...
-
Page 16: Error Message
Error message the instructions under “Installation instructions”. Should you need any spare parts, please order genuine parts from your local dealer. When you turn on the fixture, it will make a reset at first. The display may show “Err channel is XX” while there are problems with one or more channels. -
Page 17: Power Supply
Correction) Any modification to the device shall invalidate the warranty. Cooling system AYRTON cannot be held liable for the quality and compliance of the installation of this product, which is the sole responsibility Advanced ventilation cooling system of the installer. -
Page 18: Introduction
Introduction de fonctionnement. Toutefois, si vous constatiez un défaut, vous êtes prié de contacter immédiatement votre revendeur AYRTON avant son utilisation. Nous vous remercions de la confiance que vous nous accordez en choisissant le projecteur AYRTON WILDSUN 200 S. Le fabricant ne peut-être tenu pour responsable des dommages causés par le non-respect des instructions de sécurité,... -
Page 19: Conditions D'utilisation
WILDSUN Votre WILDSUN 200 S est un luminaire asservi de type wash 200 S, et le fabricant AYRTON ne saurait en être tenu pour doté de multiples sources lumineuses LED (Light Emitting Diode) destiné... -
Page 20: Présentation
11. Poignée universel, aujourd’hui largement répandu. 6. Bouton Bas Il existe une multitude de contrôleurs DMX RDM sur le marché, lesquels sont disponibles chez différents fabricants (AYRTON ne commercialise pas de contrôleurs DMX RDM). Il est à noter USER MANUAL... -
Page 21: Instructions D'installation
Ces installations doivent êtres vérifiées par un organisme compétent une fois par an. ATTENTION ! L’installation de cet appareil doit avoir été validée par un expert compétent avant sa première utilisation. Attention : L’appareil doit être installé à un emplacement où le public ne pourra ni toucher, marcher ou s’asseoir sur l’appareil. -
Page 22: Connexion Dmx 512
vis et écrous M12 logés au travers du trou de 13 mm situé au Se référer au schéma suivant : milieu de l’Oméga. Installer les 2 fixations Oméga sur l’appareil en verrouillant les vis 1/4 de tour aux emplacements dédiés. Passer l’élingue de sécurité... - Page 23 Appuyer sur la touche pour sélectionner le menu désiré. Modifier la sélection en agissant sur les touches - Confirmer votre sélection en appuyant sur la touche Il est possible de sortir d’un menu à tout moment en pressant la touche Notes : Le retournement de l’afficheur s’effectue en pressant les touches depuis l‘affichage de base.
-
Page 24: Menu
Menu WILDSUN 200 S menu - Détails des options Set Dmx Address Address A001~AXXX DMX address setting Addr Set DMX Address Set Dmx Address A001~AXXX DMX address setting Value Display PAN… DMX value display Permet d’ajuster l’adresse DMX désirée depuis le panneau de Set To Slave Slave1,Slave2,Slave3 Slave setting... - Page 25 Mode/Esc, puis Agir sur les Boutons UP et DOWN jusqu’à DOWN pour afficher “OFF”. ce que “Status” soit affiché et appuyer sur ENTER. 5. Appuyer sur ENTER pour confirmer votre choix, ou sur 2. Agir sur les Boutons UP et DOWN jusqu’à ce que “No MODE/ESC pour revenir au menu principal sans modification.
- Page 26 Disp.Settings 4. L’afficheur indique “15m” (valeur en minutes), agir sur les Boutons UP ou DOWN pour modifier cette valeur de 0m à Shutoff time 99m, ou encore l’option “OFF” (pas d’hibernation). Permet d’éteindre l’afficheur LCD du projecteur au bout d’un 5.
- Page 27 Trigger 3. Appuyer sur ENTER, l’afficheur indique “Music control”. 4. Agir sur les Boutons UP et DOWN , l’afficheur indique au DMX Value Disp. choix “Master1” ou ” Alone”. Permet de visualiser la valeur DMX reçue pour chaque canal 5. Appuyer sur ENTER pour confirmer, ou sur MODE/ESC DMX.
- Page 28 1. Accéder au menu principal en appuyant sur le bouton Permet de réinitialisé les fonctions via un contrôleur DMX. Vous Mode/Esc, puis Agir sur les Boutons UP et DOWN jusqu’à pouvez sélectionner ces fonctions en jouant avec le canal. ce que “ Time Info ” soit affiché et appuyer sur ENTER. 1.
- Page 29 Preset 3. Sélection du programme pour “Auto Program Part” § Sélectionner “Edit program” à l’aide des boutons. § Appuyer sur ENTER pour confirmer. Select prog. § Sélectionner “Select programs” à l’aide des boutons. Permet de choisir le programme pour le “Program Run”. §...
-
Page 30: Charte Dmx
Charte DMX Fonction des canaux DMX et valeurs correspondantes Fonction des canaux DMX et valeurs correspondantes Mode/circuit Valeur Fonction Mode/circuit Valeur Fonction PAN Movement 8bit : Green LED-array 5 : 0-255 Pan Movement 0-255 Green ( 0-Black , 255-100% Green ) Pan Fine 16bit Blue LED -array 5 : 0-255... - Page 31 Fonction des canaux DMX et valeurs correspondantes Fonction des canaux DMX et valeurs correspondantes Mode/circuit Valeur Fonction Mode/circuit Valeur Fonction 180--184 Blue/Green Red LED -array12 : Green/Red 185--189 0-255 Red ( 0-Black , 255-100% Red ) 190 --194 Red/Blue Green LED-array 12 : 195--199 Green/Blue 0-255...
-
Page 32: Entretien Et Maintenance
Specifications techniques Entretien et maintenance Optique L’entretien et la maintenance de votre WILDSUN 200 S doivent être réalisé par une personne qualifiée et habilitée à effectuer Système à zoom de rapport 4 :1 ce type d’intervention. Votre WILDSUN 200 S demande un Efficacité... -
Page 33: Garantie
Alimentation AYRTON ne peut en aucun cas être tenu pour responsable de la qualité et de la conformité de l’installation de ce produit, qui est Alimentation électronique avec PFC (Power factor Correction) de la responsabilité de l’installateur. actif 100 à 240 Volts - 50/60Hz... - Page 34 AYRTON Le Parc de L’Evénement 1, Allée d’Effiat F91160 - Longjumeau France Tél.: 33 (0) 1 69 10 33 90 Fax: 33 (0) 1 69 10 33 91 contact@ayrton.eu www.ayrton.eu...
Need help?
Do you have a question about the wild sun 200 and is the answer not in the manual?
Questions and answers