Table of Contents
Advertisement
Quick Links
Advertisement
Table of Contents

Subscribe to Our Youtube Channel
Related Manuals for BETCO PREDATOR SERIESE


Summary of Contents for BETCO PREDATOR SERIESE
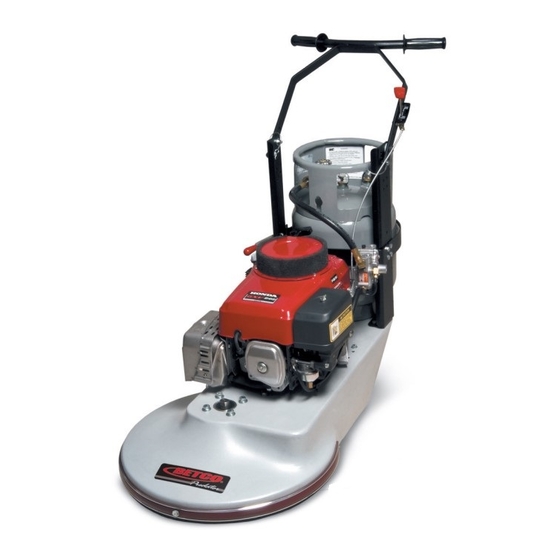
- Page 1 E12300-00 E10280-00 21”, 24" PREDATOR SERIES PREDATOR SERIES Propane Burnishers Operator and Parts Manual 1001 Brown Avenue • Toledo, Ohio 43607-0127 Customer Service: 888-GO-BETCO • Fax: 800-445-5056 • Technical Service: 877-856-5954 • www.betco.com...
-
Page 2: Table Of Contents
TABLE OF CONTENTS Carbon Monoxide Warning........3 Safety................ 4 Tank Use and Storage..........5 Starting and Stopping the Honda Engine....5 Operator Preparation..........6 Belt Tensioning............7 Pad Change Methods..........8 Pad Driver Removal...........8 Major Assemblies............9 Handle Bar..............10 Lower Handle Support.......... -
Page 3: Carbon Monoxide Warning
WARNING - CARBON MONOXIDE LETHAL EXHAUST GAS - MUST READ THIS! - Never Run The Engine In A Closed Building Or Confi ned Area Exhaust gases contain poisonous carbon monoxide. Carbon monoxide is odorless, colorless, and can cause death if inhaled. Carbon Monoxide Poisoning Symptoms Train your employees to know the warning signs of carbon monoxide poisoning. -
Page 4: Safety
SAFETY lmportant Safety Information All LPG (Liquid Propane Gas) powered engines, including this engine, produce Carbon Monoxide (CO). It is a Lethal Poison that is colorless, odorless, tasteless, and non-irritating gas. You must read “Danger: Lethal Exhaust Gas” information below. Keep hands, feet, and loose clothing away from all moving parts while the machine is in operation. -
Page 5: Tank Use And Storage
TANK USE AND STORAGE Propane Tank Use We use the Worthington gas cylinders designed for vapor withdrawal. The fuel lock offs, regulators, and engines are also designed for vapor withdrawal. • We recommend that you use the OPD (Overfl ow Protection Device) vapor withdrawal type cylinder. These style tanks have a triangle shaped valve handle. -
Page 6: Operator Preparation
OPERATOR PREPARATION Before Starting the Machine Read the Owner’s Manual and the Engine Operation Manual. Your machine is shipped ready for operation; however there is no fuel in the tank. When having the tank fi lled, you must make sure the tank is never over-fi lled. •... -
Page 7: Belt Tensioning
BELT TENSIONING Use 15/16" socket with extension to tighten tensioner in direction of arrow. Test tension by pushing or pulling on belt or belt tensioner. With proper belt tension the pulley on the belt tensioner should only move about 1". Use 9/16"... -
Page 8: Pad Change Methods
PAD CHANGE METHODS Caution: Muffl er May Be Hot! Tilt the machine back on its caster. Tilt the machine so the air filter is up. Unscrew the pad center threaded hold. Unscrew the pad center threaded hold. Remove the pad from the pad driver. Remove the pad from the pad driver. -
Page 9: Major Assemblies
MAJOR ASSEMBLIES Handle Bar E12423 - Steel Propane Tank E12422 Aluminum Propane Tank 110V Starter Button Lower Handle Support Regulator Assembly Honda Engine Assembly Deck Assembly Belt Drive System Pad Drive System... -
Page 10: Handle Bar
HANDLE BAR E86220 E12696 E12476 E10120 E83145 E86228 E11420 E86125 E81062 E81076 E10212 E10385 E11645 E10328 E86226 (20") PE50087 -- Pin & Lanyard Assembly (E10212, E10385, E10328) - Page 11 PART Description QTY. NUMBER E10120 Nut, #10-32, Nylon Lock, Grade 5, Zinc E10212 Washer, 5/16" Flat Push On, Zinc E10328 Pin, 5/16" x 0.875 Clevis With Cotter Pin Hole, Zinc E10385 Lanyard, 3/64" x 6.000" E11420 Washer, #10 SAE, Zinc E11645 Pin, Hairpin Cotter #1 E12476...
-
Page 12: Lower Handle Support
LOWER HANDLE SUPPORT E11702 E86116 E86120 E86125 E10457 (13") E81063 E81089 E86119 E10120 E10457 (5") E86115 E81063 E81089 E86117 E81062 E81076 E83629... - Page 13 PART Description QTY. NUMBER E10120 Nut, #10-32, Nylon Lock, Grade 5, Zinc E10457 Felt, 1.500 W x 0.150 Thick, Adhesive Back E11702 Propane Tank Strap Latch E81062 Washer, 5/16" USS, Zinc E81063 Nut, 5/16"-18, Nylon Lock, Grade 5, Zinc E81076 Nut, 0.375 - 16, Gr 5, Nylon Lock E81089 Screw, 5/16"-18 x 0.750 Hex Head, Grade 5, Zinc...
-
Page 14: Regulator Assembly
REGULATOR ASSEMBLY E12298 E12359 E10751 E10734 E10084 E10080 E10083 E10077 E10074 E10752 110V STARTER BUTTON E10595 E12277 E10596... - Page 15 PART Description QTY. NUMBER E10074 Honda Lola Fuel Hose E10077 Fitting, 1/8" MNPT x 1/8" Barb, Hose Barb E10080 Fitting, 3/8 MNPT x 3/8 Barb, Hose Barb, Brass E10083 Fitting, 1/8" MNPT x 1/8" FNPT, Street Elbow, Brass E10084 Fitting, 3/8 MNPT x 3/8 MJIC, 90 Elbow, Brass E10708 Cable Tie, Nylon AF525 E10734...
-
Page 16: Honda Engine Assembly
HONDA ENGINE ASSEMBLY Engine Part E10022 -- Ignition Coil E10963 -- Spark Plug, NGK E10967 -- Gasoline Ready 11HP Engine E10971-- Gasoline Ready E10942 13HP Engine E10944 E11464 -- Head Gasket E12426 -- CO Detector Badge E12279 E12440 -- Oil Level Switch E12278 E10371 E10545... - Page 17 PART Description QTY. NUMBER E10022 Voltage Regulator E10126 Screw, 5/16"-24 x 1.250 Hex Head Grade 5, Zinc E10371 Honda Oil Dipstick E10545 Decal, Read Owners Manual E10601 Screw,5/16"-18 x 2.000 Hex Head, Grade 5, Zinc E10942 Honda Intake Filter, 13HP E10944 Honda Intake Filter, 11HP E10950...
-
Page 18: Deck Assembly
DECK ASSEMBLY E81089 E81067 E12444 E10738 E11281 -- 21" Deck E11282 -- 24" Deck E81088 E86118 E12584 is supplied with the machine. After removing the 5/16" eye bolt (E11407) insert it into the hole, use a hammer to seat. E10202 E12584 E86225 E10902... - Page 19 Rivet, 3/16" OD x 0.700" L with 0.600" Head E10705 Bumper, Red (21" Deck = 53", 24" Deck = 63", 28" Deck = 75") E10738 Decal, BETCO Predator E10902 Screw, 5/16"-18 x 2.500 Hex Head, Grade 5, Zinc E11281 Deck, 21" Aluminum Casting Duracoat 21 E11282 Deck, 24"...
-
Page 20: Belt Drive System
BELT DRIVE SYSTEM E83269 -- 24" Deck place 2 E10116 between E12709 and aluminum deck at this bolt location. E10117 E83629 E83269 -- 21" Deck place 2 E81066 between E12709 and aluminum deck at this bolt location. E10135 E12447 E10459 E12709 E11289 E12547... - Page 21 PART Description QTY. NUMBER Bushing 1/4" Split Lockwasher Part 1 Bushing 1/4" Split Lockwasher Part 2 Bushing Screw, 1/4"-20 x 0.750 Hex Head Part 3 Bushing Screw, 1/4"-20 x 1.500 Hex Head Part 4 E10116 Screw, 7/16"-14 x 1.250 Hex Head, Grade 5, Zinc E10117 Washer, 7/16"...
-
Page 22: Pad Drive System
PAD DRIVE SYSTEM PE50028 -- 21" Pad Drive Assembly PE50027 -- 24" Pad Drive Assembly E10112 E81067 E10586 E12444 E10250 -- 21" Pad Driver E10251 -- 24" Pad Driver E81063 E12517 2 Piece Set E10850 84621 -- 21" Pad 84624 -- 24" Pad E12517 2 Piece Set... - Page 23 PART Description QTY. NUMBER 84621 Pad, 21" Hi-Shine Light Burnish Pad, 5/Case 84624 Pad, 24" Hi-Shine Light Burnish Pad, 5/Case E10112 Screw, 5/16"-18 x 1.250 Hex Head Grade 5, Zinc E10250 21" Pad Driver E10251 24" Pad Driver E10586 3/4" Pad Driver Shaft Coupling E10850 Rivet, 3/16"...
-
Page 24: Centrifugal Clutch Assembly
CENTRIFUGAL CLUTCH ASSEMBLY E86230 E86230 is installed to align the belt drive section of the clutch to the pad driver pulley belt drive section. E12434 Remove and discard set screws from clutch before installing. Install key after pushing clutch E11289 onto the engine drive shaft and aligning keyways. - Page 25 PART Description QTY. NUMBER E10117 Washer, 7/16" Split Lock, Zinc E10598 Screw 7/16"-20 x 1.750 Hex Head, Grade 5, Zinc E11289 Key 1/4" x 1/4" x 1.500" E11501 Washer, 7/16" USS, Zinc E12434 Clutch, Centrifugal 1750 RPM 4" Dia. E12447 Washer, 7/16"...
-
Page 26: Parts List
PARTS LIST Page Part # Description Page Part # Description E10022 Voltage Regulator E10557 Loom, 1/4" E10586 Coupling, 3/4" Pad Driver Shaft E10074 Hose, 6 LOLA Fuel Line 9.5mm ID x 16mm OD x 25" L E10595 Screw, #6-32 x 2.500 Pan Head, Zinc E10077 Fitting, 1/8 MNPT x 1/8 Barb, Brass E10596... - Page 27 Page Part # Description Page Part # Description 17,19,23 E81067 Washer, 5/16" Split Lock, Zinc E11663 Decal, Steel Propane Tank Fill Limit 43 lbs. 11,13 E81076 Nut, 3/8"-16 Nylon Lock, Zinc E11664 Decal, Aluminum Propane Tank Fill Limit 36 lbs E81088 Nut, 1/2"-13 Slim, Nylon Lock, Zinc E11702...
-
Page 28: Electrical Schematic
ELECTRICAL SCHEMATIC E12411 -- 10' Starter Cord (Not Shown) Lower Handle Assembly E10022 Ignition Coil E86119 Hour Meter, SenDEC 5-80V... -
Page 29: Engine Maintenance
ENGINE MAINTENANCE HONDA GXV340 11HP & GVX390 13HP PERIODIC MAINTENANCE EVERY EVERY EVERY EVERY DAILY PLEASE REFER TO ENGINE OWNERS MANUAL HOURS HOURS HOURS HOURS FOR MORE INFORMATION Check engine oil level and add if needed Check and clean engine intake fi lter "General check for loose or lost nuts, screws, oil leakage, fuel hose connection, etc."... -
Page 30: Troubleshooting
TROUBLESHOOTING PROBLEM CAUSE POSSIBLE SOLUTION Loose wire or bad connection Check wires and connections Bad electrical component Replace bad component Engine will not turn over Refer to engine owner’s manual and read Fuel system problem IMPORTANT below Propane tank shut off valve in off Open propane tank shut off valve completely position Propane tank empty... -
Page 32: Warranty
Service Distributor. If the original part is returned within the warranty policy period from date of delivery for inspection by Betco and is found to be defective the owner will be credited for the cost of replacement parts plus shipping and handling.
Need help?
Do you have a question about the PREDATOR SERIESE and is the answer not in the manual?
Questions and answers