
Related Manuals for Black & Decker D2030


Summary of Contents for Black & Decker D2030
- Page 1 DIGITAL ADVANTAGE™ IRON PLANCHA Use & Care Manual manual de uso y cuidado D2030 D2530 D2630...
- Page 2 Thank you for your purchase! Gracias por su compra! Should you have any questions or concerns with your new product, please call our Customer Service Line at 1-800-231-9786 (US and Canada). Please do not return to the store. Si usted tiene alguna inquietud o pregunta con su producto, por favor llame a nuestra línea de servicio al cliente una atención inmediata 1-800-231-9786 (EE.UU/Canadá) 01-800-714-2503 (México). No devuela a la tienda.
-
Page 3: Important Safety Instructions
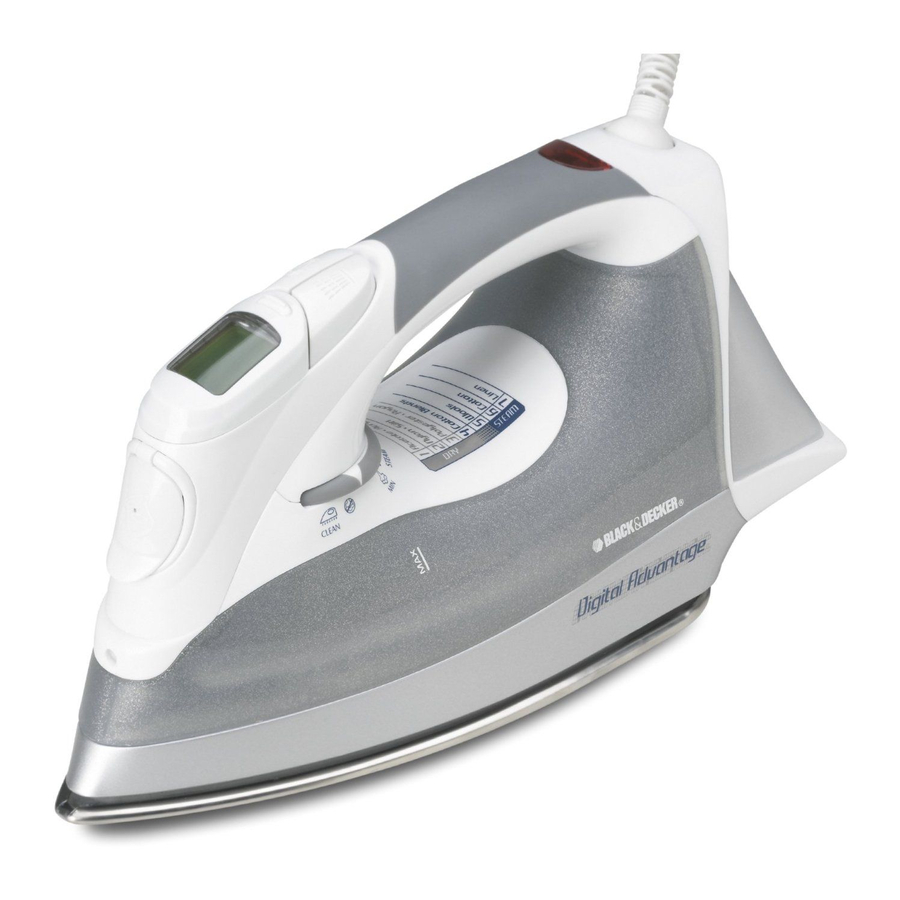
IMPORTANT SAFETY INSTRUCTIONS When using your iron, basic safely precautions should always be followed, including the following: • READ ALL INSTRUCTIONS BEFORE USING. • Burns can occur from touching hot metal parts, hot water or steam. Use caution • Use iron only for its intended use. when you turn a steam iron upside down •... - Page 4 G E T T I NG TO KN OW YO UR DIG ITAL A DVAN TAGE ™ IRO N Spray nozzle Spray mist button Water-fill opening Power indicator light Digital display Heel rest 4. Power/temperature setting button Water tank Burst of steam button 10. Variable steam dial Product may vary slightly from what is illustrated.
-
Page 5: Fil L Ing Wat Er Ta N K
H OW TO US E This appliance is intended for household use only. G E TT I NG STA RTE D • Remove any labels, stickers or tags attached to the body or soleplate of the iron. • Please go to www.prodprotect.com/applica to register your warranty. • Use ordinary tap water for ironing. Do not use water processed through a home softening system. • For optimum performance, let the iron stand for 90 seconds before beginning to iron. • Always stand the iron on its heel rest when powered on but not in use. FIL L ING WAT ER TA N K 1. Tilt the iron and using a clean measuring cup, pour water into water-fill opening until the water reaches the MAX mark on the water tank. Refill as needed. N ote: If you need to add water while ironing, unplug the iron and follow above steps. -
Page 6: Ironing With Steam/Burst Of Steam
IRON IN G W I TH STEA M 1. For steam ironing, be sure the water tank is filled to MAX. 2. Turn the variable steam dial to the appropriate steam setting for your fabric. (D) Note: See the fabric guide on the iron (B) and read garment's label to help you determine which steam setting to use. 3. For optimum performance when using steam, stand iron on its heel rest until the selected temperature setting is reached. 4. When finished ironing, turn the variable steam dial to the steam off setting. B UR ST O F ST EA M H O R I ZO N TA L Tip: Use to remove stubborn creases. 1. With the water tank filled to the MAX mark, set temperature setting and variable steam to the appropriate settings for your fabric. See fabric guide on the iron and read garment's label to help you determine fabric type. -
Page 7: 10-Minute Auto Shutoff
DRY IR O NI NG • To iron without steam, set the variable steam dial to steam off. US IN G SPRAY MI ST Tip: F or fabrics other than silk, use to dampen tough wrinkles at any setting. 1. Be sure the iron is filled with water. 2. On first use, pump the spray button several times. 10-M I NU T E AU TO SHUTO FF The automatic shutoff feature in your iron works as follows: • Once the iron reaches appropriate temperature, it will turn off after 10 minutes of inactivity. Before turning off, the iron will beep once and “AUTO OFF” will flash in the digital display. • Once turned off, the digital display will go dark, but the words “AUTO OFF” will continue to show in the display. • As soon as you pick up the iron, it will beep once and start heating again to the set temperature setting. Wait for iron to reheat completely before resuming operation. -
Page 8: Cleaning/Auto Clean System
CA RE A N D C LEA N IN G This product contains no user serviceable parts. Refer service to qualified service personnel. C LE A N I N G 1. Make sure iron is unplugged and has cooled completely. Wipe the soleplate and outer surfaces with a soft cloth dampened with water and mild household detergent. Never use abrasives, heavy-duty cleansers, vinegar or scouring pads that may scratch or discolor the iron. 2. After cleaning, steam iron over an old cloth to remove any residue from the steam vents. ® AU TO C L E A N SYST EM To keep the steam vents free of any buildup, follow these instructions when the word “CLEAN” appears in the digital display: 1. Fill the water tank well below the MAX line. Plug in the iron. 2. Press the temperature setting button to 6 and stand the iron on its heel rest. Allow it to heat about 3 minutes. -
Page 9: Need Help
NE ED H ELP ? For service, repair or any questions regarding your appliance, call the appropriate 800 number on cover of this pamphlet. Please DO NOT return the product to the place of purchase. Also, please DO NOT mail product back to manufacturer, nor bring it to a service center. You may also want to consult the website listed on the cover of this pamphlet. Warranty Information (Applies only in the United States and Canada) What does it cover? • Any defect in material or workmanship provided; however, Spectrum Brands’ liability will not exceed the purchase price of product. For how long? • Two years from the date of original purchase with proof of such purchase. What will we do to help you? • Provide you with a reasonably similar replacement product that is either new or factory refurbished. -
Page 10: Instrucciones Importantes De Seguridad
INSTRUCCIONES IMPORTANTES DE SEGURIDAD Cuando se usan aparatos eléctricos, siempre se deben respetar las siguientes medidas básicas de seguridad: • Por favor lea todas las instrucciones antes • Las partes metálicas calientes de este de usar. aparato, al igual que el agua caliente o el vapor pueden ocasionar quemaduras. -
Page 11: Product View
CON OZC A S U P L A NC HA DIG ITAL A DVAN TAGE ™ Rociador Botón de rociar Orificio de llenado de agua Luz indicadora de funcionamiento Pantalla digital Talón de descanso 4. B otón de funcionamiento / Tanque de agua ajuste de temperatura 10. Selector de vapor variable Botón de emisión potente de vapor Este producto puede variar ligeramente del que aparece ilustrado. -
Page 12: Para Llenar El Tanque De Agua
CO MO U SAR Este producto es para uso doméstico solamente. A N TE S D E U SAR • Retire cualquier etiqueta y/o calcomanías adheridas al cuerpo o la suela de la plancha. • Por favor vaya a www.prodprotect.com/applica para registrar su garantía. • Use agua corriente para planchar. No use agua procesada por medio de un sistema suavizador casero. • P ara el desempeño óptimo, deje la plancha descansar durante 90 segundos antes de comenzar a planchar. Importante: Siempre deje que la plancha descanse sobre el talón de descanso cuando esté encendida y no se esté usando. PA R A LL E N A R E L TA NQ UE DE AG UA 1. Incline la plancha y use una taza de medir limpia para verter agua dentro del orificio de llenado hasta alcanzar el nivel MAX del tanque de... -
Page 13: Para Planchar Con Vapor
PAR A PL AN CH A R CO N VAP O R 1. Para planchar con vapor, asegúrese de que el tanque de agua esté lleno hasta el nivel MAX. 2. Dé vuelta al selector de vapor variable hasta ajustarlo al nivel de vapor apropiado para su tejido (D). Nota: Consulte la guía de tejidos de la plancha (B)y lea la etiqueta de la pieza que va a planchar para que le ayuden a determinar la temperatura que debe usar. 3. Para logra un desempeño óptimo al aplicar vapor, deje que la plancha descanse hasta alcanzar el nivel de temperatura seleccionado. 4. Cuando termine de planchar, déle vuelta al selector de vapor variable hasta ubicarlo en la posición de apagado. E M ISIÓ N DE VA P O R H O R I ZO N TA L Consejo: Use para eliminar arrugas difíciles. -
Page 14: Apagado Automatico En 10 Minutos
PARA PL AN C H AR E N S E CO • Para planchar sin vapor, ubique el selector de vapor a la posición de apagado. US O D E R O C I O F IN O C onsejo: Para tejidos que no sean de seda, utilice para humedecer las arrugas difíciles en cualquier ajuste de temperatura. 1. Asegúrese de que la plancha esté llena de agua. 2. Durante el primer uso, oprima el botón de rociado varias veces. APAG AD O AUTOM ATI CO EN 10 M IN U TOS La función de apagado automático de su plancha funciona de la siguiente forma: • Una vez que la plancha alcanza la temperatura adecuada, se apagará... -
Page 15: Cuidado Y Limpieza
CUIDAD O Y LI MPI EZA Este producto no contiene partes que el consumidor pueda reparar. En caso de requerir mantenimiento, envíela al personal de servicio calificado. LI MP I E Z A 1. Asegúrese de que la plancha esté desenchufada y se haya refrescado por completo. Limpie la suela y las superficies exteriores con un paño suave humedecido con agua y detergente suave. Nunca use limpiadores abrasivos, ni para trabajos pesados, ni vinagre o estropajos que puedan rayar o decolorar la plancha. 2. Luego de limpiar, aplique vapor con la plancha sobre una tela vieja para retirar cualquier residuo de las rejillas de vapor. ® S I ST E M A D E L IM PIEZ A AUTO CL E AN Para mantener las rejillas de vapor libres de residuos, siga estas instrucciones una vez que la palabra “CLEAN” aparezca en la pantalla digital:... -
Page 16: N Ec Esi Ta Ayuda
¿N EC ESI TA AYUDA? Para servicio, reparaciones o preguntas relacionadas al producto, por favor llame al número del centro de servicio que se indica para el país donde usted compró su producto. NO devuélva el producto al fabricante. Llame o lleve el producto a un centro de servicio autorizado. Dos años de garantía limitada (Aplica solamente en Estados Unidos y Canada) ¿Qué cubre la garantía? • La garantía cubre cualquier defecto de materiales o de mano de obra que no haya sido generado por el uso incorrecto del producto. ¿Por cuánto tiempo es válida la garantía? • Por dos años a partir de la fecha original de compra mientras que tenga una prueba de la compra. ¿Cómo se obtiene el servicio necesario? • Conserve el recibo original como comprobante de la fecha de compra, comuníquese con el centro de servicio de su país y haga efectiva su garantía si cumple lo indicado en el manual de instrucciones. - Page 17 Por favor llame al número correspondiente que aparece en la lista a continuación para solicitar que se haga efectiva la garantía y donde Ud. puede solicitar servicio, reparaciones o partes en el país donde el producto fué comprado. Argentina México Servicio Técnico Articulo 123 # 95 Local 109 y 112 Monroe 3351 Col. Centro, Cuauhtemoc, CABA Argentina México, D.F. Tel: 0800 – 444 - 7296 Tel. 01 800 714 2503 servicios@rayovac.com.ar Nicaragua Chile LRM ELECTRONICA SERVICIO DE MAQUINAS Y Managua - Sinsa Altamira 1.5 HERRAMIENTAS LTDA. kilómetros al norte Portugal Nº 644 Nicaragua Santiago – Chile Tel. (505) 2270-2684 Fonos: 02-6355208 / 02-6341169 Email: servicio@spectrumbrands.cl Panamá Call center: 800-171-051 Supermarcas Colombia Centro comercial El dorado, Plaza Rayovac Varta S.A Dorado, Local 2. Carrera 17 Número 89-40 Panama Línea gratuita nacional Tel. (507) 392-6231 018000510012 Perú Costa Rica Servicio Central Fast Service Aplicaciones Electromecanicas...
- Page 18 Sello del Distribuidor: Código de fecha / Date Code / Le code de date: Fecha de compra: Modelo: P300SD - 1575 W 120 V ~ 60 Hz Comercializado por: Importado por / Imported by: Rayovac de México S.A de C.V RAYOVAC ARGENTINA S.R.L. Autopista México Querétaro Humboldt 2495 Piso# 3 No 3069-C Oficina 004 (C1425FUG) C.A.B.A. Argentina. Colonia San Andrés Atenco, Tlalnepantla C.U.I.T No. 30-70706168-1 Estado de México, C.P. 54040 Mexico. Importado por / Imported by: Rayovac de México S.A de C.V Tel: (55) 5831 – 7070 Autopista México Querétaro...
- Page 20 www.BlackAndDeckerAppliances.com BLACK+DECKER and the BLACK+DECKER logo are trademarks of The Black & Decker Corporation and are used under license. All rights reserved. BLACK+DECKER y el logo tipo BLACK+DECKER son marcas registradas de The Black&Decker Corporation y son utilizados bajo licencia. Todos los derechos reservados. © 2015 The Black & Decker Corporation and Spectrum Brands, Inc. Middleton, WI 53562 T22-5001617 Made and Printed in People’s Republic of China 11469-01 E/S Fabricado e Impreso en la República Popular de China...
Need help?
Do you have a question about the D2030 and is the answer not in the manual?
Questions and answers