Table of Contents
Advertisement
Quick Links
Advertisement
Table of Contents

Related Manuals for Brady BBP 35


Summary of Contents for Brady BBP 35
- Page 1 ® 35/37 LABEL PRINTER USER’S MANUAL...
-
Page 3: Copyright And Trademarks
Disclaimer This manual is proprietary to Brady Worldwide, Inc. (hereafter "Brady"), and may be revised from time to time without notice. Brady disclaims any understanding to provide you with such revisions, if any. This manual is copyrighted with all rights reserved. No portion of this manual may be copied or reproduced by any means without the prior written consent of Brady. - Page 4 End User License Agreement for Microsoft Windows CE© You have acquired a device that includes software licensed by Brady Worldwide, Inc. from Microsoft Licensing or its affiliates (“MS”). Those installed software products of Microsoft origin, as well as associated media, printed materials, and “online” or electronic documentation (“SOFTWARE”) are protected by international intellectual property laws and...
- Page 5 Brady’s satisfaction to have been defective at the time Brady sold it. This warranty does not extend to any persons obtaining the product from the buyer.
- Page 6 Operation of this equipment in a residential area is likely to cause interference, in which case required corrective measures will be at the owner’s expense.The user is cautioned that any changes or modifications not expressly approved by Brady Worldwide, Inc. could void the user’s authority to use the equipment.
- Page 7 Agency Compliance and Approvals TAIWAN Turkey Turkish Ministry of Environment and Forestry (Directive on the Restriction of the use of certain hazardous substances in electrical and electronic equipment). Türkiye Cumhuriyeti: EEE Yönetmeliğine Uygundur Mexico Energy Statement: Consumo de energia en operacion: ___ Wh (Energy consumption in operation mode) Consumo de energia en modo de espera: ___Wh (Energy consumption in standby mode)
- Page 8 Safety and Environment Precautions Safety and Environment ® Please read and understand this manual before using the BBP 35/37 Label Printer for the first ® time. This manual describes all of the main functions of the BBP 35/37 printer. Precautions ®...
- Page 9 Safety and Environment Batteries remplaçables Replaceable Batteries If an equipment is provided with a replaceable battery, and if replacement by an incorrect type could result in an explosion (for example, with some lithium batteries), the following applies: • if the battery is placed in an OPERATOR ACCESS AREA, there shall be a marking close to the battery or a statement in both the operating and the servicing instructions;...
-
Page 10: Contact Information
Technical Support and Registration Contact Information For repair or technical assistance, locate your regional Brady Technical Support office by going to: • United States: www.bradyid.com • Europe: www.bradyeurope.com • Asia Pacific: www.bradycorp.com • Australia: www.bradyaust.com.au • Canada: www.bradycanada.ca • Latin American: www.bradylatinamerica.com... -
Page 11: Table Of Contents
Table of Contents Introduction............1 Unpack Your Printer . - Page 12 Table of Contents Getting Started ........... . . 31 Entering Text.
- Page 13 Connecting through USB ........95 Connecting through Brady Network Card ......95 Copies .
- Page 14 Table of Contents Application Label Types ..........111 Clearing an Application Label Type .
- Page 15 Table of Contents Cleaning the Media Wiper ......... 183 Materials Required .
-
Page 17: Introduction
® ® • Automatic Cutter (BBP 35 & 37), XY Cutter (BBP • Wireless and Ethernet capabilities with Brady Network Card. See the Brady Network Card Installation Manual for details. Unpack Your Printer ® The following items are included in the standard BBP 35/37 printer package: ®... -
Page 18: System Specifications (Bbp ® 35/37)
® Note: Only B30 supplies will work with the BBP 35/37 printer. Firmware Upgrades Future upgrades to BBP®35/37 firmware can be downloaded from Brady’s website. Access www.bradyid.com. Click Support, then click Downloads. Select BBP®35/37 from the list of products. (See page 189 for instructions on upgrading your printer’s firmware from a USB flash drive or... -
Page 19: Keyboard Configurations
Keyboard Configurations Keyboard Configurations Your keyboard configuration depends on the region where you do business. The following are the currently supported keyboard configurations. ® There are five keypad configurations available for the BBP 35/37 Label Printer. The keypad layouts and the language supported by each are listed in the table below. Keyboard Type Language Applied Americas QWERTY... -
Page 20: External View
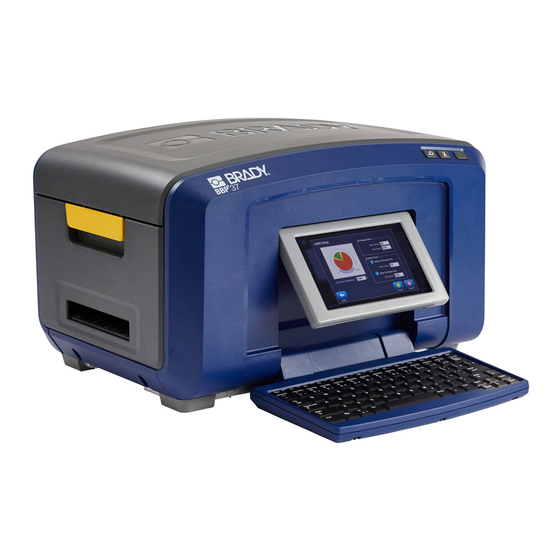
External View Cover Label exit chute Power button (green) Cover release latch Cut media button USB, Expansion Ports and Brady Network Card Feed media button Touch screen (flips out) Power cord connection Keyboard (flips down) On/Off switch ® 35/37 User’s Manual... -
Page 21: Setting Up The Printer
Setting Up the Printer Setting Up the Printer Connect Power CAUTION CAUTION Before connecting power, be sure to remove the dessicant from inside the media bay. Plug the power cord into the power cord connection port on the right side of the printer. Plug the other end of the power cord into an electrical outlet. -
Page 22: Install Ribbon Cartridge
Setting Up the Printer Install Ribbon Cartridge Illustrations on the inside of the cover show how to install the ribbon and label media (tape). Open the cover by pulling up on the bottom of the yellow latch. CAUTION CAUTION The cover pops open quickly. To ease the opening, place a hand on the cover as you release the latch. -
Page 23: Remove Ribbon Cartridge
Setting Up the Printer Turn the ribbon spindle knob to tighten the ribbon over the printhead. Close the cover. Remove Ribbon Cartridge To remove a previously installed ribbon, press down on the ribbon cartridge release tab then grasp the top barrel of the cartridge by the two sides and pull the the cartridge straight out from the printhead. -
Page 24: Install Label Media (Tape)
Setting Up the Printer Install Label Media (Tape) To install label media: Open the cover by pulling up on the bottom of the yellow latch. CAUTION CAUTION The cover pops open quickly. To ease the opening, place a hand on the cover as you release the latch. - Page 25 Setting Up the Printer Thread the label tape under and through the media guides, until the tape covers the black roller. Pinch the tape adjustment lever and slide the media guides until they are lined up with the edges of the tape liner. If using continuous media, lower the media bar.
-
Page 26: Remove Label Media (Tape)
Setting Up the Printer Remove Label Media (Tape) Open the cover by pulling up on the bottom of the yellow latch. If removing continuous media, lift the media wiper bar up off of the tape. Grasp the tape roll and pull up, sliding the media out from under the guides. ®... -
Page 27: Power On/Off
Setting Up the Printer Power On/Off To turn the display on or off: Press Power Note: To completely shut down the printer, turn the On/Off switch, located above the power cord, to the OFF position. Sleep Mode To preserve energy, when the printer detects a time of inactivity it automatically turns off the display and goes into a low-power consumption mode called Sleep Mode. -
Page 28: Display Screen
Display Screen Display Screen The BBP35/37 printer uses touch screen technology. Using your finger, touch the desired option on the display screen. Home Page The Home page automatically displays when you first start the printer. Item # Icon Description Home: Returns you to the Home page from anywhere in the application. -
Page 29: Menus
Display Screen Menus The main Menu button displays a list of sub-menus for different label or system functions. To display menu or sub-menu options: Touch to display the sub-menus. In the pop-up list, touch the desired sub-menu option. The selected sub-menu, in turn, can display another sub-menu. Keep touching a sub-menu option until a dialog box displays. -
Page 30: Drop Down Field
Display Screen Drop Down Field If a field has a drop down menu item associated with it, a downward facing arrow displays on the right side of the field. To display the drop down menu item: Touch the drop down arrow Spinner Boxes A spinner box lets you toggle through a range of values in a field. -
Page 31: Data Fields
Display Screen Data Fields For some menu items, there may be data fields requesting additional information. To enter the information: Touch the desired option. If a data field is associated with the option, a blinking cursor displays in the field. At the point of the cursor, enter data using the keyboard. -
Page 32: Option Boxes
Display Screen Some data fields contain default (pre-set) information. To change the information in these data fields: Touch the option for the pre-set data field. The pre-set data highlights. Using the keyboard, enter new data directly over the highlighted pre-set data. To accept options and data entered, touch OK Option Boxes Option boxes signify system defined choices or values. -
Page 33: Scroll Bars
Display Screen Scroll Bars If more choices are available than will fit in the specific option area of the dialog box, a scroll bar displays to the right of that option area. To view more choices: Touch the up or down arrow in the scroll bar, to move up or down through the list of choices. -
Page 34: System Defaults
System Defaults System Defaults System defaults are set to provide a consistent operating environment for the work you do with your printer. Once the defaults are set, they remain in effect until you change them. The following system default settings can be found using the Menu key . •... -
Page 35: Sleep Mode
System Defaults Sleep Mode Sleep mode is the low power consumption mode that the printer automatically activates when it detects a period of inactivity. Touch the desired inactivity time interval. If you do not want Sleep Mode to ever be activated, touch Never. Set the Date Set the date on your printer to reflect the date that you want to print on your labels. - Page 36 System Defaults To change the month: Touch the left or right arrow at the top of the calendar, until the desired month is displayed. Touch the displayed month name at the top of the calendar. A pop-up menu displays. Touch the desired month. To change the year: Touch the year displayed at the top of the calendar.
- Page 37 System Defaults Using the keyboard, enter the desired year. Touch the up or down arrows of the toggle button to increase or decrease the year number. To exit out of the year data field, touch anywhere on the calendar. Once the correct month and year have been selected, to change the date: Touch the desired date in the displayed calendar.
-
Page 38: Language
System Defaults Language The languages in which all printer menus, functions, and data display vary according to country, region, or keyboard type. Initial Language Setup When turning the printer on for the first time, immediately go to the System Setup>Localization function to choose the language you want displayed. To set the language: Touch Menu Under System, touch Setup Touch Localization... -
Page 39: Units Of Measure
System Defaults Units of Measure The Units of measure setting is used to configure label parameters for the printer. The units are: • Inches • Millimeters Once configured, you do not have to indicate “inches” or “millimeters” (or their globally accepted abbreviations or marks) when entering numbers in data fields. -
Page 40: Text Defaults
System Defaults Text Defaults If you know most of your labels will use a specific font or justification (e.g., left aligned or centered), set these options as defaults. Default settings are determined by the printer for the installed media. While you can always change the attributes for a specific label or label type, when the label supply and/or application label type is reloaded, it will return to these settings. -
Page 41: Barcode Defaults
System Defaults Barcode Defaults Barcodes are generated following industry standard symbology. A typical barcode is composed of vertical lines (bars) and spaces of varying thickness, depending on the text entered. Barcode elements support vertical resizing (height) only. The width of the barcode is based on data and symbology. - Page 42 System Defaults A check digit is used for error detection in a barcode. It consists of a single digit computed from the other digits in the barcode. If you want to use a check digit: Touch Include check character. When Include check character is touched, the Readable check character button displays. If you want the check digit to display with your barcode, touch Readable check character.
- Page 43 System Defaults Density refers to the thickness of the bars and spaces within a barcode. You can change the density (which in turn lengthens the barcode), but the size of the bars and spaces retain the same ratio to each other. For the most effective and reliable scanning, implement with the lowest possible density.
-
Page 44: Printing Defaults
System Defaults Printing Defaults To set the printing defaults for your printer: Touch Menu Under System, touch Setup Touch Printing button ® 35/37 User’s Manual Rev A... -
Page 45: Auto Cut Settings
System Defaults Auto Cut Settings The Auto Cut Settings default determines when the printer should pause for cutting. Note: The auto cut settings are only available if a monochrome ribbon is installed. If using a paneled ribbon, these settings are disabled. There are two modes to choose from: •... -
Page 46: Over Print Setting
System Defaults Over Print Setting Over Print is related to multicolor printing with colors that overlap each other. If ON, Over Print prints a base color, then prints the second color on top of the first. An example of when you want the over print setting turned on is a yellow triangle symbol. -
Page 47: Getting Started
Getting Started Getting Started This section describes the process of creating a text label with minimal formatting, using basic editing techniques, and printing the label. Entering Text When the printer is first turned on, you are presented with the Home page, displaying a blinking vertical bar (the cursor) and the message “Type or touch here...”... -
Page 48: Deleting Text
Getting Started Deleting Text To remove characters, one at a time, from the position of the cursor TO THE LEFT (backwards): Press Backspace on the keyboard. To remove characters, one at a time, from the position of the cursor TO THE RIGHT (forward): Press Delete on the keyboard. -
Page 49: Zoom
Getting Started Zoom To view label text in larger or smaller increments, use the Zoom controls in Tools. To enlarge the label view, touch Zoom In button as many times as needed to increase to the desired size of the view. To decrease the label view, touch Zoom Out button as many times as need to decrease to the desired size of the view. -
Page 50: Selecting/Deselecting Text
Getting Started Selecting/Deselecting Text Function Option Description Select a Word Touch In the text box, touch the word to highlight. Select multiple Touch the first word in a line of text. words Press and hold the Shift key and touch the last word in the line of text. -
Page 51: Sizing Text (Autosize)
Getting Started Sizing Text (Autosize) Font Size Font size can be applied on a single character, a word, or a line of text. If the size is changed before the data is entered, all the data in the current and subsequent lines, takes on the new font size until font size is changed again. - Page 52 Getting Started Changing Text Box Size In addition to autosizing text to fit the label, you can adjust the size of the text box. Vertically changing the size of the text box decreases the font size. Horizontally changing the size of the text box expands or condenses the text.
-
Page 53: Printing A Label
Getting Started Printing a Label To print a label: Touch Print Touch Start Print ® Rev A 35/37 User’s Manual... -
Page 54: Formatting A Label
Formatting a Label Formatting a Label Formatting refers to the layout, structure, and appearance of a label. Each label contains object elements that represent user content, such as text, barcodes, etc. This section details these elements. Label Objects/Elements Label Objects are tools used to place different data elements on a label. These objects include: •... -
Page 55: Selecting An Object Element
Formatting a Label Touch the desired object button. Selecting an Object Element In order to format, edit, size, or move an object element, it must be selected. Selecting an element places the focus on the element, enabling formatting functions to be performed only on that element. -
Page 56: Moving An Element
Formatting a Label Moving an Element There are two ways to move an element to a different location on a label. You can drag the element or use the keyboard arrows. To drag an element: In the Editor, touch the element you want to move. With your finger on the element, drag the element to the new location. -
Page 57: Behavior Common To All Object Elements
Formatting a Label Behavior Common to All Object Elements The options displayed in the Control Panel depend on which object element is selected. However, there are some options that are common to all object elements. These options are displayed in the following graphic and discussed below. Delete an Element To delete an object element from your label: Touch the element to be removed. -
Page 58: Undo
Formatting a Label Undo The Undo function “undoes” the last action taken, whether editing an element, adding information, or deleting data. To Undo the last action: Touch Undo No specific element needs to be selected. Undo puts the element and/or label back to the state it was in before the last action was taken. -
Page 59: Rotate
Formatting a Label Rotate The Rotation button displays along with the size arrows on an element. Each time the Rotation button is touched, the element rotates 90° counter-clockwise (to the left). To rotate an element: Touch the element to rotate. Touch Size Touch Rotate as many times as needed to reach the desired rotation. -
Page 60: Alignment
Formatting a Label Alignment The Center on Label buttons center the selected element vertically or horizontally to the boundaries (margins) of the label, not to other elements. To center an element on a label: Touch the element to be centered. Touch the Right Arrow button under More Options, until the Center on Label buttons are displayed. -
Page 61: Exact Size & Position
Formatting a Label To align an element to the label: Touch the element to align. Touch the Right Arrow button under More Options, until the Align to Label Edge buttons are displayed. Touch the desired available Align to Label Edge buttons. Exact Size &... -
Page 62: Color
Formatting a Label Color You can change the color of the data in each element (text, barcode, graphic, etc.). To change the data color: Touch the element containing the data on which you want to change color. In the element’s main control panel screen, touch Color Note: If a full color ribbon is installed, a wider palette of colors displays. -
Page 63: Frames
Formatting a Label Frames A printable frame (border) can be added to an individual text element or graphic element. You can have a different frame, or no frame, on individual elements in a multi-element label. You can also place a frame around all elements on the entire label. (See page 105 for information on framing an entire label.) - Page 64 Formatting a Label Under Line Width, touch the desired width of the frame lines, Narrow , Medium , or Wide Remove a Frame To remove an element frame: Touch the element whose frame you want to remove. In the Control Panel, in More Options, touch left or right to move to the Object Frame screen.
-
Page 65: Text Object Element
Formatting a Label Text Object Element Text elements contain user-defined text and characters, allowing direct data entry on the label. Only alphanumeric characters can be used in a text element. Text elements can be single or multi-line, however the text element does not “wrap¨ text (i.e., automatically start a new line when the label boundary has been reached). - Page 66 Formatting a Label Enter the text. A blinking cursor displays inside the text element. The text element border (text line) extends as text is entered. To add another line of text in the same text element: Press [Enter]. When finished entering the text, touch anywhere on the screen to remove the text line borders.
-
Page 67: Font
Formatting a Label Font ® The BBP 35/37 printer supports different fonts, or typefaces. When you add a text object, the text defaults to the font defined in System Setup. You can change the font for the entire text element on a specific label, or on just a few characters in the text element. To change the font: In the text element, select the text (characters, words, or entire text) on which to change the font. -
Page 68: Importing Fonts
Formatting a Label Importing Fonts You can also import your own fonts for use in labels created on the printer. Only True-Type fonts can be imported. A USB flash drive must be used to import fonts to the printer. To import fonts: First, copy the fonts to import into the root directory of a USB flash drive. -
Page 69: Font Attributes
Formatting a Label Font Attributes Character/line formats are called attributes that change the appearance of the fonts, such as underline, weight (bold), and angle (italics). To add attributes to the font: Select the characters, words, or lines of text on which to add the attributes. In the Control Panel for text elements, touch Bold , Italic , and/or Underline... -
Page 70: Special Characters
Formatting a Label Special Characters There are some characters that are not available on a standard keyboard, such as the degree or ® copyright symbol, accented characters in different languages, fractions, etc. The BBP 35/37 printer provides many of these symbols for use in text elements. Note: The available characters depend on the font in use. -
Page 71: Accented Characters
Formatting a Label Previously used special characters are displayed in the Recent: field. These characters remain in the Recent: field as long as the printer remains turned on. To re-use these characters: In the Recent: field, touch the desired character. When ready, touch OK The special character displays at the indicated position in the text element. -
Page 72: Typing Accented Characters
Formatting a Label In Figure 6, Example 1 shows how to access characters in normal operation (caps lock and Alt-GR keys not activated). Example 2 shows how to access characters when caps lock is on. Example 3 shows how to access characters using the Alt-GR key. Figure 6 •... - Page 73 Formatting a Label To type an accented character: On the keyboard, locate the key with the accented character you want applied. Type the appropriate keystroke combination (see Figure 6). The table shows example keystroke combinations. Note: The following tables show an example of North American QWERTY and European QWERTY keystroke combinations.
-
Page 74: Justification
Formatting a Label Justification Justification refers to the horizontal alignment of data between the left and right boundaries (margins) in a text element. Justification applies to the entire text element. It cannot be applied line-by-line. (To align the text element on the label, see Alignment on page 44.) To apply justification:... -
Page 75: Vertical Text
Formatting a Label Vertical Text In Vertical text, each character drops down a line below the preceding character. The word “WIRE” as vertical text displays as such: Example: Vertical text can only be applied to an entire text element. It cannot be applied line-by-line. To format text vertically: Touch the text element you want to display vertically. -
Page 76: Reverse
Formatting a Label Reverse The Reverse function switches the foreground and background colors of data on a label, based on the media installed. Text before reverse applied Text after reverse applied Figure 8 • Reverse text For instance, black lettering on a yellow background, if reversed, would print yellow lettering on a black background. -
Page 77: Expand/Condense
Formatting a Label Expand/Condense Expanding and condensing data affects character width and the spacing between characters in a word. Data can be expanded or condensed according to predefined percentages, 50% to 200% in 10% increments. If the limits are reached, the Expand/Condense buttons have no further effect. -
Page 78: Set Data Source
Formatting a Label Set Data Source You can convert an existing text or barcode object element into a serial or date/time element on the label. This applies to both template or freeform object elements. However, you cannot add serial data to a graphic. To convert text or barcode to serial data: In the Editor, touch the text or barcode element that you want to use for the serial data. - Page 79 Formatting a Label If Serial or Date/Time is selected, fill in the requested data. When ready, touch OK The text or barcode object is converted to a serial element on the label. ® Rev A 35/37 User’s Manual...
- Page 80 Formatting a Label Convert from Serial Data To change serial data to constant data: In the Editor, touch the serialized text element or barcode element that you want converted to constant data. For a text element, touch More Options. For a barcode, touch Change Barcode Touch Set Data Source .
-
Page 81: Print/Cut
Under Weeding, touch the desired weeding option (None, Line, Object) Refer to XY Cutting on page 97 for information on actually cutting out the text. Note: To more accurately transfer the cut out text to the application surface, use Brady Transfer Tape #76737. ® Rev A 35/37 User’s Manual... -
Page 82: Barcode Object Element
Formatting a Label Barcode Object Element A Barcode element represents a barcode graphic generated from user input. Barcodes are generated following industry standard symbology. A typical barcode is composed of vertical lines (bars) and spaces of varying thickness, depending on the text entered. It can also include “human readable text.”... -
Page 83: Change Barcode
Formatting a Label In the Barcode dialog box, under Symbology: Touch the up/down arrows in the scroll bar to the right of the barcode symbology to access more barcode types. Touch the desired barcode type. Touch the Data value: field and enter the data the barcode represents. Note: If a typed character is invalid for the active symbology, the typed character does not display. -
Page 84: Ratio
Formatting a Label Ratio Ratio indicates the ratio of bar height to symbol length. Not all barcode symbology allows you to change the ratio. If you are using a symbology that does not support this option (i.e., QR Code (2D) or PDF417 (2D), the Ratio buttons do not display. For those that do support it, to change the ratio: In the Editor, touch the barcode element. -
Page 85: Font
Formatting a Label Font To change the font of the human readable text: In the Editor, touch the barcode element. In More Options, touch the right arrow Under Human Readable Text, touch Font Under Available fonts, touch the up or down arrow in the scroll bar to display more fonts. Touch the desired font. -
Page 86: Start/Stop Code
Formatting a Label Start/Stop Code Most barcodes contain a Start and Stop code signifying, in a line of text, where the barcode starts and ends. The most common Start and Stop code is an asterisk (*), although some barcoes required an opening and closing parenthesis ( ). To view the start and stop code currently assigned to your barcode symbology: In the Editor, touch the barcode element. -
Page 87: Graphic Object Elements
Formatting a Label Graphic Object Elements Use the graphic object to place pictures, shapes, or signs on your label. To add a graphic object element: Touch anywhere in the Editor. OR, if you are already in a label: Touch Add Object In the Add Object control panel, touch Graphic In the Select Graphics dialog box, under Category, touch the category containing the graphic you want to add. - Page 88 Formatting a Label To import graphics from a USB flash drive: First, copy the graphics to import into the root directory of the USB flash drive. Plug the flash drive into any available USB port on the printer. On the printer, touch Menu Under System, touch Import Touch Graphics (if not already selected).
- Page 89 Formatting a Label Delete Imported Graphics Imported graphics that are no longer needed should be deleted. To delete an imported graphic: On the printer, touch Menu Under System, touch Import In the Import dialog box, touch Graphics (if not already selected). In the Imported: list, touch the graphic you want to delete.
-
Page 90: Cut-Out Shapes
Formatting a Label Cut-Out Shapes ® Shapes and graphics can be added to your label. However, only the BBP 37 printer allows you to cut out the shape. Shapes are added to your label through the Graphic Object. To add a shape to your label: Touch the Editor screen where you want the shape to be added. - Page 91 Formatting a Label The selected shape is displayed in the Editor. You can have the shape display as an outline or have it filled in with color. To fill in the shape: In the control panel, touch Fill To change the color of the fill pattern: Touch the color button , touch the desired color, then touch OK If you want to change from fill back to outline:...
-
Page 92: Serial Object Elements
Formatting a Label Serial Object Elements Serialization lets you create labels that contain number or letter sequences that print as multiple labels at print time. Serialization (or sequencing) automatically adds a series of sequential numbers or letters to the printed labels. The Serial function consecutively places the next number or letter in the defined sequence on individual labels. - Page 93 Formatting a Label In the Serial & Date/Time dialog box, touch either Serial Text or Serial Barcode, depending on what you want to serialize. Note: A serialized barcode places the serialized data in barcode format on the label. In the Serial dialog box, touch the Starting value: data field and enter the starting value of the data to be serialized.
- Page 94 Formatting a Label Serial data with ending value Serial data with total number (The number of labels to be generated is (The data that will display on the last label reflected in the Total number field.) generated is reflected in the Ending value field.) If you want to add constant, uniform text before or after the serialized data, use Prefix (for text displaying before the serialized characters) or Suffix (for text displaying after the serialized...
-
Page 95: Date/Time Object Elements
Formatting a Label Date/Time Object Elements The Date/Time object places a time stamp on the label, in text or barcode format. You can add a date, time, or date and time combined. To add a date/time object: Touch anywhere in the Editor. If you are already in a label, touch Add Object In the Add Objects panel, touch Serial &... - Page 96 Formatting a Label To include the Time, under Time format: Touch the time format to include on the label. Under Hour format, touch the clock format to use 12 hour or 24 hour. So far you have just been able to select the date and time format. The system will stamp the current date and/or time on the label in the formats you choose.
-
Page 97: File Management
File Management File Management Figure 10 • File menu options A label can be saved as a file, to be opened and reused at a later date. File Naming Standards ® To create a file on the BBP 35/37 printer, the file must be given a name. Names can be any length and consist of letters, numbers, and spaces. - Page 98 File Management You have the option of saving files directly on your printer (Internal Memory) or on a removable, external flash drive (External USB). The printer defaults to Internal Memory. To save externally (on a USB flash drive): Touch External USB Note: If storing externally, ensure the USB flash drive is plugged into a USB port.
- Page 99 File Management In the Name: data field, enter a Category name, then touch OK The Category is automatically selected. To save a file in this Category, proceed to Step 7. To save the label file in a different category from the one that is selected: On the Save File screen, touch the Category in which the label should be saved.
-
Page 100: New Label
File Management New Label When the file is saved, you are returned to the Editor screen with the saved file still displayed. To start a new file: Touch Home Touch Menu , then touch New File The previously saved label is removed from the Editor and a new label is started. If using a Text object, the font and font attributes return to the defaults. -
Page 101: Open A File
File Management Open a File To open (recall) a saved file: Touch Menu Touch Open File Only one file can be displayed on the screen at a time. When opening a saved file, if the Editing screen contains other data (or a blank object), you are prompted to save the data before the screen is cleared. -
Page 102: Delete A File
File Management Delete a File The display screen does not have to be cleared before deleting a file. A file can be deleted with other data still on the screen. When a file is deleted, it is removed from the system and is no longer available for use. - Page 103 File Management Touch Yes to accept the deletion. OR, to cancel the delete function: Touch No If No is selected, you are returned to the Delete File screen where you can select a different file for deletion. If Yes is selected, you are still returned to the Delete File screen, but the deleted file is no longer in the list of files.
-
Page 104: Printing
Printing Printing The Print function prints the file that is currently in the Editor. During printing, the print status is displayed and the Editor is unavailable. When printing is complete, you are returned to the Editor. If there is no media or ribbon installed, printing does not start and you are prompted to install media or ribbon. -
Page 105: Cancel A Print Job
Printing Cancel a Print Job System Interruption If a print job is interrupted due to a system error, for instance when media runs out or you intentionally open the cover, the system automatically stops the print job and displays a message. - Page 106 Printing The printer immediately stops printing, displays a print job interrupted message, and cuts the media. To remove the message from the screen: Touch OK Note: Once Cancel is selected, the print job cannot be resumed until Print is selected again. ®...
-
Page 107: Print Preview
Printing Print Preview ® The Print Preview function of the BMP 35/37 printer enables you to view your label file prior to printing. To preview a label: Touch Print In the Print dialog box, touch Preview The entire label is displayed for your review. If you are previewing multiple copies of a label or a label with serialized data, left and right scroll arrows display enabling you to preview the multiple labels generated. -
Page 108: Mirror Print
Printing Mirror Print Mirrored print takes all data on a label and flips it to provide a mirror image. Mirroring displays on the printed label only. Figure 11 • Mirror image To provide a mirror image of label contents, in the Print dialog box: Touch Mirror When ready, touch Start Print The mirror image displays on the printed label ONLY. -
Page 109: Advanced Settings
Printing Advanced Settings Print Energy If the printing is spotty, try increasing the print energy to transfer more of the ribbon ink to the label. However, if the ribbon sticks or tears during printing, the heat energy may be too high and should be reduced. - Page 110 Printing Print Speed You can change the print speed to be faster or slower than the default print speed of the installed media. Reducing the print speed produces better print quality at the expense of speed. Higher speed can result in fainter print. To adjust the print speed: With a label in the Editor, touch Print In the Print dialog box, touch Advanced Settings...
-
Page 111: Printing Files From Pc
35/37 printer. You can also install printer software upgrades through the PC. It is recommended that you install Brady Workstation software on your PC before connecting ® the printer to the PC. Using Brady Workstation, the PC recognizes the BBP 35/37 printer automatically when connecting via USB or Brady Network Card. -
Page 112: Copies
Printing Copies You can print a number of copies of a single label or a range of labels in a multi-label (series) ® file. The BBP 35/37 printer as a standalone printer does not support collating copies. Only when attached to a PC can it print collated copies. The PC software determines how copies of labels are printed. -
Page 113: Xy Cutting (Bbp ® 37 Only)
® XY Cutting (BBP 37 ONLY) ® XY Cutting (BBP 37 ONLY) XY Cutting is the action of cutting out objects or text using the plotter cutter inside your printer. The cutter follows the shape of the object or text. All objects can be print OR cut, but not both simulataneously. -
Page 114: Using The Xy Cutter
® XY Cutting (BBP 37 ONLY) Using the XY Cutter With the label to cut out in the Editor: On the Control Panel, in More Options, touch Left Under Print/Cut, touch Cut Shape option box to select. Touch Print Touch Advanced Settings Touch XY Cut Settings To increase or decrease the depth of the cut line: Touch Adjust XY Cut Depth... - Page 115 ® XY Cutting (BBP 37 ONLY) Overtime, the plotter cutter accuracy may drift. Use the Adjust XY Cut Accuracy feature to bring the offset back to factory settings. To adjust the cut accuracy: Touch Adjust XY Cut Accuracy On the Adjust XY Cut Accuracy screen, touch Print Test Shape The printer cuts a rectangle passing through a vertical and horizontal scale.
-
Page 116: Labels
Labels Labels The following features apply to the overall label in general, not object elements. Label Fixed Length If using continuous media, the label length adjusts to fit the data that you add to the label (variable label length). This is known as autosizing and is the system default when using continuous media. -
Page 117: Orientation
Labels In the Label Size & Orientation dialog box, touch Fixed Length option box. In the Fixed Length data field, enter the desired label length. Note: For single-color printing, the minimum supported length (after cutting) is 2 in. (51 mm). The maximum supported length is 16 ft (5 m). For multi-paneled ribbon, the label length is limited to 15 in. - Page 118 Labels If the current data will not fit on the selected length, you are prompted to have the system make the data fit, or cancel the change. If you choose to make the data fit, the objects are moved and/or resized so they fit on the label; however, the objects will not be rearranged into a new orientation.
-
Page 119: Label Width
Labels Label Width You can adjust the width of the installed media to accommodate up to 4 labels printed in the space of the adjusted width. Adjusting the width automatically changes the size of the font and the margins (boundaries). In this function, label width also addresses the height of the label, measured from top to bottom. - Page 120 Labels In the Set Label Width dialog box, with the Width option box selected, touch the desired width. (Observe the preview panel on the right side of the screen to view how the labels will print.) You can also set a custom width. Setting a custom width disables the 2- 3- and 4-Up function. To set a custom width: Touch Set Custom Width option box.
-
Page 121: Framing A Label
Labels Framing a Label A printable, or XY cut out frame (border) can be added to an entire label, surrounding all object elements on the label. Note: When printing with frames around the labels, be sure the media guides fit snug against the media so the tape does not shift while printing. - Page 122 Labels For a colored frame, touch Color Touch the desired label frame color, then touch OK When your changes are complete, touch OK ® 35/37 User’s Manual Rev A...
-
Page 123: Label Types
Label Types Label Types ® The BBP 35/37 printer provides a number of predesigned label types, containing different object elements and data fields already positioned on the label. General Templates ® The BBP 35/37 printer provides a number of predesigned label templates, containing different object elements. - Page 124 Label Types On the right side of the Select Template dialog box, templates in that category display. Touch the desired template. The template displays in the Editor with the object elements scaled to fit the installed media. The cursor is in the first element. Enter the appropriate data for that object element.
-
Page 125: Customizing The Home Page
Label Types Customizing the Home Page Place the most often used label types in the Home Page control panel for easy access. To customize your Home Page: In the Home page control panel, touch More Label Types On the Label Types screen, touch Customize You can place three label types in the Home Page control panel. - Page 126 Label Types You can arrange the order in which the label types display in the control panel. To rearrange the order, with the desired label types displayed under Included: In the Included: list, touch the label type you want to display in a different position in the control panel.
-
Page 127: Application Label Types
Application Label Types Application Label Types General Templates contain standard formats used for most generic labels. Application label types, however, provide wizards that guide and control the layout for specific label applications, according to industry or government standards. For most application label types, dialog boxes display to collect information for automatically formatting the application label. -
Page 128: Clearing An Application Label Type
Application Label Types Clearing an Application Label Type The name of the specific type being used is displayed in the Control Panel. When you are using an application label type, clearing the data removes the data you entered but the application label type parameters remain. - Page 129 Application Label Types Save an Application Label Type To save an application label type: With the label type displayed in the Editor, touch Menu Under File, touch Save File Select a category, or if desired, create a new category. (See page page 82 for information on creating categories.)
- Page 130 Application Label Types Open an Application Label Type To open a specific application label type, first launch the application. From the Home page, in the control panel, touch More Label Types On the Label Types screen, touch the application you wish to launch. ®...
- Page 131 Application Label Types To open a saved label type: From the label type’s control panel, touch Open Saved File Touch Menu , then under File, touch Open File In the Open File dialog, touch the category in which the file is saved. In the list of saved files, touch the file to open.
- Page 132 Application Label Types Delete an Application Label Type To delete a specific application label type, first launch the application. From the Home page, in the control panel, touch More Label Types On the Label Types screen, touch the application you wish to launch. In the label type control panel, touch Menu Under File, touch Delete File In the Delete File dialog, touch the category where the label is located, then touch the label...
-
Page 133: Arc Flash Label Type
Application Label Types Arc Flash Label Type Arc Flash Labels identify potential hazards with energized switch boards, panel boards, control panels and more. Standard arc flash labels usually contain the header "Warning" or "Danger.” Arc Flash labels indicate the equipment-specific hazard information. Access Arc Flash label type according to previous procedures. - Page 134 Application Label Types To access these data fields: Touch the data field to enter data. Touch Next Object Using the Next Object button will consecutively advance through the data fields, until all data fields have been filled. Some of the Arc Flash templates require a lot more user-supplied data than what can be displayed in the Editor at one time.
-
Page 135: Circle Gauge Label Type
Application Label Types Circle Gauge Label Type The Circular Gauge is a component used for displaying element values on a circular scale. It consists of range of numbers, bound by a minimum and maximum value, shown on the gauge. Typically, a gauge scale contains gauge labels and tick marks to give an accurate reading of what the gauge pointer shows. - Page 136 Application Label Types In the Operating Range Angle, touch the desired angle you want the range to display on the gauge. If the desired angle is not present, touch Custom In the Custom data field (in the middle of the gauge pictogram), enter the custom angle degree.
-
Page 137: Gauge Colors
Application Label Types The Caution Zone is optional. The Caution Zone provides a visual element that announces when you are reaching the In-Range Zone. (The Caution Zone is depicted by the yellow area on the preceding graphic.) To set up a Caution Zone: Touch the option box describing where you want the Caution Zone to display on the gradient (Before or After). - Page 138 Application Label Types When ready, touch OK You can also have the gauge outline display with a thicker and darker boundary. To better display the gauge outline: On the Colors screen, touch Show Black Outline option box to select it. Touch the line thickness option desired (Narrow, Medium, or Wide).
-
Page 139: Cut Out Gauge (Bbp ® 37 Only)
Application Label Types ® Cut Out Gauge (BBP 37 ONLY) ® If you have the BBP 37 printer, you have the ability to cut out the circle gauge to get the circle shape. To indicate you want to cut out the gauge: In the Circle Gauge Label control panel, in More Options, touch Left to move to the Print/Cut control panel. -
Page 140: Gradient Scale
Application Label Types Gradient Scale A gradient scale is a linear scale of blended colors. Each color defined for a numeric range blends with the next color, thus forming a gradient strip. Each point on the gradient scale represents a unique color and value. So, entities with different values appear in unique colors as per the position of the value on the gradient scale. - Page 141 Application Label Types The Label Size section defines the size of the gradient scale label. Side A (the long side) can be defined by either setting the distance between each tick mark (By Tick Spacing) or by setting an overall length of the scale (By Total Length). Populating one of these parameters automatically calculates the other parameter since they are dependent on each other.
- Page 142 Application Label Types The In-Range Zone provides a visual element on the gauge to show when a system is entering its optimal or detrimental value. To add or change the size of the in-range zone, under In-Range Zone touch Start Value: data field and enter the starting value for the range.
-
Page 143: Ghs/Clp
Application Label Types GHS/CLP CLP is the regulation on classification, labeling and packaging of substances and mixtures. This regulation aligns previous EU legislation on classification, labeling and packaging of chemicals to the GHS (Globally Harmonised System of Classification and Labeling of Chemicals). - Page 144 Application Label Types In the list, touch the desired label size, then touch Next Touch anywhere on the displayed label to bring up the CLP (GHS) Data dialog box. In the Product Name: data field, enter the name of the chemical (product) you want to use. OR, if chemical names have been saved (previously used): Under Primary Language, touch the down arrow next to Product name to display a list of products, then touch the desired product.
- Page 145 Application Label Types Touch Add for the statement you want to add (Hazardous, Precautionary, Supplementary). On the Select Hazardous Statements screen, touch the up/down arrows in the scroll bar to view more statements. OR, if you know the code number, or wording, of the statement you want to use: Touch the Search data field and enter the number or wording.
- Page 146 Application Label Types The label displays the added statements. There are other fields on the label where you can add custom data. These fields are designated by brackets < >. To add the suggested custom information: On the label, touch the desired custom field (inside the brackets). A dialog box displays where you can enter the requested information.
-
Page 147: Right-To-Know
Application Label Types Right-To-Know Right-to-Know (RTK) labels inform individuals of chemical hazards, as required by OSHA's Federal Hazard Communication Standard 29 CFR 1910.1200. The most popular RTK labels use a number rating and color coding system in conjunction with written text to identify the chemical and its physical and health hazards. - Page 148 Application Label Types Touch Next On the Health Hazard screen, in the list provided, touch the health hazard rating to be used on the label, then touch Next On the Fire Hazard screen, in the list provided, touch the fire hazard rating to be used on the label, then touch Next On the Instability screen, in the list provided, touch the instability rating to be used on the label, then touch Next...
- Page 149 Application Label Types On the Target Organs screen, in the Available: list, touch any body organs that could be affected by the hazardous chemical being advertised on the Right-to-Know label, then touch Include Repeat the above step to include as many target organs as required. To remove items from the Included list, touch the target organ in the Included list, then touch Remove When ready, touch Next...
- Page 150 Application Label Types On the Graphics screen, touch the desired graphic to add to the label. You can add as many graphics as required. The available graphics are divided into categories. To change to another category: Touch Change Category Under Categories, touch the up/down arrows to view more categories in the list. Touch the desired category to select it, then touch OK On the Graphics screen, touch the left or right...
-
Page 151: Setting Rtk Preferences
Application Label Types Setting RTK Preferences From the Right-to-Know Preferences menu, you can choose default label settings for size and format. You can also add or delete hazards and/or organ types. Any defaults set here will stay in effect until you change them. If you use a standard or consistent Right-to-Know label format, set these formatting preferences as defaults. - Page 152 Application Label Types Format To set up a default label format: In the Right-to-Know Preferences dialog box, touch Format On the Right-to-Know Format screen, use the up/down arrows in the scroll bar to view more format options. In the list, touch the desired format, then touch OK Size To choose a default label size: In the Right-to-Know Preferences dialog box, touch Size...
- Page 153 Application Label Types Hazard Types To add a hazard type: In the Right-to-Know Preferences dialog box, touch Hazards On the Add or delete hazards dialog box, enter the new hazard in the data field, then touch To delete a hazard type: In the Add or delete hazards list, touch the hazard you want to delete, then touch Delete ®...
- Page 154 Application Label Types Organ Types To add an organ type: In the Right-to-Know Preferences dialog box, touch Organs In the Add or delete organs dialog box, enter the new organ in the data field, then touch To delete an organ type: In the Add or delete organs list, touch the organ you want to delete, then touch Delete ®...
-
Page 155: Pipe Markers
Application Label Types Pipe Markers Pipe Marker labels are used to label what material flows through a pipe. There are three types of pipe marker labels - Standard, Rollform, and Symbol/Arrow Type. The Standard Label is placed along the length of the pipe. Contents of the label include text and optional graphics. - Page 156 Application Label Types To use a Standard Pipe Marker label type: From the Home Page, touch Pipe Marker , then touch Create New File Access Pipe Marker label type according to procedures on page 111. On the Pipe Marker Style screen, touch Standard In the Dimensions dialog, choose a Tape Width that corresponds to the diameter of your pipe, then touch Next In the Pipe contents dialog box, choose the type of material that flows through the pipe.
- Page 157 Application Label Types On the Graphics screen, touch the left or right double arrows to scroll throught the list of available graphics. Touch the desired graphic in the list. Repeat the above two steps to add another graphic. When ready, touch Next Arrows can be added to a pipe marker label according to the standards defined by the country or region.
- Page 158 Application Label Types If too many characters per line are used, a message displays prompting you to edit the text or lengthen the pipe marker. Likewise, if the length of all elements together exceeds the recommended length, you are prompted to edit the data or lengthen the pipe marker. To edit the information, touch Edit data , then repeat Steps 6 through 18 above.
-
Page 159: Set Up Pipe Marker Options
Application Label Types Set Up Pipe Marker Options Setup options for Pipe Markers are different than those for standard, generic labels. Use this procedure to set up the pipe marker color norms. To set up pipe marker color norms: From the Home page, touch Pipe Markers Touch More Label Types , then touch Pipe Markers. - Page 160 Application Label Types The list of norms and color standards for pipe marker labels vary according to the country of origin or the region you are in. Figure 13 • Color norms for Standard Pipe Markers To select the proper color norm for your pipe marker label. Under Color Norm, touch the desired country color standard.
-
Page 161: Rollform Pipe Marker
Application Label Types Rollform Pipe Marker Rollform Pipe Markers use only continuous media. Rollform Pipe Markers include one to two lines of text, repeated the length of the pipe marker, alternating at 90 degree and 270 degree rotation. You can add up to four graphics, placed in predetermined locations. Graphics are repeated and rotated along the length of the pipe marker, as is the text. - Page 162 Application Label Types On the Legend screen, touch Legend line 1: data field, and enter the text to display on the label. You can add additional data in the Legend line 2: field, then touch Next You can add up to four graphics to the pipe marker label. The available graphics are divided into categories.
-
Page 163: Symbol Or Arrow Tape Pipe Marker
Application Label Types Symbol or Arrow Tape Pipe Marker The ArrowTape Pipe Marker application uses continuous media only. The Arrow Tape application includes a single graphic (or arrow), rotated 90 degrees, repeated the length of the label. To create a symbol or arrow pipe marker: From the Home Page, touch Pipe Marker , then touch Create New File Access Pipe Marker label type according to previous procedures... - Page 164 Application Label Types You can add a single arrow or symbol (graphic) to the pipe marker label. On the Symbol Type screen, touch Arrow to add an arrow to the label. Touch Symbol to add a graphic to the label. If selecting Symbol, the Graphics screen displays.
-
Page 165: Clp Pipemarkers (Not Available In All Regions)
Application Label Types CLP PipeMarkers (Not available in all regions) The CLP PipeMarkers include Standard, Rollform, and Arrows-type Pipe Markers, but incorporate the classification criteria, labeling rules, and graphic symbols used in CLP-GHS labels. CLP Standard PipeMarker To use a CLP Standard Pipe Marker label type: From the Home Page, touch More Label Types button , then touch CLP Pipe Markers. - Page 166 Application Label Types Whether you entered the substance name or selected it from the list, you can add additional information to the Chemical name field, such as special characters. To enter special characters, touch the Chemical name: field where the special characters should be placed.
- Page 167 Application Label Types Touch the Optional Comment: field and enter additional comments to display on the pipe marker label, if desired. When ready, touch Next You can add up to four graphics to the pipe marker label. The available graphics are divided into categories.
- Page 168 Application Label Types Arrows can be added to a pipe marker label according to the standards defined by the country or region. On the Arrows screen: Touch the option box designating where you want the arrows to display - Before Legend and/or After Legend.
- Page 169 Application Label Types If you are using a BBP37 printer, you are able to cut out the CLP Pipe Marker label. On the Cut Out Label screen: Touch the cut out option desired (No Cut , Around Label , or Around Arrows When ready, touch Finish ®...
-
Page 170: Clp Rollform Pipe Marker
Application Label Types CLP Rollform Pipe Marker To use a CLP Rollform Pipe Marker label type: From the Home Page, touch More Label Types button , then touch CLP Pipe Markers. On the CLP Pipe Marker screen, touch Create New File On the Pipe Marker Style screen, touch Rollform In the Dimensions dialog, touch the Pipe diameter: data field and enter the diameter of the pipe to which the label will be afixed. - Page 171 Application Label Types Whether you entered the substance name or selected it from the list, you can add additional information to the chemical name field, such as special characters. To enter special characters, touch the Chemical name: field where the special characters should be placed.
- Page 172 Application Label Types Touch the Optional Comment: field and enter additional comments to display on the pipe marker label, if desired. When ready, touch Next You can add up to four graphics to the pipe marker label. The available graphics are divided into categories.
- Page 173 Application Label Types On the Graphics screen, touch the left or right double arrows to scroll throught the list of available graphics. Touch the desired graphic in the list. Repeat the above two steps to add another graphic. When ready, touch Finish ®...
-
Page 174: Clp Arrow Pipe Marker
Application Label Types CLP Arrow Pipe Marker To create a CLP symbol or arrow pipe marker: From the Home Page, touch More Label Types button , then touch CLP Pipe Markers. On the CLP Pipe Marker screen, touch Create New File On the Pipe Marker Style screen, touch Symbol or Arrow Tape In the Dimensions dialog, touch the Pipe diameter: data field and enter the diameter of the pipe to which the label will be afixed. - Page 175 Application Label Types If selecting Symbol, the Graphics screen displays. The available graphics are divided into categories. To change to another category: Touch Change Category Under Categories, touch the up/down arrows to view more categories in the list. Touch the desired category to select it, then touch OK On the Graphics screen, touch the left or right double arrows to scroll...
-
Page 176: Hsid Pipe Markers (Not Available In All Regions)
Application Label Types HSID Pipe Markers (Not available in all regions) The HSID PipeMarkers include Standard, Rollform, and Arrows-type PipeMarkers, but incorporate the classification criteria, labeling rules, and graphic symbols used in HSID education and labeling standards. HSID Standard Pipe Marker To use an HSID Standard Pipe Marker label type: From the Home Page, touch More Label Types button , then touch HSID Pipe... - Page 177 Application Label Types Touch the Comment: field and enter additional comments to display on the pipe marker label, if desired. When ready, touch Next You can add up to four graphics to the pipe marker label. The available graphics are divided into categories.
- Page 178 Application Label Types Arrows can be added to a pipe marker label according to the standards defined by the country or region. On the Arrows screen: Touch the option box designating where you want the arrows to display - Before Legend and/or After Legend.
- Page 179 Application Label Types If you are using a BBP37 printer, you are able to cut out the CLP Pipe Marker label. On the Cut Out Label screen: Touch the cut out option desired (No Cut , Around Label , or Around Arrows When ready, touch Finish ®...
-
Page 180: Hsid Rollform Pipe Marker
Application Label Types HSID Rollform Pipe Marker To use an HSID Rollform Pipe Marker label type: From the Home Page, touch More Label Types button , then touch HSID Pipe Markers. On the HSID Pipe Marker screen, touch Create New File On the Pipe Marker Style screen, touch Rollform In the Dimensions dialog, touch the Pipe diameter: data field and enter the diameter of the pipe to which the label will be afixed. - Page 181 Application Label Types Touch the optional Comment: field and enter additional comments to display on the pipe marker label, if desired. When ready, touch Next You can add up to four graphics to the pipe marker label. The available graphics are divided into categories.
-
Page 182: Hsid Arrow Pipe Marker
Application Label Types HSID Arrow Pipe Marker To create an HSID Symbol or Arrow Tape pipe marker: From the Home Page, touch More Label Types button , then touch HSID Pipe Markers. On the HSID Pipe Marker screen, touch Create New File On the Pipe Marker Style screen, touch Symbol or Arrow Tape In the Dimensions dialog, touch the Pipe diameter: data field and enter the diameter of the pipe to which the label will be afixed. -
Page 183: Quicklabel
Application Label Types QuickLabel QuickLabel is an application that provides a list of predefined labels. To create a QuickLabel: Access QuickLabel label type according to previous procedures (page 111). From the Select Label dialog, enter the Label ID, if known. (See Appendix A.) ®... - Page 184 Application Label Types If you do not know the label ID, touch Browse Under Category, touch the up/down arrows in the scroll bar to view more options in the list, then touch the desired category. Touch the up/down arrows in the scroll bar to the right of the displayed labels to view more labels.
-
Page 185: Tags
Application Label Types Tags A Tag is a basic label that usually contains a reinforced hole through which you can insert a lanyard, zip tie, string, or other tying device. Tag media allows for the string-attachment hole and places the data outside this area. The data placed on a tag follows general template formats. -
Page 186: Whmis
Application Label Types WHMIS WHMIS stands for Workplace Hazardous Materials Information System. It is a comprehensive plan for providing information on the safe use of hazardous materials used in Canadian workplaces. Information is provided by means of product labels, material safety data sheets (MSDS) and worker education programs. - Page 187 Application Label Types In the list of templates displayed, touch the desired template. On the label in the Editor, touch the various elements displayed and enter the appropriate data for that element (i.e., graphics, text, barcode, etc.), according to standard procedures. (See label formatting options, starting on page 41.)
- Page 188 Application Label Types When accessing a graphic data field (either by touching or using the Next Object button), the Select Graphic screen immediately displays. The WHMIS category is selected by default, however you can select a different category if desired. Touch the desired graphic.
-
Page 189: Printer Maintenance
Printer Maintenance Printer Maintenance Before performing any maintenance procedure that involves opening the enclosure cover, you should remove the power and media from the printer. (Review page 5 page 10 information on removing power and media.) Cleaning the Printer Whenever performing any maintenance on the printer, you should also clean any residue caused by the media. -
Page 190: Cleaning The Touch Screen
Printer Maintenance Cleaning the Touch Screen Materials Required • Lint-free Cloth, non-abrasive • Isopropyl Alcohol • Pre-moistened Cloth (appropriate for cleaning PC screens) Note: Normal cleaners with ammonia, soaps, or any acids can damage the screen. Use only a lint-free cloth dampened with isopropyl alchohol. To clean the touch screen: Lightly moisten a lint-free cloth with isopropyl alcohol, or use a pre-moistened cloth suitable for cleaning a PC screen. - Page 191 Printer Maintenance Pull the panel out. To remove the black roller: Slightly pull the snap tab toward you while lifting the roller to release the catch. Perform this action on both sides of the roller (left and right). When free of the catches, lift the roller out. ®...
- Page 192 Printer Maintenance Using a cotton swab, clean the cutter area. To return the black roller to its original position: Align the tabs with the insertion slots, then snap the roller into place. ® 35/37 User’s Manual Rev A...
- Page 193 Printer Maintenance To replace the gray panel: Hook the three loops on the bottom of the panel over the blue tabs on the printer, then push the panel up into place. ® Rev A 35/37 User’s Manual...
-
Page 194: Cleaning The Cutter Blade Exit Area
Printer Maintenance Cleaning the Cutter Blade Exit Area This procedure cleans the cutter blade exit area and the exit chute. Materials Required ® • BBP 35/37 Cleaning Kit • Isopropyl Alcohol To clean the exit chute: Moisten a swab from the cleaning kit with the alcohol, then clean the exit chute entrance and exit chute ramp. -
Page 195: Cleaning The Sensors
Printer Maintenance Cleaning the Sensors Some sensors on the printer are susceptible to dust that results from cutting or printing. These sensors located under two media guides. The media guides can be removed to display the sensors. Materials Required ® •... - Page 196 Printer Maintenance Figure 14 • Sensor locations Clean the other three sensors indicated in Figure 14. After cleaning the sensors, carefully lower the media guide, then tighten the screw. Wipe the two other sensors in the media feed path. (Outlined in the figure above.) Also, wipe the sensor under the cutting mechanism in the media exit chute.
-
Page 197: Dust Cleaning
Printer Maintenance Dust Cleaning Dust generated by media cuts can accumulate in the unit. If a significant amount of dust is built up, clean the unit using this procedure. Materials Required ® • BBP 35/37 Cleaning Kit • Isopropyl Alcohol •... -
Page 198: Cleaning The Printhead
Printer Maintenance Cleaning the Printhead Materials Required ® • BBP 35/37 Cleaning Kit • Isopropyl Alcohol To clean the printhead: Remove power and media from the printer. (Review page 5 page 10.) Fill the plastic bottle from the cleaning kit with isopropyl alcohol. Note: Do not rub the swab over the bronze-colored area of the printhead. -
Page 199: Cleaning The Media Wiper
Printer Maintenance Cleaning the Media Wiper Materials Required ® • BBP 35/37 Cleaning Kit • Isopropyl Alcohol To clean the media wiper: Remove power and media from the printer. (Review page 5 page 10.) On the media wiper blade, push the notch to the left through the trough. Clean the exposed foam bits with a pre-moistened swab from the cleaning kit. -
Page 200: Cleaning The Xy Cutter Blade (Bbp ® 37 Only)
Printer Maintenance ® Cleaning the XY Cutter Blade (BBP 37 ONLY) Materials Required ® • BBP 35/37 Cleaning Kit • Isopropyl Alcohol To clean the XY cutter blade: Remove power and media from the printer. (Review page 5 page 10.) Open the cover of the printer Unscrew the thumbscrew of the XY cutter module. - Page 201 Printer Maintenance To re-install the cutter module: Place the flat surface of the collar against the carriage, then insert the cutter module into the carriage. Tighten the thumbscrew until it clicks. ® Rev A 35/37 User’s Manual...
-
Page 202: Cleaning Upper Guide And Cut Pad
Printer Maintenance Cleaning Upper Guide and Cut Pad Overtime, dust and adhesive builds up on the upper guide and the cut pad. These parts can be removed for cleaning. Materials Required • Magnetic screw driver ® • BBP 35/37 Cleaning Kit •... - Page 203 Printer Maintenance Remove the cut pad screws. Gently pull up on the tab to loosen the cut pad, then swing the cut pad out from underneath the XY cutter carriage to remove it Use a moistened wipe from the cleaning kit to clean the cut pad. To reinstall the cut pad and upper guide: Tuck the left edge of the cut pad underneath the cutter module carriage, then swing the right edge back into place, lining up the holes for the screws.
- Page 204 Printer Maintenance Tuck the left edge of the upper guide underneath the cutter module carriage, on top of the cut pad, aligning the hole on the right side with the empty screw hole. Replace the upper guide screw into the screw hole and tighten. Replace the cutter module by placing the flat surface of the collar against the carriage, then inserting the cutter module into the carriage.
-
Page 205: Upgrading Printer Firmware
Printer Maintenance Upgrading Printer Firmware ® Upgrades to BBP 35/37 firmware can be downloaded from the Brady website. Once downloaded to a PC or USB flash drive, the firmware upgrades can be transferred to the ® 35/37 printer. . To download printer upgrades: Access the Brady website at: www.bradyid.com/bbp3537 or www.bradyeurope.com... - Page 206 Printer Maintenance When you have insured that the requested information has been satisfied: Touch OK On the PC, launch the upgrade utility. In the Welcome dialog, select Next. ® In the Select your printer dialog, select your BBP 35/37 printer. Note: If your printer does not have enough free space, you will be prompted to install a USB Flash Drive with at least 64MB of free space.
-
Page 207: Upgrade From Usb Flash Drive
Printer Maintenance Upgrade from USB Flash Drive To upgrade your printer firmware to a new version that is stored on a USB flash drive: CAUTION CAUTION Do not interrupt power during an upgrade from a USB flash drive . Connect the USB flash drive to any available USB port on the printer. Press Menu In the menu list, select More Tools Select Upgrade from USB drive... -
Page 208: Troubleshooting
Troubleshooting Troubleshooting Messages indicate the problem for the task being performed and also provide a possible corrective action. The following sections provide additional information for troubleshooting printer errors. Problem Cause Corrective Action Hardware Errors Keyboard works intermittently or One or more keys is stuck in Identify any keys stuck in down not at all. - Page 209 Troubleshooting Problem Cause Corrective Action Hardware Errors (continued) Pinch roller is unable to engage Something is blocking the pinch Open the cover and remove any media. roller from engaging properly media or foreign objects that are with the tape. preventing the pinchroller from engaging properly.
- Page 210 Troubleshooting Problem Cause Corrective Action Ribbon Errors Install ribbon color <color name The ribbon is the wrong color for Install ribbon and close cover, or here>. the job. Message displays when press Continue with Current the selected ribbon color is not Ribbon.
- Page 211 Troubleshooting Problem Cause Corrective Action Ribbon Errors (continued) Ribbon Out (roll reached purple Ribbon out. Ribbon is at end of Replace ribbon and close printer trailer). roll and has reached the purple cover. trailer while actively printing. Either resume the current or next print job.
- Page 212 Troubleshooting Problem Cause Corrective Action Ribbon Errors (continued) Current ribbon color: Black Currently installed ribbon is a Load required ribbon color. continuous color monochrome black ribbon. For this multi-color job, load this ribbon last. Note: If multi-color print job is selected, the label quality is better To continue, load another required when black is printed on top of the...
- Page 213 Troubleshooting Problem Cause Corrective Action Small Cell Errors (continued) Error reading ribbon memory cell. Code in ribbon cell is incorrect. Open cover and install ribbon correctly. The message Insert ribbon memory cell again automatically clears. or replace ribbon. If error persists, contact Technical Support.
- Page 214 Troubleshooting Problem Cause Corrective Action Power Errors Printer does not power up when Power cord has been pulled out of Check power cord. turned on. printer or wall socket. Press Power to turn printer Screen freezes User Interface error off. Press again to turn Power...
- Page 215 Troubleshooting Problem Cause Corrective Action Printing Errors (continued) • Tension the ribbon by rotating the Void areas or lines appear on Ribbon wrinkling. spool until all slack is removed. printed text. • Try another ribbon cartridge. Printer not ready. Close and latch The printer cover is open.
-
Page 217: Appendix A - Reference Images
Appendix A - Reference Images Appendix A - Reference Images Quick Label Reference Images - Europe For information about the available labels for Europe, contact your local Sales Representative. Note: Quick Labels for Europe are available only in French, German, Italian and Dutch. -
Page 218: Alerts And First Aid
Appendix A - Reference Images Alerts and First Aid Chemical - Hazardous Materials ® 35/37 User’s Manual Rev A... -
Page 219: Conduit - Voltage
Appendix A - Reference Images Conduit - Voltage Electrical Hazard - Lockout ® Rev A 35/37 User’s Manual... -
Page 220: Fire
Appendix A - Reference Images Fire Funny Signs ® 35/37 User’s Manual Rev A... -
Page 221: Graphics - Mandatory
Appendix A - Reference Images Graphics - Mandatory ® Rev A 35/37 User’s Manual... -
Page 222: Graphics - Packaging
Appendix A - Reference Images Graphics - Packaging ® 35/37 User’s Manual Rev A... -
Page 223: Graphics - Ppe
Appendix A - Reference Images Graphics - PPE ® Rev A 35/37 User’s Manual... -
Page 224: Graphics - Prohibition
Appendix A - Reference Images Graphics - Prohibition ® 35/37 User’s Manual Rev A... -
Page 225: Graphics - Signal Words
Appendix A - Reference Images Graphics - Signal Words ® Rev A 35/37 User’s Manual... -
Page 226: Graphics - Warning
Appendix A - Reference Images Graphics - Warning ® 35/37 User’s Manual Rev A... -
Page 227: Inspection
Appendix A - Reference Images Inspection Machine - Operational No Smoking ® Rev A 35/37 User’s Manual... -
Page 228: Pipe Marker Arrows
Appendix A - Reference Images Pipe Marker Arrows ® 35/37 User’s Manual Rev A... -
Page 229: Pipe Markers
Appendix A - Reference Images Pipe Markers ® Rev A 35/37 User’s Manual... - Page 230 Appendix A - Reference Images ® 35/37 User’s Manual Rev A...
-
Page 231: Protective
Appendix A - Reference Images Protective Warning Stakes ® Rev A 35/37 User’s Manual... -
Page 232: Appendix B - Character Mapping & Keyboard Layouts
Appendix B - Character Mapping & Keyboard Layouts Appendix B - Character Mapping & Keyboard Layouts Keyboard configurations vary by region. See “Character Mappingn page 216 for a list of accent characters available for each keyboard configuration. See “Keyboard Layoutsn page 220 for a graphical layout of the keyboard configurations. -
Page 233: European Azerty
Appendix B - Character Mapping & Keyboard Layouts European AZERTY Accent Characters Affected A, a, E, e, I, i, O, o, U, u ´ A, a, E, e, I, i, O, o, U, u, Y, y, C, c, S, s, N, n ˆ... -
Page 234: European Qwertz
Appendix B - Character Mapping & Keyboard Layouts European QWERTZ Accent Characters Affected A, a, E, e, I, i, O, o, U, u ´ A, a, E, e, I, i, O, o, U, u, Y, y, C, c, S, s, Y, y, N, n ˆ... -
Page 235: European Qwerty
Appendix B - Character Mapping & Keyboard Layouts European QWERTY Accent Characters Affected A, a, E, e, I, i, O, o, U, u ´ A, a, E, e, I, i, O, o, U, u, Y, y, S, s, Z, z, C, c, N, n ˆ... -
Page 236: Keyboard Layouts
Appendix B - Character Mapping & Keyboard Layouts Keyboard Layouts The following figures show the supported keyboard layouts for each of the configurations. Figure 15 • QWERTY - America’s Keyboard Configuration Figure 16 • QWERTY - EU Keyboard Configuration ® 35/37 User’s Manual Rev A... - Page 237 Appendix B - Character Mapping & Keyboard Layouts Figure 17 • AZERTY - EU Keyboard Configuration Figure 18 • QWERTZ - EU Keyboard Configuration ® Rev A 35/37 User’s Manual...
- Page 238 Appendix B - Character Mapping & Keyboard Layouts Figure 19 • CYRILLIC - EU Keyboard Configuration ® 35/37 User’s Manual Rev A...
Need help?
Do you have a question about the BBP 35 and is the answer not in the manual?
Questions and answers