Table of Contents
Advertisement
Quick Links
Advertisement
Table of Contents

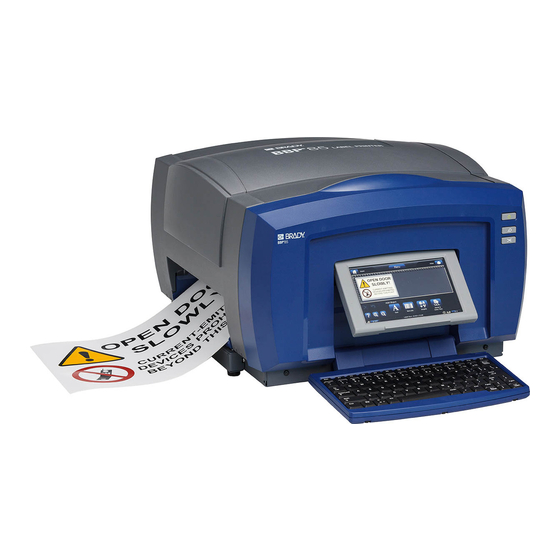
Related Manuals for Brady BBP 85


Summary of Contents for Brady BBP 85
- Page 1 Tutorial...
- Page 2 The lessons provide step-by-step instructions on how to achieve the desired results. Some lessons present multiple ways to accomplish a certain task. Note: All lessons assume that 4in. (101.5 mm) tape is installed in the printer. © 2012 Brady Corporation. All Rights Reserved. Y2113334 Revision A...
-
Page 3: Table Of Contents
Contents Contents Before Starting ..................1 Lesson 1: Creating a Simple Text Label ...........2 Enter Text ......................2 Change Font Size ....................2 Highlight Text ......................3 Format Text ......................3 Justify Text ......................3 Frame an Object ....................4 Set Label Fixed Length ..................4 Preview a Label .....................4 Clear a Label and Return Home ................4 Lesson 2: Adding Graphics to Labels ..........5 Lesson 3: Adding Serialization &... -
Page 4: Before Starting
Tutorial Before Starting Before starting, you should understand the sections of the display screen that will be used in these tutorials. The Home page automatically displays when you first start the printer. The sections of the Home page that you will be using for these lessons are: Item Icon Description... -
Page 5: Lesson 1: Creating A Simple Text Label
Lesson 1: Creating a Simple Text Label Lesson 1: Creating a Simple Text Label This lesson shows you how to create a simple label, adding formatting attributes and revising the label before printing. For more information on the techniques used in this lesson, see “Create Labels” on page 3-1 and “Printing Labels” on page 5-3 of the user’s manual. -
Page 6: Highlight Text
Lesson 1: Creating a Simple Text Label Highlight Text You can use the keyboard navigation keys [ ] to move the cursor around in a text box. You can also touch a word to highlight it. 1. Use [ ] to move the cursor to the beginning or end of the word Left. 2. -
Page 7: Frame An Object
Lesson 1: Creating a Simple Text Label Frame an Object 1. Touch More Options until you get to the Object Frame options. 2. In the Object Frame options, select Rounded . The framed object is immediately shown in the display. Set Label Fixed Length 1. -
Page 8: Lesson 2: Adding Graphics To Labels
Lesson 2: Adding Graphics to Labels Lesson 2: Adding Graphics to Labels 1. From the Home page, touch anywhere in the Editor. 2. Select Graphic . The box on the left shows the available graphic categories. As you touch a category, the available graphics for that category will display in the box on the right. - Page 9 Lesson 2: Adding Graphics to Labels To move objects on the label: There are three ways to move objects on a label: 1. Drag and Drop: a. Touch and hold the object. b. Drag the object to the desired location on the label. 2.
-
Page 10: Lesson 3: Adding Serialization & Barcode Data
Lesson 3: Adding Serialization & Barcode Data Lesson 3: Adding Serialization & Barcode Data In this lesson, you will learn how to apply text and barcode serialization to labels and redefine the sequence numbering. For more information on the techniques used in this lesson refer to “Converting Text or Barcode to Variable Data”... -
Page 11: Add Barcode Data
Lesson 3: Adding Serialization & Barcode Data Preview Text Serialization To preview all of your labels in the series. 1. With the serialized label in the Editor window, touch Print 2. Select Preview . Note the Label number indicates 1 of 10. 3. -
Page 12: Lesson 4: Using A Template To Create A Label
Lesson 4: Using a Template to Create a Label Lesson 4: Using a Template to Create a Label 1. From the Home page, select General Templates 2. In the Category field, touch With Sign Headers. 3. Select the 2 template (sign header on top, text and graphic below). 4. -
Page 13: Lesson 5: Saving And Opening A File
Lesson 5: Saving and Opening a File Lesson 5: Saving and Opening a File In this lesson, you will learn how to save labels as a file for use at a later date, open a saved label file and delete a label file. For more information on the techniques used in this lesson, refer to “Save a Label File”... -
Page 14: Lesson 6: Creating Pipe Markers
Lesson 6: Creating Pipe Markers Lesson 6: Creating Pipe Markers In this lesson, you will learn how to create, save, open and delete a standard pipe marker label. Note: To create a rollform or symbol/arrow pipe marker, see the user manual. To create a standard pipe marker: 1. - Page 15 Lesson 6: Creating Pipe Markers To save a pipe marker: 1. With the pipe marker displayed, select Menu 2. Select Save File 3. In the File name dialog, enter a file name for the pipe marker. 4. Select OK . The pipe marker is saved. To open an existing pipe marker: 1.
-
Page 16: Lesson 7: Creating Quicklabels
Lesson 7: Creating QuickLabels Lesson 7: Creating QuickLabels In this lesson, you will learn to create a QuickLabel by entering the label ID and by browsing to the label. Note: After creating the label, you can edit the objects by using the procedures from “Lesson 1: Creating a Simple Text Label”... -
Page 17: Lesson 8: Changing Objectcolors
Lesson 8: Changing Object Colors Lesson 8: Changing Object Colors This lesson shows you how to change the color of ribbon or media for text, barcodes and graphics. For more information on the techniques used in this lesson, see xxx in the user’s manual. Note: Whenever there is text that you should enter, the word is highlighted in Blue. - Page 18 © 2012 Brady Worldwide, Inc. All Rights Reserved.
Need help?
Do you have a question about the BBP 85 and is the answer not in the manual?
Questions and answers