Table of Contents
Advertisement
Advertisement
Table of Contents

Related Manuals for Magnum Ui5


Summary of Contents for Magnum Ui5
- Page 1 English PLEASE READ ME FIRST! USER GUIDE...
-
Page 2: Table Of Contents
Table of contents 1. Your E-Bike…………………………………………………………………..2—3 1.1 Introduction 1.2 General presentation of the vehicle 2. Function of Display…………………………………………………………4—8 2.1 Function summary 2.2 Full view area 2.3 Normal view area 2.4 Normal operation 3. Using the bike……………………………………………………………...9—12 3.1 Riding the bike 3.2 Quick-release devices 3.3 Adjusting the saddle height 3.4 Precautions required prior to each use... -
Page 3: Your E-Bike
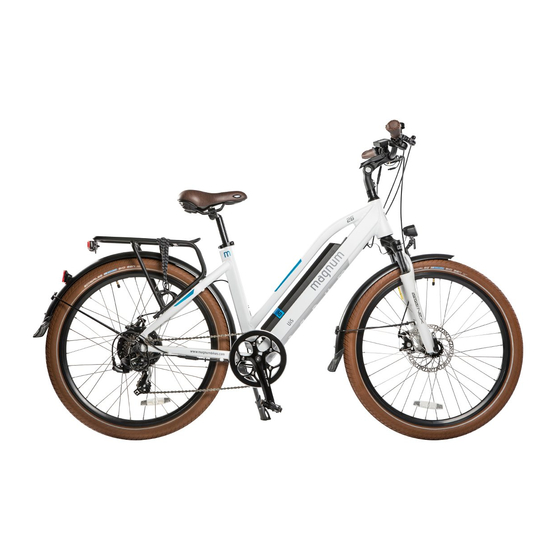
Your E-Bike 1.1 Introduction We would like to thank you for your purchase of a new Magnum e-Bike. The e-bike is equipped with pedals and an auxiliary electric motor. You will thoroughly enjoy riding this new and electrical power- assisted bike with an optional throttle propulsion. - Page 4 1.2.2 Parts specifications Spare parts name Motor Das-Kit, 36V 350W, Rear drive motor Battery 36V13AH SAMSUNG CELLS, with USB port Das-Kit, C4BT : LCD, 6 Levels, Error code Display report Front fork SUNTOUR, NEX E-Brake Lever ARTEK Disc Brake TEKTRO Disc Brake Derailleur SHIMANO ,Altus, 7 Speed Tires...
-
Page 5: Function Of Display
2. Function Display 2 .1 FUNCTION SUMMARY The indicated contents are as below. -
Page 6: Full View Area
2.2 FULL VIEW AREA 2.3 NORMAL VIEW AREA The normal viewing area of the C4BT LCD is shown below. Press SET to switch the displaying information. sequence →Riding Time→Riding Distance→Max Speed. 2.4 NORMAL OPERATION 1、ON/OFF Click ON/OFF and start the display. The display will provide power for the controller. Click ON/OFF again can open the backlight. - Page 7 3 、SPEED DISPLAY The current riding speed of the e-bike displays as below. 4、KM/H & MPH Select KM/H or MPH for the speed and mileage. The display will show the denomination in the selected units. 5、BACKLIGHT With the power on, click the ON/OFF to turn on the backlight. Click it again to turn off the backlight.
- Page 8 trip distance trip time max speed 8.3 Wheel diameter setting Press SET for 3 seconds, SET 2 to enter into wheel diameter setting. Select the accurate wheel diameter value to ensure the accuracy of display about speed and mileage. ※ Click UP or DOWN to set the wheel diameter. 8.4 Throttle speed setting Press SET for 15 seconds to enter into the throttle speed setting interface.
- Page 9 Trip distance records the driving mileage, it is displayed as below. 10、TRIP TIME INDICATOR The trip time records the riding time, displayed as below. 11、ERROR DISPLAY Press SET and DOWN in the case of not working to see all the error codes. The error codes are defined as follows: [0] Fault-Free [1] Current Abnormality...
-
Page 10: Using The Bike
3. Using the bike 3.1 Riding the bike Before taking off, make sure that you activate the battery by pressing on the button located on the side of battery. The 4 LEDs located on the top of the battery indicate the charge level. Turn on the display unit on the handlebar. -
Page 11: Adjusting The Saddle Height
3.3 Adjusting the Saddle Height to Suit the Rider 3.4 Precautions required prior to each use Verify that the brakes and the front & rear lights are all working properly. Also, check the pressure of the tires. On derailleur geared bicycles the rear derailleur automatically tensions the chain. Make sure that all hinges and levers on your bike are properly locked. -
Page 12: Lubrication
3.5 Lubrication Frequency Component Lubricant How to Lubricate Chain Chain Lube or Light Oil Brush On or Squirt Derailleur Pulleys Chain Lube or Light Oil Brush On or Squirt Weekly Derailleurs Oil Can Brake Calipers 3 drops from oil can Brake Levers 2 drops from oil can Monthly... -
Page 13: Service Checklist
3.6.2. Service checklist Frequency Task Before every ride Be sure batteries are fully charged Check tire pressure Check brake operation Check wheels for loose spokes After every ride Be sure to fully charge batteries Quick wipe down with damp cloth Weekly Lubrication as per schedule 3.7 Inspect wires... -
Page 14: Charging
To put the battery back into place, insert the battery along to the guide rail. Push it closely against the controller box. Click in place to fasten the battery lock. 4.2 Charging the battery Never let a battery be charged unattended. The battery’s voltage is indicated by the 4 LED lights located on the side of the battery, and also on the display unit located on the handlebar. -
Page 15: Battery Autonomy And Lifespan
4.3 Battery Autonomy and Lifespan 4.3.1 Autonomy The bike's autonomy ranges from 40 to 100 kilometers, depending on various factors (degree of assistance used, topology, rider’s weight, frequent stops/start-ups, hills, tire pressure, etc…) To increase the battery efficiency always begin riding while pedaling (using the throttle to start riding can decrease the riding range and eventually the battery life) 4.3.2 Battery Your bicycles battery is just like any household battery. -
Page 16: Safety Maintenance And Recommendations
Safety and maintenance Recommendations 5.1 Safety recommendations Helmet For safe riding, always wear a bicycle helmet. Tires Inspect the wear of your tires on a regular basis and verify the tire pressure at least once a month. Tire pressure: 40-65 PSI depending on the weight of the user. -
Page 17: Accessories
7. Warranty You are provided with a warranty for one year from the day you purchase your Magnum Bike. Details regarding your bike’s warranty coverage terms are available from your dealer and on our website: www.magnumbikes.com/warranty Have a safe and pleasant ride,... - Page 18 www.magnumbikes.com E-mail: info@magnumbikes.com Phone: (323) 375-2666...
Need help?
Do you have a question about the Ui5 and is the answer not in the manual?
Questions and answers