Table of Contents
Advertisement
Quick Links
Advertisement
Table of Contents

Subscribe to Our Youtube Channel
Related Manuals for Magnum Ui5


Summary of Contents for Magnum Ui5
- Page 1 English PLEASE READ ME FIRST! USER GUIDE...
-
Page 2: Table Of Contents
Table of contents 1. Your E-Bike…………………………………………………………………3—4 1.1 Introduction 1.2 General presentation of the vehicle 2. Function Display …………………………………………………………5—9 2.1 Function summary 2.2 Full view area 2.3 Normal view area 2.4 Normal operation 3. Using the bike……………………………………………………………9—12 3.1 Riding the bike 3.2 Quick-release devices 3.3 how to adjust the saddle height to suit the rider 3.4 Precautions required prior to each use... -
Page 3: Your E-Bike
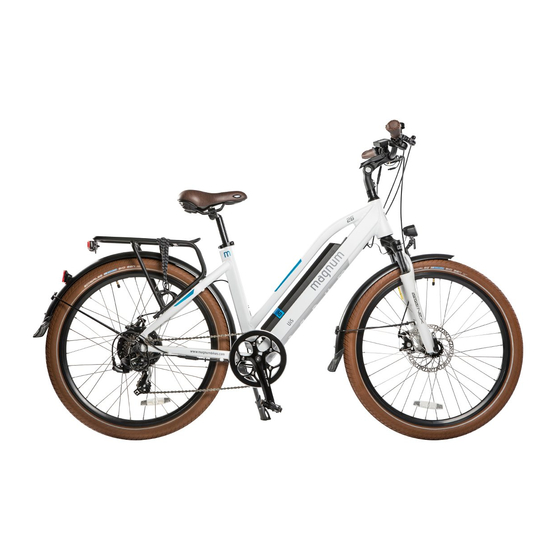
1.Your E-Bike 1.1 Introduction We would like to thank you for your e-bike purchasing. The e-bike, equipped with pedals and an auxiliary electric motor, cannot be propelled exclusively by means of this auxiliary electric motor. You will thoroughly enjoy riding this new and electrical power- assisted bike. - Page 4 1.2.2 Spare parts spec Spare parts name Motor Das-Kit, 36V250W, Rear drive motor Battery 36V13AH SAMSUNG CELLS, with USB port Display Das-Kit, C4B : LCD, 6 Levels, Error code report Front fork SUNTOUR, NEX E-Brake Lever ARTEK Disc Brake TEKTRO Disc Brake Derailleur SHIMANO ,Altus, 7 Speed Tires...
-
Page 5: Function Display
2. Function Display 2 .1 FUNCTION SUMMARY The indicated contents are as below. -
Page 6: Full View Area
2.2 FULL VIEW AREA 2.3 NORMAL VIEW AREA The normal viewing area of the C300 is shown below. Press SET to switch the displaying information. The order is: ODO →Riding Distance →Riding Time →Max Speed. 2.4 NORMAL OPERATION 1、ON/OFF Hold ON/OFF and start the display. The display will provide power for the controller. Hold ON/OFF again can open the backlight. - Page 7 3 、SPEED DISPLAY It displays the current riding speed of e-bike. The speed display is as below. 4、KM/H & MPH Select KM/H or MPH for the speed and mileage, display will be the currently selected units display. 5、BACKLIGHT INDICATOR With the power on, click the ON/OFF and turn on the backlight. Click it again and turn off the backlight.
- Page 8 ※ Click UP or DOWN to set the wheel diameter. 8.4 Throttle speed setting Hold UP and SET for 5 seconds to enter into the throttle speed setting interface. Click UP or DOWN to set the throttle speed limited or not, the limited throttle speed is 6km/h.
-
Page 9: Using The Bike
11、BATTERY INDICATOR When the battery capacity is high, the six battery segments are all light. When the battery is low, the battery frame will flash. It indicates that the battery is severely low and needs to be recharged immediately. Low battery flash 3. -
Page 10: Quick-Release Devices
3.2 Quick-release devices Tighten the adjusting nut by hand and move the quick release lever to the closed position. You should feel considerable resistance while moving the lever. If not, re- open and re-tighten the lever, then move it to the closed position so it is in line with the frame. -
Page 11: Precautions Required Prior To Each Use
3.4 Precautions required prior to each use Verify that the brakes and the front & rear lights are all working properly. Also, check the pressure of the tires. On derailleur geared bicycles the rear derailleur automatically tensions the chain. Make sure that the hinges on your bike are properly locked. Indeed, when using the bike on a regular basis, the tension of the hinges’... -
Page 12: Routine Maintenance
3.6 Routine maintenance 3.6.1.Recommended values of the nut torque. 22-27 Newton Meters Front Wheel Nuts 16.2- 19.8 ft.-lb. 24-29 Newton Meters Rear Wheel Nuts 17.5- 21.3 ft.-lb. 12- 17 Newton Meters Seat Binder Nut 8.8- 12.5 ft.-lb. 15- 19 Newton Meters 11.0-14.0 ft.-lb. -
Page 13: The Battery
4. The battery 4.1 Installing and removing thebattery To remove the battery, unfasten the lock which is located along the battery’s box. Remove the battery by pulling it out. To put the battery back into place, insert the battery along to the guide rail. Push it closely against the controller box. -
Page 14: Battery Safety Instructions
4.3.2 Battery Your battery is just like a household battery. It contains a limited amount of energy, which diminishes as it is being used. When the available autonomy no longer corresponds with your needs, you need to buy a new one from your dealer. 4.3.3 Maintenance If you don’t use your bike for a period of time exceeding 2 months, store it in a humidity-free area to protect the electronic components and make sure that the... -
Page 15: Maintenance
Wheel-rims Take care of any risk of damage in case of defective wheel-rims. Swap them immediately when the rim is worn out. Important: braking distance increases on humid or slippery ground Gears Like the chain, the freewheel must be kept clean and well lubricated. If the chain has become worn and need to be replaced, then it is likely that the freewheel will also have become worn and should also be replaced. -
Page 16: Accessories
Maintenance Make sure your bike is safe for the environment. Used parts must be disposed of in appropriate selective sorting recycling bins. A battery which no longer works must be returned to your dealer so that he may pass it to a recycling company. Replacing the rear light batteries: remove the screw to access the batteries. - Page 17 www.magnumbikes.com E-mail: info@magnumbikes.com Phone: (323) 375-2666...
Need help?
Do you have a question about the Ui5 and is the answer not in the manual?
Questions and answers