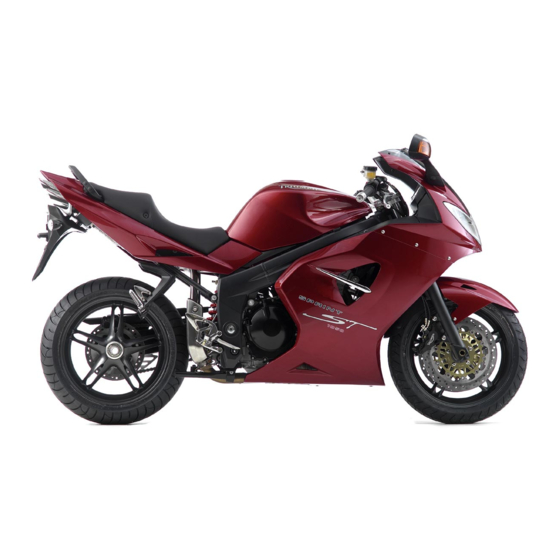
Triumph Sprint ST Owner's Handbook Manual
Hide thumbs
Also See for Sprint ST:
- Handbook (116 pages) ,
- Owner's handbook manual (126 pages) ,
- Service manual (411 pages)
Table of Contents
Advertisement
Quick Links
FOREWORD
This handbook contains information on the Triumph Sprint ST and Sprint GT motorcycles.
Always store this owner's handbook with the motorcycle and refer to it for information
whenever necessary.
Warnings, Cautions and
Notes
Throughout
this
owner's
particularly
important
information
presented in the following form:
Warning
This warning symbol identifies special
instructions or procedures, which, if not
correctly followed, could result in personal
injury, or loss of life.
handbook
This caution symbol identifies special
is
instructions or procedures, which, if not
strictly observed, could result in damage to,
or destruction of, equipment.
Note:
•
This note symbol indicates points
of particular interest for more
efficient and convenient operation.
Foreword
Caution
1
Advertisement
Chapters
Table of Contents

Subscribe to Our Youtube Channel
Related Manuals for Triumph Sprint ST


Summary of Contents for Triumph Sprint ST
- Page 1 Foreword FOREWORD This handbook contains information on the Triumph Sprint ST and Sprint GT motorcycles. Always store this owner's handbook with the motorcycle and refer to it for information whenever necessary. Warnings, Cautions and Notes Caution Throughout this owner's handbook...
-
Page 2: Foreword
Maintenance To ensure a long, safe and trouble free life for your motorcycle, maintenance should only be carried out by an authorized Triumph dealer. Only an authorized Triumph dealer will have the necessary knowledge, equipment and skills to maintain your Triumph motorcycle correctly. - Page 3 800-447-4700, or by writing to the Our relationship with you does not end with Motorcycle Safety Foundation at: 2, Jenner the purchase of your Triumph. Your feedback Street, Irvine, California 92718. To ensure a on the buying and ownership experience is...
-
Page 4: Table Of Contents
Information The information contained in this publication is based on the latest information available at the time of printing. Triumph reserves the right to make changes at any time without prior notice, or obligation. Not to be reproduced wholly or in part without the written permission of Triumph Motorcycles America Limited. -
Page 5: The Motorcycle
Sprint ST - 473 lbs (215 kg); within a short time. Always operate your Sprint GT - 473 lbs (215 kg). - Page 6 Foreword - Safety First Riding Warning Warning This Triumph motorcycle should operated within the legal speed limits for Never ride the motorcycle when fatigued the particular road travelled. Operating a or under the influence of alcohol or other motorcycle high speeds drugs.
- Page 7 Caution Your solution to both situations is the same. Keep a firm hold on the handlebars without This Triumph motorcycle is not fitted with locking arms or fighting the steering. spark arresters. Operation in forests, brush Smoothly ease off the throttle to slow or grass areas may violate state and local gradually.
- Page 8 Foreword - Safety First Helmet and Clothing Warning Warning A helmet is one of the most important pieces of riding gear as it offers protection When riding the motorcycle, both rider against head injuries. You and your and passenger must always wear a passenger's helmet should be carefully motorcycle helmet, eye protection, gloves, chosen and should fit you or your...
- Page 9 Foreword - Safety First Handlebars and Footrests Parking Warning Warning The rider must maintain control of the Always turn off the engine and remove the vehicle keeping hands ignition key before leaving the motorcycle handlebars at all times. unattended. By removing the key, the risk of use of the motorcycle by unauthorized The handling and stability of a motorcycle or untrained persons is reduced.
- Page 10 The maximum bank angle wear limits are: • Sprint ST - 0.2 in (5 mm) Triumph does not accept any liability remaining; whatsoever for defects caused by the •...
- Page 11 Triumph dealer for inspection motorcycle's lights, mufflers, emission or and repair. Any accident can cause noise control systems can violate the law.
-
Page 12: Warning Labels
Warning Labels WARNING LABELS The labels detailed on this and the following pages draw your attention to important safety information in this handbook. Before riding, ensure that all riders have understood and complied with all the information to which these labels relate. Warning Label Locations Windshield Breaking-In... - Page 13 Warning Labels WARNING LABELS Warning Label Locations (continued) Daily Safety Checks Unleaded Fuel (page 50) (page 36) Helmet (page 8) ccou Coolant Engine Oil Fairing Stowage (page 79) (page 75) (page 67)
-
Page 14: Parts Identification
Parts Identification PARTS IDENTIFICATION Sprint ST ccmq 1. Headlight 9. Front brake disc 2. Position lamp 10.Front brake caliper 3. Front turn signal 11. Oil cooler 4. Coolant expansion tank 12.Side stand 5. Radiator/Coolant pressure cap 13.Gear-shift pedal 6. Fuel filler cap 14.Drive chain... - Page 15 Parts Identification PARTS IDENTIFICATION Sprint ST ccmp 17. Rear brake fluid reservoir 22.Rear brake disc 18.Battery 23.Rear brake caliper 19.Rear suspension unit 24.Rear brake pedal 20.Tool kit 25.Oil filler cap/Dipstick 21. Front fork 26.Clutch cable...
- Page 16 Parts Identification PARTS IDENTIFICATION Sprint GT cgdx 1. Headlight 9. Front brake disc 2. Position lamp 10.Front brake caliper 3. Front turn signal 11. Oil cooler 4. Coolant expansion tank 12.Side stand 5. Radiator/Coolant pressure cap 13.Gear-shift pedal 6. Fuel filler cap 14.Drive chain 7.
- Page 17 Parts Identification PARTS IDENTIFICATION Sprint GT cgdw ccmp 17. Rear brake fluid reservoir 23.Rear brake disc 18.Battery 24.Rear brake caliper 19.Rear suspension unit 25.Rear brake pedal 20.Tool kit 26.Oil filler cap/Dipstick 21. Front fork 27.Clutch cable 22.Muffler...
- Page 18 Parts Identification Parts Identification (continued) - Sprint ST and GT 1. Clutch lever 9. Front brake fluid reservoir 2. Passing button 10.Engine stop switch 3. Clutch lever adjuster 11. Brake lever adjuster 4. Headlight dimmer switch 12.Front brake lever 5. Speedometer 13.Horn button...
-
Page 19: Serial Numbers
Serial Numbers SERIAL NUMBERS Vehicle Identification Engine Serial Number Number (VIN) ccmy The engine serial number is stamped on the engine crankcase, immediately above the The vehicle identification number is stamped clutch cover. into the steering head area of the frame. In Record the engine serial number in the space addition, it is displayed on a label which is provided below. - Page 20 Serial Numbers This page intentionally left blank...
-
Page 21: General Information
General Information GENERAL INFORMATION Table of Contents Instrument Panel Layout............21 Speedometer . - Page 22 Helmet Hooks - Sprint GT ........... . . 41 Triumph Accessory D-lock Storage - Sprint GT models only ......41 Pannier System - Sprint GT .
-
Page 23: Instrument Panel Layout
General Information Instrument Panel Layout km/h 10 12 ccmk (Sprint ST shown, Sprint GT similar) 1. Tachometer 11. Engine management malfunction 2. Tachometer 'red zone' indicator light 3. Speedometer 12.ABS warning light (ABS models only) 4. Odometer/Trip meters 13.Low fuel level indicator light 5. -
Page 24: Speedometer
General Information Speedometer The odometer shows the total distance that the motorcycle has travelled. The speedometer indicates the road speed of The odometer and two trip meters are the motorcycle. located in the same LCD display as the clock and trip computer. Either trip meter shows Tachometer the distance that the motorcycle has travelled The tachometer shows the engine speed in... -
Page 25: Clock/Trip Computer
General Information Clock/Trip Computer Range This is an indication of the probable distance that can be travelled on the remaining fuel in the tank. Trip Distance The total distance travelled, since the last reset. km/h Trip Time The total time elapsed, since the last reset. Average Speed The average speed is calculated from when ccnl... -
Page 26: Trip Computer Reset
General Information Trip Computer Reset To reset the trip computer select the desired display, press the 'scroll' and 'set' buttons simultaneously seconds. After 2 seconds, the selected display will reset. Note: • Trip distance, trip time average speed are reset at the same time. -
Page 27: Coolant Temperature Gauge
General Information After a short time, the clock's hour display will Coolant Temperature Gauge start to flash. To reset the hour display, ensure that the hour display is still flashing then depress the 'scroll' button to change the setting. Each individual press will change the setting by one digit. -
Page 28: Fuel Gauge
General Information Fuel Gauge Caution Do not continue to run the engine if either of the high temperature warnings are displayed as severe engine damage may result. ccni 1. Fuel gauge The fuel gauge indicates the amount of fuel in the tank. With the ignition switched on, the number of bars shown in the display indicates the level of fuel in the tank. -
Page 29: Warning Lights
General Information Warning Lights Caution Turn Signals Stop the engine immediately if the low oil When the turn signal switch is pressure warning light illuminates. Do not pushed to the left or right, the restart the engine until the fault has been corresponding turn signal light rectified. -
Page 30: Engine Management System Malfunction Indicator Light
Reduced engine performance could cause a dangerous riding condition, leading to loss of control and an accident. Contact an authorized Triumph dealer as soon as possible to have the fault checked and rectified. -
Page 31: Abs (Anti-Lock Brake System) Indicator Light - Sprint Gt Only
In this situation, braking too hard number, and a spare key blade for use with will cause the wheels to lock resulting in Triumph accessory alarm. Make a note of the loss of control and an accident. key number and store the spare key, key blade and key number tag in a safe place See also Braking on page 57. -
Page 32: Ignition Switch/Steering Lock
General Information Note: Ignition Switch/Steering Lock • On Sprint ST models, three unused locks supplied with motorcycle. These are for use with the optional accessory panniers and top box and will ensure that, when fitted, the same key will operate all the locks on the motorcycle. -
Page 33: Brake And Clutch Lever Adjusters
General Information Note: Brake and Clutch Lever Adjusters • Do not leave the steering lock in the P position for long periods of time as this will cause the battery to discharge. Warning For reasons of security and safety, always move the ignition switch to the OFF position and remove the key when leaving the motorcycle unattended. -
Page 34: Right Handlebar Switches
General Information Right Handlebar Switches Warning Do not attempt to adjust the levers with the motorcycle in motion as this may lead to loss of motorcycle control and an accident. After adjusting the levers, operate the motorcycle in an area free from traffic to gain familiarity with the new lever setting. -
Page 35: Starter Button
General Information Left Handlebar Switches Caution Do not leave the ignition switch in the ON position unless the engine is running as this may cause damage to electrical components and will discharge the battery. Starter Button The starter button operates the electric starter. -
Page 36: Turn Signal Switch
When the horn button is pushed, with the ignition switch turned to the ON position, the This Triumph motorcycle is designed to run horn will sound. on unleaded gasoline with a CLC or AKI octane rating (R+M)/2 of 89 or higher. - Page 37 Warning gasoline and another compound such as To help reduce hazards associated with alcohol. This Triumph motorcycle will give its refuelling, always observe the following best performance when using unleaded fuel safety instructions: gasoline. However, the following should be...
-
Page 38: Fuel Tank Cap
General Information Fuel Tank Cap Filling the Fuel Tank Avoid filling the tank in rainy or dusty conditions where airborne material can contaminate the fuel. Caution Contaminated fuel may cause damage to fuel system components. Fill the fuel tank slowly to help prevent spillage. -
Page 39: Stands
General Information Stands Warning Side Stand Overfilling the tank can lead to fuel spillage. If fuel is spilled, thoroughly clean up the spillage immediately and dispose of the materials used safely. Take care not to spill any fuel on the engine, exhaust pipes, tires or any other part of the motorcycle. -
Page 40: Center Stand
1. Center stand 2. Lifting handle (Sprint ST shown, Sprint GT similar) To set the motorcycle up on the center stand, step down firmly on the foot-finder part of... -
Page 41: Tool Kit And Handbook
General Information Tool Kit and Handbook Seat - Sprint ST ccpm ccxg 1. Tool kit/Handbook location (Sprint ST 1. Seat fasteners shown) Two seat fasteners are located under the rear The tool kit and handbook are located in a edge of the seat. To remove the seat, push... -
Page 42: Seat - Sprint Gt
General Information Seat - Sprint GT Seat Care To prevent damage to the seat or seat cover, care must be taken not to drop or lean the seat against any surface which may damage the seat or seat cover. Caution To prevent damage to the seat or seat cover, care must be taken not to drop the seat. -
Page 43: Helmet Hooks - Sprint Gt
Space is provided under the seat to store a Triumph accessory D-lock (available from your Triumph dealer). Secure the lock as follows: Thread the strap through the rear fender lock support from the rear, so that the buckle faces towards the rear of the motorcycle. -
Page 44: Pannier System - Sprint Gt
General Information Pannier System - Sprint GT Insert the key into the lock. Turn the key to the RELEASE position and lift the carrying handle to its fully raised position. To install each pannier: Note: • same procedure followed to remove and mount the left hand right... - Page 45 General Information Ensure that the lower mounting bracket fits To remove each pannier: into the locating cup moulded into the front Note: of the pannier. • same procedure followed to remove and mount the left hand right hand panniers. cgds 1.
-
Page 46: Pannier Operation
General Information Pannier Operation Caution The pannier lid has two latch positions; the first latch position acts as a safety catch. Always ensure the pannier lid is fully closed on to the second latch position, as the pannier will not fully seal on the first latch position. - Page 47 • Sprint ST - 473 lbs (215 kg); • Sprint GT - 473 lbs (215 kg). This maximum loading weight is made up from the combined weight of the rider, passenger, any accessories fitted and any load carried.
-
Page 48: Electrical Accessory Socket
This motorcycle must not be operated above the legal road speed limit except in authorized closed-course conditions. Warning Only operate this Triumph motorcycle at high speed in closed-course on-road competition or on closed-course racetracks. High-speed operation should only be attempted by riders who have been... -
Page 49: Breaking-In
General Information Breaking-In From 1000 miles (800 1500 kilometers): • Engine speed can gradually be increased to the rev limit for short periods. R.P.M. Both during and after running-in has been Breaking-in is the name given to the process completed: that occurs during the first hours of a new •... -
Page 50: Safe Operation
Inspect all areas for loose/damaged Adjustment section or see your authorized fasteners. Triumph dealer for the action required to Steering Action: Smooth but not loose from return the motorcycle to a safe operating lock to lock. No binding of any of the control condition. - Page 51 General Information On models equipped with ABS: Ensure Clutch: Smooth operation and correct cable that the ABS warning light does not remain free play (page 84). illuminated at speeds above 6 mph (10 km/h) Coolant: No coolant leakage. Check the when moving off (page 57).
- Page 52 General Information This page intentionally left blank...
- Page 53 How to Ride the Motorcycle HOW TO RIDE THE MOTORCYCLE Table of Contents To Stop the Engine ............50 To Start the Engine .
-
Page 54: How To Ride The Motorcycle
How to Ride the Motorcycle To Stop the Engine ccpb To Start the Engine 1. Engine stop switch 2. Starter button Check that the engine stop switch is in the 3. Neutral indicator light RUN position. 4. ON position Ensure the transmission is in neutral. 5. -
Page 55: Moving Off
How to Ride the Motorcycle Pull the clutch lever fully into the handlebar. • The motorcycle is equipped with starter lockout switches. The switches Leaving the throttle fully closed, push the prevent the electric starter from starter button until the engine starts. operating when the transmission is not in neutral with the side stand Warning... -
Page 56: Shifting Gears
How to Ride the Motorcycle Shifting Gears Note: • The gear shift mechanism is the 'positive stop' type. This means that, for each movement of the gear shift pedal, you can only select each gear, one after the other, in ascending or descending order. -
Page 57: Braking
Triumph strongly recommends that all riders When stopping, always apply both brakes take a course of instruction, which includes at the same time. Normally the front brake advice on safe brake operation. - Page 58 How to Ride the Motorcycle Warning Warning For your safety, always exercise extreme When descending a long, steep gradient, caution when braking, (whether or not use engine braking by down shifting and ABS is fitted), accelerating or turning as use the brakes intermittently. Continuous any improper action can cause loss of brake application can overheat the brakes control and an accident.
-
Page 59: Abs (Anti-Lock Brake System) - Sprint Gt Only
Do not continue to ride for longer than is necessary with the indicator light illuminated. Contact an authorized Triumph dealer as soon as possible to have the fault checked and rectified. In this situation, braking too hard will cause the wheels to lock resulting in loss of control and an accident. -
Page 60: Parking
How to Ride the Motorcycle Parking Warning The ABS warning light will illuminate when the rear wheel is driven at high speed for more than seconds when motorcycle is on a stand. This reaction is normal. When the ignition is switched off and the motorcycle is re-started, the warning light will illuminate until the motorcycle reaches a speed exceeding 19 mph (30 km/h). - Page 61 How to Ride the Motorcycle Note: • When parking near traffic at night, Warning or when parking in a location The engine and exhaust system will be hot where parking lights are required after riding. park where by law, leave the tail, license plate pedestrians and children are likely to touch and position lights on by turning the motorcycle.
-
Page 62: Considerations For High-Speed Operation
A problem, which may not be noticed at normal Warning operating speeds, greatly Only operate this Triumph motorcycle at exaggerated at high speeds. high speed in closed-course on-road competition or on closed-course racetracks. General High-speed operation should only then be... -
Page 63: Brakes
How to Ride the Motorcycle Brakes Engine Oil Check that the front and rear brakes are Make certain that the engine oil level is functioning properly. correct. Ensure that the correct grade and type of oil is used when topping off. On models equipped with ABS, check that the system is functioning by ensuring that the Coolant... - Page 64 How to Ride the Motorcycle This page intentionally left blank...
- Page 65 Never exceed the maximum vehicle loading weight of: • Sprint ST - 473 lbs (215 kg); • Sprint GT - 473 lbs (215 kg). This maximum loading weight is made up from the combined weight of the rider, passenger, any accessories fitted and any load carried.
- Page 66 Warning Never ride accessory equipped Only operate this Triumph motorcycle at motorcycle, or a motorcycle carrying a high speed in closed-course on-road payload of any kind, at speeds above competition or on closed-course racetracks. 80 mph (130 km/h). In either/both of...
- Page 67 Accessories and Loading Warning Warning Do not carry animals on your motorcycle. Never attempt to store any items between the frame and the fuel tank. This can An animal could make sudden and restrict the steering and will cause loss of unpredictable movements that could lead control leading to an accident.
- Page 68 Caution Warning If the passenger seat or rack (rack on Sprint ST only: Do not allow luggage to Sprint GT models) are used to carry small rest on or against the upper portion of the objects, they must not exceed a total rear bodywork.
- Page 69 Maintenance and Adjustment MAINTENANCE AND ADJUSTMENT Table of Contents Scheduled Maintenance............68 Engine Oil .
- Page 70 Spring Pre-Load Adjustment - Sprint ST ........
-
Page 71: Maintenance And Adjustment
Maintenance and Adjustment Main Beam Bulb Replacement ..........108 Position Lamp Bulb Replacement . -
Page 72: Scheduled Maintenance
Triumph dealer maintenance chart. Only an authorized carry out the scheduled maintenance of Triumph dealer will have this knowledge this motorcycle. - Page 73 • • Valve clearances - check/adjust • • • • Air cleaner - change Autoscan - carry out a full Autoscan using the Triumph diagnostic • • • tool Engine ECM - check for stored DTCs • • ABS ECM - check for stored DTCs •...
- Page 74 Maintenance and Adjustment Operation Description Odometer Reading in Miles (Kms) or Time Period, whichever comes first First A Service B Service C Service D Service Service Every 6,000 12,000 18,000 24,000 (800) (10,000) (20,000) (30,000) (40,000) 1 month 1 year 2 years 3 years 4 years...
-
Page 75: Engine Oil
Maintenance and Adjustment Engine Oil Oil Level Inspection cbnz In order for the engine, transmission, and clutch to function correctly, maintain the engine oil at the correct level, and change the oil and oil filter in accordance with scheduled maintenance requirements. Warning Motorcycle operation with insufficient, deteriorated, or contaminated engine oil... - Page 76 Maintenance and Adjustment Start the engine and run at idle for approximately five minutes. Warning Stop the engine and wait for three minutes to Never start the engine or run the engine in allow the oil to settle. a confined area. Exhaust fumes are With the motorcycle upright, remove the filler poisonous cause...
-
Page 77: Oil And Oil Filter Change
Contact with hot oil may cause the skin to be scalded or burned. Unscrew and remove the oil filter using Triumph service tool T3880313. Dispose of the old filter in an environmentally friendly way. After the oil has completely drained out, ccog install a new sealing washer to the drain plug. -
Page 78: Oil Specification And Grade
Maintenance and Adjustment Oil Specification and Grade Caution Triumph high performance fuel injected engines are designed to use 10 W/40 or If the engine oil pressure is too low, the low 15 W/50 semi or fully synthetic motorcycle oil pressure warning light will illuminate. If... -
Page 79: Cooling System
• HD4X Hybrid OAT coolant, as cooling system when supplied by Triumph, is pre-mixed motorcycle leaves the factory. It is and does not need to be diluted colored green, contains a 50% prior to filling or topping off the solution of ethylene glycol based cooling system. -
Page 80: Coolant Level Inspection
Maintenance and Adjustment Coolant Level Inspection Coolant Level Adjustment ccno ccob 1. Expansion tank 1. Upper infill panel 2. MAX mark 2. Lower infill panel 3. MIN mark 3. Expansion tank 4. Tank cap Position the motorcycle on level ground and in an upright position. -
Page 81: Coolant Change
Tighten the fasteners to 44 lb in (5 Nm). Coolant Change Have the coolant changed by an authorized Triumph dealer in accordance with scheduled maintenance requirements. -
Page 82: Throttle Control
Warning Always be alert for changes in the 'feel' of the throttle and have the throttle system checked by an authorized Triumph dealer if any changes are detected. Changes can be due to wear in the mechanism, which could lead to a sticking throttle. -
Page 83: Adjustment
Release the locknut on the 'opening' cable Ride carefully to your nearest authorized adjuster. Triumph dealer and have them check the Rotate the 'opening' cable adjuster at the throttle system thoroughly before riding twist grip end such that it has an equal again. -
Page 84: Clutch
Maintenance and Adjustment Clutch Inspection Check that there is 0.08 - 0. 1 2 in (2 - 3 mm) clutch lever free play at the lever. If there is an incorrect amount of free play, adjustments must be made. Adjustment Loosen the knurled locknut at the lever end of the clutch cable and turn the adjuster sleeve until the correct amount of clutch lever... -
Page 85: Drive Chain
Therefore, always replace worn or damaged chains using genuine Triumph parts supplied Caution by an authorized Triumph dealer. Do not use a pressure wash to clean the... -
Page 86: Chain Free-Movement Inspection
This impaired Model Specification stability and handling may lead to loss of control or an accident. Sprint ST 1.00 - 1.38 in (25 - 35 mm) Check the rear brake effectiveness. Sprint GT 1.02 - 1.50 in (26 - 38 mm) -
Page 87: Chain And Sprocket Wear Inspection
Remove the chain guards. Use a genuine Triumph supplied chain as Stretch the chain taut by hanging a specified in the Triumph parts catalogue. 20 - 40 lb (10 - 20 kg) weight on the chain. -
Page 88: Brakes
Maintenance and Adjustment Brakes Caution Brake Wear Inspection If the sprockets are found to be worn, always replace the sprockets and drive chain together. Replacing worn sprockets without also replacing the chain will lead to premature wear of the new sprockets. cbmz 1. -
Page 89: Breaking-In New Brake Pads And Discs
It is dangerous to operate the motorcycle Warning under such conditions and your authorized Triumph dealer must rectify the fault Brake pads must always be replaced as a before riding. wheel set. At the front, where two calipers... -
Page 90: Disc Brake Fluid
Reduce speed and do not continue to ride for longer than is necessary with the indicator light illuminated. Contact an Warning authorized Triumph dealer as soon as possible to have the fault checked and Brake fluid is hygroscopic which means it rectified. -
Page 91: Brake Fluid Level Inspection And Adjustment
(reservoir held horizontal). reservoir, consult your authorized Triumph Front Brake dealer for advice before riding. Riding with depleted brake fluid levels, or with a brake... - Page 92 Maintenance and Adjustment Rear Brake - Sprint ST Level Adjustment Remove the seat. Disconnect the battery, negative (black) lead first. The starter solenoid and main fuse are attached to a rubber mounting. This mounting fits over the rear brake fluid reservoir filler cap.
-
Page 93: Brake Light Switches
ON position, the brake light does not work when the front brake lever is pulled or the rear brake pedal is pressed, have your authorized Triumph dealer investigate and rectify the fault. Warning Riding the motorcycle with defective brake lights is illegal and dangerous. -
Page 94: Steering/Wheel Bearings
If any free play can be detected in the steering (steering head) bearings, ask your authorized Triumph dealer to inspect and rectify any faults before riding. Warning Steering Inspection... -
Page 95: Wheel Bearings Inspection
Examine each fork for any sign of damage, your authorized Triumph dealer inspect the scratching of the slider surface, or for oil wheel bearings. -
Page 96: Suspension Setting Chart
See the following pages for instructions on how to Warning adjust your suspension. Sprint ST Ensure that the correct balance between front and rear suspension is maintained. LOADING FRONT REAR Suspension imbalance could significantly... -
Page 97: Spring Pre-Load Adjustment
Maintenance and Adjustment Spring Pre-Load Adjustment Rear Suspension Adjustment The rear suspension unit is adjustable for rebound damping and spring pre-load. Rebound Damping Adjustment ccpd 1. Spring pre-load adjuster To change the spring pre-load, rotate the adjuster clockwise to increase pre-load, or ceyq counter-clockwise decrease... -
Page 98: Spring Pre-Load Adjustment - Sprint St
Maintenance and Adjustment Spring Pre-Load Adjustment - Spring Pre-Load Adjustment - Sprint GT Sprint ST ccnt cgdq 1. Spring pre-load adjuster 1. Spring pre-load adjuster The spring pre-load adjuster is situated on The spring pre-load adjuster is situated on the right hand side of the motorcycle, above the left hand side of the motorcycle, at the the swinging arm. -
Page 99: Tires
Maintenance and Adjustment Tires Tire Inflation Pressures Correct inflation pressure will provide maximum stability, rider comfort and tire life. Always check tire pressures before riding when the tires are cold. Check tire pressures daily and adjust if necessary. See the cboa Specification section for details of the correct inflation pressures. -
Page 100: Tire Wear
As the tire tread wears down, the tire Warning becomes more susceptible to punctures and Only operate this Triumph motorcycle at failure. It is estimated that 90% of all tire high speed in closed-course on-road problems occur during the last 10% of tread competition or on closed-course racetracks. -
Page 101: Tire Replacement
Use of non-recommended tires can affect Triumph dealer to inspect the tire both wheel speed and cause the ABS function internally and externally. Remember, tire not to operate, potentially leading to loss of... - Page 102 Warning When replacement tires are required, Tires that have been used on a rolling road consult your authorized Triumph dealer dynamometer may become damaged. In who will arrange for the tires to be some cases, the damage may not be visible selected, in a correct combination, from the on the external surface of the tire.
-
Page 103: Battery
Maintenance and Adjustment Battery Battery Removal Sprint ST Warning Under some circumstances, the battery can give off explosive gases; keep sparks, flames cigarettes away. Provide adequate ventilation when charging or using the battery in an enclosed space. The battery contains sulfuric acid (battery acid). -
Page 104: Battery Disposal
Maintenance and Adjustment Remove the seat. Battery Maintenance Remove the battery strap. Clean the battery using a clean, dry cloth. Be sure that the cable connections are clean. Disconnect the battery leads, negative (black) lead first. Take the battery out of the case. Warning The battery acid is corrosive and poisonous Warning... -
Page 105: Battery Discharge During Storage And Infrequent Use Of The Motorcycle
Should the battery Voltage fall below Keeping the battery fully charged reduces the 12.7 Volts, the battery should be charged likelihood of it freezing in cold conditions. using a Triumph approved battery charger. Allowing a battery to freeze will cause serious Always remove... -
Page 106: Battery Installation
Sprint ST the motorcycle and kept charged using a Triumph approved maintenance charger. Similarly, should the battery charge fall to a level where it will not start the motorcycle, remove the battery from the motorcycle before charging. -
Page 107: Fuse Identification - Sprint St
Maintenance and Adjustment Sprint GT Fuse Identification - Sprint ST The fuses can be identified by a number moulded into the fusebox housing, adjacent to each fuse, as shown below. These numbers correspond to the numbers given in the table below. -
Page 108: Fuse Identification - Sprint Gt
Maintenance and Adjustment Fuse Identification - Sprint GT The fuse identification numbers listed in the tables correspond with those printed on the fuse box cover, as shown. Spare fuses are located at right angles to the main fuses and should be replaced if used. A blown fuse is indicated when all of the systems protected by that fuse become inoperative. -
Page 109: Headlights
Maintenance and Adjustment Headlights Warning Adjust road speed to suit the visibility and weather conditions in which the motorcycle is being operated. Ensure that the beams are adjusted to EMPTY illuminate the road surface sufficiently far OPEN ahead without blinding oncoming traffic. An incorrectly adjusted headlight may impair visibility causing an accident. -
Page 110: Headlight Adjustment
Maintenance and Adjustment Headlight Adjustment Main Beam Horizontal Adjustment Each headlight can be adjusted by means of The main beam horizontal adjustment screw vertical and horizontal adjustment screws is accessible without removing any panels. It located on the top and rear of each headlight. can be reached from below the lights. -
Page 111: Dipped Headlight Vertical Adjustment
Maintenance and Adjustment Turn the vertical adjustment screw clockwise Dimmed Headlight Horizontal to raise the beam or counter-clockwise to Adjustment lower the beam. Switch the headlights off when the beam setting is satisfactory. Re-install the cover panel and windshield. Dimmed Headlight Vertical Adjustment The dimmed headlight vertical adjustment screws are accessible without removing any... -
Page 112: Dipped Headlight Bulb Replacement
Maintenance and Adjustment Re-install the cover and filler panels. Installation is the reverse of the removal procedure. Dipped Headlight Bulb Main Beam Bulb Replacement Replacement It is necessary to remove the cockpit and the It is not necessary to remove the dipped complete headlight unit... -
Page 113: Position Lamp Bulb Replacement
If the glass is touched or of failure of the LED unit, consult your gets dirty, clean with alcohol before re-use. authorized Triumph dealer. An accident causing injury to the rider and Position Lamp Bulb Replacement... -
Page 114: Turn Signal Lights
Maintenance and Adjustment Turn Signal Lights Rear Turn Signal Bulb Replacement Front Turn Signal Bulb Replacement ccoa ccnz 1. Turn signal lens 2. Lens screw 1. Mirror glass The lens on each turn signal light is held in 2. Securing screws place by a screw located in the body of the 3. -
Page 115: License Plate Light
Maintenance and Adjustment License Plate Light Windshield Cleaning Bulb Replacement Carefully remove the rubber bulb holder from the back of the license plate light unit and remove the bulb. Clean the windshield with a solution of mild soap or detergent and lukewarm water. After Caution cleaning, rinse well and then dry with a soft, lint free cloth. -
Page 116: Cleaning
Maintenance and Adjustment Cleaning Warning Frequent, regular cleaning is an essential part of the maintenance of your motorcycle. If Never attempt to clean the windshield regularly cleaned, the appearance will be while the motorcycle is in motion as preserved for many years. Cleaning with cold releasing the handlebars may cause loss of water containing an automotive cleaner is vehicle control and an accident. -
Page 117: Where To Be Careful
Maintenance and Adjustment Where to be Careful After Washing Avoid spraying water with any great force Remove the plastic bags and tape, and clear near the following places: the air intakes. • Instruments; Lubricate the pivots, bolts and nuts. • Brake cylinders and brake calipers;... -
Page 118: Unpainted Aluminum Items
Maintenance and Adjustment Unpainted Aluminum Items Drying Items such as brake and clutch levers must Dry the exhaust system as far as possible with be correctly cleaned to preserve their a soft cloth. Do not run the engine to dry the appearance. -
Page 119: Preparation For Storage
Storage STORAGE Preparation for Storage Spray rust inhibiting oil (there are a host of products on the market and your dealer will Clean the entire vehicle thoroughly. be able to offer you local advice) on all Fill the fuel tank with the correct grade of unpainted metal surfaces to prevent rusting. - Page 120 Storage Preparation after Storage Crank the engine on the starter motor several times until the oil pressure light goes out. Install battery removed) (see Replace the spark plugs, tightening to page 106). 9 lbf ft (12 Nm), and start the engine. If the motorcycle has been stored for more Check and if necessary correct the tire than four months, change the engine oil (see...
- Page 121 Specifications SPECIFICATIONS Sprint ST Sprint GT Dimensions Overall Length 83.2 in (2, 1 14 mm) 88.9 in (2,260 mm) Overall Width 29.3 in (745 mm) 37 in (940 mm) Overall Height: 47.8 in (1,215 mm) 47.6 in (1,210 mm) Wheelbase 57.4 in (1,457 mm)
- Page 122 80 ft.lbf (108 Nm) at 6,300 Lubrication Type Forced Lubrication Forced Lubrication (Wet sump) (Wet sump) Cooling Coolant Type Triumph HD4X Hybrid OAT Triumph HD4X Hybrid OAT coolant coolant Water/Anti-freeze ratio 50/50 (pre-mixed as 50/50 (pre-mixed as supplied by Triumph) supplied by Triumph) Coolant Capacity 0.60 US gal (2.3 liters)
-
Page 123: Specifications
Specifications Sprint ST Sprint GT Ignition Ignition System Digital Inductive Digital Inductive Electronic Rev Limiter (r/min) 9,500 (r/min) 9,500 (r/min) Spark Plug NGK CR9EK NGK CR9EK Spark Plug Gap 0.027 in (0.7 mm) 0.027 in (0.7 mm) Gap Tolerance +0.001/-0.003 min +0.001/-0.003 min... - Page 124 Specifications Sprint ST Sprint GT Tires Tire Pressures (Cold): Front 36 psi (2.5 bar) 36 psi (2.5 bar) Rear 42 psi (2.9 bar) 42 psi (2.9 bar) Approved tires/sizes: Option 1 Front Bridgestone BT021 (FBZ) Bridgestone BT021 (FBZ) 120/70ZR17 120/70ZR17...
- Page 125 Specifications Warning Use the recommended tires ONLY in the combinations given. Do not mix tires from different manufacturers or mix different specification tires from the same manufacturer as this may result in loss of motorcycle control and an accident.
- Page 126 Specifications Sprint ST Sprint GT Electrical Equipment Battery 12 Volt, 10 Ah 12 Volt, 12 Ah Alternator 12 Volt, 35 Amp 12 Volt, 35 Amp Headlight 3 x 12 Volt, 55 watt H7 3 x 12 Volt, 55 watt H7...
- Page 127 Specifications Sprint ST Sprint GT Fluids and Lubricants Engine Oil Semi or fully synthetic Semi or fully synthetic 10 W/40 or 15 W/50 10 W/40 or 15 W/50 motorcycle engine oil motorcycle engine oil which meets specification which meets specification...
- Page 128 Specifications This page intentionally left blank...
- Page 129 Coolant Level Inspection ..80 Fuse Identification - Sprint ST ..107 Corrosion Inhibitors....79 Level Adjustment.
- Page 130 Warnings Sprint ST ..... . . 14 Warning Label Locations ..12 Performance .
Need help?
Do you have a question about the Sprint ST and is the answer not in the manual?
Questions and answers