WMF 2000S User Manual
Hide thumbs
Also See for 2000S:
- User manual (72 pages) ,
- Service manual (39 pages) ,
- Cleaning instructions (2 pages)

Related Manuals for WMF 2000S


Summary of Contents for WMF 2000S
-
Page 1: User Manual
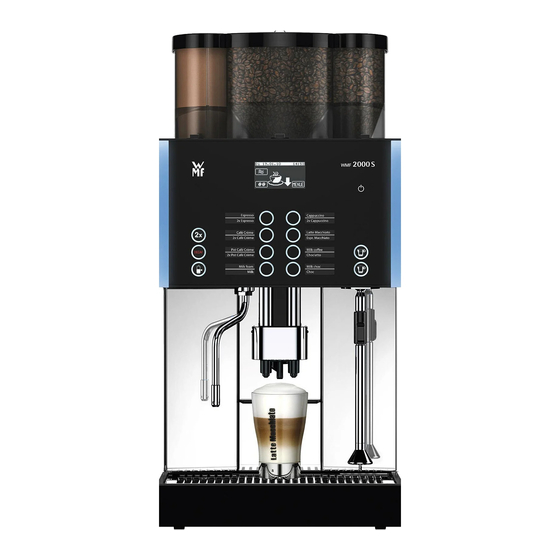
coffee wakes up the world User Manual Coffee machine English 02.06.001 Model Series 1700 Order number 33 2510 0010 Edition 12.2012... - Page 2 Congratulations on the purchase of your WMF coffee machine The WMF 2000 S coffee machine is a fully automatic single cup machine for espresso, café crème, cappuccino, milk coffee, latte macchiato, milk foam and hot water. Options Please read the User Manual prior include steam dispensing and the preparation of hot Choc to using the coffee machine.
-
Page 3: Table Of Contents
Connect up the milk ..........12 With WMF Cooler, WMF Cup&Cool (optional) Standard Steam Milk (optional) / Dual Milk (optional) - Page 4 Set grinding degree..........38 Labelling of beverage buttons User Manual WMF 2000 S...
- Page 5 Hazards to the coffee machine Intended use Directives Duties of the owner / operator Warranty claims No warranty is provided: Appendix: Cleaning instructions (Standard) Appendix: Technical data Technical data for coffee machine Conditions for usage and installation Appendix: Accessories and spare parts Index User Manual WMF 2000 S...
-
Page 6: Chapter 1 Introduction
Introduction Chapter 1 Introduction Parts of the coffee machine 3 1 . 0 3 . 2 0 1 0 0 8 : 1 6 User Manual WMF 2000 S... - Page 7 Steam Milk buttons (optional) Adjustable screen Height adjustable combi spout with integrated milk foamer Steam Milk outlet (optional) Brewing unit Active Milk (optional) “Warm rinse” pad Barista pad Timer and clock display Information pad Messages / error messages Menu pad (opens main menu) User Manual WMF 2000 S...
-
Page 8: User Manual Signs And Symbols
Call up the main menu ™ Touch The main menu is displayed. m a i n m e n u There are other display options M ain menu. Main menu User Manual WMF 2000 S... -
Page 9: Glossary
Prior to brewing cycle, coffee is briefly infused in order to ensure a more intense release of its aromatic substances. Pressing Automatic pressing of ground coffee prior to brewing cycle. Rinsing Intermediate cleaning SB mode Self-service customer operation (self-service mode) Twin Choc Divided hopper for two types of Choc. User Manual WMF 2000 S... -
Page 10: Chapter 2 Operation
Button allocation w S oftware w S ettings w R ecipes and buttons page 28 Decaf button (optional) Preparation of a decaffeinated coffee beverage from the decaf grinder: ™ Press the Decaf button ™ Press the desired beverage button User Manual WMF 2000 S... -
Page 11: Shift Button (Optional)
L = approx. 25 % more than M Dispensing hot water ™ Press the hot water button Dispensing occurs. If less water is required than the pre-set dispense amount, dispensing can be stopped by pressing the hot water button again. User Manual WMF 2000 S... -
Page 12: Milk Or Milk Foam (Optional)
• for uncooled milk white natural * Nominal power rating, see Technical data. With WMF Cooler, WMF Cup&Cool (optional) ™ Insert the milk nozzle for cooled milk into the milk connection on the combi spout Cooler adapter ™ Remove the milk container out of the cooler ™... -
Page 13: Steam Milk (Optional) / Dual Milk (Optional)
28 w C hange recipes page 29 Override function (optional) Function is adjusted upon request by WMF Service. Milk and foam can boil over if the temperature is set to Caution. Hot surfaces. 90 °C, or when the override function is used. -
Page 14: Height Adjustment Of The Combi Spout
Choc powder into Choc hopper. day, in order to maintain the freshness of the products. 2.11 Twin Choc hopper (optional) Divided hopper for two types of Choc. • Left side: Choc 1 • Right side: Choc 2 User Manual WMF 2000 S... -
Page 15: Manual Insert (Optional) / Tablet Insert
™ Open manual insert lid ™ Insert ground coffee (max. 16 g) ™ Close manual insert lid ™ Press the desired beverage button For beverages on level two, press the shift button before opening the manual insert. Manual insert User Manual WMF 2000 S... -
Page 16: Grounds Container
The spent coffee grounds are collected Clean coffee grounds chute daily in a large container under the counter. w C are page 42 User Manual WMF 2000 S... -
Page 17: Drip Tray
™ Disconnect mains plug w O perating options page 33 ™ Turn off mains tap We do not accept any warranty for damage resulting Follow the manual. from failure to observe this requirement. Observe the Safety chapter. User Manual WMF 2000 S... -
Page 18: Chapter 3 Software
Barista (strength of the coffee) Chapter 3.2.2 Information Chapter 3.2.3 Main menu Chapter 3.2.4 Error message Touching the pad calls up the error message. Care message Touching the pad leads directly to the menu. Cleaning required. Descaling required. User Manual WMF 2000 S... - Page 19 Save settings start Start or confirm a step continue Back to the higher menu level Cancel / leave without saving (Exit) Clear or reset Start preparation test / coffee trial Increase or reduce setting values Forward or back one step in listings User Manual WMF 2000 S...
-
Page 20: Ready To Operate
• Start-up data c u s t o m e r c a r e • Next maintenance date b r e w t i m e • Software version User Manual WMF 2000 S... -
Page 21: Care
3 1 . 0 3 . 2 0 1 0 0 8 : 1 6 The main menu is displayed..with additional pads Delayed fade-in w S ettings w O perating options page 33 User Manual WMF 2000 S... -
Page 22: Main Menu
Latte macchiato is more successful if the interval between milk and milk foam dispensing is lengthened. The standard setting is 3 seconds. Reduce setting value -> shorter interval Set milk pump pulse (optional) w A dditional instructions Active Increase setting value -> longer interval Milk User Manual WMF 2000 S... -
Page 23: Timer Program
Select desired settings with the ™ Set the desired switching time (action) pads Current selection is inversely • Switch on time = (on display) displayed. • Switch off time = (on display) ™ Confirm with ™ Delete with User Manual WMF 2000 S... -
Page 24: Copy Day
Switch on times are indicated by bars. o p e r a t i n g t i m e switching times Monday to Friday (1–5). On time 7 a.m. (7:00) Off time 6 p.m. (18:00) User Manual WMF 2000 S... -
Page 25: Delete Timer
1 8 : 0 0 o p e r a t i n g t i m e s w i t c h o f f User Manual WMF 2000 S... -
Page 26: Care
Milk system rinsing starts. milk system Optional Plug&Clean cleaning. Plug&Clean Cleaning w C are page 42 Milk system rinsing is performed automatically by the Caution. Hot liquids in the cleaning program. dispensing area. Observe the Safety chapter. User Manual WMF 2000 S... -
Page 27: Mixer Rinsing
Observe the Safety chapter. Filter change (optional) This point can be selected by trained personnel if the WMF Service function has been enabled. Filter change (optional) and maintenance actions are confirmed here. Query: was the filter changed? yes / no... -
Page 28: Settings
™ Press the desired preselection button ™ Press the desired beverage button Adjust values ™ Adjust values with the pads Start a preparation test with the current values ™ Touch The values are not saved yet. Save setting ™ Save with User Manual WMF 2000 S... - Page 29 If very finely ground coffee is used with a small amount of brewing Quality 5 After pressing, a pre-infusion occurs. In water, a high quality level can addition the brew time is automatically cause a brewing water flow error. extended. User Manual WMF 2000 S...
-
Page 30: Steam Milk Settings (Optional)
Ground coffee quantity for decaf is set by percentage for g r o u n d c o f f e e the ground coffee quantity set in the standard recipe. This setting applies to all coffee beverages with preselected “Decaf”. ™ Save with User Manual WMF 2000 S... -
Page 31: Sequence Of Ingredients Additions
Chociatto beverage. Select the portion controller for the Choc beverage (only for Twin Choc) ™ Press beverage button ™ Select recipe, for example milk Choc 1 ™ Select portion controller (on the right or left) User Manual WMF 2000 S... -
Page 32: Weigh Grounds
Recommended setting: active. Foamer rinsing (optional) Whether automatic foamer rinsing should occur after the last beverage with milk components is dispensed. foamer rinsing yes / no User Manual WMF 2000 S... -
Page 33: Rinsing Interval
Symbol: messages that require immediate action are shown on the display. With illumination (optional): All other messages are displayed as symbol messages that require immediate ™ Touch the symbol action are accompanied by All messages are displayed. flashing side illumination. User Manual WMF 2000 S... -
Page 34: Illumination (Optional)
User Manual WMF 2000 S... -
Page 35: Eco-Mode
3 1 . 0 3 . 2 0 1 0 ™ Touch the pad in the main menu Numerical keyboard display appears. P I N ™ Enter required 4-figure PIN ™ Confirm with Following entry of a valid PIN, the assigned functions are PIN entry display available. User Manual WMF 2000 S... -
Page 36: Pin Rights, Access Control
On entering the valid PIN, access to: = Milk and foam settings = Timer program Accounting level access = Care = PIN-protected ON/OFF button = Settings (beverage, general, others) = Assign PIN rights, access control = Accounting numbers of beverages User Manual WMF 2000 S... -
Page 37: Delete Pin
If no beverage is selected, on touching the clear pad a dialogue appears in the display querying whether the counter readings for all beverages should be zeroed. The “Accounting numbers of beverages” function should be protected with a PIN to prevent unauthorised access. User Manual WMF 2000 S... -
Page 38: Chapter 4 Other Settings
Grinding degree 1 g fine Grinding degree 6 g coarse Display grinding degree Bruising or crushing hazard. Caution. Bruising or crushing Never reach into the grinders with coffee machine hazard. running and product hoppers removed. Observe the Safety chapter. User Manual WMF 2000 S... -
Page 39: Labelling Of Beverage Buttons
™ Stick on label mount and re-insert behind the front glass panel The template can be printed out on adhesive labels or paper. Free download of WMF label Stick paper to label mount using an adhesive sticker. template from www.servicecenter.wmf.com Matching adhesive labels: Zweckform-Avery No. -
Page 40: Chapter 5 Care
= Daily, at least once per day and as required Weekly = Weekly cleaning Regularly = Regularly as required Message = After the display shows a message Optional = Optional (depending on the model) = Daily as required User Manual WMF 2000 S... -
Page 41: For All Cleaning Instructions
Cleaning consists of two, or optionally three parts. • Automatic foamer rinsing after each beverage with milk or milk foam (optional) • Display-guided milk system rinsing • Once per day, place combi spout, milk hose and milk nozzles in a cleaning solution User Manual WMF 2000 S... -
Page 42: Milk System Cleaning Plug&Clean
C leaning instructions 5.2.5 General cleaning Grounds container cleaning (grounds chute, optional) Order numbers for the WMF care program ™ Empty grounds container and rinse under running water w A ppendix ™ Clean with a clean, damp cloth Accessories and spare parts... -
Page 43: Weekly Cleaning
™ Push mixer hose onto mixer bowl fitting again, and plug in combi spout ™ Replace milk cover Ensure that mixer hose is replaced securely. Caution. This is important, as otherwise hot water or hot Choc Scalding hazard. beverage may escape. Observe the Safety chapter. User Manual WMF 2000 S... -
Page 44: Steam Milk Outlet Cleaning
™ Screw the steam nozzle onto the Steam Milk outlet Caution. ™ Immerse the steam nozzle in a jug with clear water Hot steam. ™ Briefly press a Steam Milk button Observe the Safety chapter. ™ Wipe steam outlet with a damp cloth User Manual WMF 2000 S... -
Page 45: Regular Cleaning
™ With one hand, reach into the chute under the brewing unit and release the retaining catch (illustration 1) ™ Slowly guide the brewing unit downwards, tilt and pull forward ™ Remove the brewing unit and hold firmly (illustration 2) Illustration 1 Illustration 2 User Manual WMF 2000 S... - Page 46 If the brewing unit cannot be replaced without Hazards to the resistance: turn thread on the brewing unit head slightly machine. to the left or right with the multitool until the brewing Follow the manual. unit slides into the guide. Never use force. User Manual WMF 2000 S...
-
Page 47: Bean Hopper Cleaning
™ Switch off the coffee machine using the ON/OFF button ™ Disconnect mains plug open close ™ Unlock product hopper with multitool by turning counter-clockwise ™ Lift product hopper out and empty completely ™ Unscrew union nut at front and rear ™ Remove the dosing auger User Manual WMF 2000 S... - Page 48 The Twin Choc hopper is divided in the middle and has two separate compartments for two different types of Choc. Never clean product hoppers in the dishwasher. Hazards to the machine. Follow the manual. Dismantled dosing augers User Manual WMF 2000 S...
-
Page 49: Chapter 6 Haccp Cleaning Schedule
With correct installation, care, maintenance, and cleaning, WMF coffee machines meet the requirements described above. If care and cleaning of the coffee machine is not carried out properly, dispensing milk beverages will constitute a food hygiene hazard point. -
Page 50: Recommendation For Choc (Optional)
Cool the milk occasionally 20 cappuccinos. if needed. WMF AG offers a range • If little milk is used, cooled milk must be placed in the of refrigeration options refrigerator again during operation. -
Page 51: Chapter 7 Maintenance
68 • Maintenance after the display message; may only be Service maintenance message w M essages and instructions undertaken by trained personnel or by WMF Service, as page 53 in this instance components affecting safety must be replaced. • Revision after the display message; may only be undertaken by trained personnel or by WMF Service, as... -
Page 52: Wmf Service
Maintenance WMF Service You can reach the WMF Service Center if the local WMF Service is not known. WMF AG Eberhardstraße D - 73309 Geislingen (Steige) User Manual WMF 2000 S... -
Page 53: Chapter 8 Messages And Instructions
C a u t i o n ! Error number is displayed. w E rror messages / malfunctions P l e a s e c o n s u l t t h e u s e r m a n u a l ! User Manual WMF 2000 S... -
Page 54: Error Messages And Malfunctions
If this does not rectify the error or if the error indicated is not listed please call WMF Service. Some messages lead to blocking of individual functions. You will notice this by the fact that the beverage button illumination goes out. - Page 55 Messages and instructions Your WMF 2000S is provided with a diagnostics program. Any errors that occur are shown on the display. The error messages listed may also be caused by an interruption to the mains electricity supply. If there is a current error or a message to the operator, the pad is displayed.
-
Page 56: Errors Without Error Message
Error pattern Action instructions No hot water dispensing ™ Clean hot water spout but water in grounds ™ Call WMF Service (coffee dispensing possible) container No Choc dispensing but ™ Do not use Choc dispensing water in grounds container ™ Call WMF Service (coffee dispensing possible) Choc portion controller ™... - Page 57 ™ Switch off the coffee machine and on again water in grounds container ™ If error not remedied call WMF Service Milk foamer assembly and ™ Lightly smear the O-rings with WMF gasket grease w I nstructions in Customer Check-up Kit. disassembly stiff Choc hopper cannot be ™...
-
Page 58: Chapter 9 Safety
Safety Chapter 9 Safety Hazards to the operator At WMF, safety is one of the most essential product features. The effectiveness of safety devices can only be Caution Failure to follow safety ensured if the following points are observed: instructions can result • Read the User Manual carefully prior to use. - Page 59 Slipping hazard Caution Slipping hazard if fluids Fluids can be discharged from the coffee machine if are discharged used improperly or if errors occur. These fluids can cause Slipping hazard a slipping hazard. User Manual WMF 2000 S...
-
Page 60: Hazards To The Coffee Machine
- installation of a suitable water • For water with carbonate hardness in monitor in the mains water supply excess of 5 °dKH, a WMF water filter - installation of smoke alarms must be fitted; otherwise, the coffee • After shut off for several days we... -
Page 61: Directives
The device fulfils the requirements of the Any modifications that are not approved German Food and Feed Code (LFGB), the by WMF will cause this declaration to Regulation on Commodities (BedGgstV), become invalid. Currently valid national the EU regulation No. 10/2011 as well as rules apply in countries outside of the the EU regulation No. -
Page 62: Duties Of The Owner / Operator
These measures The coffee machine must be set up by the are conducted by WMF Service or by operator such that care and maintenance WMF authorised service personnel as part can be performed without hindrance. -
Page 63: Warranty Claims
(e.g. User Manual and maintenance instructions). • With respect to faults which occur as the result of failure to use original WMF spare parts or incorrect assembly by the purchaser or by third parties or by faulty or negligent treatment. -
Page 64: Appendix: Cleaning Instructions (Standard)
Appendix: Cleaning instructions (Standard) Appendix: Cleaning instructions (Standard) User Manual WMF 2000 S... -
Page 65: Appendix: Technical Data
The work must be carried out by authorised installation technicians in compliance with general, country- specific and local regulations. The WMF service engineers may only connect the coffee machine to existing prepared connection points. WMF Service is neither authorised nor responsible for carrying out any on-site installation work prior to connection. - Page 66 For operating, service and safety reasons the machine should be installed with a clearance of not less than 50 mm at the back and sides from the building or non-WMF components. A minimum working space of 800 mm in front of the coffee machine is recommended. A clear height of 1,100 mm from the top of the supporting surface should be ensured.
- Page 67 In order to avoid possible faults from arising on our shielded data lines due to potential equalisation currents between the devices, an additional potential equalisation unit should be planned for devices connected to the vending system. (See EN 60309) User Manual WMF 2000 S...
-
Page 68: Appendix: Accessories And Spare Parts
Appendix: Accessories and spare parts Appendix: Accessories and spare parts User Manual WMF 2000 S... - Page 69 Appendix: Accessories and spare parts User Manual WMF 2000 S...
-
Page 70: Index
Menu control pads 19 Dispense milk or milk foam 12 Menu pad 33 Dispensing beverages 10 Messages and instructions 53 Dispensing hot water 11 Messages for operation 53 Display contrast 32 Milk and foam 22 Display language 32 User Manual WMF 2000 S... - Page 71 Open water supply valve 53 Technical data 65 Operating options 33 Time and date 32 Operation 10 Timer 21, 23 Original WMF spare parts 63 Timer information 25 Other settings 38 Timer overview 24 Override function 13 Timer program 23...
- Page 72 Your nearest WMF Service: © 2010–2012 WMF AG All rights reserved, in particular duplication, distribution and translation rights. No part of this manual may be reproduced in any form or processed, duplicated or distributed using electronic systems without written consent. Design and production / typesetting and print presentation: TecDoc GmbH;...
Need help?
Do you have a question about the 2000S and is the answer not in the manual?
Questions and answers