
Subscribe to Our Youtube Channel
Related Manuals for WMF Cafemat 2 3700 Series


Summary of Contents for WMF Cafemat 2 3700 Series
- Page 1 WMF COFFEE MACHINES Operating instructions WMF Cafemat 2 Series 3700 Edition 4 - Printed in 03.08 Item-No. 33 2243 6000...
- Page 2 Are you one of those people who don’t like reading operating instructions? Please do so anyway! You will get more pleasure from your WMF COFFEE MACHINE afterwards and will find it was worth it after all. To avoid serious injuries or damage, please be...
-
Page 3: Table Of Contents
Contents 1 General Description ......................... 77 2 Designation of Machine Parts ....................79 3 Warnings........................... 80 4 Safety instructions........................81 5 Technical Data.......................... 83 6 Conditions of Use and Installation ..................84 7 Operations..........................85 7.1 Starting the Machine......................85 7.2 Filling the Ground Coffee Hopper .................. - Page 4 10.1.1 Fully Automatic Cleaning (using the granulate cleaning reservoir)..... 135 10.1.2 Semi-Automatic Cleaning (manual cleaner input) ..........137 10.2 General Care of Your Machine ..................139 11 Error Messages / Remedial Action..................140 12 WMF Customer Service......................141 13 Warranty Claims ........................142...
-
Page 5: General Description
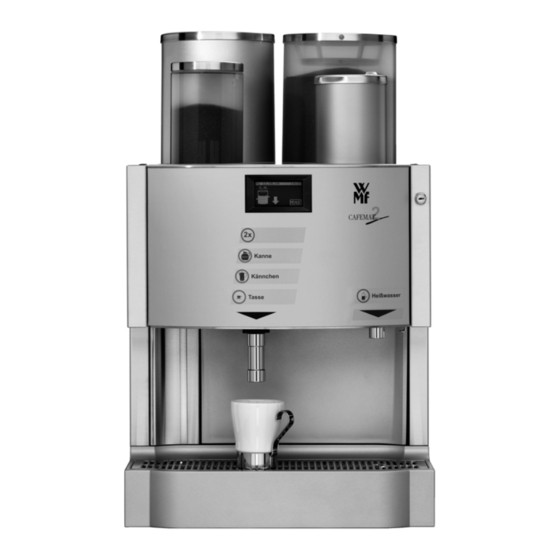
1 General Description The WMF Cafemat 2 is a coffee machine for the automatic preparation of filter coffee and hot water. Cups, mugs, pots and jugs can be dispensed. The brewer unit enables up to 0.75 litres of coffee to be prepared per brewing cycle. -
Page 7: Designation Of Machine Parts
2 Designation of Machine Parts Coffee Storage Reservoir (Optional) Small Ground Coffee Hopper (Optional) Touch Screen Display Beverage Keys Coffee Spout (Fixed Or Folding) Drip Tray Large Ground Coffee Hopper Granulate Cleaner Reservoir (Optional) On/Off Key Switch Hot Water Key Front Panel Lever Hot Water Spout Waiter Lock (Optional) -
Page 8: Warnings
3 Warnings Maximum machine safety is an integral WMF product characteristic to which we pay particular attention. In spite of all our safety precautions, every machine is potentially hazardous if not operated properly. This is why – for your own safety – we have summarised the warnings below and highlighted them in grey throughout the instruction manual. -
Page 9: Safety Instructions
Switch off the machine if any faults arise on the hot water boiler. Inform the WMF customer service team and do not switch on the machine again before the fault has been removed. - Page 10 If the water used in the machine has a carbonate hardness above 9°, a WMF water filter must be fitted in the supply line. Otherwise limescale can cause damage to the machine.
-
Page 11: Technical Data
Technical Data Rated power 3.3 kW 6.3 kW Hourly output Filter coffee 200 cups 280 cups 3.0 litres Storage reservoir (optional) 300 cups Hourly output with storage reservoir 24 l/h 48 l/h Hot water output, total 1.6 kg each Ground coffee hopper, large 0.5 kg Ground coffee hopper , small 1.0 kg... -
Page 12: Conditions Of Use And Installation
5-pole CEE/CEKON socket to EN 60309 should be fitted. If the power lead to this machine is damaged, it must be replaced by a WMF Customer Service Technician or a similarly qualified specialist. -
Page 13: Operations
6 Operations 6.1 Starting the Machine Before the machine is started up, the main shutoff valve in the fresh water feed line must be opened and the main electrical switch supplying the machine must be turned on. x Switching on manually Turn the key switch to the “1”... -
Page 14: Filling The Ground Coffee Hopper
Each beverage key can be assigned a different legend and symbol. A set of pre-printed labels is supplied with the machine. Consult your WMF Customer Service Technician about choosing the appropriate press-in labels for your requirements. -
Page 15: Opening The Front Panel
Opening the Front Panel Note: The front panel has to be opened in order to empty the grouts collector and to manually add cleaning granulate. Caution! Take care not to trap your fingers when opening and closing the front panel. Beware the danger of crushing. -
Page 16: Coffee Dispensing Options
Coffee Dispensing Options There are various options for coffee preparation and dispensing, depending on your machine version and the individual beverage settings. Machines without a 3L storage reservoir On pressing a beverage key, the coffee beverage is freshly brewed and dispensed directly at the coffee spout. -
Page 17: Selection Of Quantity Of Coffee For Storage
The brewer unit in the WMF Cafemat 2 allows brewing quantities of up to 0.75 litres of coffee to be prepared. One or more brewing cycles are carried out until the storage reservoir contains the desired quantity. -
Page 18: Manual Quantity Control
3.0 litres are transferred to the storage reservoir to begin with. If the coffee level in the storage reservoir falls below 2.3 litres, the WMF Cafemat 2 starts an automatic refill brewing of fresh coffee (0.75 litres). Should the coffee level fall below 0.75 litres, coffee dispensing is disabled. -
Page 19: Coffee Dispensing From The Storage Reservoir (Optional)
3. Free Flow Coffee dispensing continues as long as the beverage is pressed or the amount limit is reached. Your WMF Customer Service Technician will set your preferences as required. If there is no coffee in the storage reservoir to start with... -
Page 20: Coffee Dispensing By Fresh Brewing
Only the beverage keys for beverages that can be dispensed at the time are active. Otherwise, please refer to the messages in your WMF coffee machine display. Press the appropriate beverage key. 2. While brewing is taking place the name of the coffee beverage selected and the progress of brewing are indicated in the display by a cup filling up. -
Page 21: Quantity Pre-Selection
Quantity Pre-selection Each beverage selection can be repeated automatically up to 12 times if required. After starting the first brewing cycle, the quantity pre-selection (number) for the beverages to be dispensed can be altered upwards or downwards by pressing the corresponding keys. In the example shown here, one cup of coffee has been selected and the number increased to 6 by means of quantity pre-selection. -
Page 22: Coffee Dispensing Via The Multi-Brew Arm (Optional)
3. Open the front door and input the correct quantity of ground coffee for the required brewing quantity (approx. 8 g for one cup and in any case not more than 35 g) into the open brewing chamber. Close the front door again. -
Page 23: Hot Water Dispensing
3. Free Flow Hot water dispensing continues as long as the hot water is pressed or the amount limit is reached. Your WMF Customer Service Technician will set your preferences as required. The beverage selected is indicated in the display while hot water dispensing is taking place. -
Page 24: Grounds Container
If the control panel includes a key designated 2x or Special, press that key first to dispense a larger portion of hot water. Note: Only one portion of hot water can be dispensed while a brewing cycle is in progress. Further hot water portioning is disabled until the end of the brewing cycle. -
Page 25: Switching Off The Machine
(this should be ordered separately). This allows larger volumes of grounds to be collected. Your WMF Customer Service Technician will set up the maximum capacity on the machine. 6.14 Switching Off the Machine... -
Page 26: User Guide
7 User Guide The machine user guide is provided in the form of a touch screen display. When the machine is ready for operation, the following display is shown: Pressing on the blank area of the display will produce the additional symbol , which can be used to call up information about the machine, etc. - Page 27 ƒ Quantity storage ƒ Timer mode (see chapter 9, page 121) ƒ Cleaning (see chapter 9.1 , page 135), ƒ Extended access authorisation (PIN numbers) (see chapter 8.5, page 107), ƒ Beverage settings (see chapter 7.1, page 100), ƒ Machine settings (see chapter 8.4, page 105), ƒ...
-
Page 28: Beverage Settings
Beverage Settings The machine is ready for operation and the following display is shown: By pressing the soft key you can access a second level, where there is a Selection menu in which beverage settings can be made. If you have allocated access authorisations (PIN numbers - see chapter 8.5, page 107), on pressing the soft key you will be asked for your PIN number. -
Page 29: Quantity Of Ground Coffee
7.1.1 Quantity of Ground Coffee To alter the quantity of ground coffee, enter the Beverage Settings menu (see chapter 7.1, page 100), select the setting mode for the chosen beverage and use the keys to scroll to the settings page where the soft key appears. -
Page 30: Testing The Quantity Of Ground Coffee And Water
7.1.3 Testing the Quantity of Ground Coffee and Water You can use the key at any time during setting to run a Test test brewing cycle (trial) to check the result of the changes you have made to the settings. You can choose whether to test the freshly prepared coffee beverage (“Fresh”) or, on machines with a storage reservoir, the quantity of beverage portioned from the storage reservoir. -
Page 31: Setting Storage Reservoir Brewing (Optional)
7.2 Setting Storage Reservoir Brewing (optional) Select storage reservoir brewing in the Settings (see chapter 8.1, page 100) menu (only on machines with a storage reservoir). You can alter the quantity of ground coffee used to brew the 750 ml coffee beverage in the storage reservoir. As described previously for beverage settings, select the symbol and use the keys to alter the... -
Page 32: Setting Multi-Brewing (Optional)
On completion of the brewing cycle you can press Start to dispense the beverage from the storage reservoir or press Stop to cancel dispensing from the storage reservoir. Press the Continue soft key to return to the trial Selection menu. Setting Multi-Brewing (optional) In the Settings menu select the required multi-brewing option (1, 2 or 3;... -
Page 33: Machine Settings
The change is displayed both graphically and as a percentage. Maximum deviations of approx. + 2% / - 3% can be set. Bigger changes can only be made by a WMF Customer Service Technician. 7.4.2 Mode (Self-Service) To change the mode of operation of your coffee machine, in the “Settings / Machine”... -
Page 34: Setting The Date And Time
7.4.3 Setting the Date and Time The machine is ready for operation and the following display is shown: By pressing the soft key, you can access a second level, where there is a Selection menu. Here you can set the date and time. If you have allocated access authorisations (PIN numbers - see chapter 8.5, page 107), on pressing the soft key... -
Page 35: Access Authorisations (Pin Code)
Access Authorisations (PIN code) 7.5.1 System of Access Authorisations The access authorisation system featured in the WMF Cafemat 2 restricts access to the Selection menu, if desired. There are 4 levels of access authorisations: Level 0 Generally accessible information , not protected by a PIN. -
Page 36: Changing Access Authorisations (Pin Numbers)
7.5.2 Changing Access Authorisations (PIN Numbers) The machine is ready for operation and the following display is shown: Pressing the soft key takes you to a second level, where a Selection menu allows you to change the access authorisations (PIN numbers). If you have already allocated access authorisations (PIN numbers), on pressing the soft key you will be asked... - Page 37 For example, if you have chosen the PIN number 1234 for level 1 the following display will appear if no PIN Cleaning number has been allocated yet for the higher levels 2 and 3: The PIN number for the lower levels is therefore used for the higher levels.
-
Page 38: Unit Number Accounting
Waiter Accounting System Your WMF Cafemat 2 can be fitted with a WMF Waiter Accounting System, in conjunction with an accounting system (e.g. WMF bar systems). The coffee machine is equipped with a waiter lock and connected to the accounting unit. - Page 39 WMF coffee machine. In other words, the waiter first of all keys in the beverage sale information at the till. If the WMF coffee machine shows a credit for a beverage, the beverage can be dispensed either freely or by inserting...
-
Page 40: Vending Units
Vending Units 7.8.1 Coin Checker / Token Checker Using for the first time The WMF Cafemat 2 can be equipped with a coin checker or token checker for self-service mode. Note: The coin checker / token checker must only be connected and put into service by a WMF Customer Service Technician. - Page 41 190 mm Depth 380 mm Settings Once the coin checker has been commissioned by a WMF Customer Service Technician, you can program your own selling prices. This is done as follows: First, open the coin box and pull the coin checker housing towards you.
-
Page 42: Chip) Card Reader
Carry out some trial sales to check the price or prices you have set. 7.8.2 (Chip) Card Reader The WMF Cafemat 2 can be equipped with a card reader for self-service mode. The card reader is purchased by the customer and sent to WMF for fitting. -
Page 43: Coin Changer
The coin changer must only be connected and put into service by a WMF Customer Service Technician. The WMF Cafemat 2 can be fitted with a coin changer for self-service mode. Please observe attached operating instructions from the coin changer manufacturer. - Page 44 Note: If faults occur that you cannot correct yourself, call WMF Customer Service. Do not switch the machine on again until the fault has been remedied. Rated voltage 230 V Dimensions Height 528 mm 190 mm Width 380 mm Depth Weight approx.
- Page 45 You can use this keypad to change the following items: Keys: Display: Beverage Editor PRINT /ABR Bev.Amt. 16 >> Enter number of beverages (e.g. on the WMF Cafemat 2) Beverage Editor Prod. Amt. 16 >> Beverage Editor ENTER Press key to confirm. Prod. Amt. 16 >> Beverage Slave 1 >>...
- Page 46 Use only the key to confirm the following displays. Do not make any changes to the settings, as this could cause the coin changer to malfunction. Any changes must only be made by a WMF Customer Service Technician. Max. credit >>...
- Page 47 With the vending options, only the last two digits should be altered to your requirements. Vending Options 1 0 0 1 0 0 1 0 10010010 >> = 0 means that change is given each time a beverage is dispensed. Do not make any = 1 means that several beverages can be dispensed changes! Changes can...
-
Page 48: Manual Dispensing (With Storage Reservoir Option)
Manual Dispensing (with storage reservoir option) You can use the manual dispensing function dispense coffee from the storage reservoir in free flow mode. However, this should only be used, for instance, to drain the remaining coffee from the storage reservoir. Caution! Burning hazard! There is a danger of burning and scalding in the area of the coffee spout... -
Page 49: Timer Functions
8 Timer Functions The timer in your WMF Cafemat 2 gives you total independence and flexibility. The timer takes over routine tasks such as: Switching the machine on and off Changes to the quantity of coffee prepared (with the storage reservoir option) -
Page 50: Timer Settings
Timer Settings The following timer settings are available: Operating times (switching the machine on and off) Setting different quantities of coffee to be prepared Carrying out automatic machine cleaning Switch over the machine to self-service mode 8.1.1 Setting the Operating Times Press the soft key in the Selection menu to set the timer on your coffee machine. - Page 51 Alternatively, you can use the keys to select the days of the week. The time (hour/minute) can only be set by using the keys. Note: The timer is controlled by the date and time set on the coffee machine. It is therefore important to ensure that the date and time on your machine are correctly set.
- Page 52 This setting then appears as a symbol in the display: Î Switch ON Î Switch OFF Î Claening + OFF Press the soft key to confirm your selection. A programmed switching time can be cleared by pressing soft key. If you use the Plus (up arrow) and Minus (down arrow) keys in the “Action”...
-
Page 53: Setting Coffee Quantities To Be Prepared
8.1.2 Setting Coffee Quantities to be Prepared To set the timer on your coffee machine, press the soft key in the Selection menu. The following display appears: Then press the soft key Timeradjustment The following symbol appears in the display: Press the soft key to program different Preselection... - Page 54 This setting then appears as a symbol in the display: Î Empty Î Half Full Î Full Press the soft key each time to confirm your choice. A programmed switching time can be cleared by pressing soft key. If you use the Plus (up arrow) and Minus (down arrow) keys in the “Action”...
-
Page 55: Setting Machine Cleaning Times (With Automatic Granulate Cleaner Option)
8.1.3 Setting Machine Cleaning Times (with automatic granulate cleaner option) To set the timer on your coffee machine, press the soft key in the Selection menu. The following display appears: Then press the soft key. Timeradjustment The following symbol appears in the display: Press the soft key to program automatic cleaning Cleaning... -
Page 56: Setting Switch Over To Self-Service Mode
Your chosen setting then appears as a symbol in the display: Î w/o Switch OFF Press the soft key to confirm your choice. A programmed switching time can be cleared by pressing soft key. If you use the Plus (up arrow) and Minus (down arrow) keys in the “Action”... - Page 57 In the following menu you can set the day, time (for an example, see chapter 8.1.1 Setting the operating times on page 122) and the action you wish your coffee machine to perform. Under the column heading “Action” you can select the various possible settings.
-
Page 58: Timer Check
Timer Check To check your programmed switching times in the Timerprogram, press the Clock symbol in the Selection menu . The following display appears: Then press the soft key. Timer Table You can now display the preset operating times or your programmed pre-selection settings in the timer check. -
Page 59: Making Changes To The Timer
Making Changes to the Timer 8.3.1 Copying the Timer Once a full day’s sequence has been set up, it can easily be copied to other days. Start from the timer setting mode Preselection. Note: The Copy function can be accessed from any setting mode (Operating Time, Pre-selection, Cleaning or Self-service mode). -
Page 60: Clearing The Timer
Next, select the option and the day to which you Insert Day want to copy your Monday settings. In our example, that day is Thursday. Touch the soft key in the display. Thursday The day you have copied will now be pasted. All the switching times programmed for Monday have now been copied to Thursday, and will immediately apply to Thursdays as well. -
Page 61: Timer Information
Timer Information The Timer Information function provides information about the next timer action which is due to be carried out. In Timer mode, scroll to page two and press the soft key. Timer Info The machine timer is switched on. The next action which the timer is due to carry out is to set the pre-selection to half full at 16:00. -
Page 62: Care Of The Machine
9 Care of the Machine Daily cleaning of the coffee machine is very important in order to ensure correct operation of the machine and optimum coffee quality. Accordingly, 26 hours after switching on the machine, a message will appear in the display reminding you to carry out daily cleaning. -
Page 63: Cleaning The Machine
Note: Always ensure the granulate cleaning reservoir full. Only WMF special cleaning granulate should be used (order no. 33.2118.6000). Refer also to the information in the lid of the granulate cleaning reservoir 8. Take care not to overfill the reservoir 8, however, as this can block the granulate meter. - Page 64 Press the soft key or the SwitchingOFF No SwitchingOFF soft key to choose whether the machine is to Abschalten return to “ready” mode after cleaning , or to No SwitchingOff be switched off automatically after cleaning – in this case, press SwitchingOFF After selecting the cleaning mode, you will be asked again...
-
Page 65: Semi-Automatic Cleaning (Manual Cleaner Input)
9.1.2 Semi-Automatic Cleaning (manual cleaner input) The machine is ready for operation and the following display is shown, or the display for the storage setting selected: Press the soft key to enter a second level, where a Selection menu allows you to run the cleaning program. If you have allocated access authorisations (PIN numbers - see chapter 8.5 on page 107), on pressing the soft key... - Page 66 Open the front panel. For a machine with a storage reservoir, pour one level large measuring spoon (order no. 33 0742 3000) of WMF special cleaning granulate into the brewing chamber. For a machine without a storage reservoir, pour one level small measuring spoon (order no.
-
Page 67: General Care Of Your Machine
Caution! Health hazard! Always fit the protective panel provided (cleaning adapter) over the spout before starting cleaning. Never reach underneath the spout while cleaning is in progress. There is a danger of burning and scalding. While the cleaning program is running, the display shows the remaining cleaning time. -
Page 68: Error Messages / Remedial Action
10 Error Messages / Remedial Action Your WMF Cafemat 2 has a built-in diagnostic program. Any errors occurring will appear in the display 3. symbol indicates that an error has occurred or that the operator’s attention is required. The following error messages are currently implemented: ƒ... -
Page 69: Wmf Customer Service
ƒ Your individual beverage settings will be retained. 11 WMF Customer Service WMF’s comprehensive service network allows every area to be reached in a short period of time. Our personnel are experienced experts and carry special tools and the original spare parts required at all times, so that malfunctions can be remedied on the spot. -
Page 70: Warranty Claims
WMF will be liable as follows for justified defects of quality: All products or services, which show defects of quality within the limitation period, shall, at WMF’s discretion, be repaired or replaced free of charge, provided that the defect cause existed at the time of passing of risk.
Need help?
Do you have a question about the Cafemat 2 3700 Series and is the answer not in the manual?
Questions and answers