Fujitsu Siemens Computers Lifebook E Series Easy Manual
Hide thumbs
Also See for Lifebook E Series:
- User manual (97 pages) ,
- Easy manual (43 pages) ,
- Specifications (2 pages)

Subscribe to Our Youtube Channel
Related Manuals for Fujitsu Siemens Computers Lifebook E Series


Summary of Contents for Fujitsu Siemens Computers Lifebook E Series
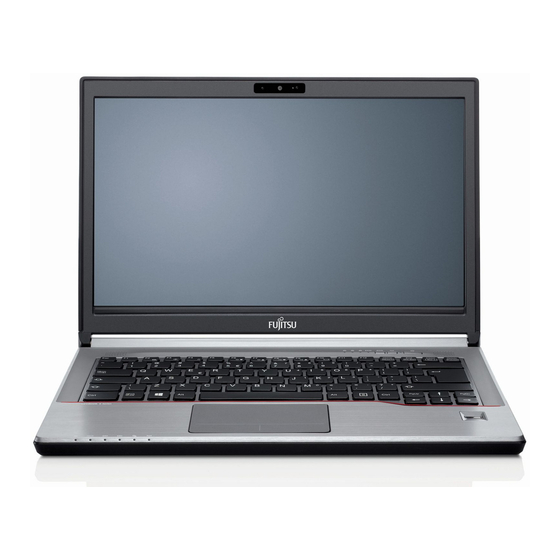
- Page 1 E S e r i e s E S e r i e s E S e r i e s E S e r i e s L I F E B O O K L I F E B O O K L I F E B O O K L I F E B O O K EasyGuide...
- Page 2 Are there ..any technical problems or other questions which you would like to be clarified? Please contact: • your sales partner • your sales outlet Further information can be found in the "Safety and Warranty" manual. The latest information on our products, tips, updates, etc., can be found on the internet under: http://www.fujitsu-siemens.com...
- Page 4 Published by Fujitsu Siemens Computers GmbH A26391-K114-Z120-1-7619 A26391-K114-Z120-1-7619 A26391-K114-Z120-1-7619 A26391-K114-Z120-1-7619 Order No.: AG 0701 07/01 A26391-K114-Z120-1-7619...
-
Page 5: Lifebook E Series
Introduction Important notes E Series Working with the LIFEBOOK Notebook Connecting external devices Operating Manual Connecting docking devices Energy saving functions Settings in BIOS Setup Troubleshooting and tips Technical data Index July 2001 edition... - Page 6 All other trademarks referenced are trademarks or registered trademarks of their respective owners, whose protected rights are acknowledged. Copyright ã Fujitsu Siemens Computers GmbH 2001 All rights, including rights of translation, reproduction by printing, copying or similar methods, in part or in whole, are reserved.
-
Page 7: Table Of Contents
Contents Introduction .............................1 Using this Manual ..........................2 Important notes ..........................3 Energy saving............................3 Energy saving under Windows ....................3 marking............................4 Disposal and recycling........................4 Working with your Notebook ......................5 Preparing for operation ........................5 Selecting a location ........................5 Connecting the power adapter......................6 Switching the notebook on.........................7 Switching the notebook off.........................7... - Page 8 Contents Connecting external devices......................35 Port symbols ........................... 36 Connecting an external monitor ...................... 38 Connecting an external keyboard....................38 Connecting an external mouse......................39 PS/2 mouse ..........................39 Serial mouse ........................... 39 Fujitsu Siemens infrared mouse ....................40 Connecting a printer........................
-
Page 9: Introduction
Introduction Your is a versatile and ergonomic notebook. Innovative technology and ergonomic design LIFEBOOK make this notebook the ideal user-friendly and reliable travel companion. Your operating system is pre-installed on the hard disk for your convenience when you use your notebook for the first time. Depending on the configuration level chosen, your notebook is supplied with Windows 98, Windows Millenium Edition, Windows 2000, Windows XP or Windows NT as the operating system. -
Page 10: Using This Manual
Introduction Using this Manual Using this Manual The meanings of the symbols and fonts used in this manual are as follows: Indicates information which is important for your health or for preventing physical damage. Failure to follow the instructions may lead to loss of data, invalidate your warranty, destroy the notebook, or endanger your life. -
Page 11: Important Notes
20 million tons of carbon dioxide into the atmosphere - the equivalent of 5 million automobiles. As an Energy Star Partner, Fujitsu Siemens Computers GmbH has determined that this product meets the Energy Star guidelines for energy efficiency. -
Page 12: Ce Marking
Do not throw lithium batteries into the household waste. They must be disposed of in accordance with local regulations concerning special waste. If you have any questions on disposal, please contact your local office, our Hotline/Help Desk, or: Fujitsu Siemens Computers GmbH Recycling Center D-33106 Paderborn... -
Page 13: Working With Your Notebook
Working with your Notebook In this chapter you will find advice on the safe positioning and use of your notebook and power adapter, as well as information about each connector and LIFEBOOK feature. Preparing for operation The power cable supplied conforms to the requirements of the country in which you purchased your notebook. -
Page 14: Connecting The Power Adapter
Working with your Notebook Connecting the power adapter Connecting the power adapter Ê Place the notebook on a flat, sturdy surface. Ê Connect the power adapter cable to the DC jack (DC IN) of the notebook (1). Ê Connect the power cable to the power adapter (2). Ê... -
Page 15: Switching The Notebook On
Switching the notebook on Working with your Notebook Switching the notebook on Ê Press the release button and open the LCD display panel. Ê Connect the external power adapter to your notebook (1). Ê Press the Suspend/Resume button to switch on the notebook (2). When you switch on your notebook for the first time the supplied software is already installed. -
Page 16: Re-Starting The Notebook
Working with your Notebook Security panel Re-starting the notebook Restarting the computer without turning the power off, referred to as "Warm Boot". This is performed via the operating system using Start – Shut Down – Restart. Security panel The security panel enables you to protect your notebook from unauthorised use with a hardware password. - Page 17 Security panel Working with your Notebook Assigning a user password The setup programme can be found under Start - AddOn Software. Ê Enter the programme name FJSECU.EXE under Start - Run. Ê Click on OK. Ê Follow the instructions of the programme. Examples of possible password combinations "1"...
-
Page 18: Interior View
Working with your Notebook Interior view Interior view 1 = LID switch 8 = Keyboard 2 = Device lock 9 = Touchpad and touchpad buttons 3 = LCD display panel 10 = Loudspeakers 4 = Microphone 11 = Security panel 5 = LCD status display 12 = Headphones port 6 = Suspend/Resume button... -
Page 19: Left Side Panel
Left side panel Working with your Notebook Left side panel 1 = LAN connector 5 = Eject buttons for PC cards 2 = Modem connector 6 = Kensington Lock 3 = Fan openings 7 = Hard disk lock 4 = PC card slot 8 = Infrared interface Right side panel 1 = Battery compartment... -
Page 20: Back Panel
Working with your Notebook Back panel Back panel 1 = PS/2 port 5 = USB ports 2 = Serial port 6 = Port for docking devices 3 = Parallel port 7 = DC jack (DC IN) 4 = VGA interface Under side 1 = Battery compartment 2 = Memory compartment... -
Page 21: Battery
Battery Working with your Notebook Battery The battery supplies your notebook with the necessary power during mobile use. You can increase battery life by enabling the system's power management features. The battery charge is indicated by the battery symbol in the "Status indicator panel". -
Page 22: Battery Storage
Working with your Notebook Battery Battery storage Keep the battery pack between 0°C and +30°C (32 and 122 degrees Fahrenheit). If you do not intend to use the battery for long periods of time, remove it from the notebook. Never store the battery in the notebook. The lower the temperature at which the batteries are stored, the lower is the rate of self- discharge. - Page 23 Battery Working with your Notebook Ê Pull the battery slightly out of the battery compartment (1). Ê Lift out the battery upward in the direction of the arrow (2). Installing the battery Ê Position the battery at a 45 degree angle over the battery compartment.
-
Page 24: Indicators And Input Devices
Working with your Notebook Indicators and input devices Indicators and input devices Power-on indicator Floppy disk drive indicator Power indicator PC card indicators NumLK indicator (Num Lock) Battery being charged CapsLK indicator (Caps Lock) First battery indicator Scroll indicator (Scroll Lock) Second battery indicator CD/DVD indicator Security panel indicator... -
Page 25: Status Indicator Panel
Indicators and input devices Working with your Notebook Status indicator panel Symbols in this panel provide information on the status of the power, disks and keyboard lock features. The meaning of the symbols are as follows: Power-on indicator Your notebook is ready for operation when this symbol appears. The power-on indicator is shown when the notebook is supplied with power and flashes when it is in Standby mode. -
Page 26: Keyboard
Working with your Notebook Keyboard Scroll indicator (Scroll Lock) The [Scr] [Scr] [Scr] key has been pressed. The effect this key has varies from programme to [Scr] programme. Security panel indicator This indicator appears when a password is required. Keyboard The following description of keys refers to Windows. - Page 27 Keyboard Working with your Notebook Alt Gr key Alt Gr The [Alt Gr] [Alt Gr] [Alt Gr] key causes the characters in the lower middle of the keycap to appear [Alt Gr] (e.g. { in the case of the [7] [7] key shown on the example keyboard).
-
Page 28: Key Combinations
Working with your Notebook Keyboard Key combinations The following description of key combinations refers to functions when using Microsoft Windows. Some of the following key combinations may not function in other operating systems and with some device drivers. Other key combinations are described in the relevant manuals supplied with your application programmes. -
Page 29: Touchpad And Touchpad Buttons
Touchpad and touchpad buttons Working with your Notebook Touchpad and touchpad buttons Keep the touchpad clean, protect it from dirt, liquids, and grease. Do not use the touchpad if your fingers are dirty. Do not rest heavy objects (e.g., books) on the touchpad or touchpad buttons. The touchpad enables you to move the mouse pointer on the screen. -
Page 30: Lcd Display Panel
Working with your Notebook LCD display panel Selecting an item: Ê Move the pointer to the item you wish to select. Ê Tap the touchpad once or press the left button once. The item will be selected. Executing a command Ê... -
Page 31: Hard Disk
Hard disk Working with your Notebook Synchronising the display on the LCD screen and an external monitor Your notebook supports the simultaneous display on the LCD screen and an external monitor. If the picture does not appear correctly on the LCD monitor, press the key combination [Fn] [Fn] + [F10] [F10] [Fn]... -
Page 32: Removing Modules
Working with your Notebook Installing and removing modules Removing modules Ê Place the notebook on a flat, sturdy surface. Ê Pull out the eject lever in the direction of the arrow. Ê Press the eject lever (1). Ê The module will spring out of the bay (2). -
Page 33: Cd / Dvd-Rom Drive
CD / DVD-ROM drive Working with your Notebook Ê Push the eject lever back into place. CD / DVD-ROM drive In the following chapter we refer to the actual disk (CD/DVD), although all of the following optical drives can be used with your notebook: CD-ROM, CD-RW, DVD-ROM and CD-RW / DVD Combo. This device contains a light-emitting diode, classified according to IEC 825-1:1993: LASER CLASS 1, and must not be opened. -
Page 34: Inserting Or Removing A Cd/Dvd
Working with your Notebook CD / DVD-ROM drive Inserting or removing a CD/DVD The notebook must be switched on. Ê Push the insert/eject button. The CD/DVD tray will open. Ê Pull the CD/DVD tray completely out. Ê Place the CD/DVD in the CD/DVD tray with the label facing upwards and push the CD/DVD fully into the mount unitl it clicks into place. -
Page 35: Floppy Disk Drive
Floppy Disk Drive Working with your Notebook Manual removal (emergency removal) In the event of a power failure or damage to the drive it may be necessary to manually remove the CD/DVD. Ê Switch the notebook off. Ê Press a pen or a piece of wire (e.g. a paper clip) firmly into the opening. -
Page 36: Working With Floppy Disks
Working with your Notebook Floppy Disk Drive Working with floppy disks Follow the instructions supplied by the vendor of the floppy disks. 1 = Insertion direction 2 = Label area 3 = Write protection tab for a 1.44 Mbyte floppy disk 4 = Identification of a 1.44 MB floppy disk 5 = Eject button for inserted floppy disks 6 = Disk is write-protected... -
Page 37: Connecting The Modem
Connecting the modem Working with your Notebook Connecting the modem Ê Connect the modem to the modem connection on the left-hand side of your notebook. Connecting LAN Ê Connect the LAN data cable to the LAN port on the left-hand side of your notebook. A26391-K114-Z120-1-7619... -
Page 38: Pc Cards
Working with your Notebook PC cards PC cards Two PC card slots (CardBus or PC Card), on the left-hand side of your notebook, permit operation with two type I / II PC cards or one type III PC card. The PC card must not consume more than 600 mA (at +5 V) or 60 mA (at +12 V). Consult the documentation supplied by the PC card's manufacturer and follow the instructions provided. -
Page 39: Removing A Pc Card
PC cards Working with your Notebook Removing a PC card Ê Push the eject button and release, so that the button pops out. Ê Push the eject button (1). Ê Pull the PC card out of the slot (2). Ê Push the eject button down flush into the notebook casing. -
Page 40: Memory Expansion
Working with your Notebook Memory expansion Memory expansion The notebook must be switched off when installing/removing the memory modules, it must not be in Suspend mode. Sufficient memory space must be available on the hard disk (at least the size of the main memory +16 Mbytes) for the current data to be saved in Save to Disk mode. - Page 41 Memory expansion Working with your Notebook Installing memory modules Ê Insert the memory module, contacts first, into the slot. Ê Carefully push the memory module down until you feel it latch into place. Mounting the cover Ê Place the cover tabs into the slots provided and replace the cover (1).
-
Page 42: Microphone And Loudspeakers
Working with your Notebook Microphone and loudspeakers Microphone and loudspeakers 1 = built-in microphone 2 = built-in loudspeakers Your notebook contains a built-in microphone (a) and two loudspeakers (b). If you attach an external microphone, the built-in microphone is disabled. The internal loudspeakers switch off when you attach headphones or external loudspeakers to the audio jack. -
Page 43: Connecting External Devices
Connecting external devices Under all circumstances, please observe the safety notes provided in the "Important notes" chapter. Read the documentation on the external device before connecting it. Do not connect or disconnect cables during a thunderstorm. Always take hold of the actual plug, do not pull on the cable itself. Connect and disconnect the cables in the order described below: Connecting devices to notebook 1) Turn off all power and equipment switches. -
Page 44: Port Symbols
Connecting external devices Microphone and loudspeakers Port symbols The standard ports are marked with the symbols shown below: > < Keyboard port Serial port PS/2 mouse port USB ports Monitor port Docking port > < Parallel interface / Printer DC jack (DC IN) A26391-K114-Z120-1-7619... - Page 45 Microphone and loudspeakers Connecting external devices Infrared port for infrared mouse Infrared interface Headphones Microphone connector LAN connector Modem port Some of the devices that you connect may require special drivers (see the operating system and device documentation). A26391-K114-Z120-1-7619...
-
Page 46: Connecting An External Monitor
Connecting external devices Connecting an external monitor Connecting an external monitor The notebook graphics card supports extended SXGA+ resolutions up to 1400x1050 internal resolution and 1600x1200 external resolution, 85 Hz and 16.7 million colours. • Using the [Fn] [Fn] + [F10] [F10] key combination you can switch back and forth between the external [Fn] [Fn]... -
Page 47: Connecting An External Mouse
Connecting an external mouse Connecting external devices Connecting an external mouse PS/2 mouse You do not need to switch your notebook off. Ê Simply connect the mouse to the PS/2 mouse port on the back of your notebook. A Y-cable is contained in the delivery scope of your notebook, with this you can connect a PS/2 keyboard and a PS/2 mouse to your notebook simultaneously. -
Page 48: Fujitsu Siemens Infrared Mouse
Connecting external devices Connecting an external mouse Fujitsu Siemens infrared mouse An infrared mouse is available as an accessory for your notebook. The infrared mouse requires two AAA batteries, please observe the "Disposal and recycling" instructions. The default setting in the BIOS Setup is Infrared mouse - Disabled, in order to activate the infrared mouse change this setting to Enabled. - Page 49 Connecting an external mouse Connecting external devices Ê Switch the mouse on. Switch to L (Low) to operate the mouse at a distance of up to 40 cm. Switch to H (High) to operate the mouse at a distance of up to 60 cm. When the mouse is no longer required, set the switch to OFF.
-
Page 50: Connecting A Printer
Connecting external devices Connecting a printer Connecting a printer Using the parallel port Ê Switch the notebook off. Ê Connect the printer data cable to the parallel port on the back of the notebook. Ê Plug the printer power cable into the mains outlet. Ê... -
Page 51: Configuring The Infrared Connection
Connecting USB devices Connecting external devices Configuring the infrared connection By default, the mode for the infrared port is set to FIR ("Fast IrDA Mode") in the BIOS Setup. If you want to communicate with a system running Windows NT, you can change the setting in the Advanced menu to IrDA Mode. -
Page 53: Connecting Docking Devices
Connecting docking devices In this chapter the Port Replicator II-L is used as an example of a docking device. The notebook may be switched on when docking on the docking device. Only the power adapter supplied may be connected to the Port Replicator II-L. Docking the notebook Ê... -
Page 55: Energy Saving Functions
Energy saving functions The notebook uses less power when the power management features are enabled, which allows you to work for longer before having to recharge the battery. Never switch the notebook off with the Suspend/Resume button while the notebook is in one of the energy-saving modes. -
Page 56: Operating Systems With Acpi
Energy saving functions Operating systems with ACPI Save to Disk The active data can only be saved if sufficient space is available on the hard disk (at least the main memory size +16 Mbytes). If the Windows NT or OS/2 Warp operating system is installed, a FAT partition with this space must be created as a drive on the hard disk (see the manual for the respective operating system). -
Page 57: Operating Systems With Apm
Operating systems with APM Energy saving functions Operating systems with APM (Windows 95, Windows NT with APM extensions) For operating systems with APM (Advanced Power Management) you can set the energy- saving functions in the BIOS Setup (e.g. Suspend to RAM, Save to Disk, LCD off etc.). Setting energy-saving modes Ê... -
Page 58: Phdisk (For Windows Nt Only)
Energy saving functions PHDISK (for Windows NT only) PHDISK (for Windows NT only) The PHDISK service programme reserves the memory space required for the use of Save-to-Disk mode. The programme creates a file for saving the main memory contents and the system register when your notebook is switched over to Save-to-Disk mode. -
Page 59: Settings In Bios Setup
Settings in BIOS Setup In BIOS Setup you can set the system functions and the hardware configuration of the notebook. The settings can only be changed via the keyboard. The notebook is delivered with factory default settings, which can be changed in BIOS Setup. Any changes you make take effect as soon as you save and quit the BIOS Setup. -
Page 60: Setting The Password
Settings in BIOS Setup Setting the password We recommend that you print out the following instructions, as these cannot be displayed while setting the password. You have three attempts to enter the correct password, after three attempts your system will be locked. In this case, you must switch your notebook off before you attempt a restart. -
Page 61: Troubleshooting And Tips
Troubleshooting and tips Take note of the safety hints in the chapter "Important notes", when you connect or disconnect cables. If a fault occurs, try to correct it as described. If you fail to correct the problem, proceed as follows: Ê... -
Page 62: Restoring The Hard Disk Contents Under Windows 9X
Troubleshooting and tips Restoring the hard disk contents under Windows 9x All data on the hard disk will be deleted. After this, operating system, drivers and software utilities will be reinstalled. For this reason you should try to save important data to a backup medium before you restore the hard disk contents. -
Page 63: The Lcd Display Panel Is Difficult To Read
Troubleshooting and tips The LCD display panel is difficult to read Reflection Ê Turn the notebook or alter the tilt of the LCD display panel. The external monitor stays blank If your screen remains blank this may be due to the following: Monitor is switched off Ê... -
Page 64: The Notebook Cannot Be Started
Troubleshooting and tips The notebook cannot be started If the notebook does not start after switch on, this may be due to one of the following: The battery is not installed correctly Ê Switch the notebook off. Ê Check whether the battery is installed correctly in its compartment. Ê... -
Page 65: The Mouse Does Not Work
Troubleshooting and tips The mouse does not work If the connected mouse does not work, the following can cause it: Mouse driver is not loaded Ê Check whether the correct mouse driver is properly installed and is present before the application programme is started. -
Page 66: Error Messages On The Screen
Troubleshooting and tips Error messages on the screen This section describes the error messages generated by the BIOS-Setup. Error messages displayed by the operating system or programmes are described in the relevant manuals. CMOS Battery Bad If the error message occurs repeatedly, then the buffer battery in the notebook is flat. Ê... - Page 67 Troubleshooting and tips Failure Fixed Disk n The settings of the hard disk drive are incorrect. Ê Start the BIOS Setup (IDE Adapter 0 Master submenu) and select the correct settings. Fixed Disk address conflict Diskette Drive address conflict There is an I/O address conflict. Ê...
- Page 68 Troubleshooting and tips Press <F1> to resume, <F2> to SETUP. This error message appears if an error occurs during the self-test before starting the operating system. Ê Press the [F1] [F1] function key to start the operating system. [F1] [F1] Ê...
-
Page 69: Technical Data
Technical data Notebook Processor Mobile Intel Pentium III Processor-M from 866 MHz. Main memory (SO DIMM 3.3 V): 128 Mbyte - 1 Gbyte SD RAM 2 slots for 128, 256 or 512 Mbyte modules JEDEC 144 pin • CD-ROM drive Possible modules: •... -
Page 70: Battery
Technical data Battery reader Connections with port replicator • PS/2 mouse port/PS/2 keyboard port: 6-pin mini DIN female connector • Parallel port: 25-pin female connector, bi-directional, EPP /ECP capable • Monitor port: 15-pin female connector • Serial port: 9-pin male connector, 16550 compatible •... -
Page 71: Index
Index Acoustic warnings ACPI changing settings Additional battery Administrator password, assigning Alt Gr key setting energy-saving modes Audio devices, connecting 34, Audio input Audio ports 34, Battery 13, battery status indicator being charged capacity charge status charging disposal indicator installing maintenance removing second battery... - Page 72 Index CD-ROM drive installing manually opening removing CD-RW drive CE marking Cleaner diskette Closed cover switch Connecting external devices Connecting LAN Ctrl+C Data audio battery dimensions electrical environmental conditions graphics card input devices LCD screen notebook ports with port replicator power adapter slots technical...
- Page 73 Index removing DVD by hand Electromagnetic compatibility Energy consumption Energy saving Energy saving functions additional closed cover switch hard disk timeout power button standby timeout Windows Energy-saving modes setting Enter key Error correction Error message acoustic on the screen FJSECS.EXE FJSECU.EXE Floppy disk cannot write...
- Page 74 Index CapsLK CD/DVD drive floppy disk drive Num Lock PC cards scroll (Scroll Lock) Indicators Infrared connection Infrared port for infrared mouse Infrared software Input devices Alt Gr Backspace Caps Lock cursor control keys Cursor key Enter Fn key Fn+F3 Fn+F9 menu numeric keypad...
- Page 75 Index Microsoft Backup Microsoft IntelliMouse Modem, connecting Modem/LAN port Module floppy disk drive installing removing Module bay Monitor connecting error message external 38, refresh rate remains blank 54, settings Monitor port Mouse external Fujitsu Siemens infrared mouse Fujitsu Siemens wheel mouse Microsoft IntelliMouse no mouse pointer serial...
- Page 76 Index changing delete entry, example error alarm setting up Pause key connecting direct connection infrared connection infrared software PC card installing removing PC memory card PCMCIA, see PC card PHDISK executing Ports left-hand side right-hand side Power button Power indicator Power supply unit connecting 5, Power, saving...
- Page 77 Index Status indicator panel Summer time Suspend/Resume button 7, Symbols, explanation of System configuration System expansion System files Technical data Time daylight savings not correct Tips Touchpad buttons dragging items executing commands moving the pointer selecting items Troubleshooting USB devices, connecting USB port USB, Universal Serial Bus User password, assigning...
Need help?
Do you have a question about the Lifebook E Series and is the answer not in the manual?
Questions and answers