Table of Contents
Advertisement
Advertisement
Table of Contents

Related Manuals for EasyStand 5000 YOUTH


Summary of Contents for EasyStand 5000 YOUTH
- Page 1 5000 YOUTH Owner’s Manual...
-
Page 2: Table Of Contents
Assembly ........3-15 Using Your EasyStand ......16-19 Parts &... -
Page 3: Introduction
This manual is an integral part of your standing system and should be read completely and thoroughly by anyone that will be operating the unit. This will ensure that the EasyStand 5000 YOUTH is assembled properly and then used in the most beneficial manner. -
Page 4: Safety Precautions
• Altimate Medical Inc. recommends that you consult with your therapist or physician prior to starting a standing program. • Check your EasyStand periodically to make sure that all nuts, bolts and adjustable parts are tightened securely. • Never reposition the foot holders while you are in the standing position. Consult with your therapist or doctor for proper foot placement and angle. -
Page 5: Assembly
Depending on what base style you ordered you will have either level glides (standard), casters, or the mobile option. Turn the base over as shown and locate the enclosed tool package. Many of the pictures in this manual show the optional ratchet handles. - Page 6 The front level glides (with adapters) must be tightened securely onto the frame as shown. Level glides will come with anti-tips when ordered with the clear desk table. Position the anti-tip between the level glide and the adapter pointing outward. After attaching adapter thread the level glide in securely.
- Page 7 The front casters (with adapter) must be attached securely into the frame as shown. (fig. A) Then thread the caster completely into the adapter with the enclosed wrench. The anti-tips must be installed when used with the clear desk table. (fig. B) (fig.
- Page 8 With your unit in the Be sure that H-frame upright position, remove bracket is facing inward. the quick pins. Place H-frame into base with kneepad bracket Standard Knee bracket facing inward. Replace quick pins. Independent Knee Attach the kneepad and tighten securely.
- Page 9 To install the table, loosen ratchet han- the H-frame knobs dles or knobs slightly, be sure the front pad bracket faces toward the seat. Note: If you ordered the clear desk table the front anti-tips must be installed as in step #7. Insert the table into the H-frame and push the spring button to continue...
- Page 10 The actuator handle can be installed on the right or left side. Attach the actuator handle so that the handle is near vertical. Use the enclosed allen wrench and a multi-use wrench. Tighten Securely. If you ordered the removable actuator handle it can be removed by loosening the knob as shown.
- Page 11 To install the back option, loosen the quick adjust knob on the square tube. Press the spring button on the lower following arm and insert it into the round corresponding tube. Continue pressure until you hear the spring button "click". Slide the upper square back tube into the corresponding seat...
- Page 12 To install the seat, first raise the seat by pumping the actuator handle. The bolts for the seat are found in the seat. Remove bolts and place the seat onto the frame, narrow end toward the rear of the unit. Tighten securely.
- Page 13 Side supports mount under the seat. Loosen the quick adjust knob and depress the spring button. Hip guide will snap into maximum width. (Picture shown is side support with optional padded hip guide.) Note: If you ordered the high back extension go to #27. Attach the back pad and tighten securely.
- Page 14 To adjust the footrests, loosen the knobs and pivot the foot rests forward, then tighten securely. If you ordered the high back extension with the optional chest vest, it comes assembled. Install it like you would the high back. If you ordered the chest vest with the low back, attach it to the back frame as shown.
- Page 15 If you ordered laterals with the low back, attach them the same way as the chest vest. You must either widen or remove the pad brackets for ease in installation. Note: The quick adjust knobs go to the top (see fig. #32).
- Page 16 If you are using it with the Whitmyer Pro receiver, Pro-MS, Pro-MD or the soft/plush series receiver #M1012, use the four bolts supplied by Whitmyer to attach your headrest. For use with the Stealth ® Otto Bock™ or Whitmyer #M0012 detachable mount, you must remove the auxiliary mounting plate.
-
Page 17: Assembly
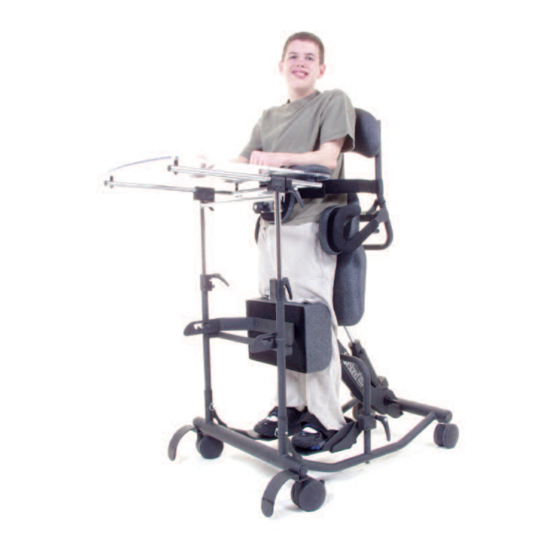
® headrest, use the two of the provided buttonhead bolts to fasten their hardware as shown. Here is the 5000 Youth shown with casters, ratchet handles, padded hip guides, table swing-away sleeve, clear desk table, independent kneepads, anti-tips and back option. -
Page 18: Using Your Easystand
• Do not use the mobile option on ramps or uneven surfaces or outdoors. • Before transferring into the EasyStand with the Mobile Option, make sure that the casters and the push rim locking mechanisms are in the locked position. Use these locks whenever you want to keep the EasyStand stationary. - Page 19 The front end of the EasyStand can be removed so an assistant can use proper body mechanics for a standing pivot or fully assisted sliding board transfer. • When transferring out of the EasyStand, pump the seat up so that it is equal to or higher than the seat you are transferring back in to.
- Page 20 • Please consult with your therapist or doctor before starting a standing program. • Once transferred into the EasyStand, position your feet and the knee support and secure any straps. Push the pump handle forward with 15-25 strokes. The seat will slowly rise into the standing position.
- Page 21 (the weight limit for the EasyStand 6000 is 280 lbs). • If your EasyStand was shipped to you during or exposed to a temperature of less then 50 degrees Fahrenheit, you must allow the hydraulic unit to warm up to room temperature before any use.
- Page 22 EasyStand Parts Detail page# 5000 YOUTH OPTION OVERVIEW page 20 Parts Detail...
- Page 23 5000 YOUTH BASIC FRAME page 21 Parts Detail...
- Page 24 LEVEL GLIDES #10126 LOCKING CASTERS #5062 page 22 Parts Detail...
- Page 25 MOBILE OPTION #5200Y ACTUATOR HANDLE #58483 page 23 Parts Detail...
- Page 26 REMOVABLE ACTUATOR HANDLE #5020 ACTUATOR HANDLE EXTENSION #5022 page 24 Parts Detail...
- Page 27 FOOT HOLDERS #80635 FOOT STRAPS #80634 SECURE FOOT OPTION #80616 page 25 Parts Detail...
- Page 28 INDEPENDENT KNEE PADS #5026 STANDARD KNEE PAD #10128 page 26 Parts Detail...
- Page 29 CLEAR DESK TABLE #5041 BLACK MOLDED TABLE #10600 page 27 Parts Detail...
- Page 30 OVERSIZED TABLE OPTION #5040 NO-TABLE OPTION #5250 page 28 Parts Detail...
- Page 31 TILT TABLE FOR MOLDED TABLE #81011 TILT TABLE FOR OVERSIZED TABLE #80997 page 29 Parts Detail...
- Page 32 TILT TABLE FOR CLEAR TABLE #80996 ROHO SEAT SET #81020 page 30 Parts Detail...
- Page 33 TABLE SWING-AWAY-SLEEVE #5024 ARM TROUGHS #5030 page 31 Parts Detail...
- Page 34 BACK OPTION #5100Y page 32 Parts Detail...
- Page 35 REMOVABLE BACK OPTION #5100YR page 33 Parts Detail...
- Page 36 LATERAL SUPPORTS #5036 HIGH BACK W/CHEST STRAP #5150 page 34 Parts Detail...
- Page 37 HIGH BACK HEAD SUPPORT #5032 BACK HEAD SUPPORT #7030 HIGH BACK UNIVERSAL RECEIVER #80643 BACK UNIVERSAL RECEIVER #80642 page 35 Parts Detail...
- Page 38 UNIVERSAL HEADREST RECEIVER #80608 SHOULDER RETRACTORS #5034 page 36 Pats Detail...
- Page 39 NO BACK OPTION #58582 HIP GUIDES #5038Y page 37 Parts Detail...
- Page 40 LARGE CHEST STRAP #51600 SMALL CHEST STRAP #51601 LARGE CHEST VEST #80633 MEDIUM CHEST VEST #80632 SMALL CHEST VEST #80631 page 38 Parts Detail...
- Page 41 SEAT BELT #51500 page 39 Parts Detail...
-
Page 42: Health Benefits
Health Benefits IMPROVED HEALTH THROUGH STANDING Improved trunk strength and balance Natural alignment of internal organs Improved renal & bowel function Sustained ROM decreases spasticity allowing for improved positioning and comfort Strengthen cardiovascular and respiratory systems Range of motion (spine, hips, knees, ankles) to prevent contractures Pressure relief through changing positions... -
Page 43: User Log
User Log photo copy this page for a long term record of your standing progress Client Name End Time Date Start Time Total Time page 41 User Log... -
Page 44: Specifications
Specifications 4’0”-5’6” 122-168cm Height Range 180 lbs. 82kg Weight Limit 14”-18” 36-46cm Seat Depth Range (from front pivot) 19.5” 49cm Seat Height from Floor (transfer height) 11”-19” 28-48cm Seat to Footplate Range 2’-10” 5-25cm Table/Frontpad Depth Range (from seat when standing) 12”-26”... -
Page 45: Limited Warranty
Limited Warranty This warranty is extended only to the original purchaser/customer (or dealer non consumer who does not buy or resell). Altimate Medical, Inc. (AMI) warrants the EasyStand 5000 Youth against defects in materials and work- manship as listed below. - Page 46 EasyStand products are manufactured by Altimate Medical, Inc. A small company with a big heart, based out of Morton, Minnesota, Altimate Medical is proud to have been helping people stand for fifteen years. If you have any stories or comments about standing please write us at the address below.
Need help?
Do you have a question about the 5000 YOUTH and is the answer not in the manual?
Questions and answers