Table of Contents
Advertisement
RETURN TO MAIN INDEX
SVM147-A
September, 2002
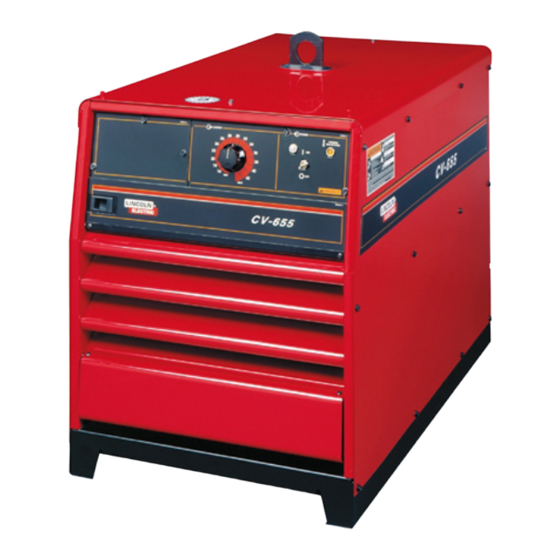
CV-655
For use with machine code number 10120 thru 10129
Safety Depends on You
Lincoln arc welding and cutting
equipment is designed and built
with safety in mind. However,
your overall safety can be
increased by proper installation
. . . and thoughtful operation on
your part. DO NOT INSTALL,
OPERATE OR REPAIR THIS
EQUIPMENT WITHOUT READ-
ING THIS MANUAL AND THE
SAFETY PRECAUTIONS CON-
TAINED THROUGHOUT. And,
most importantly, think before
you act and be careful.
SERVICE MANUAL
Copyright © 2002 Lincoln Global Inc.
• World's Leader in Welding and Cutting Products •
• Sales and Service through Subsidiaries and Distributors Worldwide •
Cleveland, Ohio 44117-1199 U.S.A. TEL: 216.481.8100 FAX: 216.486.1751 WEB SITE: www.lincolnelectric.com
Advertisement
Chapters
Table of Contents
Troubleshooting

Related Manuals for Lincoln CV-655


Summary of Contents for Lincoln CV-655
-
Page 1: Service Manual
SERVICE MANUAL Copyright © 2002 Lincoln Global Inc. • World's Leader in Welding and Cutting Products • • Sales and Service through Subsidiaries and Distributors Worldwide • Cleveland, Ohio 44117-1199 U.S.A. TEL: 216.481.8100 FAX: 216.486.1751 WEB SITE: www.lincolnelectric.com... - Page 2 Miami, Florida 33135 or CSA Standard W117.2-1974. A Free copy of “Arc Welding Safety” booklet E205 is available from the Lincoln Electric Company, 22801 St. Clair Avenue, Cleveland, Ohio 44117-1199. BE SURE THAT ALL INSTALLATION, OPERATION, MAINTENANCE AND REPAIR PROCEDURES ARE PERFORMED ONLY BY QUALIFIED INDIVIDUALS.
-
Page 3: Safety
SAFETY ARC RAYS can burn. ELECTRIC SHOCK can kill. 3.a. The electrode and work (or ground) circuits 4.a. Use a shield with the proper filter and cover are electrically “hot” when the welder is on. plates to protect your eyes from sparks and Do not touch these “hot”... - Page 4 SAFETY WELDING SPARKS can CYLINDER may explode cause fire or explosion. if damaged. 6.a. Remove fire hazards from the welding area. 7.a. Use only compressed cylinders If this is not possible, cover them to prevent containing the correct shielding gas for the the welding sparks from starting a fire.
- Page 5 SAFETY zones où l’on pique le laitier. PRÉCAUTIONS DE SÛRETÉ 6. Eloigner les matériaux inflammables ou les recouvrir afin de Pour votre propre protection lire et observer toutes les instructions prévenir tout risque d’incendie dû aux étincelles. et les précautions de sûreté specifiques qui parraissent dans ce manuel aussi bien que les précautions de sûreté...
-
Page 6: Table Of Contents
Theory of Operation ......................Section E Troubleshooting and Repair....................Section F How to Use Troubleshooting Guide....................F-2 PC Board Troubleshooting Procedures ..................F-3 Troubleshooting Guide ........................F-4 Test Procedures ........................F-13 Oscilloscope Waveforms ......................F-43 Replacement Procedures......................F-49 Retest After Repair........................F-57 Electrical Diagrams ......................Section G Parts Manual ..........................P284 CV-655... -
Page 7: Installation Section
Section A-1 TABLE OF CONTENTS Section A-1 - INSTALLATION SECTION - Installation ..........................Section A Technical Specifications - CV-655 ....................A-2 Graphic Symbols that Appear on Rating Plate ................A-3 Safety Precautions........................A-4 Select Suitable Location......................A-4 Stacking..........................A-4 Tilting ............................A-4 Electrical Input Connections.......................A-4 Fuse and Wire Sizes......................A-4 Ground Connection ......................A-4... -
Page 8: Installation
INSTALLATION TECHNICAL SPECIFICATIONS – CV-655 INPUT - THREE PHASE ONLY Input Current at Rated Output Standard Code 100% Duty Cycle 60% Duty Cycle Volatge Number 94/47 116/58 230/460/60 10120 94/47/38 116/58/47 230/460/575/60 10121 104/52 128/64 208/416/60 10122 460/60 10123 575/60... -
Page 9: Graphic Symbols That Appear On Rating Plate
Designates welder complies with Constant Current Output Underwriters Laboratories (UL) Characteristics standards. (Domestic Models) NRTL SMAW Open Circuit Output Voltage Input Voltage Rating(s) Input Current Rating(s) Output Duty Cycle Rating(s) Output Voltage Rating(s) Output Current Rating(s) CV-655... -
Page 10: Safety Precautions
• Turn the input power OFF at the disconnect switch or fuse box before working on this equipment. • Turn the Power Switch on the CV-655 “OFF” before FIGURE A.1 - ELECTRICAL INPUT CONNECTIONS connecting or disconnecting output cables, wire feeder or remote connections, or other equipment. -
Page 11: Reconnect Procedure
5. MOUNT THE LINKS IN THE POSITIONS SHOWN. CONNECT THE FLEX LEAD AS SHOWN; POSITIONING THE LUGS TO MAINTAIN MAXIMUM CLEARANCE TO THE LINKS. CONTROL INSTALL AND TIGHTEN ALL OF THE HEX NUTS. TRANSF. XD-UF LINKS M18225 THE LINCOLN ELECTRIC CO., CLEVELAND OHIO U.S.A. FIGURE A.2 - DUAL VOLTAGE MACHINE RECONNECTION PROCEDURE CV-655... -
Page 12: Output Connections
4. Work Sense lead #21 from the 14 Pin MS-recepta- for recommended cable sizes based on length. cle must be connected to “-21”on the terminal strip. Note: This is how the CV-655 is shipped from TABLE A.1 the factory. Cable Sizes for Combined Lengths of Copper 5. -
Page 13: Auxiliary Power And Control Connections
European Models one line is connected to “-21” on the terminal strip. This is the configuration connected to chassis ground. for positive welding. If welding negative polarity, connect lead #21 to the “+21” connection point on the terminal strip. CV-655... -
Page 14: Terminal Strips
If connecting a feeder cable directly to the terminal strip, Lead #21 from the cable is connected to “-21” on the terminal strip for posi- tive welding. If welding negative polarity, connect lead #21 to the “+21” connection point on the terminal strip. CV-655... - Page 15 Design Features and Advantages ..................B-3 Welding Capability........................B-3 Controls and Settings .........................B-4 Lower case front control conections...................B-5 Case Back Connections ......................B-6 220 VAC Auxiliary Receptacle....................B-6 220 VAC 2 Amp Circuit Breaker...................B-6 Auxiliary Power ...........................B-6 Thermal Fan Control ........................B-6 Overload Protection........................B-6 Fan Motor Fuse ..........................B-6 CV-655...
-
Page 16: Operation
• Keep flammable material away. • Do not cut containers that have held combustibles. ARC RAYS can burn. • Wear eye, ear, and body protection. Observe additional Safety Guidelines detailed in the beginning of this manual. CV-655... -
Page 17: General Description
OPERATION GENERAL DESCRIPTION DESIGN FEATURES AND ADVANTAGES (CONT’D) The CV-655 is an energy efficient constant voltage DC power source that produces outstanding arc characteristics. • 115 VAC, auxiliary power available for the wire feed- er; circuit breaker protected. 20 amp breaker on... -
Page 18: Controls And Settings
OPERATION CONTROLS AND SETTINGS All operator controls and adjustments are located on the case front of the CV-655. Refer to Figures B.1, and B.2 and corresponding explanations. CV-655 FIGURE B.1 CONTROL PANEL CONTROLS 1. INPUT POWER ON/OFF SWITCH - This tog- time. - Page 19 This terminal strip contains the same circuits as the 14 pin MS-receptacle. The cover also provides for installation of cable strain relief clamps. 6. NEGATIVE OUTPUT TERMINAL - This output ter- minal is for connecting a welding cable. To change CV-655...
-
Page 20: Case Back Connections
CAUTION OVERLOAD PROTECTION When using a CV-655 with wire feeders, there will be a small spark if the electrode contacts the work or ground with several seconds after releasing the trigger. - Page 21 TABLE OF CONTENTS - ACCESSORIES - Accessories...........................Section C Wire Feeders..........................C-2 Field Installed Options........................C-2 Connection of Lincoln Electric Automatic or Semiautomatic Wire Feeders ......C-3 Automatic Wire Feeders.......................C-3 NA-3 or LT-7 (Terminal Strip) ..................C-3 NA-5 or NA-5R (Terminal Strip) ..................C-4 Semiautomatic Wire Feeders ....................C-6 LN-7 (14-Pin MS Receptacle)..................C-6...
-
Page 22: Accessories
NA-5 Mechanized towing can lead to injury and /or damage to the CV-655. * European CV-655 models only provide 115VAC for these feeders at the ter- minal strip (TS2) REMOTE OUTPUT CONTROL “Cold starting for sub-arc cannot be used. (It must be jumpered out. See... -
Page 23: Connection Of Lincoln Electric Automatic Or Semiautomatic Wire Feeders
AUTOMATIC OR SEMIAUTOMATIC WIRE CONNECTING THE NA-3 OR LT-7 TO THE CV-655 FEEDERS (TERMINAL STRIP) 1. Set CV-655 POWER toggle switch to the OFF (0) WARNING position. ELECTRIC SHOCK can kill. 2. Disconnect main AC input power to the CV-655. -
Page 24: Or Lt-7 (Terminal Strip
Make a bolted connection using AWG #14 or CV-655 (TERMINAL STRIP) larger insulated wire. Tape the bolted connec- tion with insulating tape. 1. Set the CV-655 POWER toggle switch to the OFF (0) position. b. An S-16586-X remote voltage sensing work lead is available for this purpose. - Page 25 NOTE: The connection diagram shown in Figure C.2 shows the electrode connected for positive polarity. To change polarity: a. Set the CV-655 POWER toggle switch to the OFF (0) position. b. Move the electrode cable to the negative (-) output terminal.
-
Page 26: Semiautomatic Wire Feeders
4. Connect control cable between the CV-655 and tion. the LN-7. See Figure C.3. 2. Disconnect main AC input power to the CV-655. 5. Place the output terminals switch in the “Remote” position. 3. Connect the electrode cable from the control cable to the “+”... -
Page 27: Terminal Strip
CV-655 (TERMINAL STRIP) and the connections to the work piece are secure, then wire feeder control cable lead 1. Set the CV-655 POWER toggle switch to the OFF #21 can be connected directly to the CV- (0) position. 655 terminal strip. - Page 28 ACCESSORIES FIGURE C.4 - LN-8 OR LN-9 WIRE FEEDER CONNECTION TO THE CV-655 POWER SOURCE TO LN-8 OR LN-9 INPUT CABLE PLUG CONTROL CABLE 31 32 75 76 77 N.E. NEGATIVE POSITIVE ELECTRODE CABLE TO WIRE FEED UNIT TO WORK...
-
Page 29: 14-Pin Ms Receptacle
WIRE FEEDER VOLTAGE the welding voltage with the WIRE FEEDER VOLT- CONTROL. AGE CONTROL. 7. Set the DIP switches on the DH-10 for CV-655. See the DH-10 Operator’s Manual. FIGURE C.5 – CV-655 DH-10 CONNECTION DH-10... - Page 30 NOTES CV-655...
-
Page 31: General Maintenance
Section D-1 Section D-1 TABLE OF CONTENTS -MAINTENANCE- Maintenance .........................Section D Safety Precautions........................D-2 General Maintenance........................D-2 General Component Locations....................D-3 CV-655... - Page 32 3. Periodically check the welding cables. Inspect for any slits or punctures. Also make sure that all connections are tight. CV-655...
- Page 33 4. CASE TOP 5. RECONNECT PANEL (LOCATION) 6. INPUT CONTACTOR (LOCATION) 7. CONTROL TRANSFORMER (LOCATION) 8. CASE BACK 9. FAN ASSEMBLY 10. CONTROL PANEL 11. PC BOARDS (LOCATION) 12. CHOKE 13. MAIN TRANSFORMER 14. BASE 15. SCR RECTIFIER BRIDGE CV-655...
- Page 34 NOTES CV-655...
- Page 35 Fault Protection and Transformers ....................E-2 Control Board, Firing Board, Snubber/Fan Board and Rectification ......................E-3 Protective Devices and Shutdown Circuits ................E-4 Thermal Protection .......................E-4 Over Current Protection .......................E-4 SCR Operation ..........................E-5 FIGURE E.1 – CV-655 BLOCK LOGIC DIAGRAM CONTROL TRANSFORMER 42VAC 115VAC CONTROL BOARD...
- Page 36 The desired three-phase input power is connected to motor and provides the user with up to 20 amps of the CV-655 through an input contactor located in the 115 VAC auxiliary power at the receptacle or 14-pin input box at the rear of the machine. Two phases of MS type connector.
- Page 37 This large inductor stores ener- bridge. gy, which provides current filtering for the welding out- put of the CV-655. Two positive output terminals are A portion of the firing board is a three-phase circuit. provided. One is connected to the tap lead in the Each phase provides two firing pulses, one for each of choke, thus providing a lower inductance.
-
Page 38: Fan Motor Fuse
This is done by turning the power switch off, then back on with the overload removed. FAN MOTOR FUSE (EUROPEAN MODEL) A 10 amp slow blow fuse protects the fan motor cir- cuit. This fuse is located inside the CV-655 mounted on the fan motor bracket. CV-655... -
Page 39: Scr Operation
ON state and the remainder of the time in the resulting in lower SCR output. OFF state. The amount of time spent in the ON state is controlled by the Gate. CV-655... - Page 40 NOTES CV-655...
-
Page 41: How To Use Troubleshooting Guide
Abnormal Open Circuit Voltage Waveform-Maximum Output Setting (No Load) ..F-46 Typical SCR Gate Voltage Waveform-Maximum Output Setting (No Load) ....F-47 Replacement Procedures Input Contactor (CR1) Cleaning/Replacement .............F-49 SCR Rectifier Bridge Removal and Replacement ............F-51 Main Transformer and Choke Removal and Replacement ...........F-54 Retest After Repair ......................F-57 CV-655... - Page 42 HOW TO USE TROUBLESHOOTING GUIDE WARNING Service and repair should be performed by only Lincoln Electric Factory Trained Personnel. Unauthorized repairs performed on this equipment may result in danger to the technician and machine operator and will invalidate your factory warranty. For your safety and to avoid Electrical Shock, please observe all safety notes and precautions detailed throughout this manual.
-
Page 43: Pc Board Troubleshooting Procedures
Do not touch electrically hot parts. - If you return a PC board to The Lincoln Electric Company for credit, it must be in the static-shielding bag. This will prevent further damage and allow prop- CAUTION er failure analysis. -
Page 44: Troubleshooting & Repair Section
CAUTION If for any reason you do not understand the test procedures or are unable to perform the test/repairs safely, con- tact the Lincoln Electric Service Department for electrical troubleshooting assistance before you proceed. Call 1-800-833-9353. CV-655... -
Page 45: Troubleshooting Guide
CAUTION If for any reason you do not understand the test procedures or are unable to perform the test/repairs safely, con- tact the Lincoln Electric Service Department for electrical troubleshooting assistance before you proceed. Call 1-800-833-9353. CV-655... - Page 46 See the Control Board LED Chart. CAUTION If for any reason you do not understand the test procedures or are unable to perform the test/repairs safely, con- tact the Lincoln Electric Service Department for electrical troubleshooting assistance before you proceed. Call 1-800-833-9353. CV-655...
- Page 47 3. The 115 VAC receptacle may be defective. CAUTION If for any reason you do not understand the test procedures or are unable to perform the test/repairs safely, con- tact the Lincoln Electric Service Department for electrical troubleshooting assistance before you proceed. Call 1-800-833-9353. CV-655...
- Page 48 See the Wiring Diagram. CAUTION CAUTION If for any reason you do not understand the test procedures or are unable to perform the test/repairs safely, con- tact the Lincoln Electric Service Department for electrical troubleshooting assistance before you proceed. Call 1-800-833-9353. CV-655...
- Page 49 3. The digital meter PC board may be faulty. CAUTION If for any reason you do not understand the test procedures or are unable to perform the test/repairs safely, con- tact the Lincoln Electric Service Department for electrical troubleshooting assistance before you proceed. Call 1-800-833-9353. CV-655...
- Page 50 2. The meter(s) may be defective. CAUTION If for any reason you do not understand the test procedures or are unable to perform the test/repairs safely, con- tact the Lincoln Electric Service Department for electrical troubleshooting assistance before you proceed. Call 1-800-833-9353. CV-655...
- Page 51 See the Control Board LED Chart. CAUTION If for any reason you do not understand the test procedures or are unable to perform the test/repairs safely, con- tact the Lincoln Electric Service Department for electrical troubleshooting assistance before you proceed. Call 1-800-833-9353. CV-655...
- Page 52 CAUTION If for any reason you do not understand the test procedures or are unable to perform the test/repairs safely, con- tact the Lincoln Electric Service Department for electrical troubleshooting assistance before you proceed. Call 1-800-833-9353. CV-655...
-
Page 53: Internal Trigger Circuit Test
INTERNAL TRIGGER CIRCUIT TEST WARNING Service and repair should be performed by only Lincoln Electric factory trained person- nel. Unauthorized repairs performed on this equipment may result in danger to the tech- nician or machine operator and will invalidate your factory warranty. For your safety and to avoid electrical shock, please observe all safety notes and precautions detailed throughout this manual. - Page 54 TEST PROCEDURE 1. With the correct input power applied to the CV-655 and the trigger circuit activated, LED 10 on the firing board should be lit. See Figure F.1. If LED 10 lights when the trigger is activated, the wiring and circuitry to the firing board is good.
- Page 55 Simplified Trigger Diagram. Also perform the Main Transformer Test. 6. Remove the main input supply power to the CV-655 machine. 7. Check continuity (zero ohms) from lead #42A ( plug P15 pin-13) to lead #2 at the 14- pin receptacle pin “C”. Also check continu- ity to the output terminal switch.
- Page 56 TO #42 AT MAIN TRANSFORMER FIRING BOARD TERMINAL STRIP 11J5 #309 14-PIN RECEPTACLE CONTROL OUTPUT BOARD TERMINAL LED10 SWITCH 10J5 #310 LATCHING RESISTOR ENABLE #273 FIRING N.C. N.C. CIRCUIT CHOKE LEAD SECONDARY THERMOSTAT THERMOSTAT ENABLE TO #41 AT MAIN TRANSFORMER CV-655...
-
Page 57: Firing Board Test
FIRING BOARD TEST WARNING Service and repair should be performed by only Lincoln Electric factory trained person- nel. Unauthorized repairs performed on this equipment may result in danger to the tech- nician or machine operator and will invalidate your factory warranty. For your safety and to avoid electrical shock, please observe all safety notes and precautions detailed throughout this manual. - Page 58 4. Connect the correct AC input power to the 5. Turn the power switch (SW1) to the ON CV-655. position. 6. LEDs 7, 8 and 9 should be lit and equally bright. See Figure F.4 to locate the LEDs.
- Page 59 Check for loose or faulty connections. Perform the Main Transformer Test. LED 10 is ON This indicates the trigger circuit is activated at the 14-pin receptacle or the terminal strip or that the Output Terminal Switch (SW5) is closed. CV-655...
- Page 60 9. Set the Output Control Switch (SW3) in the If all of LEDs 1 through 6 do not glow or do “Output Control at CV-655” (local) position. not change in brightness equally as the output control is rotated, go to step 11.
- Page 61 LEDs 1 through 6 do NOT vary in brightness, the firing board may be faulty. If the voltage does NOT vary, the control board, control potentiometer or associated leads may be faulty. See the Wiring Diagram. CV-655...
-
Page 62: Main Transformer (T1) Voltage Test
MAIN TRANSFORMER (T1) VOLTAGE TEST WARNING Service and repair should be performed by only Lincoln Electric factory trained personnel. Unauthorized repairs performed on this equipment may result in danger to the technician or machine operator and will invalidate your factory warranty. For your safety and to avoid elec-... - Page 63 3. Confirm that the reconnect panel is config- contactor, check the input fuses and leads. ured correctly for the three-phase AC input power supplied to the CV-655. See the a. L1 to L2 connection diagram located on the inside b. L2 to L3 of the input box assembly.
- Page 64 See Figure faulty connections. See the Wiring Diagram. If F.7. the leads and connections are OK, the main transformer may be faulty. CV-655...
- Page 65 Wiring Diagram. cuit breaker and the receptacle. See the 13. Remove the AC input power to the CV-655. Wiring Diagram. Remove the screws from the control box 11. If 115 VAC is NOT present and the wiring cover and carefully lower the cover.
- Page 66 42 VAC Plug J13 pin-3 (lead #335) to pin-6 (lead #336) 18. If the correct primary voltages are applied 16. Turn on the CV-655 and check for approxi- to the main transformer and any of the sec- mately 32 VAC at the following leads and ondary voltages are missing or not correct, pins at plug J5.
- Page 67 CONTROL TRANSFORMER (T2) TEST WARNING Service and repair should be performed by only Lincoln Electric factory trained personnel. Unauthorized repairs performed on this equipment may result in danger to the technician or machine operator and will invalidate your factory warranty. For your safety and to avoid elec-...
- Page 68 TEST PROCEDURE 1. Disconnect the main AC input voltage to the 4. Locate the control transformer primary leads CV-655. (H1, H2, H3, etc.). See the Wiring Diagram. 2. Remove the case top and sides. NOTE: Unused leads should be insulated and taped.
- Page 69 6. Apply the correct three-phase input power to the CV-655 and check for 115 VAC at leads X1 to X2. NOTE: The CV-655 does not have to be ON to perform this test. If the main AC input...
-
Page 70: Control Board Transformer (T3) Test
CONTROL BOARD TRANSFORMER (T3) TEST WARNING Service and repair should be performed by only Lincoln Electric factory trained personnel. Unauthorized repairs performed on this equipment may result in danger to the technician or machine operator and will invalidate your factory warranty. For your safety and to avoid elec-... - Page 71 1. Disconnect the main AC input power to the 5. Apply the correct three-phase input power CV-655 machine. to the CV-655 and turn the power switch (SW1) to the ON position. 2. Remove the case top and sides. 6. Carefully check for 42 VAC at the secondary 3.
-
Page 72: Input Contactor Test
INPUT CONTACTOR TEST WARNING Service and repair should be performed by only Lincoln Electric factory trained personnel. Unauthorized repairs performed on this equipment may result in danger to the technician or machine operator and will invalidate your factory warranty. For your safety and to avoid elec-... - Page 73 1. Disconnect the main input supply power to 5. Apply the correct three-phase input power the machine. to the CV-655 and turn the power switch (SW1) to the ON position. 2. With the 3/8” nut driver, remove the case top and input access cover.
- Page 74 TEST FOR CONTACT CONTINUITY 1. Disconnect the main input supply power to 4. With the contactor activated, check the the CV-655 machine. continuity across the contacts. (Zero ohms or very low resistance is normal.) 2. Locate, label and remove the three leads Figure F.13.
-
Page 75: Static Scr Test
STATIC SCR TEST WARNING Service and repair should be performed by only Lincoln Electric factory trained personnel. Unauthorized repairs performed on this equipment may result in danger to the technician or machine operator and will invalidate your factory warranty. For your safety and to avoid elec-... - Page 76 TEST PROCEDURE 1. Disconnect the main AC input power to the 4. Test for high or infinite resistance from the CV-655 machine. anode to the cathode of SCR1. See Figure F.15. Use an analog ohmmeter (multimeter). 2. Locate and disconnect plug J9 from the thermal fan/snubber board and plug J5 from 5.
- Page 77 Repeat steps #4 and #5 Test. for each of the six SCRs. It may be neces- sary to disconnect the transformer sec- ondary leads from the rectifier assembly to isolate the defective SCR(s). See the Wiring Diagram. CV-655...
-
Page 78: Active Scr Test
ACTIVE SCR TEST WARNING Service and repair should be performed by only Lincoln Electric factory trained personnel. Unauthorized repairs performed on this equipment may result in danger to the technician or machine operator and will invalidate your factory warranty. For your safety and to avoid elec-... - Page 79 3. Remove the red insulating paint from the machine. heat sink test points. See Figure F.17. DO NOT DISASSEMBLE THE HEAT SINKS. 2. Locate and disconnect plug J9 from the thermal fan/snubber board and plug J5 from the firing board. See Figure F.16. CV-655...
- Page 80 15. Replace all SCR assemblies that do not switch is closed and after the switch is pass the above tests. open, the SCR is functioning. 16. Plug J9 onto the thermal fan/snubber board and plug J5 into the firing board. CV-655...
-
Page 81: Thermal Fan/Snubber Board Led Chart
The thermal protection light should also be illuminated. Indicates the fan motor should be running. LED 6 should be illuminated and the fan running when any of the following LEDs are lit: LED 2, LED 3, LED 4, or LED 5. CV-655... -
Page 82: Control Board Led Chart
1000 amp draw exists, replace control PCB. 9 + 11 LED’s 9 & 11 should be OFF on CV-655 machines. LED 10 Should be ON when machine power is ON. If not, replace the Control PCB. *FOOTNOTE: If LED’s 1, 2, or 3 are not ON when the machines POWER IS ON, replace PCB. -
Page 83: Normal Open Circuit Voltage Waveform-Maximum Output Setting
20 volts and that each horizontal divi- sion represents 2 milliseconds in time. Note: Scope probes connected at machine output terminals: (+) probe to positive High Inductance terminal, (-) probe to negative terminal. SCOPE SETTINGS Volts/Div.....20V/Div. Horizontal Sweep..2 ms/Div. Coupling ......DC Trigger ......Internal CV-655... -
Page 84: Typical Output Voltage Waveform-Machine Loaded
The grid bank meters read 650 amps at 44 VDC. Note: Scope probes connected at machine output terminals: (+) probe to positive High Inductance terminal, (-) probe to negative terminal. SCOPE SETTINGS Volts/Div.....20V/Div. Horizontal Sweep..2 ms/Div. Coupling ......DC Trigger ......Internal CV-655... - Page 85 2 milliseconds in time. Note: Scope probes connected at machine output terminals: (+) probe to positive High Inductance terminal, (-) probe to negative terminal. SCOPE SETTINGS Volts/Div.....20V/Div. Horizontal Sweep..2 ms/Div. Coupling ......DC Trigger ......Internal CV-655...
-
Page 86: Abnormal Open Circuit Voltage Waveform-Maximum Output Setting (No Load
20 volts and that each horizontal division represents 2 milliseconds in time. Note: Scope probes connected at machine output terminals: (+) probe to positive High Inductance terminal, (-) probe to negative terminal. SCOPE SETTINGS Volts/Div.....20V/Div. Horizontal Sweep..2 ms/Div. Coupling ......DC Trigger ......Internal CV-655... -
Page 87: Typical Scr Gate Voltage Waveform
5 milliseconds in time. Note: Scope probes connected at SCR gate and cathode: (+) probe to gate, (-) probe to cathode. SCOPE SETTINGS Volts/Div.......2V/Div. Horizontal Sweep..5 ms/Div. Coupling ......DC Trigger ......Internal CV-655... - Page 88 F-48 NOTES F-48 CV-655...
-
Page 89: Input Contactor (Cr1) Cleaning/Replacement
INPUT CONTACTOR (CR1) CLEANING/REPLACEMENT WARNING Service and repair should be performed by only Lincoln Electric factory trained personnel. Unauthorized repairs performed on this equipment may result in danger to the technician or machine operator and will invalidate your factory warranty. For your safety and to avoid elec-... - Page 90 8. Remove the input contactor. 6. Replace the input contactor cover plate. 9. Insert the replacement input contactor and install it following the procedures in reverse order. NOTE: Be sure to reconnect all leads cor- rectly. CV-655...
- Page 91 REPLACEMENT PROCEDURE WARNING Service and repair should be performed by only Lincoln Electric factory trained personnel. Unauthorized repairs performed on this equipment may result in danger to the technician or machine operator and will invalidate your factory warranty. For your safety and to avoid elec-...
- Page 92 LED4 LED1 LED3 PLUG J20 PLUG J9 PROCEDURE 1. Remove the input power to the CV-655 4. Disconnect lead #222 from the negative machine. output terminal. This lead runs from plug J9 to the negative output terminal. Cut any 2. Using the 3/8” wrench, remove the case top necessary cable ties.
- Page 93 6. Connect lead #222 to the high inductance bly from the machine. Clear all leads. output terminal. 7. Install plugs J9 and J20 onto the thermal fan/snubber board. 8. Replace any cable ties cut at disassembly. 9. Install the case top and sides. CV-655...
- Page 94 AND REPLACEMENT PROCEDURE WARNING Service and repair should be performed by only Lincoln Electric factory trained personnel. Unauthorized repairs performed on this equipment may result in danger to the technician or machine operator and will invalidate your factory warranty. For your safety and to avoid elec-...
- Page 95 LEADS (3) PROCEDURE 6. Using the 9/16” wrench, remove the high inductance output lead from the bottom 1. Remove the input power to the CV-655 choke lead. See Figure F.21. machine. 7. Using the 1/2” wrench, Remove the reactor 2. Remove the case top and sides.
- Page 96 12. With the 1/2” wrench, remove the six trans- 1. Using the rope sling, carefully position the former secondary leads from the SCR heat iron/coil assembly onto the CV-655. Mount sink assembly. it to the frame assembly with four bolts, washers and nuts.
-
Page 97: Retest After Repair
MINIMUM ACCEPTABLE OUTPUT VOLTAGE - AT MAXIMUM OUTPUT SETTINGS Mode Control Settings Load WELD (CV) Output Control at Maximum 815 Amps @ 44.0 Volts (Min) Auxiliary Output (#31-#32) 5 Amps @ 121/127 VAC (Min) Auxiliary Output (#41-#42) 5 Amps @ 43/47 VAC (Min) CV-655... - Page 98 F-58 NOTES F-58 CV-655...
- Page 99 FIRING PC BOARD ASSEMBLY ..........G-10 CV-655...
-
Page 100: Electrical Diagrams
ELECTRICAL DIAGRAMS WIRING DIAGRAM - CV655 - CODE 10120, 10122, 10123, 10124 OUTPUT DUAL (EXCEPT 380/500V & 230/400V) & SINGLE VOLTAGE 10A 42V CIRCUIT BREAKER UNDER 346 VOLTS (SHOWN CONNECTED FOR LOW VOLTAGE) CONTROL N.D. RECONNECT SUPPLY PANEL LINES GND. 10K 1/2W STUD OPTIONAL... - Page 101 ELECTRICAL DIAGRAMS WIRING DIAGRAM - CV655 - CODE 10121 230/460/575 VOLTAGE OUTPUT 10A 42V CIRCUIT BREAKER (SHOWN CONNECTED FOR 230 VOLTS) CONTROL N.D. RECONNECT SUPPLY PANEL LINES GND. 10K 1/2W STUD OPTIONAL TO GROUND PER ANALOG METERS 115V NATIONAL CIRCUIT ELECTRICAL OUTPUT N.E.
- Page 102 ELECTRICAL DIAGRAMS WIRING DIAGRAM - CV655 - CODE 10125, 10126, 10127, 10128, 10129 10A 42V CIRCUIT BREAKER OUTPUT DUAL (EXCEPT 380/500V & 230/400V) & SINGLE VOLTAGE CONTROL UNDER 346 VOLTS (SHOWN CONNECTED FOR LOW VOLTAGE) N.D. LIFT RECONNECT CASE SUPPLY CASE BALE BACK...
- Page 103 ELECTRICAL DIAGRAMS SCHEMATIC - CONTROL PC BOARD NOTE: This diagram is for reference only. It may not be accurate for all machines covered by this manual. CV655...
- Page 104 Lincoln Electric discourages board level troubleshooting and repair since it may compromise the quality of the design and may result in danger to the Machine Operator or Technician.
- Page 105 ELECTRICAL DIAGRAMS SCHEMATIC - FAN / SNUBBER PC BOARD NOTE: This diagram is for reference only. It may not be accurate for all machines covered by this manual. CV655...
- Page 106 Lincoln Electric discourages board level troubleshooting and repair since it may compromise the quality of the design and may result in danger to the Machine Operator or Technician.
- Page 107 GATE DRIVE POWER SUPPLY SOURCE POINT N.B. COMMON CONNECTION FRAME CONNECTION THE LINCOLN ELECTRIC CO. THIS SHEET CONTAINS PROPRIETARY INFORMATION OWNED BY FILE: G2792_3ED EARTH GROUND CONNECTION THE LINCOLN ELECTRIC CO. AND IS NOT TO BE REPRODUCED, DISCLOSED OR USED WITHOUT THE EXPRESS PERMISSION OF EQUIP.
- Page 108 Lincoln Electric discourages board level troubleshooting and repair since it may compromise the quality of the design and may result in danger to the Machine Operator or Technician.
- Page 109 Please include the machine’s code number and how the problem was resolved. Thank You, Technical Services Group Lincoln Electric Co. 22801 ST. Clair Ave. Cleveland, Ohio 44117-1199 FAX 216-481-2309 SVM Number ___________________________...
Need help?
Do you have a question about the CV-655 and is the answer not in the manual?
Questions and answers